
Step 1 of 9
Meet the Page’s DOM Tree
Build the local Reading List page and connect its visible parts to the live DOM tree.

Learning path · Level 5 · Tutorial 1
Read and modify a local page through JavaScript, including its text, controls, classes, and child elements, while keeping user-supplied text separate from HTML markup.

 Meet the Page’s DOM Tree
Build the local Reading List page and connect its visible parts to the live DOM tree. 2 min
Meet the Page’s DOM Tree
Build the local Reading List page and connect its visible parts to the live DOM tree. 2 min
 Select One Element and Handle No Match
Select one intended DOM element with `querySelector()` and safely handle a selector that returns `null`. 2 min
Select One Element and Handle No Match
Select one intended DOM element with `querySelector()` and safely handle a selector that returns `null`. 2 min
 Select and Inspect Several Elements
Select all matching book elements, inspect their NodeList, and distinguish an empty NodeList from a null single-element selection. 2 min
Select and Inspect Several Elements
Select all matching book elements, inspect their NodeList, and distinguish an empty NodeList from a null single-element selection. 2 min
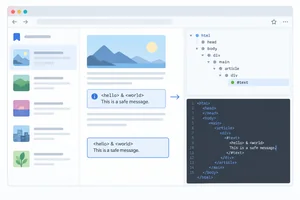 Read and Replace Text Without Parsing HTML
Read and replace a message element’s text while keeping HTML-like input as literal visible characters. 3 min
Read and Replace Text Without Parsing HTML
Read and replace a message element’s text while keeping HTML-like input as literal visible characters. 3 min
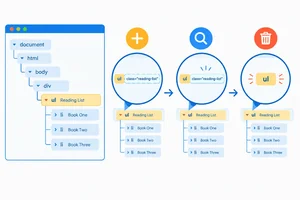 Read, Set, and Remove Attributes
Inspect, update, and remove an ordinary text attribute on the Reading List element, including the difference between an empty value and a missing attribute. 2 min
Read, Set, and Remove Attributes
Inspect, update, and remove an ordinary text attribute on the Reading List element, including the difference between an empty value and a missing attribute. 2 min
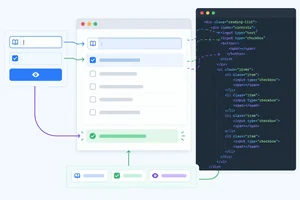 Use Properties for Current Control Values
Read and update the current values and availability of Reading List controls through DOM properties, while distinguishing them from HTML attributes. 2 min
Use Properties for Current Control Values
Read and update the current values and availability of Reading List controls through DOM properties, while distinguishing them from HTML attributes. 2 min
 Update Classes Predictably
Add, remove, and force CSS classes on an existing Reading List item while preserving its base styling. 2 min
Update Classes Predictably
Add, remove, and force CSS classes on an existing Reading List item while preserving its base styling. 2 min
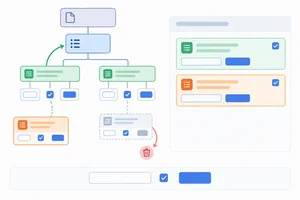 Create and Change Child Elements
Create, insert, replace, and remove Reading List child elements while keeping structural changes scoped to the list. 3 min
Create and Change Child Elements
Create, insert, replace, and remove Reading List child elements while keeping structural changes scoped to the list. 3 min
 Apply and Verify a Safe DOM Update
Complete a local previewBook() helper, run it with HTML-like input, and verify that the page updates safely without parsing supplied text as markup. 3 min
Apply and Verify a Safe DOM Update
Complete a local previewBook() helper, run it with HTML-like input, and verify that the page updates safely without parsing supplied text as markup. 3 min
Step 1 of 9
Build the local Reading List page and connect its visible parts to the live DOM tree.
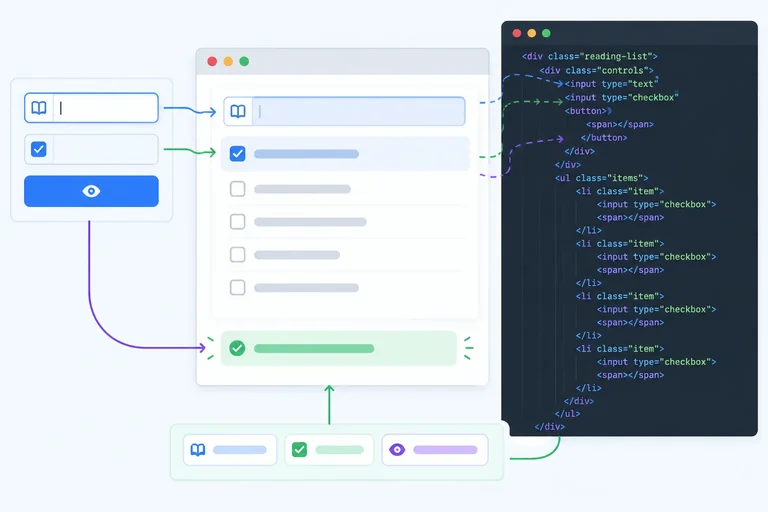
A browser represents the page currently on screen as a live DOM tree. The top entry point is the document object. Inside it are element nodes, such as main, h1, p, ul, and li, plus text nodes that hold words such as “Reading List.”
Tree relationships describe structure: the ul is the parent of its li children, and the two book li elements are siblings. This live tree is what browser JavaScript will work with throughout this tutorial.
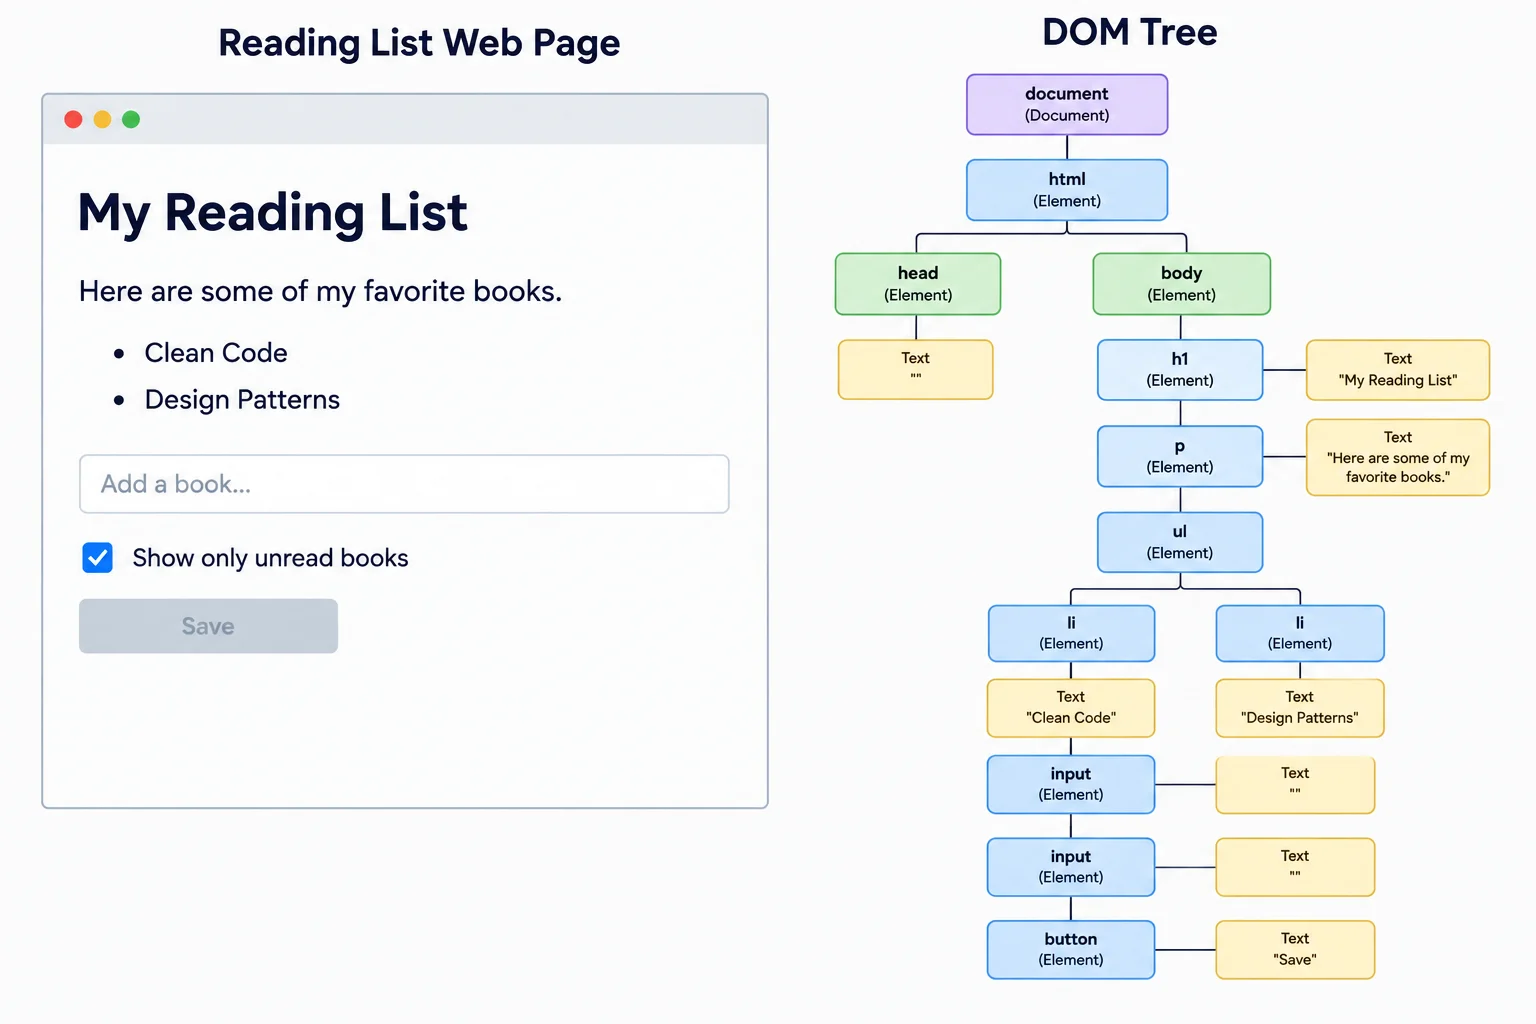
The visible page and the DOM tree describe the same current document in different forms.
In one local folder, create these three files. Paste the complete source below into index.html. It links the stylesheet and loads script.js with defer. Keep this starter page unchanged as later steps replace only the contents of script.js.
index.html
<!doctype html>
<html lang="en">
  <head>
    <meta charset="UTF-8">
    <meta name="viewport" content="width=device-width, initial-scale=1.0">
    <title>Reading List</title>
    <link rel="stylesheet" href="styles.css">
    <script src="script.js" defer></script>
  </head>
  <body>
    <main>
      <h1 id="page-title">Reading List</h1>
      <p id="message">Two books ready.</p>

      <ul id="reading-list">
        <li class="book">HTML Basics</li>
        <li class="book">CSS Layouts</li>
      </ul>

      <label for="book-title">Book title</label>
      <input id="book-title" type="text" value="JavaScript Basics">

      <label>
        <input id="highlight-book" type="checkbox" checked>
        Highlight new book
      </label>

      <button id="preview-button" type="button" disabled>Preview</button>
    </main>
  </body>
</html>styles.css
body {
  font-family: system-ui, sans-serif;
  margin: 0;
  padding: 2rem;
  color: #1f2933;
}

main {
  max-width: 38rem;
  margin: 0 auto;
}

label,
input,
button {
  display: block;
  margin-top: 0.75rem;
}

.book {
  margin: 0.5rem 0;
  padding: 0.5rem;
}

.is-highlighted {
  background: #fff3bf;
  border: 2px solid #8a5a00;
}

button:disabled {
  opacity: 0.6;
}
script.js
console.log('DOM ready:', document.title);DOM ready: Reading List
Open index.html in your browser and open the Console. The message confirms that script.js can reach the current document.
The saved index.html is source on your computer; the DOM is the browser's current in-memory tree. A temporary DevTools edit changes the current page, not the saved file. Reloading reconstructs the DOM from the saved HTML and runs script.js again.
Tip
Use reload to return to the saved starting page after experimenting in DevTools. Reload is not a way to save a DOM change back into index.html.
Match each page part or DOM fact to its description.
Tap an item and then its matching pair.
Step 2 of 9
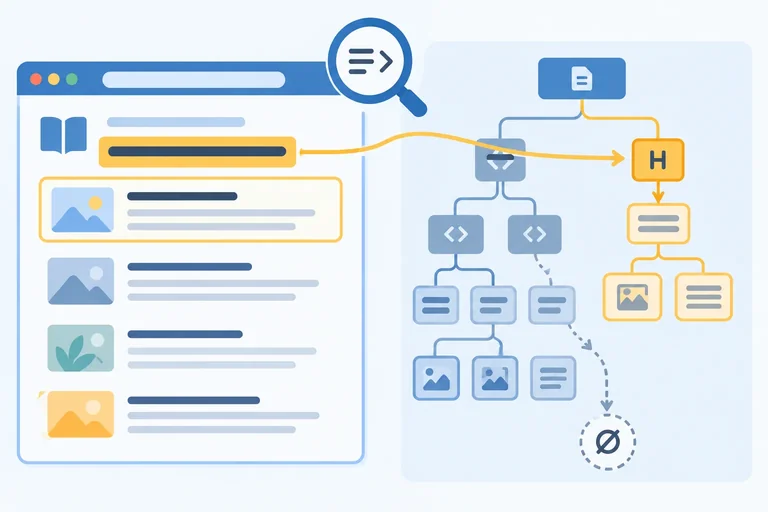
Select one intended DOM element with querySelector() and safely handle a selector that returns null.
document.querySelector() starts at the document and accepts a CSS selector. It returns the first matching element.
Store that result in a clearly named variable before you use it. On the Reading List page, '#page-title' identifies the page heading.
A selector can be valid but still find nothing. In that case, querySelector() returns null, not an element.
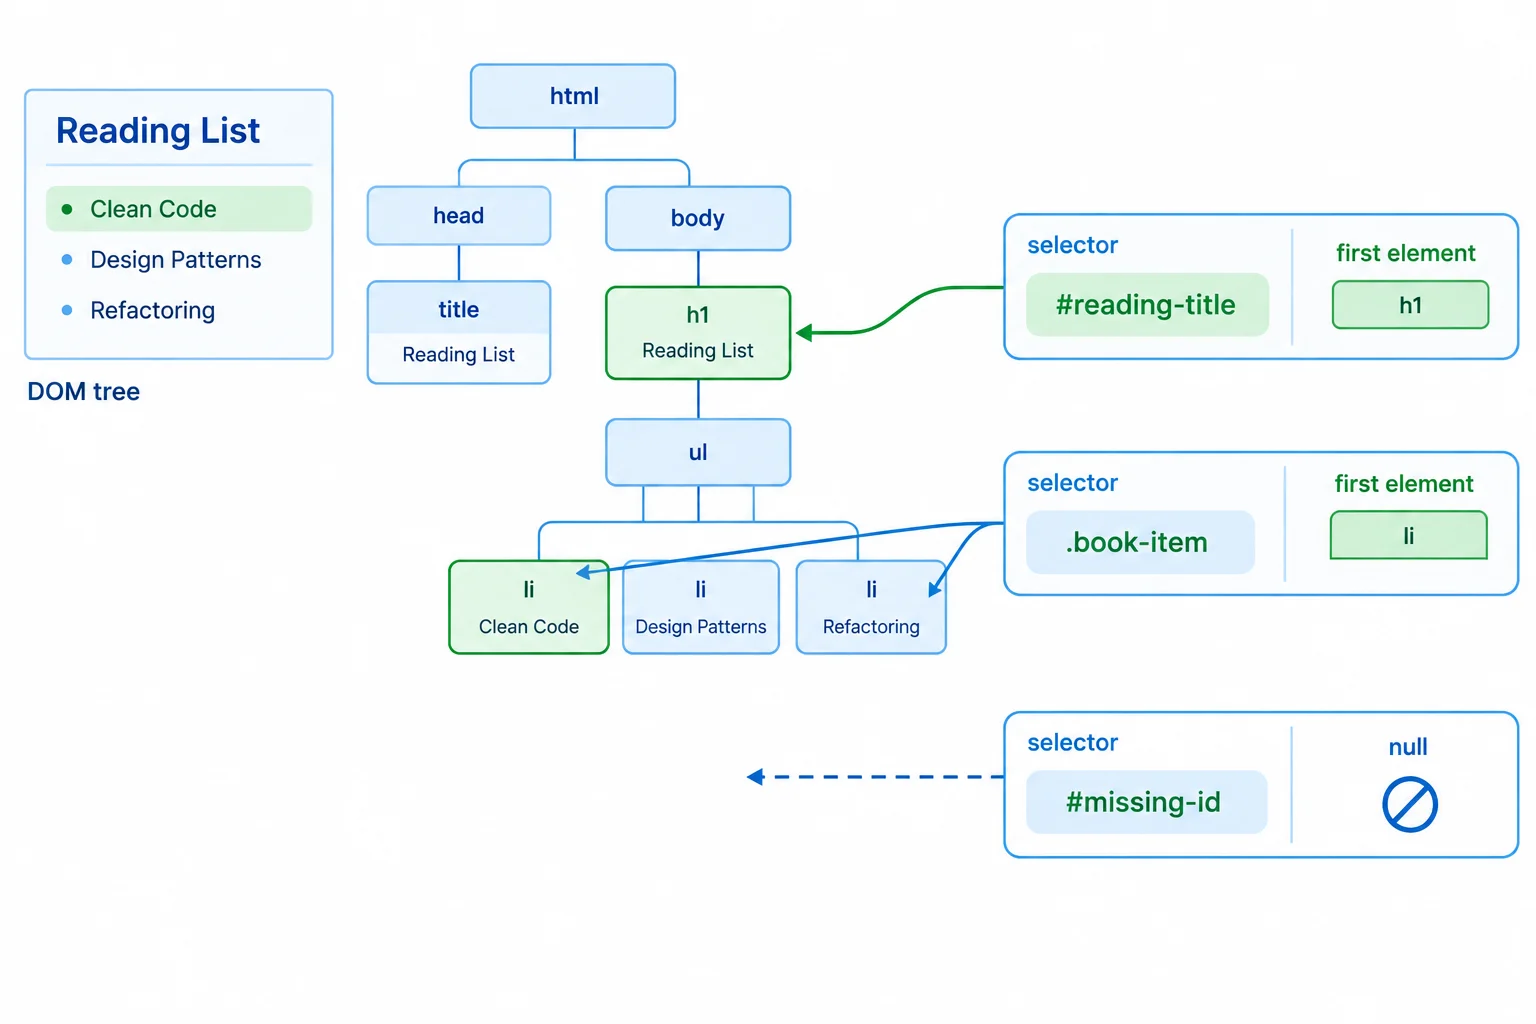
querySelector() returns the first match it encounters, or null when there is no match.
Replace the current contents of script.js with this code, save, then refresh the local page. Open the browser Console to inspect the result.
const heading = document.querySelector('#page-title');

if (heading === null) {
  console.log('Heading was not found.');
} else {
  console.log(heading);
}<h1 id="page-title">Reading List</h1>
The Console’s element display varies by browser. The important result is that it represents the element with id `page-title`.
Check for null before accessing an element’s properties or methods. The else branch is the only place where this script uses heading, so it runs only when an element was found.
This separates a normal missing-element case from code that expects an element. It also makes the variable’s purpose clear: heading holds the selected heading or null.
Tip
A selector that finds no element is not an error by itself. The error happens when code treats null as though it were an element—for example, by trying to read one of its properties.
On the starter page, what does this expression return?
document.querySelector('.book')
Complete the guard for this deliberately missing selector. Make the script report the branch that runs when no element is selected.
const heading = document.querySelector('#missing-heading');

if () {
  console.log();
} else {
  console.log('An element was selected.');
}
Step 3 of 9
Select all matching book elements, inspect their NodeList, and distinguish an empty NodeList from a null single-element selection.
querySelectorAll() finds every element that matches a CSS selector and returns a NodeList in document order. On the Reading List page, document.querySelectorAll('#reading-list .book') finds the two book li elements: first HTML Basics, then CSS Layouts.
A NodeList is not an Array, but this NodeList provides useful features including .length and .forEach(). Each entry refers to an actual element in the current DOM tree.
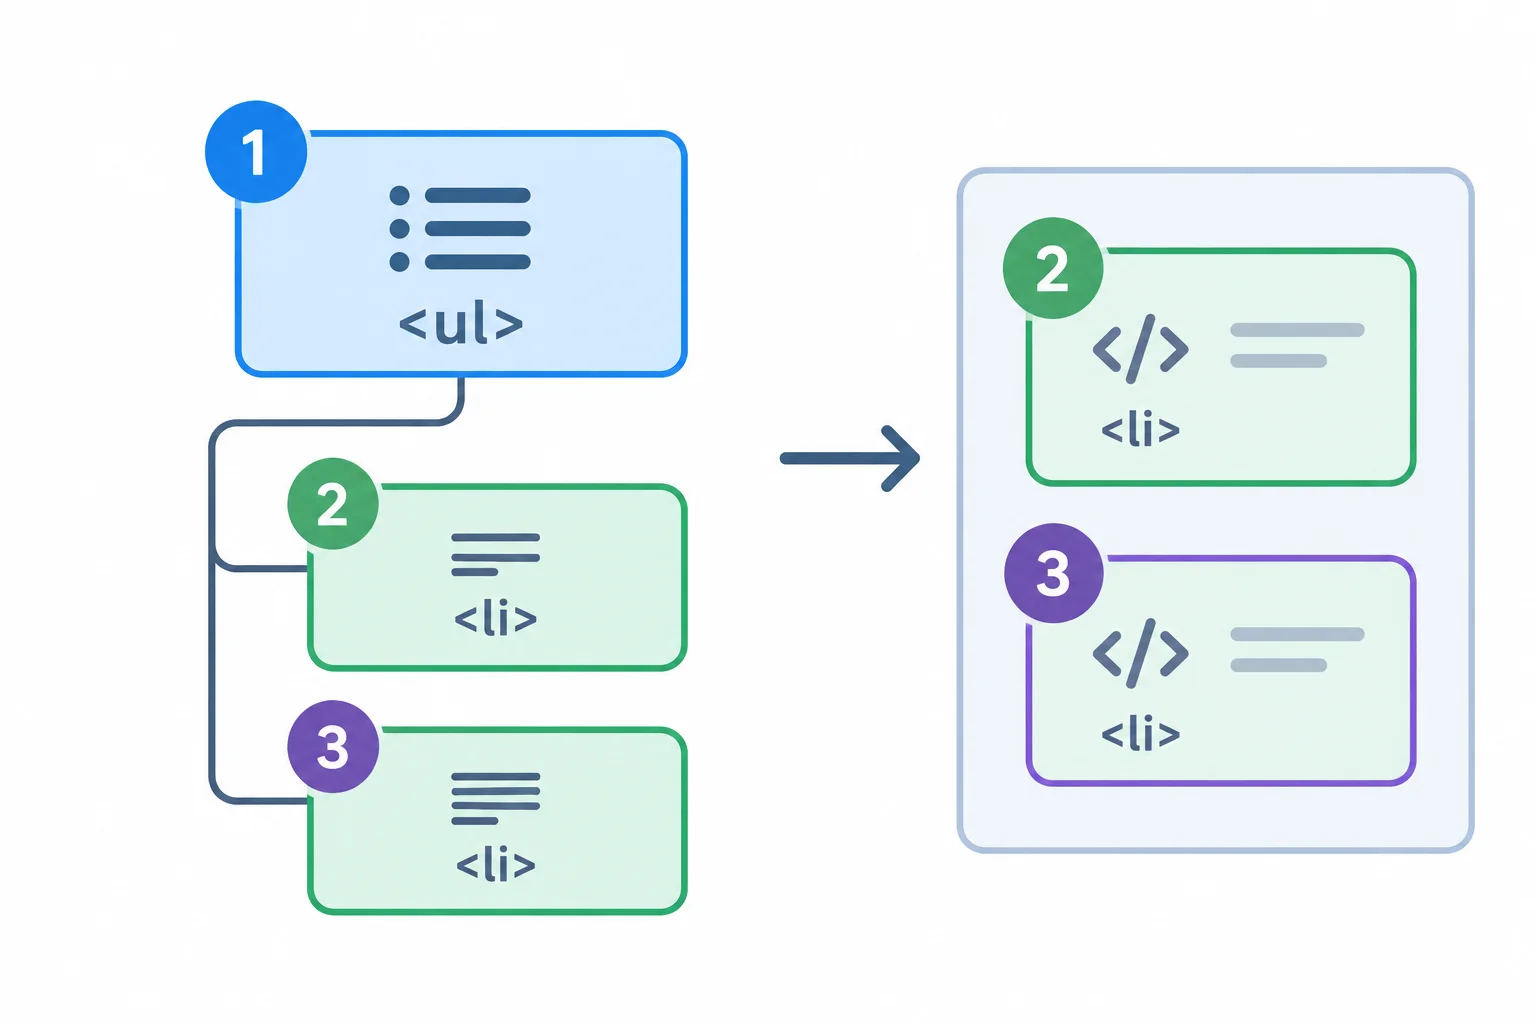
querySelectorAll() collects every matching element in document order.
Replace the previous example in script.js, refresh the page, and inspect the output in the Console.
const books = document.querySelectorAll('#reading-list .book');

console.log(books.length);

books.forEach((book) => {
  console.log(book);
});2 <li class="book">HTML Basics</li> <li class="book">CSS Layouts</li>
Browsers may display each logged element as an expandable DOM element rather than exactly as shown.
Tip
A returned NodeList is static: its membership does not automatically gain newly matching elements later. Its existing entries still refer to their DOM elements.
When you later need a selection that includes changed list membership, run querySelectorAll() again. For now, use .length to count this selection and forEach() to visit each book.
A selector can be valid but match nothing. Replace script.js with this example, refresh, and inspect the Console.
const missingOne = document.querySelector('#missing-book');
const missingMany = document.querySelectorAll('#missing-book');

console.log(missingOne);
console.log(missingMany.length);

missingMany.forEach((book) => {
  console.log(book);
});null 0
The first line is the single-element result. The second line is the number of entries in the multi-element result.
querySelector() returns null when it finds no element. In contrast, querySelectorAll() returns an empty NodeList, not null.
An empty NodeList has length 0, and its forEach() runs no callbacks because there are no entries to visit.
Complete this script.js check so it logs each matched book element and confirms the two no-match results.
const books = document.querySelectorAll('#reading-list .book');

books.forEach((book) => {
  console.log();
});

const oneMissing = document.querySelector('#missing-book');
const manyMissing = document.querySelectorAll('#missing-book');

console.log(oneMissing === );
console.log(manyMissing.length === );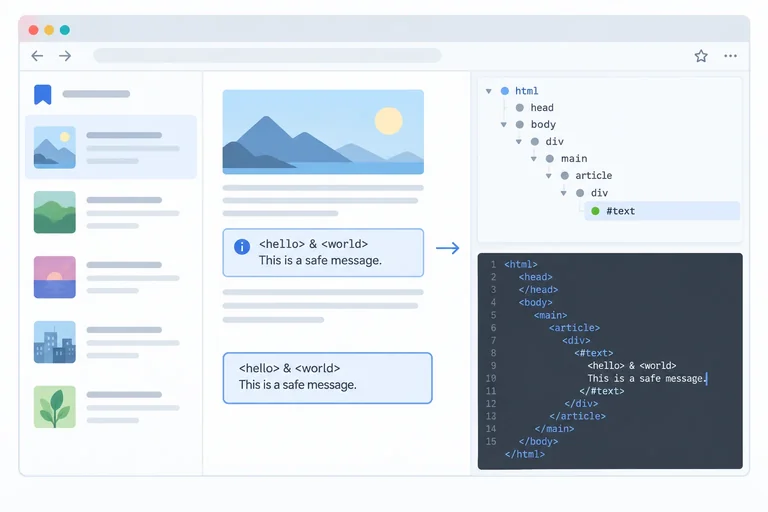
Step 4 of 9
Read and replace a message element’s text while keeping HTML-like input as literal visible characters.
textContent reads the text contained by an element. On the starter page, #message contains the text Two books ready., so its textContent is that string.
Assigning to textContent replaces the selected element’s child content with a text node. It is useful when you want displayed characters to remain text—not page structure.
In script.js, replace the previous example with this code. Save the file and refresh the page. The Console first shows the message’s original text; then the page updates.
const message = document.querySelector('#message');

if (message !== null) {
  console.log(message.textContent);
  message.textContent = '<strong>New book</strong> & notes';
}Two books ready.
The Console output is the original message. On the page, the angle brackets, tag name, and ampersand are all visible characters.
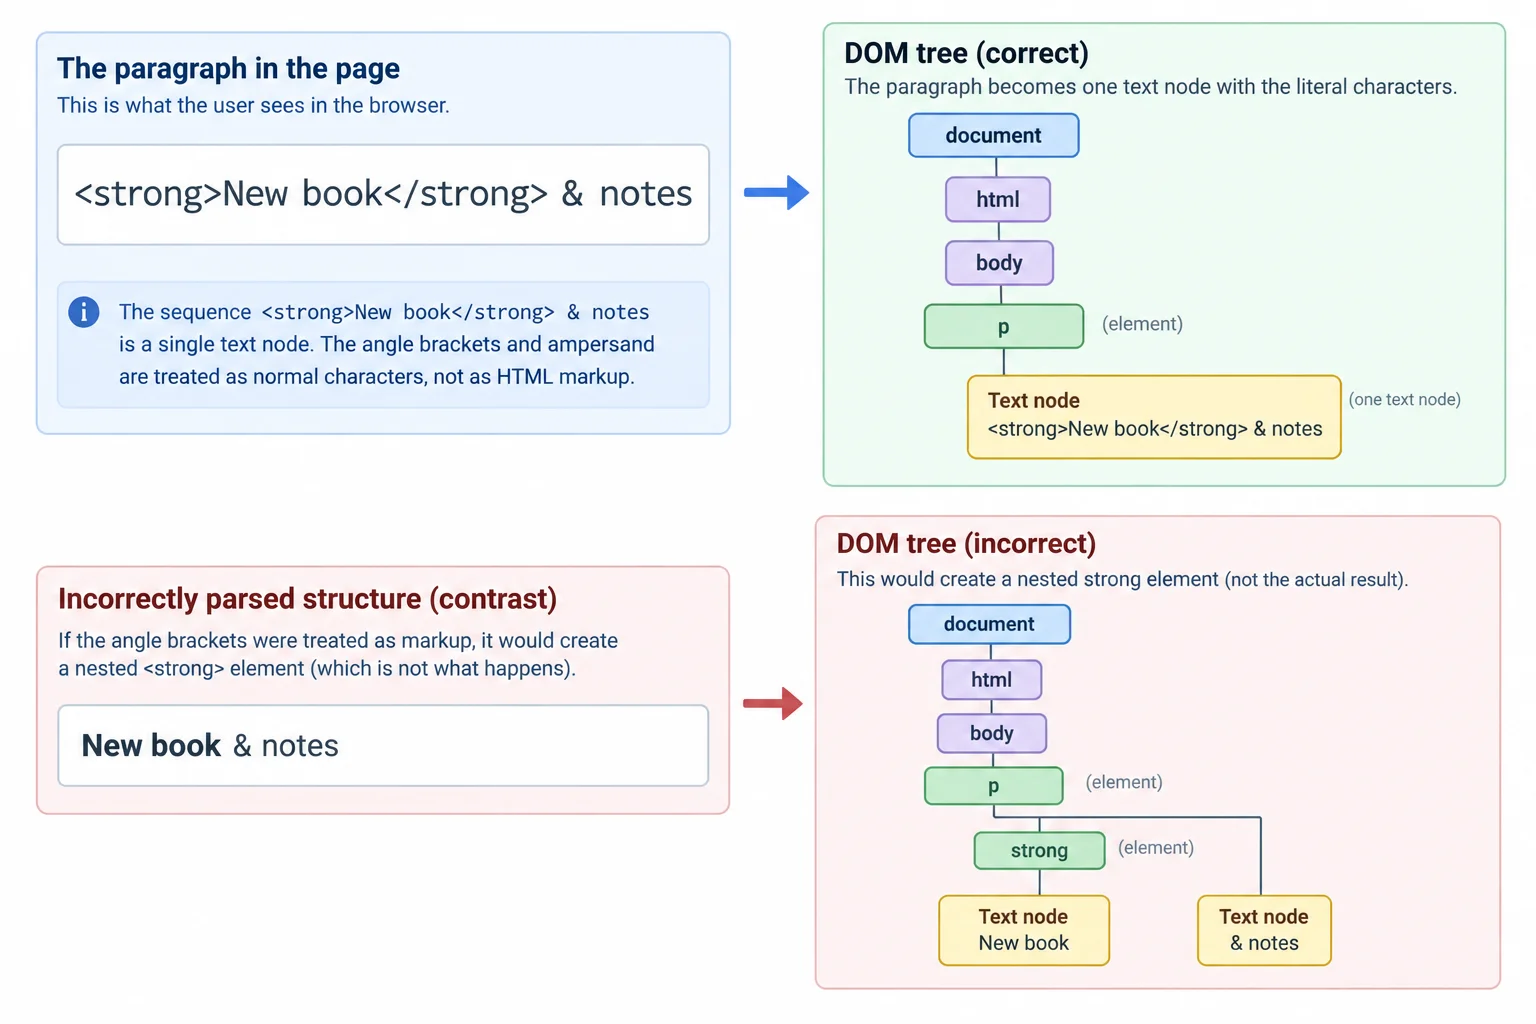
With textContent, the safety-test string is displayed literally. The resulting DOM tree has text inside #message, not a new strong element.
Warning
textContent replaces every child node inside the element you assign to. Keep the update narrowly scoped: update #message, not a parent that also contains the input, checkbox, button, or reading list.
Do not substitute an HTML-parsing API when displaying supplied text. This step deliberately uses textContent so HTML-like characters remain ordinary visible characters.
Complete the property name so the supplied string is inserted as literal text into the already selected message element.
if (message !== null) {
  message. = '<strong>New book</strong> & notes';
}After message has been selected and guarded, choose the completion and outcome that correctly handle this safety-test string:
const safetyTest = '<strong>New book</strong> & notes';

message.____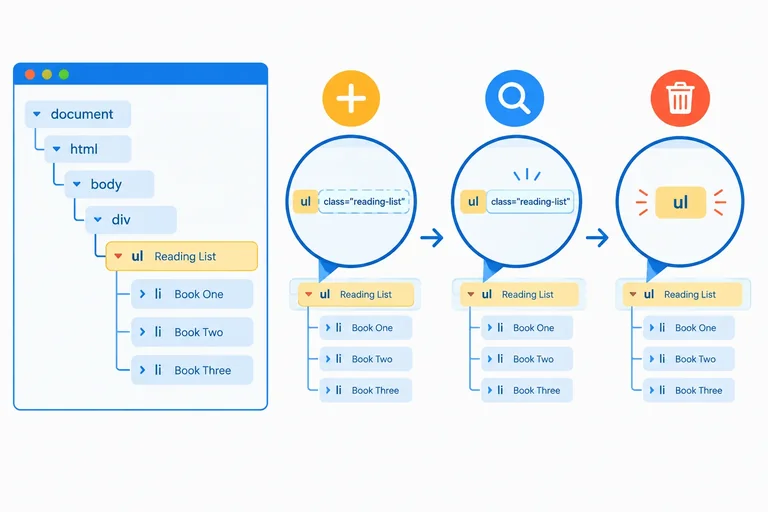
Step 5 of 9
Inspect, update, and remove an ordinary text attribute on the Reading List element, including the difference between an empty value and a missing attribute.
An attribute is named information attached to an element in the DOM tree. For the Reading List, work with the ordinary text attribute title on #reading-list.
Use getAttribute('title') to read it. The result is a string when the attribute exists, or null when it is absent. That makes “no title attribute” different from a title whose value happens to be an empty string.
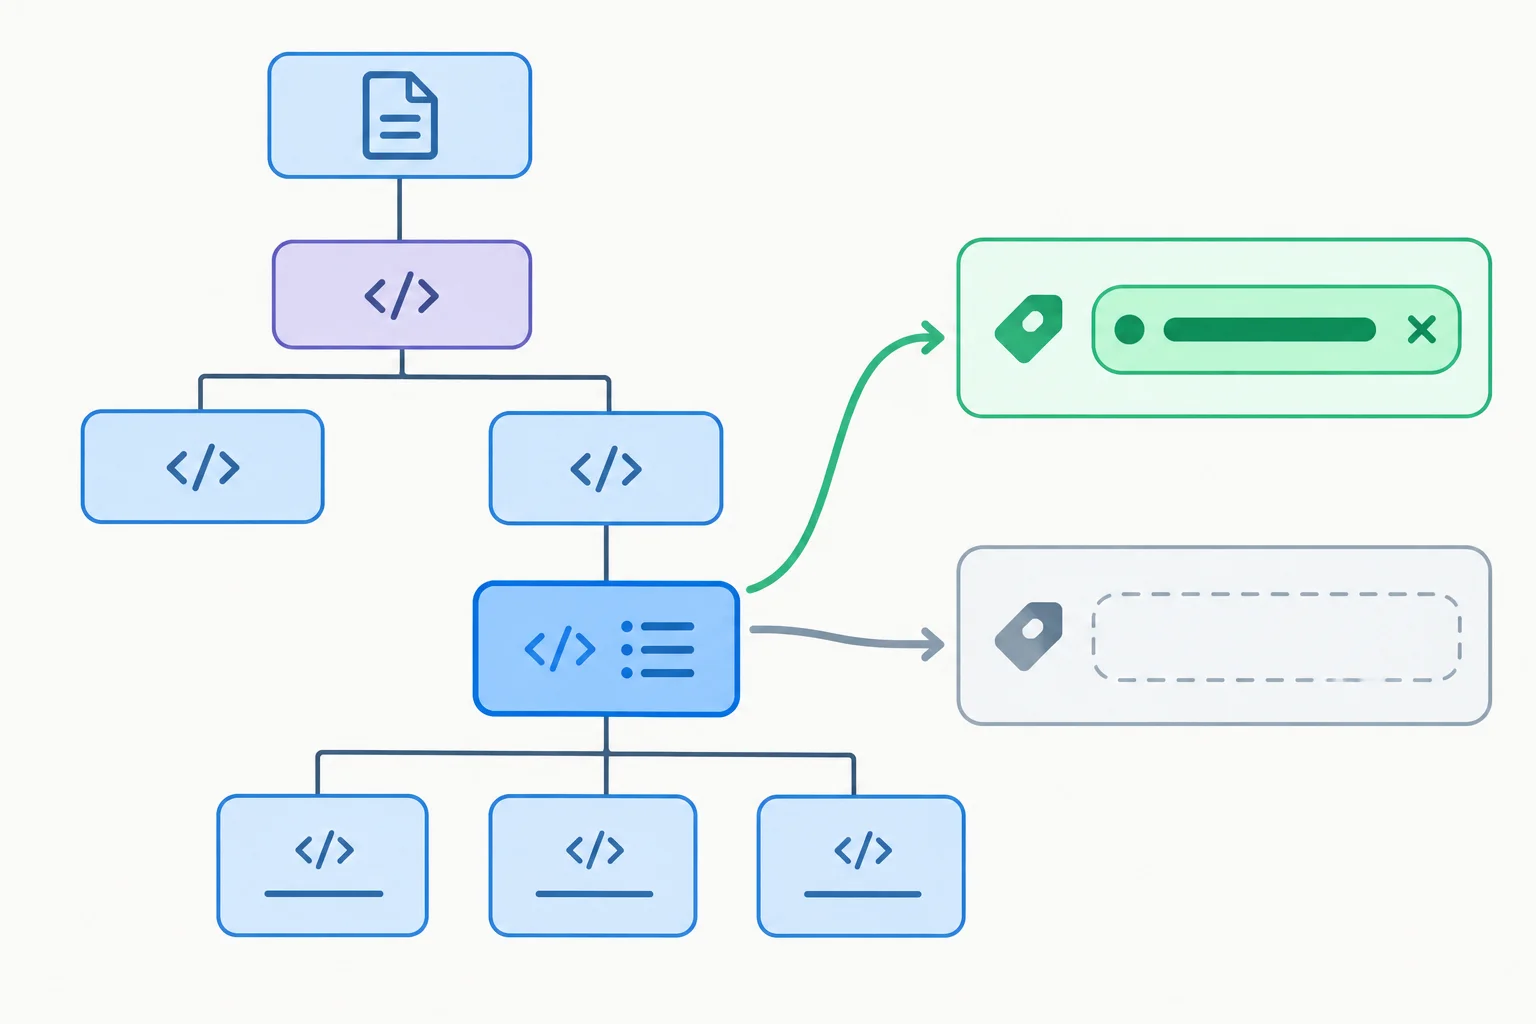
The same element can have a title attribute with a string value, or no title attribute at all.
Use these methods on the selected element.
| Goal | Method | Result |
|---|---|---|
| Read the title | getAttribute('title') | String or null |
| Add or change the title | setAttribute('title', value) | Attribute has the value |
| Make the title absent | removeAttribute('title') | Attribute is removed |
Replace script.js with this code, save, refresh the local page, and inspect the Console. The final call leaves the Reading List with its fixed title attribute.
const readingList = document.querySelector('#reading-list');

if (readingList !== null) {
  console.log(readingList.getAttribute('title'));

  readingList.setAttribute('title', 'Books to explore');
  console.log(readingList.getAttribute('title'));

  readingList.removeAttribute('title');
  console.log(readingList.getAttribute('title'));

  readingList.setAttribute('title', 'Books to explore');
}null Books to explore null
The first and third lines are `null` because the title attribute is absent at those moments. The final setAttribute call restores the title without logging another line.
setAttribute() adds the attribute when it is missing and updates it when it already exists. In contrast, removeAttribute() removes the attribute itself; assigning '' only creates or keeps an attribute whose value is an empty string.
After refreshing, use the browser’s Elements inspector to select #reading-list. Its title attribute should be Books to explore after the previous script finishes.
Now replace script.js with this version. It compares an empty attribute value with an absent attribute, then restores the fixed title.
const readingList = document.querySelector('#reading-list');

if (readingList !== null) {
  readingList.setAttribute('title', '');
  console.log(readingList.getAttribute('title') === '');

  readingList.removeAttribute('title');
  console.log(readingList.getAttribute('title'));

  readingList.setAttribute('title', 'Books to explore');
}true null
`true` confirms that the first read is an empty string. The second read is `null` because removeAttribute removes the title attribute entirely.
Warning
Use these methods for the ordinary title attribute shown here. setAttribute() changes an attribute; it does not decide whether every possible attribute name and value is safe or appropriate. Other kinds of attributes can require additional rules, which are outside this step.
Match each Reading List title situation with its correct method or result.
Tap an item and then its matching pair.
Step 6 of 9
Read and update the current values and availability of Reading List controls through DOM properties, while distinguishing them from HTML attributes.
A control has live properties on its DOM element. They describe what the control contains or does now:
bookTitle.value is the text currently in the input.highlightBook.checked is the checkbox’s current boolean state.previewButton.disabled is whether the button is currently unavailable.HTML attributes establish markup and often initial defaults. After someone edits a control, read its property—not its original attribute—to learn the current state.
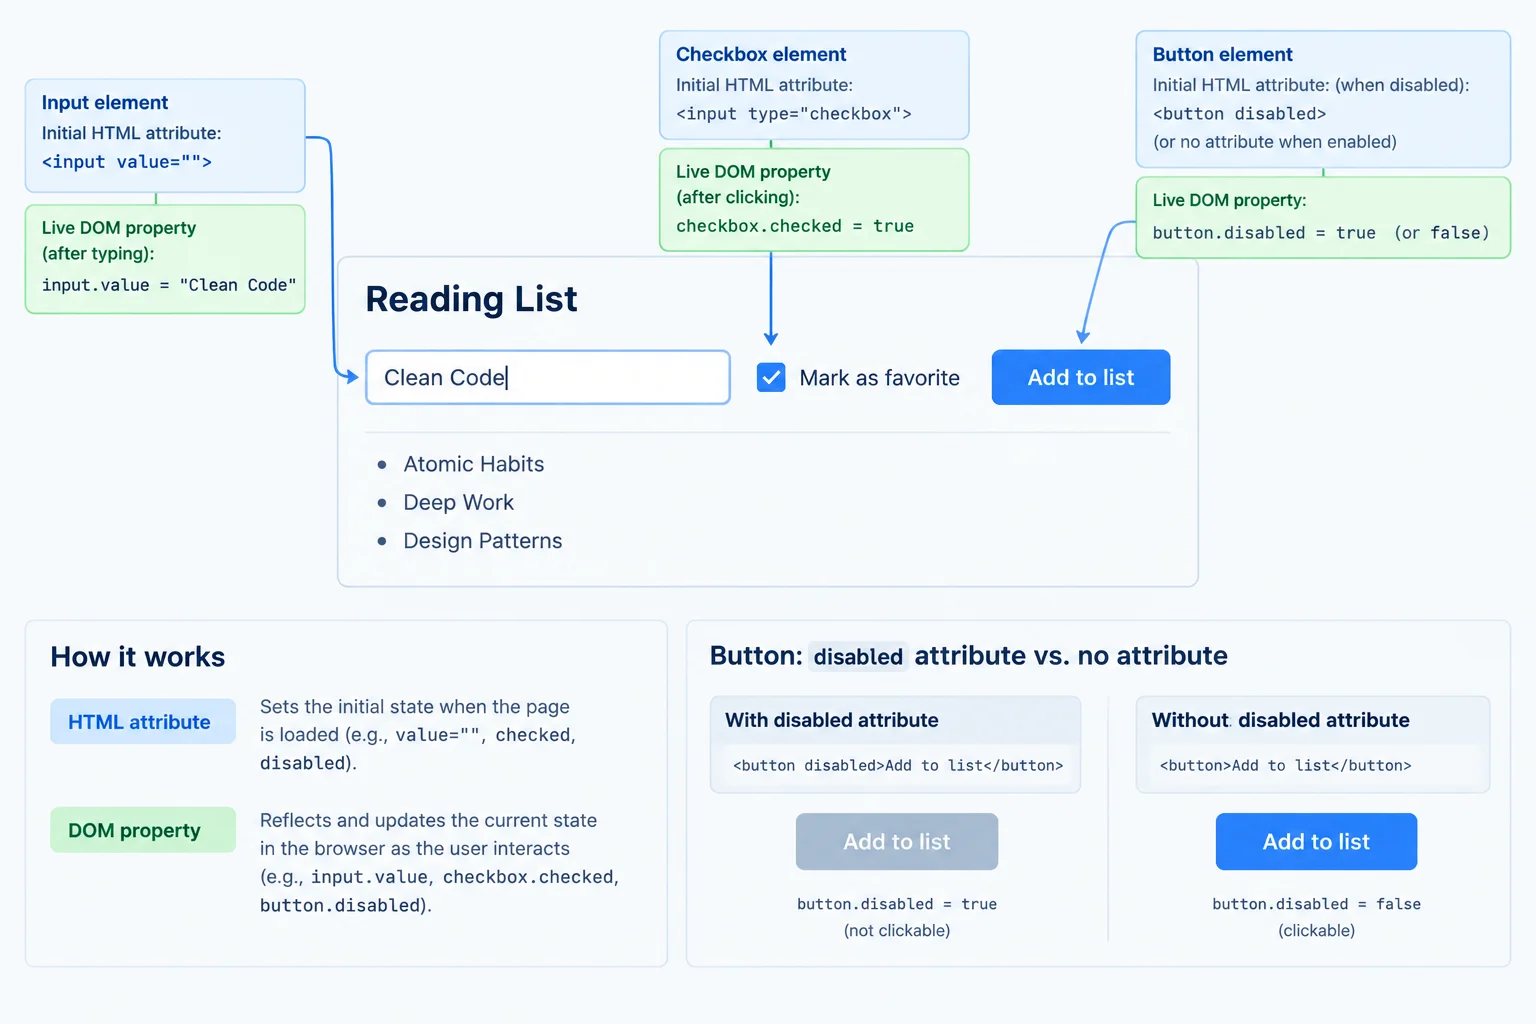
Properties report the control’s current state. For disabled, the attribute’s presence is what matters.
Use the property that matches the control state you need.
| Control | Live property | What the matching attribute represents |
|---|---|---|
| Text input | `value` (string) | Initial value |
| Checkbox | `checked` (boolean) | Initial checked state |
| Button | `disabled` (boolean) | Presence means disabled |
Replace script.js with this complete file, save it, and reload the local page. The first three log lines read the starter state. The assignments then change the current page: they do not rewrite index.html.
script.js
const bookTitle = document.querySelector('#book-title');
const highlightBook = document.querySelector('#highlight-book');
const previewButton = document.querySelector('#preview-button');

if (bookTitle !== null && highlightBook !== null && previewButton !== null) {
  console.log(bookTitle.value);
  console.log(highlightBook.checked);
  console.log(previewButton.disabled);

  bookTitle.value = 'DOM Patterns';
  highlightBook.checked = false;
  previewButton.disabled = false;

  console.log(bookTitle.value);
  console.log(highlightBook.checked);
  console.log(previewButton.disabled);
}JavaScript Basics true true DOM Patterns false false
The first three lines are the starter values. The remaining lines are the values immediately after the property assignments.
Warning
disabled is a boolean property. Set previewButton.disabled = false to enable the button.
Do not treat disabled="false" in HTML as enabled. disabled is a boolean attribute: if it is present at all—even with the text "false"—the button starts disabled. Removing the attribute, or setting the DOM property to false, enables it.
Keep the page open after the script runs. Change the input text to Changed in the page and check the checkbox yourself. Do not reload.
Then use the Console to inspect the current page. No event listener is needed: the browser has already applied your manual edits, and the properties expose their current state.
Console
console.log(bookTitle.value);
console.log(bookTitle.getAttribute('value'));
console.log(highlightBook.checked);
console.log(previewButton.disabled);Changed in the page JavaScript Basics true false
This output assumes you typed the specified input text and checked the checkbox after running the previous script.
Assume the input has been manually edited without a reload, and the button’s initial HTML includes disabled="false". Complete the code to record the button’s initial state, read both title forms, and enable the button.
const buttonStartsDisabled = previewButton.disabled === ;
const currentTitle = bookTitle.;
const originalTitle = bookTitle.('value');
previewButton. = ;
Step 7 of 9
Add, remove, and force CSS classes on an existing Reading List item while preserving its base styling.
An element can carry more than one CSS class. On a Reading List item, book supplies the base styling, while is-highlighted supplies optional emphasis.
classList.add('is-highlighted') adds that one class token without replacing book. Likewise, classList.remove('is-highlighted') removes only the named class. Pass class names to classList without the CSS dot.
Work with an existing list item in this step. The explicit null check ensures class operations run only when the intended element was found.
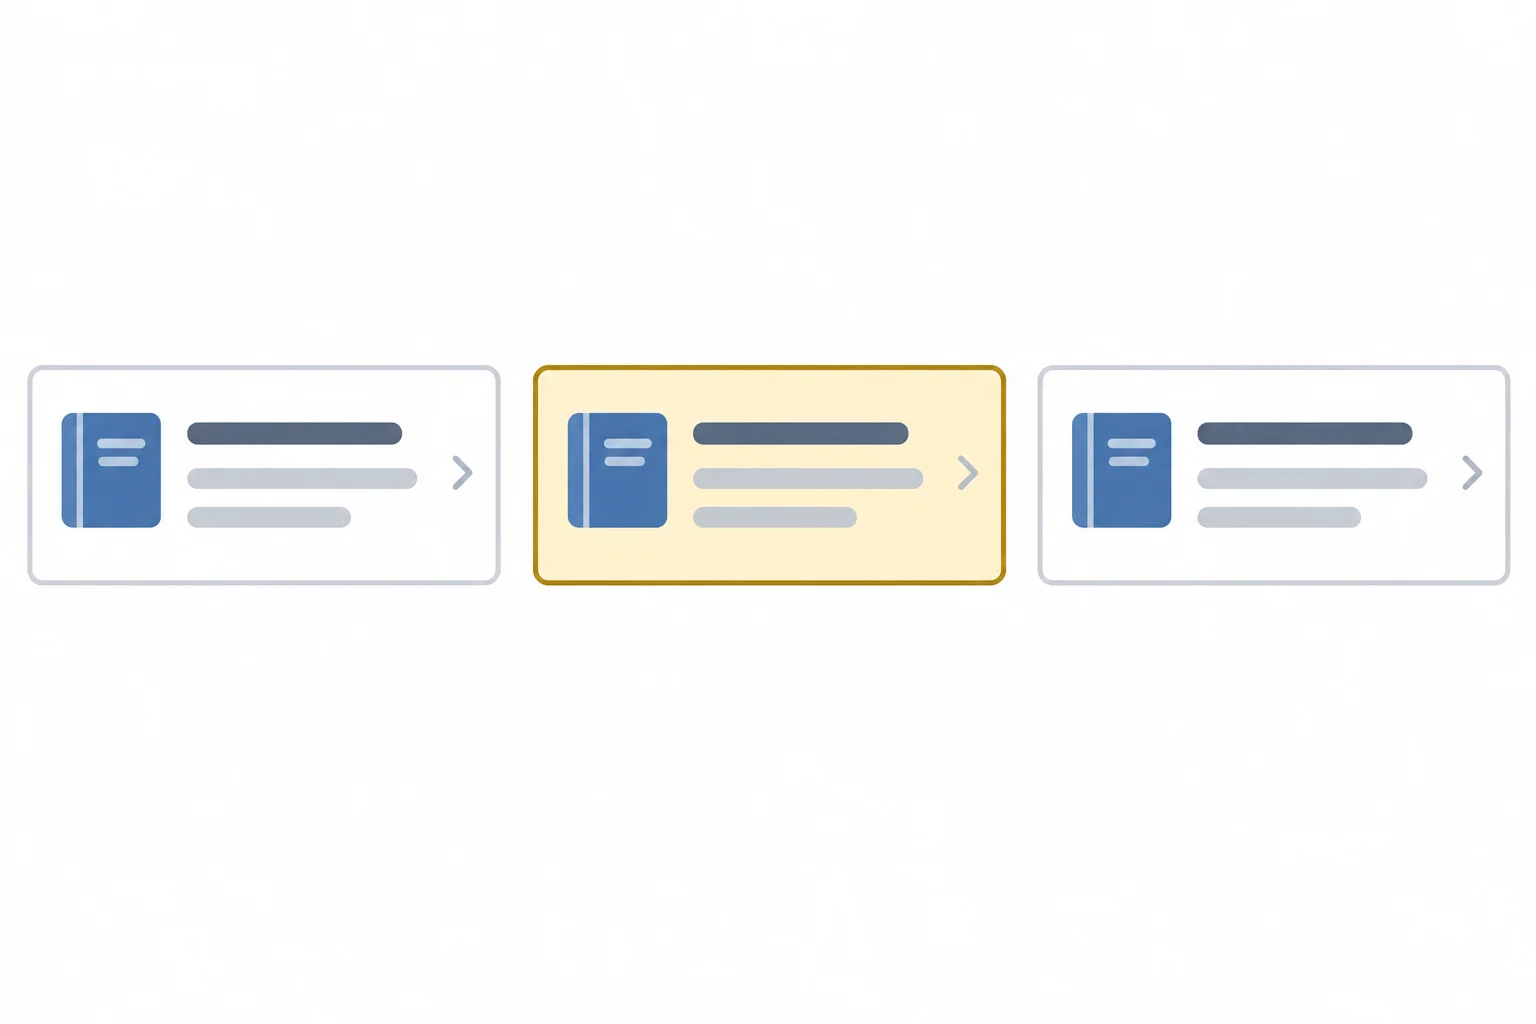
The emphasis class is an addition to the base book class, not a replacement for it.
Replace script.js with this code, save, and refresh the local page. The first Reading List item receives emphasis, then returns to its base appearance. The Console records its class attribute after each change.
const book = document.querySelector('#reading-list .book');

if (book === null) {
  console.log('Book was not found.');
} else {
  console.log(book.getAttribute('class'));

  book.classList.add('is-highlighted');
  console.log(book.getAttribute('class'));

  book.classList.remove('is-highlighted');
  console.log(book.getAttribute('class'));
}book book is-highlighted book
With the unchanged starter page, the first book begins with only its base class.
classList.toggle() has two different behaviors:
true makes the class present and false makes it absent.For a one-time update based on the control as it is now, use highlightBook.checked as the second argument. This reads the checkbox’s current property; it does not create an automatic response to later checkbox changes.
Each operation affects only the named class token, so the base book class remains available for styling.
| Call form | Result for is-highlighted |
|---|---|
| add('is-highlighted') | Present; other classes remain |
| remove('is-highlighted') | Absent; other classes remain |
| toggle('is-highlighted') | Reverses current presence |
| toggle('is-highlighted', true) | Present every time |
| toggle('is-highlighted', false) | Absent every time |
Replace the previous script.js with this version, save, and refresh. Watch the first book and inspect the Console. Two ordinary toggles alternate its appearance. The two boolean-forced calls both use the checkbox’s current checked value, so they leave the same result each time.
const book = document.querySelector('#reading-list .book');
const highlightBook = document.querySelector('#highlight-book');

if (book === null || highlightBook === null) {
  console.log('Required element was not found.');
} else {
  book.classList.toggle('is-highlighted');
  console.log(book.getAttribute('class'));

  book.classList.toggle('is-highlighted');
  console.log(book.getAttribute('class'));

  book.classList.toggle('is-highlighted', highlightBook.checked);
  console.log(book.getAttribute('class'));

  book.classList.toggle('is-highlighted', highlightBook.checked);
  console.log(book.getAttribute('class'));
}book is-highlighted book book is-highlighted book is-highlighted
The starter checkbox is checked after a refresh, so its current value is true in this run.
Complete the two classList method calls. This update runs twice: the existing item must retain its base styling, and its highlight state must match the checkbox’s current boolean after both runs.
const book = document.querySelector('#reading-list .book');
const highlightBook = document.querySelector('#highlight-book');

const applyClasses = () => {
  if (book === null || highlightBook === null) {
    return;
  }

  book.classList.('book');
  book.classList.('is-highlighted', highlightBook.checked);
};

applyClasses();
applyClasses();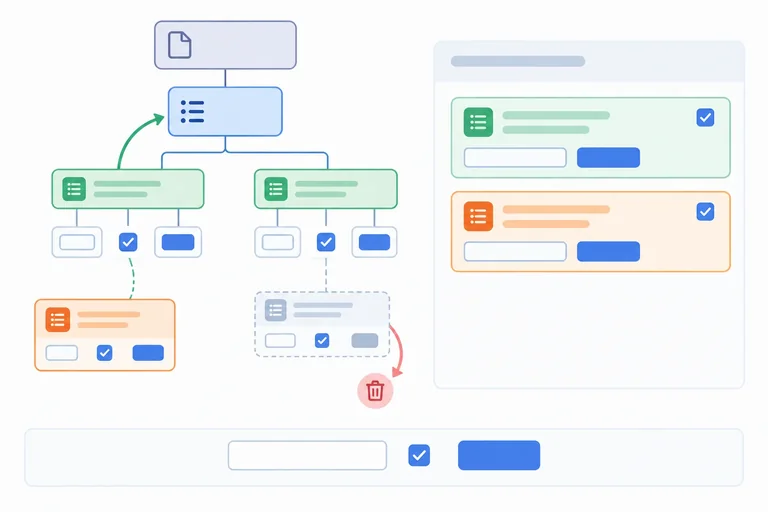
Step 8 of 9
Create, insert, replace, and remove Reading List child elements while keeping structural changes scoped to the list.
document.createElement('li') makes an element object, but does not put it into the DOM tree. The new element has no parent until code inserts it.
Prepare the detached li first: assign its textContent and add its base book class. Then call append() on #reading-list. append() inserts the configured element after the list’s existing children.
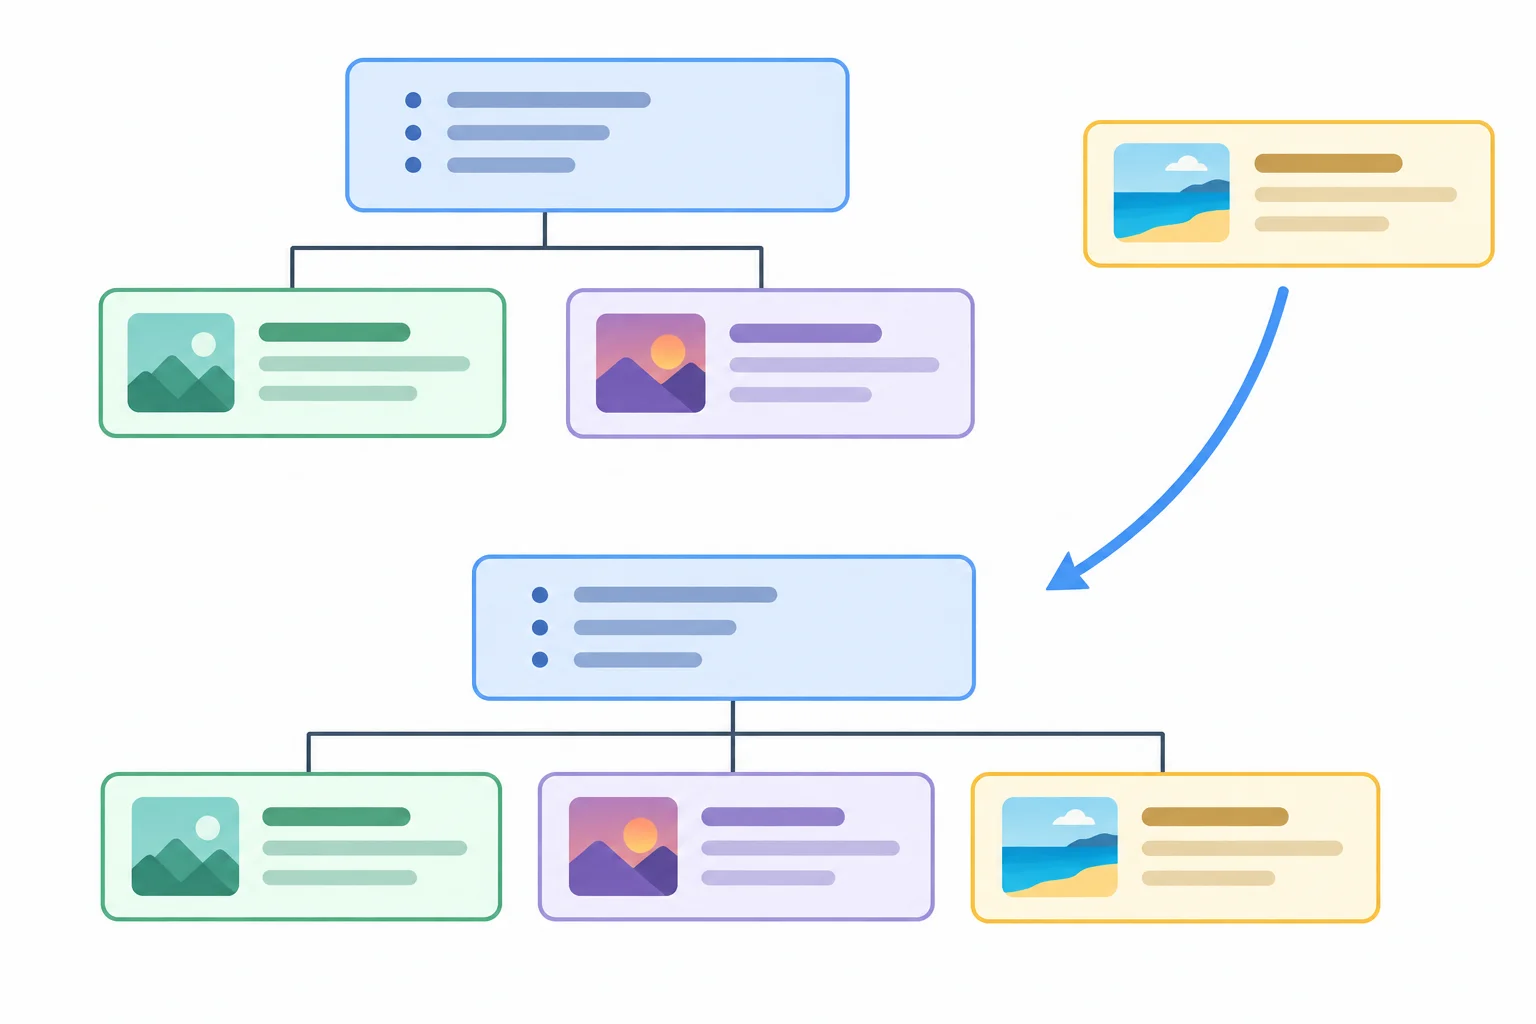
Creating an element and inserting it are separate actions: configure the detached element, then append it to the list.
Replace script.js with this code, save, and refresh the unchanged starter page. The original two books stay in place and the configured new book appears last.
const readingList = document.querySelector('#reading-list');

if (readingList === null) {
  console.log('Reading list was not found.');
} else {
  const newBook = document.createElement('li');

  newBook.textContent = 'JavaScript Basics';
  newBook.classList.add('book');

  readingList.append(newBook);
}Visible #reading-list: HTML Basics CSS Layouts JavaScript Basics
Expected visible page result: the list has three items in this order. The message and controls are unchanged.
Child-element methods affect the children of the element that receives the method. Target readingList, not an ancestor that also contains the input, checkbox, and button.
replaceChildren(newBook) removes the list’s current children and inserts the supplied child. With no arguments, replaceChildren() clears the list. book.remove() detaches that selected list item from the document.
A NodeList returned earlier is static. After an update, run querySelectorAll() again when you need a fresh selection that includes the current list membership.
These operations change list content without replacing the surrounding controls.
| Method | Effect |
|---|---|
| append(newBook) | Adds a child after existing children |
| replaceChildren(newBook) | Replaces all current children with this child |
| replaceChildren() | Removes all children |
| book.remove() | Detaches the selected list item |
This replacement script.js removes the first original book, replaces the remaining list children with one new book, then creates a fresh NodeList. Save, refresh, and inspect the Console.
const readingList = document.querySelector('#reading-list');
const book = document.querySelector('#reading-list .book');

if (readingList === null || book === null) {
  console.log('Required element was not found.');
} else {
  book.remove();

  const newBook = document.createElement('li');
  newBook.textContent = 'JavaScript Basics';
  newBook.classList.add('book');

  readingList.replaceChildren(newBook);

  const books = document.querySelectorAll('#reading-list .book');
  console.log(books.length);
}1
The fresh selection contains the one current `.book` element. The visible list contains only JavaScript Basics; the controls remain on the page.
Put these actions in the order for adding one configured book item to the Reading List.
Starting with the unchanged Reading List page, complete the three structural method calls and the final message. Predict the title of the one item that remains after the operations finish.
const message = document.querySelector('#message');
const readingList = document.querySelector('#reading-list');
const bookTitle = document.querySelector('#book-title');
const book = document.querySelector('#reading-list .book');

if (message === null || readingList === null || bookTitle === null || book === null) {
  console.log('Required element was not found.');
} else {
  const newBook = document.createElement('li');

  newBook.textContent = bookTitle.value;
  newBook.classList.add('book');

  readingList.(newBook);
  book.();
  readingList.(newBook);
  message.textContent = ' remains.';
}
Step 9 of 9
Complete a local previewBook() helper, run it with HTML-like input, and verify that the page updates safely without parsing supplied text as markup.
You have already learned each DOM operation separately. Now combine them in one helper: previewBook().
Each time you call it, the helper selects the required elements, explicitly guards against a missing element, reads the controls as they are now, and creates one li. The typed string becomes text content, not page structure.
The update stays narrow: it replaces only #reading-list children, then updates the message, fixed list metadata, and Preview control state. There is no event listener yet; you will call the helper manually from the Console.
Each operation has a narrow target, so the controls and surrounding page structure remain intact.
| Need | Target | Operation |
|---|---|---|
| Current typed title | Text input | Read value property |
| New book item | New li element | Create, set text, add classes |
| Displayed list | List children only | Replace children |
| Status sentence | Message paragraph | Replace textContent |
| List metadata | List attribute | Set title attribute |
| Preview availability | Button control | Set disabled property |
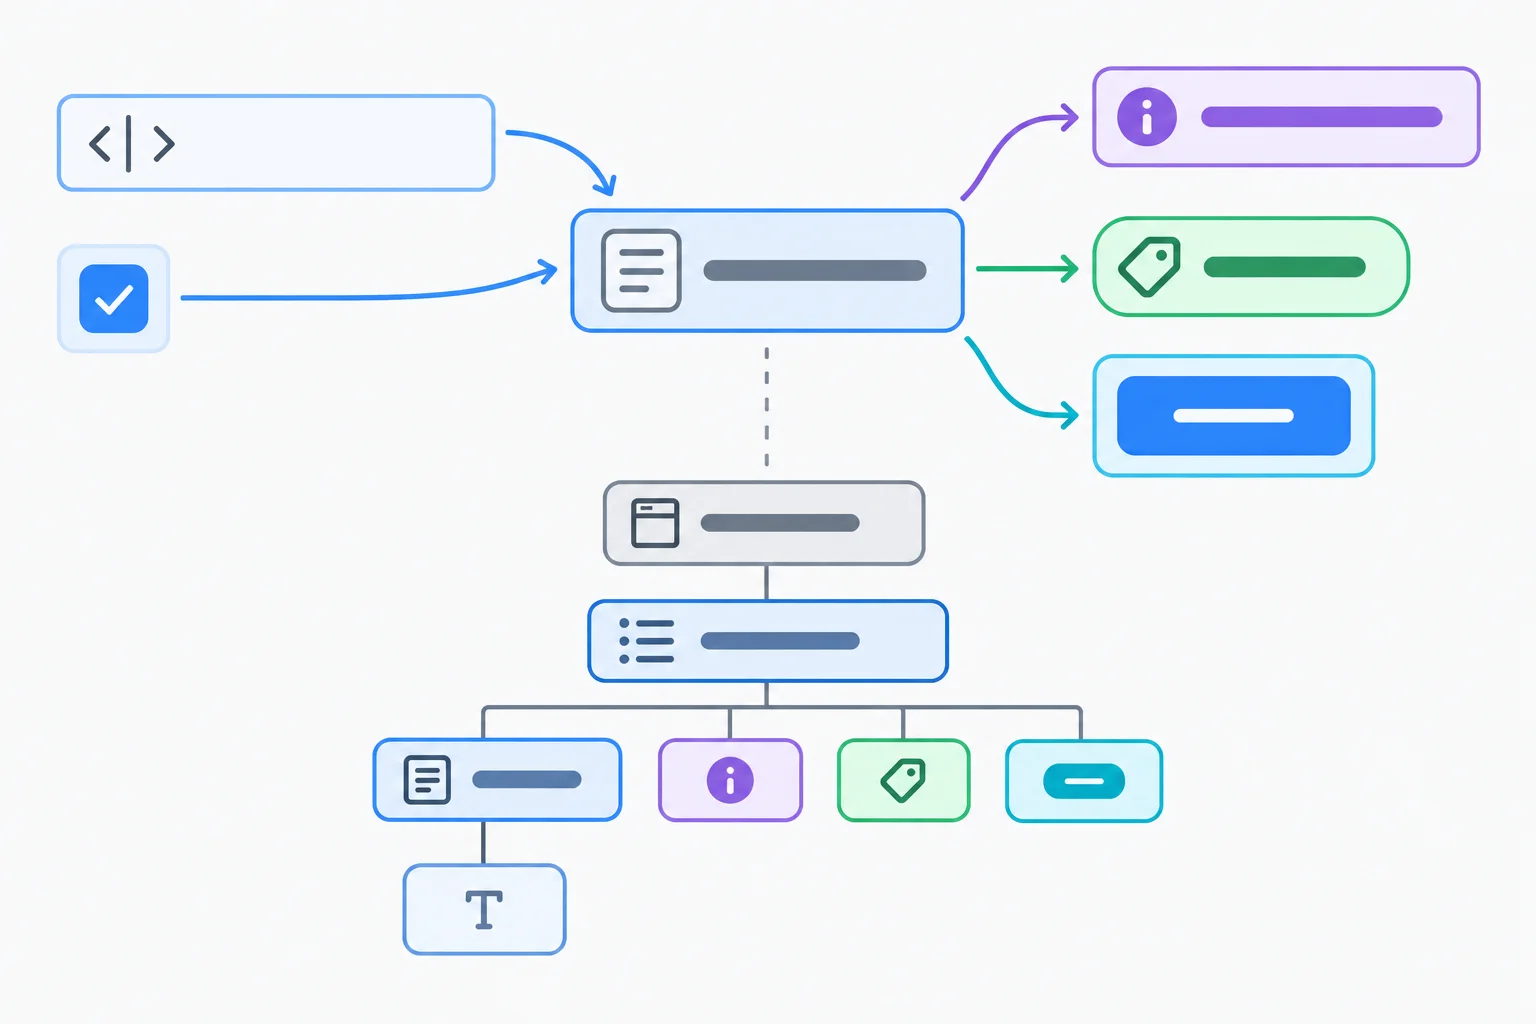
The input becomes text inside a new list item; it is not interpreted as markup.
Complete the helper in script.js. The helper selects its required elements when it is called, so the explicit guard can safely stop the update if any selection returns null.
Fill each blank with the operation that matches its target. The function is not connected to a click: after saving and refreshing, you can invoke it manually from the Console.
Fill the four DOM operations.
function previewBook() {
  const message = document.querySelector('#message');
  const readingList = document.querySelector('#reading-list');
  const bookTitle = document.querySelector('#book-title');
  const highlightBook = document.querySelector('#highlight-book');
  const previewButton = document.querySelector('#preview-button');

  if (message === null || readingList === null || bookTitle === null || highlightBook === null || previewButton === null) {
    return;
  }

  const newBook = document.createElement('li');
  newBook.textContent = bookTitle.value;
  newBook.classList.add('book');
  newBook.classList.toggle('', highlightBook.checked);

  readingList.replaceChildren(newBook);
  message. = 'Preview ready.';
  readingList.('title', 'Books to explore');
  previewButton. = false;
}Replace the contents of script.js with this complete helper. Save the file and refresh your local page so the function is available in the Console.
function previewBook() {
  const message = document.querySelector('#message');
  const readingList = document.querySelector('#reading-list');
  const bookTitle = document.querySelector('#book-title');
  const highlightBook = document.querySelector('#highlight-book');
  const previewButton = document.querySelector('#preview-button');

  if (message === null || readingList === null || bookTitle === null || highlightBook === null || previewButton === null) {
    return;
  }

  const newBook = document.createElement('li');
  newBook.textContent = bookTitle.value;
  newBook.classList.add('book');
  newBook.classList.toggle('is-highlighted', highlightBook.checked);

  readingList.replaceChildren(newBook);
  message.textContent = 'Preview ready.';
  readingList.setAttribute('title', 'Books to explore');
  previewButton.disabled = false;
}In the page, replace the input value with this exact safety-test string. Leave Highlight new book checked. Without refreshing, enter previewBook() in the Console.
<strong>New book</strong> & notes
The list now has one preview item. Its visible content must include the angle brackets, tag name, and ampersand as ordinary characters. The input, checkbox, and button remain on the page because only the list’s children were replaced.
Console — run these checks after calling previewBook(). The first line checks for a nested strong element using a selector; the last line checks whether an element with the highlight class was found.
console.log(document.querySelector('#reading-list strong'));
console.log(document.querySelector('#reading-list').getAttribute('title'));
console.log(document.querySelector('#preview-button').disabled);
console.log(document.querySelectorAll('#reading-list .book').length);
console.log(document.querySelector('#reading-list .is-highlighted') !== null);null Books to explore false 1 true
The final line is true when the checkbox remained checked before you invoked the helper.
Test the guard without editing your saved files. First reload to restore the starter page. In the Console, remove the Preview control, then invoke the helper:
document.querySelector('#preview-button').remove();
previewBook();
One required selection is now null, so the helper returns without an error. The initial message and two original list items remain unchanged. Reload once more to restore the removed control.
Summary
textContent when a string must become literal visible text.getAttribute(), setAttribute(), and removeAttribute() for ordinary attributes such as title.value, checked, and disabled for current control state.classList to preserve base classes while changing emphasis.createElement(), replaceChildren(), and remove() for focused child-element changes.Run the completed helper locally with the exact safety-test string and a checked checkbox. Write a compact verification report that includes:
.book items after the update.strong element.Do not refresh between entering the safety-test string and calling previewBook().
Write at least 220 characters (0/220).
Congratulations! You completed: Read and Update the DOM Safely
Thousands of online courses in video, ebooks and audiobooks.
To test your knowledge during online courses
Generated directly from your cell phone's photo gallery and sent to your email

Download our app via QR Code or the links below:.



Carry knowledge in your pocket.
Download the Cursa app.
There are hundreds of free courses available, with a free certificate of completion that is saved in your mobile image gallery.
Download the app to access the Course Completion Certificate for Free.


+ 10 million
students

Free and Valid
Certificate

60 thousand free
exercises

4.8/5 rating in
app stores

Free courses in
video and ebooks