Step 1 of 8
Recognize the Controlled-Control Contract
Learn the contract that keeps React-controlled form values stable before binding individual controls.

Learning path · Level 9 · Tutorial 5
Build a labeled React form whose controls stay synchronized with state and whose local submission behavior preserves native validation.
 Recognize the Controlled-Control Contract
Learn the contract that keeps React-controlled form values stable before binding individual controls. 2 min
Recognize the Controlled-Control Contract
Learn the contract that keeps React-controlled form values stable before binding individual controls. 2 min
 Bind a Labeled Text Field
3 min
Bind a Labeled Text Field
3 min
 Control Selects and Checkboxes
Bind the session selector and materials checkbox to their own state values with the prop and event property appropriate to each control. 3 min
Control Selects and Checkboxes
Bind the session selector and materials checkbox to their own state values with the prop and event property appropriate to each control. 3 min
 Type Extracted Change Handlers
Extract element-specific React change handlers while keeping the Workshop planner controls controlled. 2 min
Type Extracted Change Handlers
Extract element-specific React change handlers while keeping the Workshop planner controls controlled. 2 min
 Keep Numeric Drafts Editable
Keep the Workshop planner seat count editable as a string, then convert it only when a local preview needs a number. 2 min
Keep Numeric Drafts Editable
Keep the Workshop planner seat count editable as a string, then convert it only when a local preview needs a number. 2 min
 Submit Locally Without Bypassing Validation
Handle a valid form submission through the form, preserve native browser validation, and render an accessible local preview from state. 3 min
Submit Locally Without Bypassing Validation
Handle a valid form submission through the form, preserve native browser validation, and render an accessible local preview from state. 3 min
 Reset the Draft and Its Feedback
3 min
Reset the Draft and Its Feedback
3 min
 Verify the Complete Controlled Form
Run and verify a complete labeled controlled form in your own React project, including native validation, local-only feedback, keyboard submission, and state-driven reset. 3 min
Verify the Complete Controlled Form
Run and verify a complete labeled controlled form in your own React project, including native validation, local-only feedback, keyboard submission, and state-driven reset. 3 min
Step 1 of 8
Learn the contract that keeps React-controlled form values stable before binding individual controls.
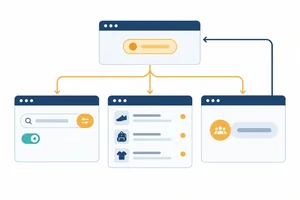
A controlled control has one source of truth: React state.
This loop means the displayed control and its state stay synchronized. In the Workshop planner, a typed attendee name will eventually be represented by string state, while a checked checkbox will be represented by boolean state.
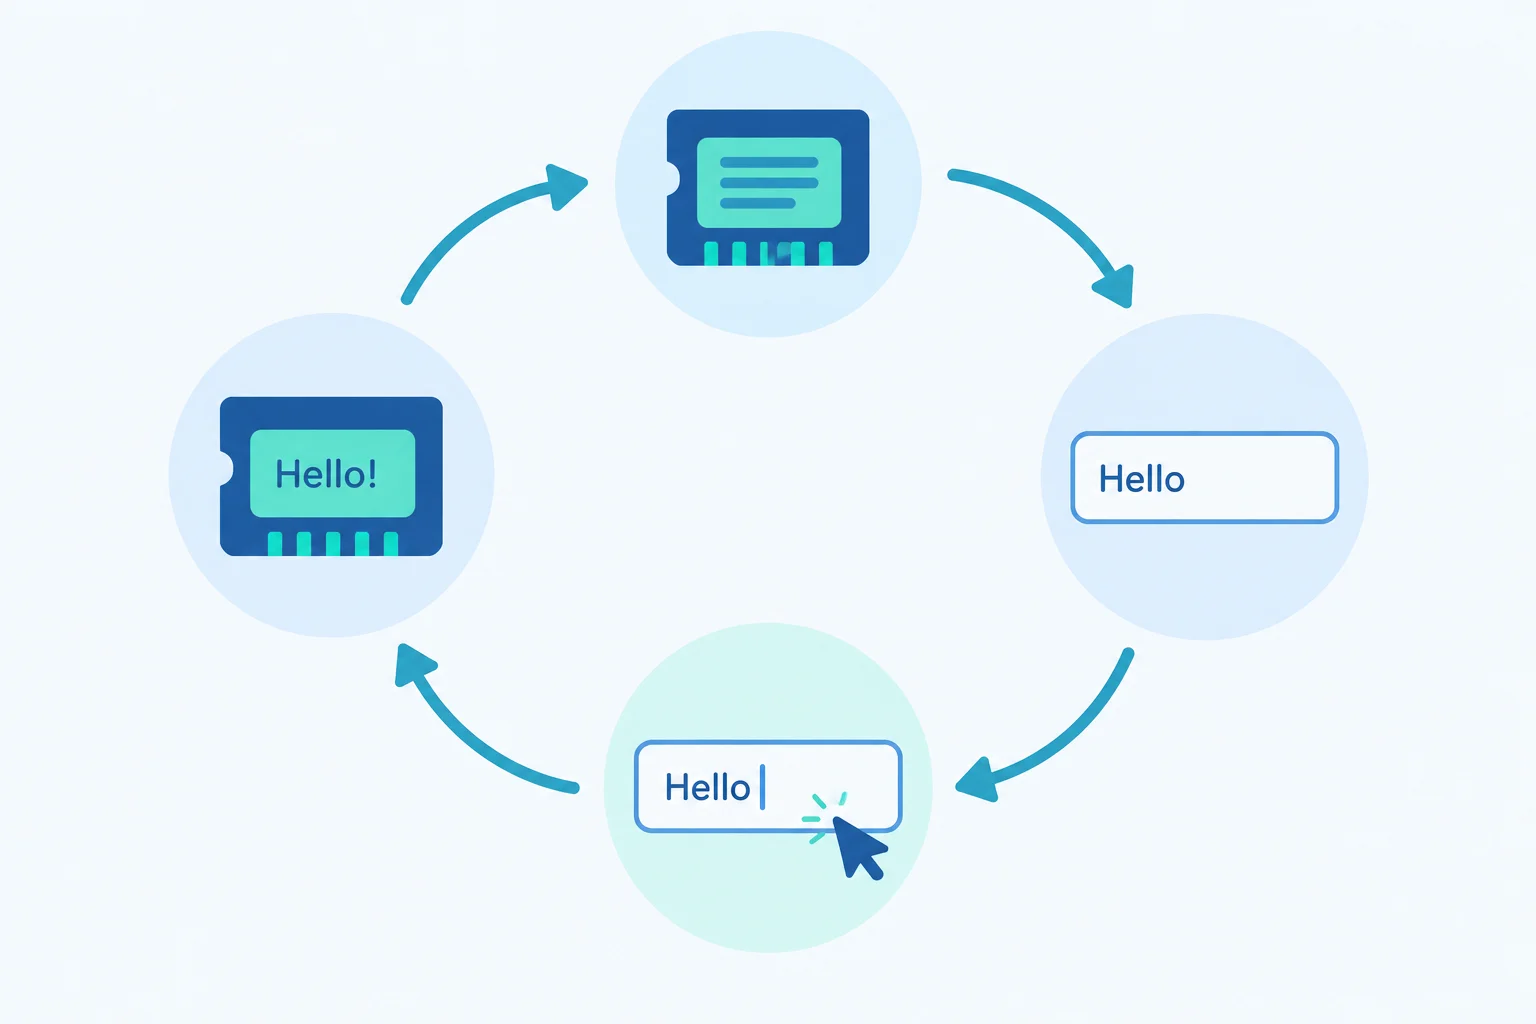
A controlled-control loop: state supplies the display, and an edit leads back to updated state.
Choose a mode for a control and keep that mode for its whole lifetime.
value and checked describe the current values of controlled controls.defaultValue and defaultChecked provide an initial value for uncontrolled controls; after that, the browser manages the live value.Do not switch a control between these modes after it first renders. In particular, do not pass null or undefined as a controlled value. A controlled text value is always a string, including ""; a controlled checked value is always a boolean.
Tip
These initial Workshop planner states already use stable controlled-value types. The bindings and change handlers will be added in the next steps.
Workshop planner state in src/App.tsx
import { useState } from "react";

export default function App() {
  const [attendeeName, setAttendeeName] = useState("");
  const [session, setSession] = useState("");
  const [seatsDraft, setSeatsDraft] = useState("1");
  const [includeMaterials, setIncludeMaterials] = useState(false);

  return <main />;
}Match each JSX prop to its role.
Match every prop with its role.
Tap an item and then its matching pair.
Which initialization keeps attendeeName ready to be used as the current value of a controlled text field from its first render?

Step 2 of 8
A controlled text field has one source of truth: React state. The input displays attendeeName; when the learner types, the change callback stores that exact string; React then renders the updated value back into the input.
For the Workshop planner, keep attendeeName as a string. The empty string is a valid starting value, and every edit—including spaces—can be stored unchanged.
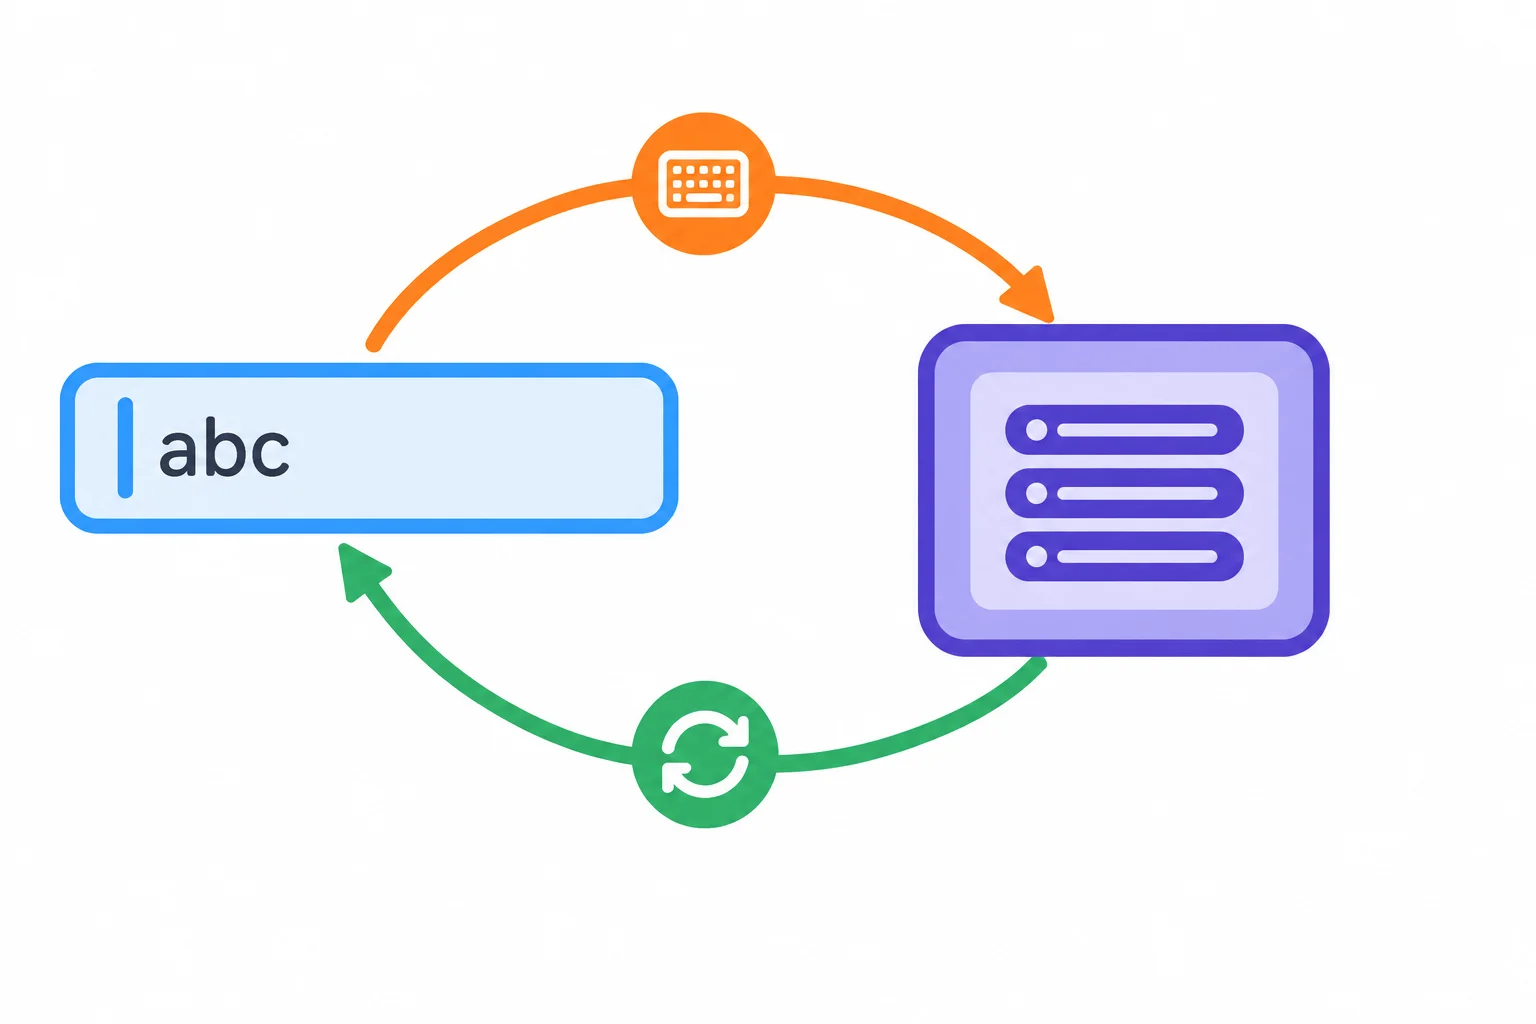
The displayed text comes from state, while each edit sends a new string back to state.
In src/App.tsx, create the first controlled control. The inline callback receives its event type from the onChange prop, so TypeScript knows that event.currentTarget is this input element. Read its string with .value and pass it directly to the setter.
The native label connection remains intact: htmlFor and id use the same value. React controls the text value; the browser still provides the label and the required constraint.
src/App.tsx — Workshop planner
import { useState } from "react";

export default function App() {
  const [attendeeName, setAttendeeName] = useState("");

  return (
    <main>
      <h1>Workshop planner</h1>
      <form>
        <label htmlFor="attendee-name">Attendee name</label>
        <input
          id="attendee-name"
          name="attendee-name"
          type="text"
          required
          value={attendeeName}
          onChange={(event) => {
            setAttendeeName(event.currentTarget.value);
          }}
        />
      </form>
    </main>
  );
}
Warning
Do not replace the current-value binding with an uncontrolled default. A controlled control needs its displayed value and its change update to work together for its entire lifetime.
Complete the three bindings for the controlled attendee-name field. A field that receives a current value but does not successfully update its state will render the old value again, so typing appears not to work normally.
<label htmlFor="attendee-name">Attendee name</label>
<input
  id="attendee-name"
  name="attendee-name"
  type="text"
  required
  ={attendeeName}
  ={(event) => {
    (event.currentTarget.value);
  }}
/>
Step 3 of 8
Bind the session selector and materials checkbox to their own state values with the prop and event property appropriate to each control.
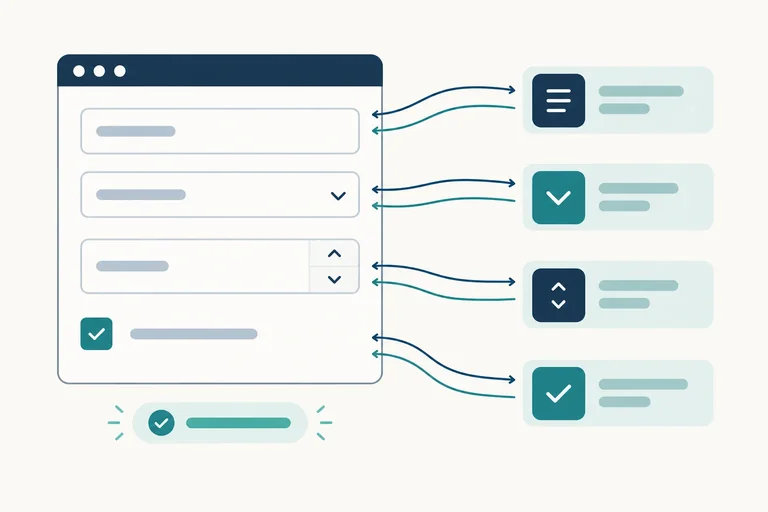
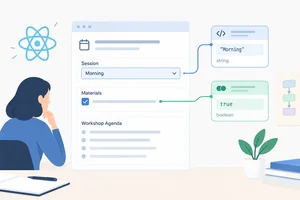
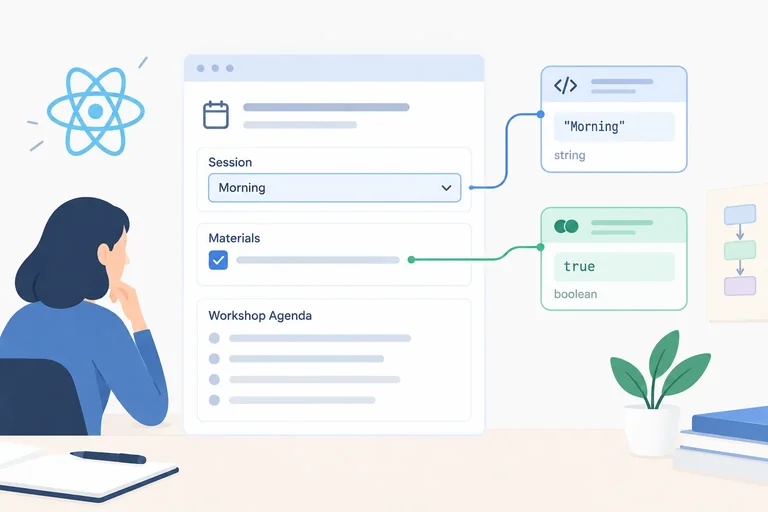
In Workshop planner, session starts as "". That empty string matches the first option, so the select begins with Choose a session displayed.
Bind the select with value={session}. Each option's value is the value React stores—not necessarily the text a person sees. When the learner selects an option, read event.currentTarget.value; it is a string.
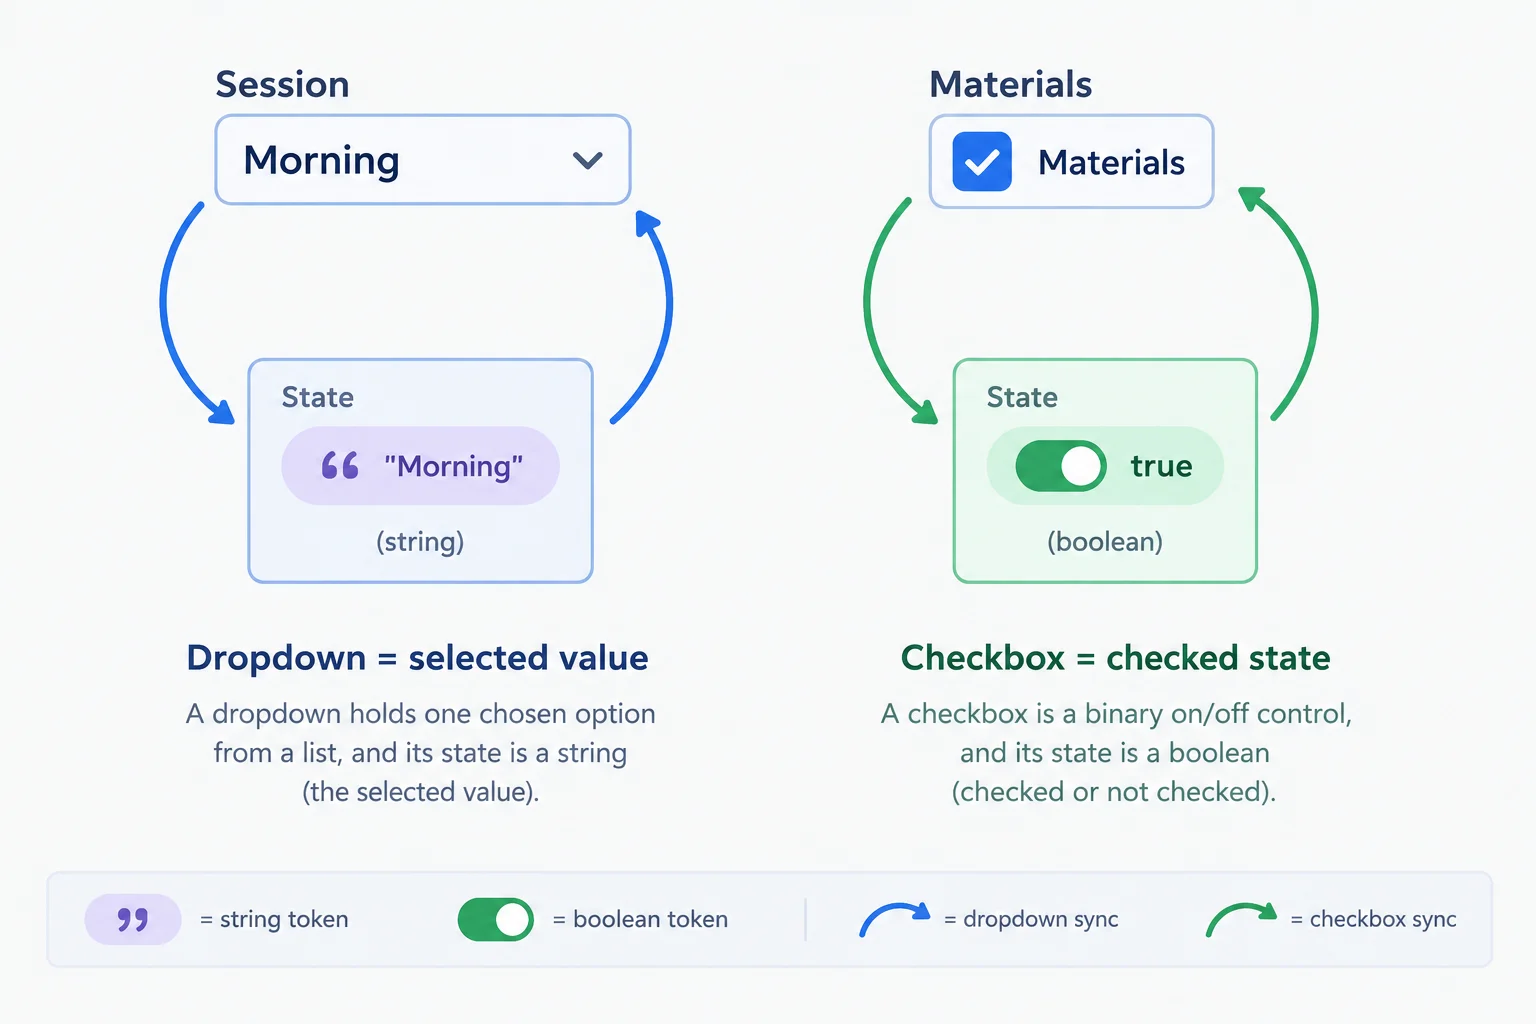
The selector synchronizes a string value; the checkbox synchronizes a boolean checked state.
Add the session state and this labeled controlled select in src/App.tsx. The empty-value option represents no session selection yet.
const [session, setSession] = useState("");

<label htmlFor="session">Session</label>
<select
  id="session"
  name="session"
  required
  value={session}
  onChange={(event) => setSession(event.currentTarget.value)}
>
  <option value="">Choose a session</option>
  <option value="morning">Morning</option>
  <option value="afternoon">Afternoon</option>
</select>A checkbox has a string value attribute too, but that does not describe whether it is selected. Its displayed on/off state comes from checked, and event.currentTarget.checked is a boolean.
Keep this state separate from session: changing materials must not change the session, and changing the session must not change materials.
Add a separate boolean state and the optional materials control. The inline handler receives the appropriate input event type from JSX.
const [includeMaterials, setIncludeMaterials] = useState(false);

<label htmlFor="include-materials">Include materials</label>
<input
  id="include-materials"
  name="include-materials"
  type="checkbox"
  checked={includeMaterials}
  onChange={(event) => setIncludeMaterials(event.currentTarget.checked)}
/>
Tip
Use value for the single-select's current string. Use checked for the checkbox's current boolean. Both handlers read from event.currentTarget, but they read the property that matches the control.
Match each Workshop planner control detail to its correct partner.
Tap an item and then its matching pair.
Complete both controlled bindings.
<label htmlFor="session">Session</label>
<select
  id="session"
  name="session"
  required
  ={}
  onChange={(event) => setSession(event.currentTarget.)}
>
  <option value="">Choose a session</option>
  <option value="morning">Morning</option>
  <option value="afternoon">Afternoon</option>
</select>

<label htmlFor="include-materials">Include materials</label>
<input
  id="include-materials"
  name="include-materials"
  type="checkbox"
  ={}
  onChange={(event) => setIncludeMaterials(event.currentTarget.)}
/>
Step 4 of 8
Extract element-specific React change handlers while keeping the Workshop planner controls controlled.
Inline JSX handlers receive their event type from the prop they are attached to. Once you move that callback into a standalone function, it no longer has that contextual type. Add an explicit ChangeEvent<...> annotation so TypeScript knows what event.currentTarget is.
The generic identifies the actual control element. That lets you read its appropriate property without a cast or any.
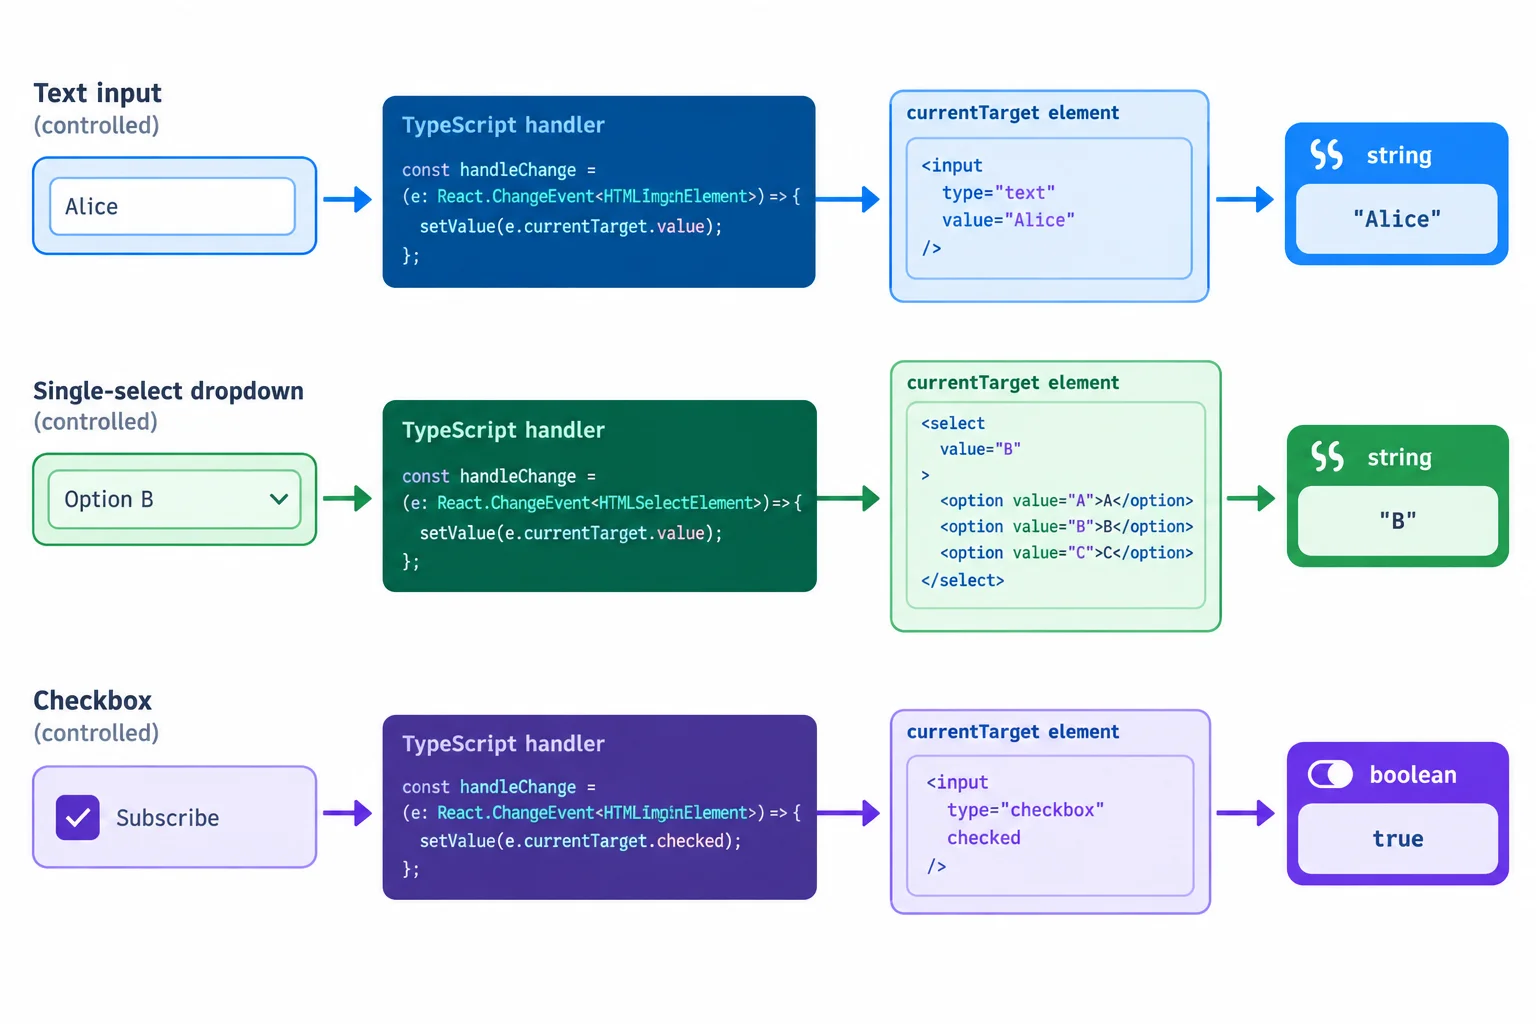
An element-specific event generic gives currentTarget the matching DOM element type.
Import React event types with a type-only import, then annotate each extracted handler for the element that triggers it.
import type { ChangeEvent } from "react";

function handleNameChange(event: ChangeEvent<HTMLInputElement>) {
  setAttendeeName(event.currentTarget.value);
}

function handleSessionChange(event: ChangeEvent<HTMLSelectElement>) {
  setSession(event.currentTarget.value);
}

function handleMaterialsChange(event: ChangeEvent<HTMLInputElement>) {
  setIncludeMaterials(event.currentTarget.checked);
}Use the named handlers in the existing controlled controls. Their state bindings stay the same; only the callback is now named.
| Control | Handler event type | Read from currentTarget | State value type |
|---|---|---|---|
| Attendee name | ChangeEvent<HTMLInputElement> | value | string |
| Session | ChangeEvent<HTMLSelectElement> | value | string |
| Include materials | ChangeEvent<HTMLInputElement> | checked | boolean |
Complete the extracted handlers so TypeScript identifies each control and its string value.
function handleNameChange(event: ChangeEvent<>) {
  setAttendeeName(event.currentTarget.);
}

function handleSessionChange(event: ChangeEvent<>) {
  setSession(event.currentTarget.);
}
Step 5 of 8
Keep the Workshop planner seat count editable as a string, then convert it only when a local preview needs a number.
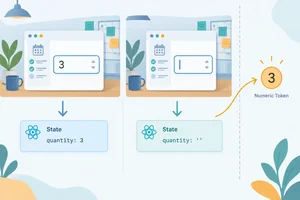
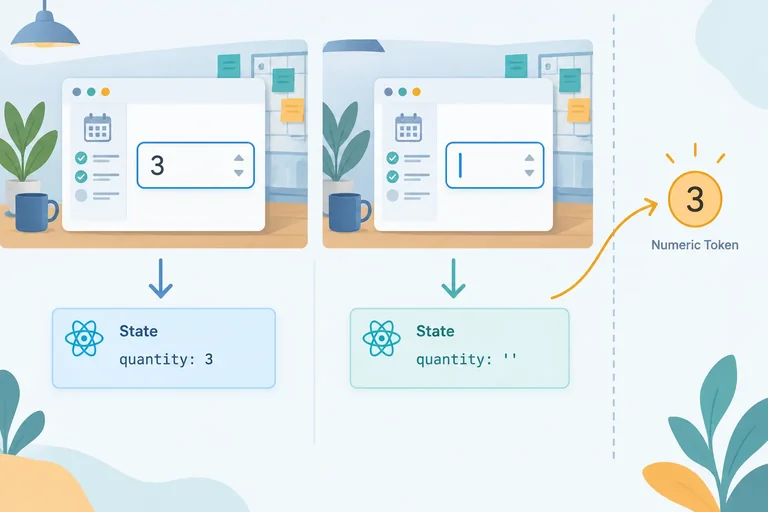
type="number" changes the browser’s input UI and native constraints, but event.currentTarget.value is still a string. Keep the editable seat count in seatsDraft.
That gives the draft an important state: it can be empty while the learner is editing. An empty draft is not the same thing as the numeric value zero.
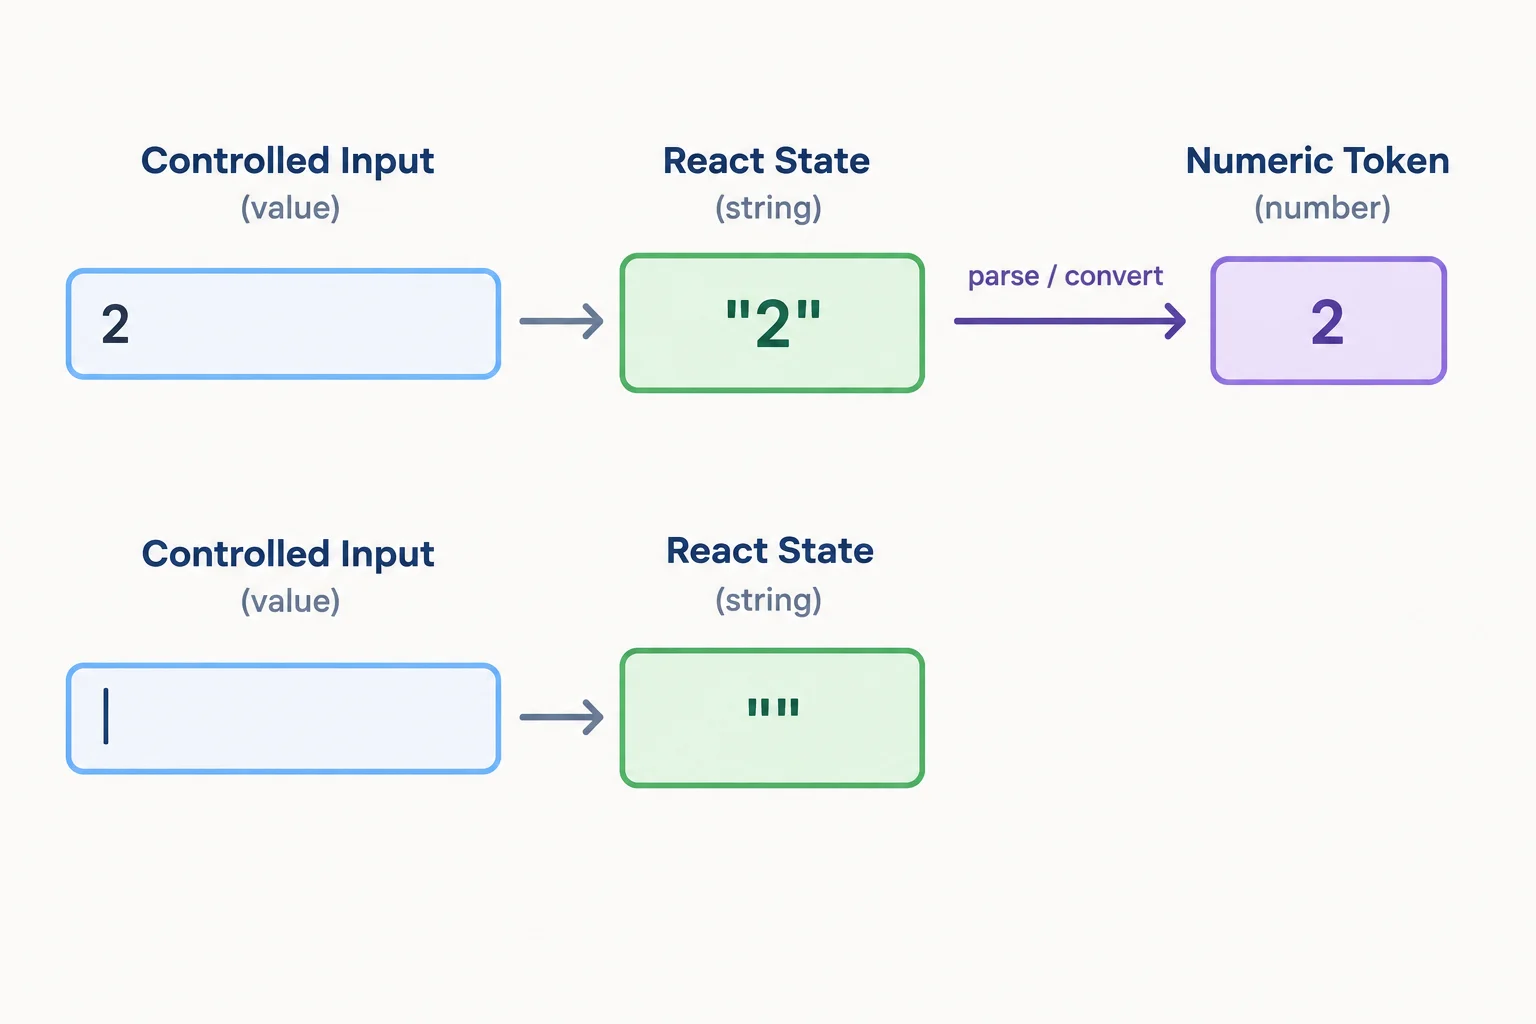
While editing, the control and seatsDraft share a string value. Conversion belongs at the later local-submission boundary.
Place this state line near the other state declarations in the existing Workshop planner App component. Bind the Seats control to that state and store the unmodified value from currentTarget.
A controlled number input may temporarily be blank. If every edit were converted with Number, a cleared field would become 0, which changes what the learner typed. Keep only the draft while editing; do not add a second synchronized numeric state.
At the later accepted local-submission boundary, derive the number once with const seats = Number(seatsDraft);.
Inside src/App.tsx, in the existing Workshop planner component
const [seatsDraft, setSeatsDraft] = useState("1");

<label htmlFor="seats">Seats</label>
<input
  id="seats"
  name="seats"
  type="number"
  min={1}
  max={6}
  step={1}
  required
  value={seatsDraft}
  onChange={(event) => setSeatsDraft(event.currentTarget.value)}
/>These are different moments in the same interaction.
| User edit | seatsDraft | Number(seatsDraft) |
|---|---|---|
| Initial field | "1" | 1 |
| Types 2 | "2" | 2 |
| Clears field | "" | 0 |
Complete the controlled Seats binding so every edit, including a cleared edit, stays in the editable draft.
<label htmlFor="seats">Seats</label>
<input
  id="seats"
  name="seats"
  type="number"
  min={1}
  max={6}
  step={1}
  required
  value=
  onChange={(event) => }
/>After the learner clears the initialized Seats field, write a short two-step trace. State what the change handler stores, then contrast that with what immediate numeric conversion would produce. Conclude why conversion should wait for the local-submission boundary.
Write at least 90 characters (0/90).

Step 6 of 8
Handle a valid form submission through the form, preserve native browser validation, and render an accessible local preview from state.
Attach submission behavior to the form’s onSubmit, not to a submit button click. That gives a click on Preview locally and keyboard submission the same route.
With normal browser submission, native constraints run first. An empty required control or an invalid Seats value is rejected by the browser, so the submit handler is not reached. When the form is valid, React receives the submit event. The handler can then keep the page in place and create a local preview.
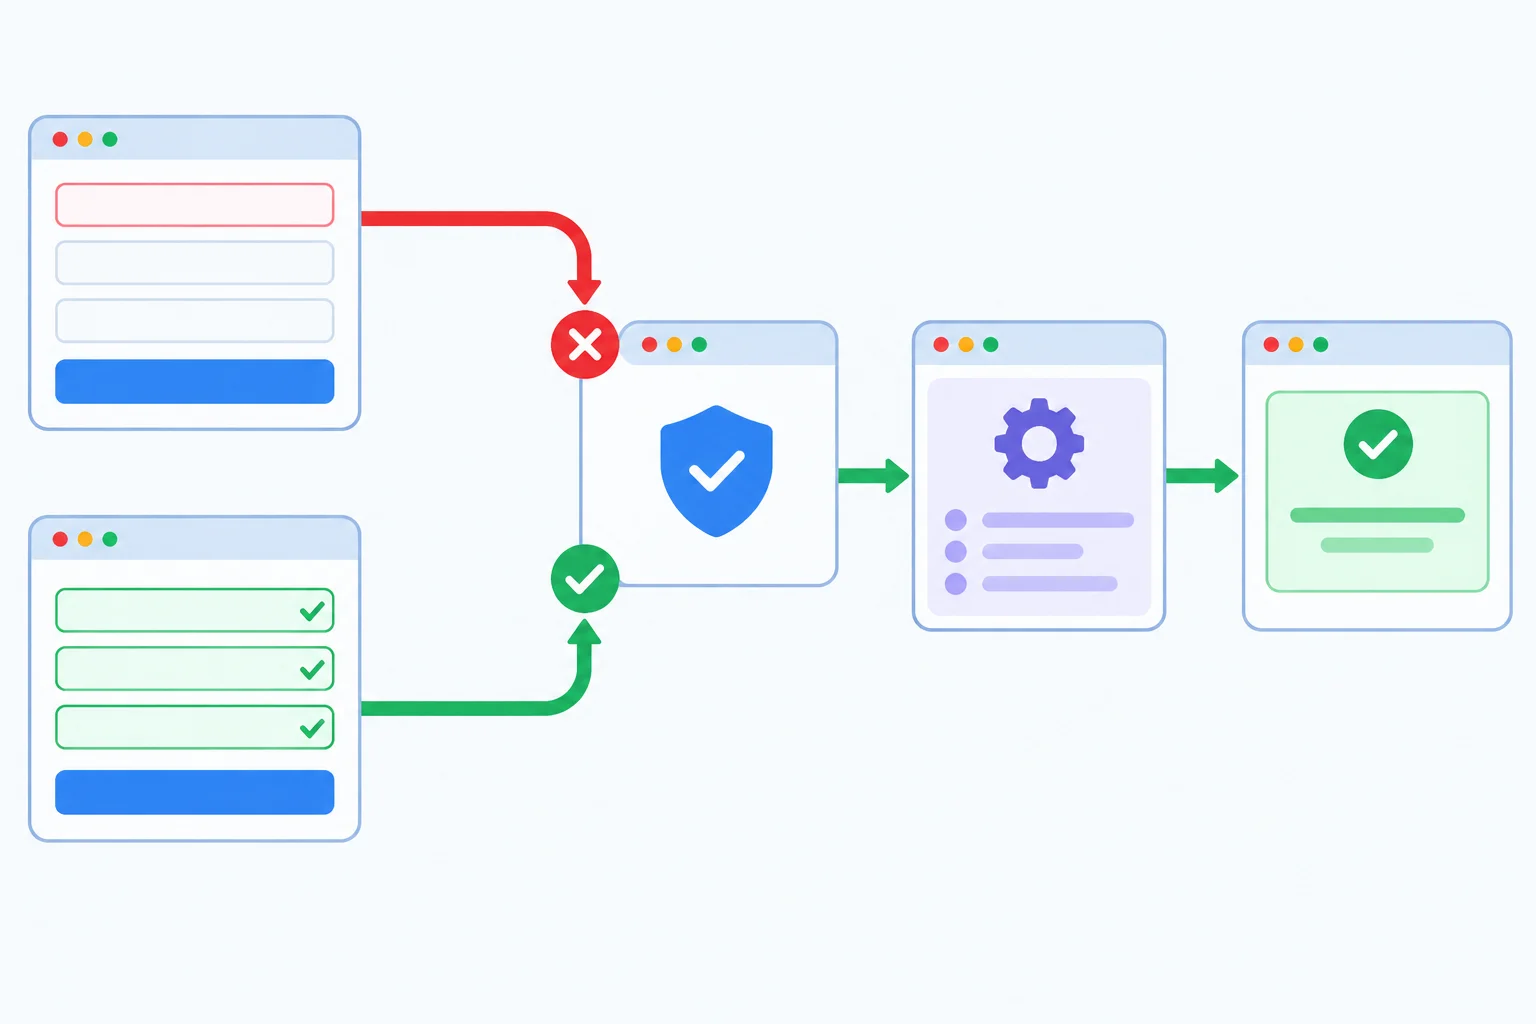
Native validation decides whether the submit handler is reached; only a valid form continues to the local preview.
Warning
Do not add noValidate, and do not move submission work to a submit button’s onClick. Keep the browser’s constraints and normal keyboard behavior in the form flow.
Call event.preventDefault() only inside handleSubmit. At that point, native validation has accepted the normal submission, and preventing the default stops navigation—not validation.
First, update the imports at the top level of src/App.tsx. ES module imports stay outside App.
Then, inside the existing App component, add feedback alongside the other state declarations and place handleSubmit before return. The handler converts the accepted string draft to seats, then stores one truthful in-memory local preview. It does not send or save anything.
At the top of src/App.tsx, keep the runtime import and update the type-only import.
import { useState } from "react";
import type { ChangeEvent, FormEvent } from "react";Inside App, alongside the existing state and handlers, add the feedback state and valid-submission handler.
const [feedback, setFeedback] = useState("");

function handleSubmit(event: FormEvent<HTMLFormElement>) {
  event.preventDefault();

  const seats = Number(seatsDraft);

  setFeedback(
    `Last local preview: ${attendeeName}, ${session}, ${seats} seat(s), materials: ${includeMaterials}. Nothing was sent or saved.`,
  );
}In the returned JSX, connect the existing form to the handler. Keep the status region mounted inside the form so React can render the feedback string.
<form onSubmit={handleSubmit}>
  {/* Existing labeled controlled controls stay here. */}
  <button type="submit">Preview locally</button>
  <p role="status">{feedback}</p>
</form>Complete the valid-submission handler.
function handleSubmit(event: FormEvent<HTMLFormElement>) {
  event.();

  const seats = (seatsDraft);

  (
    `Last local preview: ${attendeeName}, ${session}, ${seats} seat(s), materials: ${includeMaterials}. Nothing was sent or saved.`,
  );
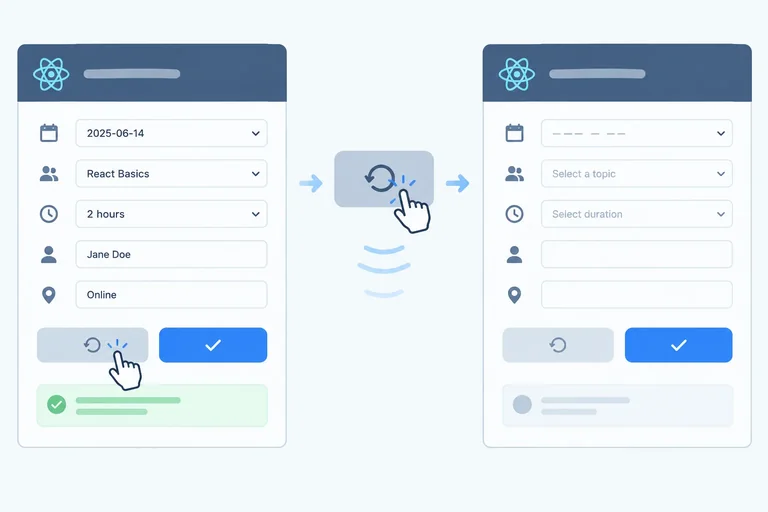
}Put the valid local-submission path in order. If the browser finds an invalid constraint at the first stage, none of the later stages occur.
Step 7 of 8
A successful local preview creates a feedback snapshot. It reflects the values at submission time.
If the learner then edits a controlled control, those draft values change—but the previous feedback does not. No new submission occurred, so feedback keeps its earlier text.
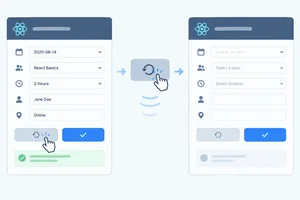
Reset form is a separate user action. It restores every React-owned field to its initial value and clears the feedback string.
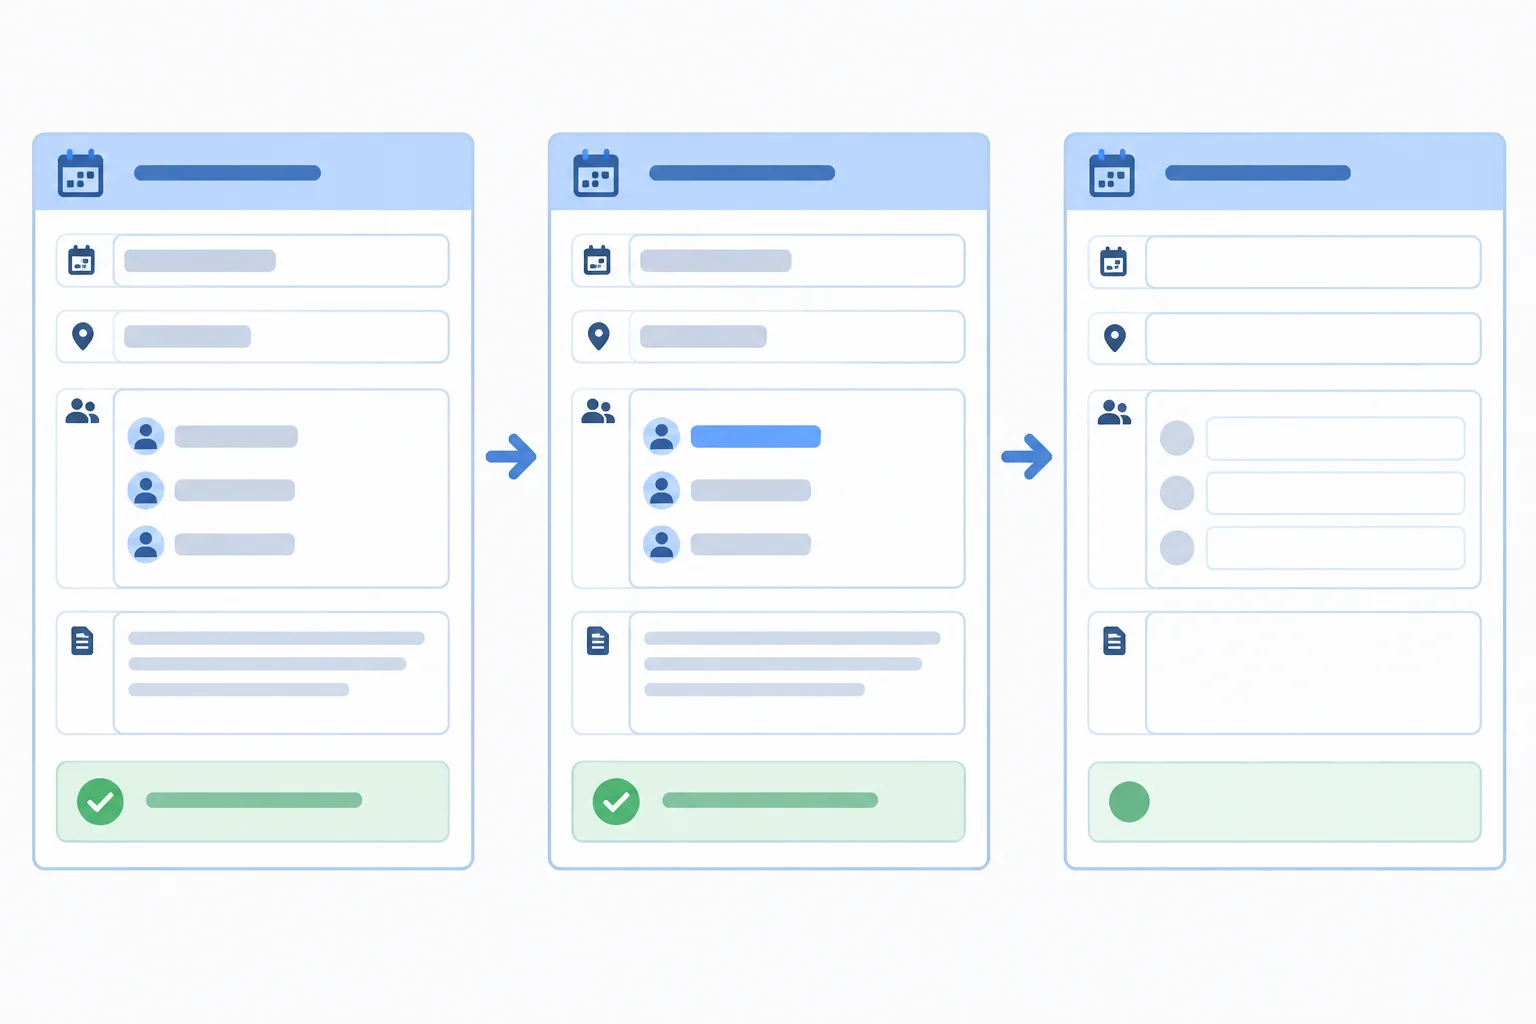
Later draft edits do not rewrite the last local preview. Reset clears it while the status region stays mounted.
Controlled controls receive their displayed values from React state. Therefore, reset those state values in the reset button's event handler.
A native DOM reset alone does not reset React state. On a later render, React can apply the state-owned values again. Use an explicit button with type="button" so this action does not submit the form.
Add this inside App, alongside the existing submit handler. Place the button inside the form.
function handleReset() {
  setAttendeeName("");
  setSession("");
  setSeatsDraft("1");
  setIncludeMaterials(false);
  setFeedback("");
}

// Inside the form, near the submit button:
<button type="button" onClick={handleReset}>
  Reset form
</button>
Keep the existing status region mounted:
<p role="status">{feedback}</p>
setFeedback("") makes the region empty after reset. It does not remove the region or mutate the DOM directly.
Complete the reset handler for the Workshop planner.
function handleReset() {
  setAttendeeName();
  setSession();
  setSeatsDraft();
  setIncludeMaterials();
  setFeedback();
}Without looking back, write the five setter calls that belong in handleReset.
Then predict both outcomes:
Also state why the reset button must not submit the form.
Write at least 120 characters (0/120).

Step 8 of 8
Run and verify a complete labeled controlled form in your own React project, including native validation, local-only feedback, keyboard submission, and state-driven reset.
Replace src/App.tsx in your existing React + TypeScript project with the following three contiguous sections, in order. Keep the imports at the top of the file, add no dependencies, and do not add noValidate.
The diagram is the integration contract you will verify: state supplies every displayed controlled value; native validation gates submission; a valid submission produces an in-memory local preview; reset restores the initial draft.
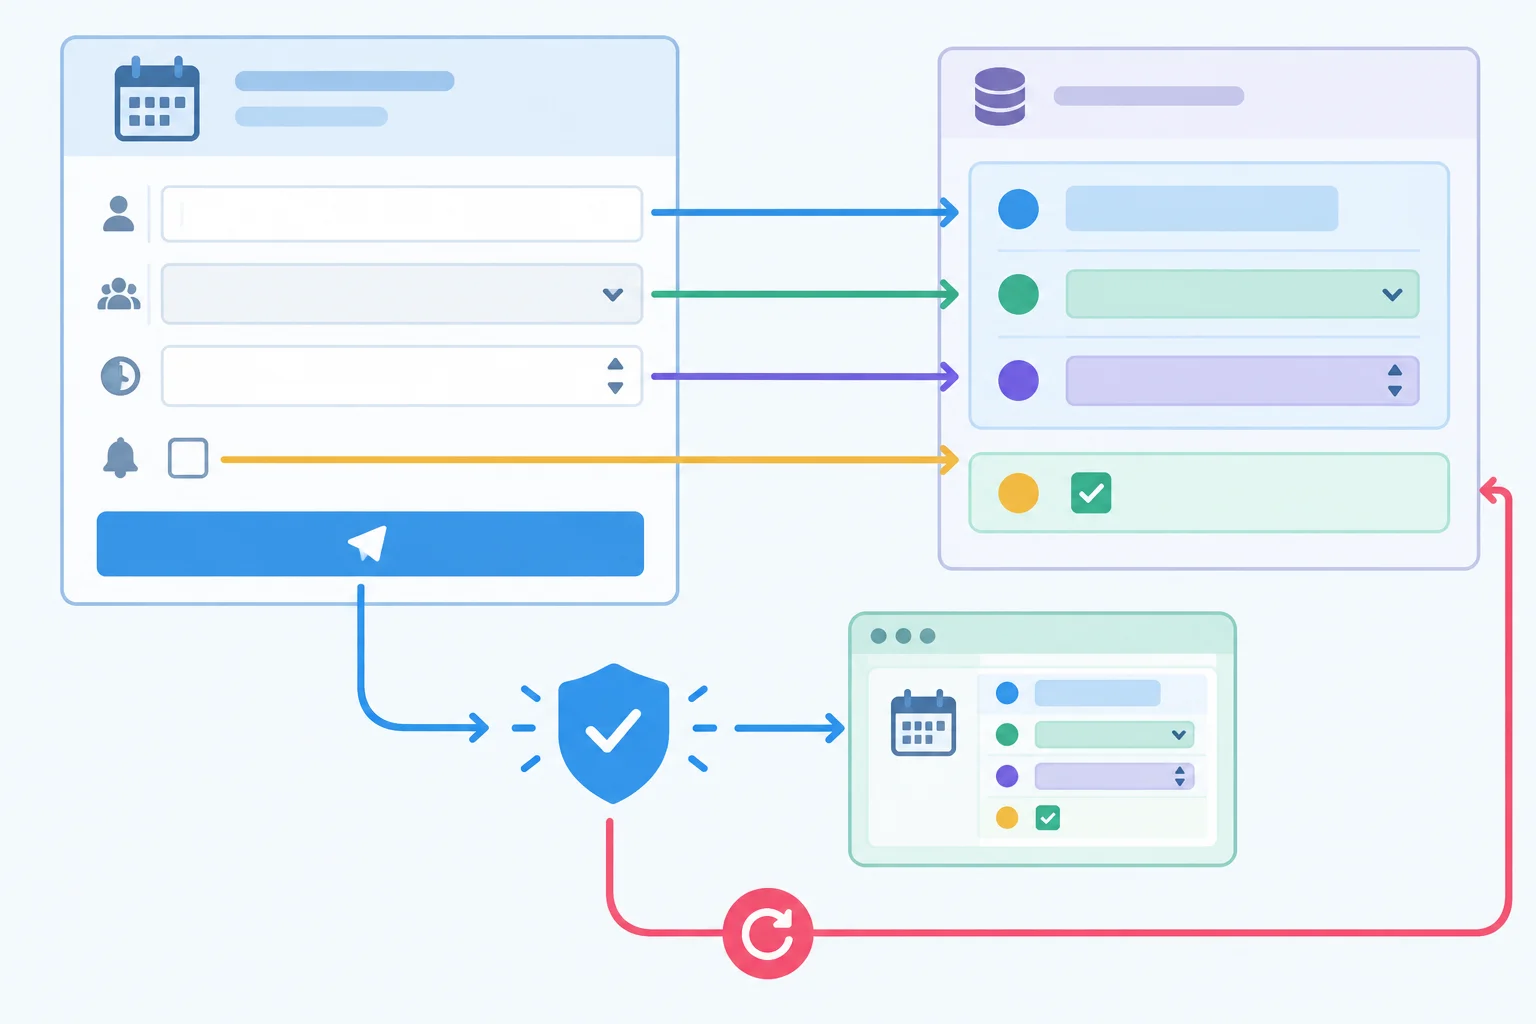
State controls the displayed draft. Native constraints decide whether the local submit handler runs; reset restores React-owned values.
Copy this as the first section of src/App.tsx.
import { useState } from "react";
import type { ChangeEvent, FormEvent } from "react";

export default function App() {
  const [attendeeName, setAttendeeName] = useState("");
  const [session, setSession] = useState("");
  const [seatsDraft, setSeatsDraft] = useState("1");
  const [includeMaterials, setIncludeMaterials] = useState(false);
  const [feedback, setFeedback] = useState("");

  function handleNameChange(event: ChangeEvent<HTMLInputElement>) {
    setAttendeeName(event.currentTarget.value);
  }

  function handleSessionChange(event: ChangeEvent<HTMLSelectElement>) {
    setSession(event.currentTarget.value);
  }

  function handleMaterialsChange(event: ChangeEvent<HTMLInputElement>) {
    setIncludeMaterials(event.currentTarget.checked);
  }
Place this section immediately after section 1. The form owns submission through onSubmit, so clicking Preview locally and submitting with the keyboard use the same behavior. The browser checks required fields and the Seats constraints before this handler runs.
On a valid submission, preventDefault() prevents navigation, Number converts the accepted draft, and feedback stores one local preview snapshot. The reset handler restores every state value rather than changing the DOM directly.
Paste this directly below section 1.
  function handleSubmit(event: FormEvent<HTMLFormElement>) {
    event.preventDefault();

    const seats = Number(seatsDraft);

    setFeedback(
      `Last local preview: ${attendeeName}, ${session}, ${seats} seats, materials: ${includeMaterials}. Nothing was sent or saved.`,
    );
  }

  function handleReset() {
    setAttendeeName("");
    setSession("");
    setSeatsDraft("1");
    setIncludeMaterials(false);
    setFeedback("");
  }

  return (
    <main>
      <h1>Workshop planner</h1>
      <form onSubmit={handleSubmit}>
        <label htmlFor="attendee-name">Attendee name</label>
        <input
          id="attendee-name"
          name="attendee-name"
          type="text"
          required
          value={attendeeName}
          onChange={handleNameChange}
        />

        <label htmlFor="session">Session</label>
        <select
          id="session"
          name="session"
          required
          value={session}
          onChange={handleSessionChange}
        >
          <option value="">Choose a session</option>
          <option value="morning">Morning</option>
          <option value="afternoon">Afternoon</option>
        </select>
Paste the final section directly below section 2, then save the file and use your project's usual local development command. The expected rendered states are attached to this completed, runnable component: compare your initial form and your valid local preview with them.
Paste this directly below section 2 to complete src/App.tsx.
        <label htmlFor="seats">Seats</label>
        <input
          id="seats"
          name="seats"
          type="number"
          min={1}
          max={6}
          step={1}
          required
          value={seatsDraft}
          onChange={(event) => setSeatsDraft(event.currentTarget.value)}
        />

        <label htmlFor="include-materials">Include materials</label>
        <input
          id="include-materials"
          name="include-materials"
          type="checkbox"
          checked={includeMaterials}
          onChange={handleMaterialsChange}
        />

        <button type="submit">Preview locally</button>
        <button type="button" onClick={handleReset}>
          Reset form
        </button>
        <p role="status">{feedback}</p>
      </form>
    </main>
  );
}
Initial render
Workshop planner
Attendee name: [empty]
Session: [Choose a session]
Seats: [1]
Include materials: [unchecked]
[Preview locally] [Reset form]
Status: [empty]

After entering Alex, selecting Morning, entering 2, checking Include materials, and submitting
Workshop planner
Attendee name: [Alex]
Session: [Morning]
Seats: [2]
Include materials: [checked]
[Preview locally] [Reset form]
Status: Last local preview: Alex, morning, 2 seats, materials: true. Nothing was sent or saved.
Rendered controls are represented as text here. Native browser validation bubbles and styling vary by browser; for invalid attempts, the important result is that no new status message appears and the page does not navigate.
Use this checklist in the local browser. Begin with an invalid attempt before creating a valid preview, so you can tell whether an invalid attempt changed the status region.
| Action | Expected behavior |
|---|---|
| Submit with a required field empty | The browser blocks submission; no new local preview appears. |
| Use Seats outside 1–6 | The browser blocks submission; the submit handler does not create a new preview. |
| Use Alex, Morning, 2, and checked materials | A valid submit stays on the page and updates the status region with the local preview. |
| Press Enter with a valid form | The form follows the same submit behavior as the submit button. |
| Edit a field after a valid preview | The prior feedback remains a submitted snapshot until another valid submission or reset. |
| Choose Reset form | Initial controlled values return and the status region becomes empty. |
| Reload after a valid preview | The preview disappears because no persistence exists. |
The complete component keeps the controlled-form contract intact. Strings control the text field, select, and editable numeric draft; a boolean controls the checkbox. Change handlers read currentTarget and update the matching state. Native constraints gate onSubmit; only valid submissions create a local preview. Reset restores state and clears the still-mounted status region.
Tip
Use state as the source of truth for displayed control values and completion feedback.
Run the checklist in your own project. First attempt submission with an empty required control and with an out-of-range seat count. Then use Alex, the Morning session, a seat draft of "2", and checked materials; submit with the keyboard. Edit one field after the preview, reset the form, then create another valid preview and reload the page.
In 3–6 sentences, report what you observed for blocked submissions, keyboard submission, the local preview, edits after submission, reset, and reload.
Write at least 180 characters (0/180).
Congratulations! You completed: Build Controlled Forms in React
Thousands of online courses in video, ebooks and audiobooks.
To test your knowledge during online courses
Generated directly from your cell phone's photo gallery and sent to your email

Download our app via QR Code or the links below:.



Carry knowledge in your pocket.
Download the Cursa app.
There are hundreds of free courses available, with a free certificate of completion that is saved in your mobile image gallery.
Download the app to access the Course Completion Certificate for Free.


+ 10 million
students

Free and Valid
Certificate

60 thousand free
exercises

4.8/5 rating in
app stores

Free courses in
video and ebooks