Step 1 of 7
Separate Identity, Permission, and Presentation
Separate authentication, authorization, and interface presentation through Project Desk examples.

Learning path · Level 11 · Tutorial 4
Separate sign-in status from resource permissions, identify ineffective client-only access checks, and choose appropriate interface behavior when an API refuses access.
 Separate Identity, Permission, and Presentation
Separate authentication, authorization, and interface presentation through Project Desk examples. 2 min
Separate Identity, Permission, and Presentation
Separate authentication, authorization, and interface presentation through Project Desk examples. 2 min
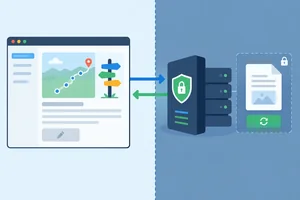 Locate the Real Access Boundary
Identify why browser-side route and control restrictions cannot enforce access to protected resources. 2 min
Locate the Real Access Boundary
Identify why browser-side route and control restrictions cannot enforce access to protected resources. 2 min
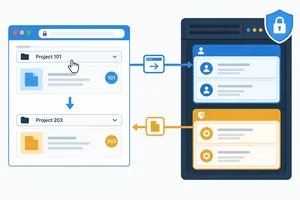 Recognize Untrusted Access Claims
Recognize that browser-supplied identifiers and claims can select or describe a request but cannot prove permission. 2 min
Recognize Untrusted Access Claims
Recognize that browser-supplied identifiers and claims can select or describe a request but cannot prove permission. 2 min
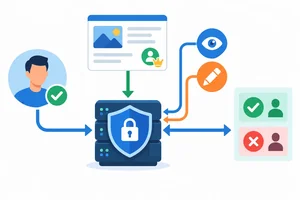 Specify Checks for Each Resource and Action
Determine the trusted server-side checks required before Project Desk returns protected project data or applies an update. 3 min
Specify Checks for Each Resource and Action
Determine the trusted server-side checks required before Project Desk returns protected project data or applies an update. 3 min
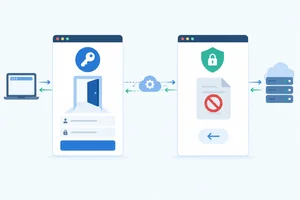 Respond Appropriately to 401 and 403
Choose accurate sign-in-required or access-denied feedback for representative API refusals without exposing protected details or misreporting a refused update. 2 min
Respond Appropriately to 401 and 403
Choose accurate sign-in-required or access-denied feedback for representative API refusals without exposing protected details or misreporting a refused update. 2 min
 Explore Local Interface Branches
Build and inspect a small browser-only Project Desk simulation, then explain why its fixtures demonstrate interface presentation rather than secure access control. 3 min
Explore Local Interface Branches
Build and inspect a small browser-only Project Desk simulation, then explain why its fixtures demonstrate interface presentation rather than secure access control. 3 min
 Review a Complete Access Decision
Audit Project Desk access decisions by separating Browser presentation from Server/API authentication and authorization. 2 min
Review a Complete Access Decision
Audit Project Desk access decisions by separating Browser presentation from Server/API authentication and authorization. 2 min
Step 1 of 7
Separate authentication, authorization, and interface presentation through Project Desk examples.
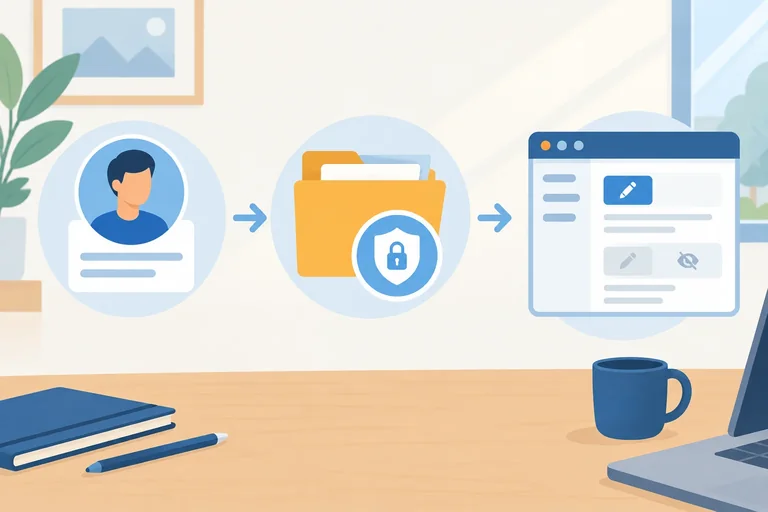
Project Desk separates three different jobs:
These jobs are related, but they are not interchangeable. A signed-in user is not automatically allowed to read every project or update every project.
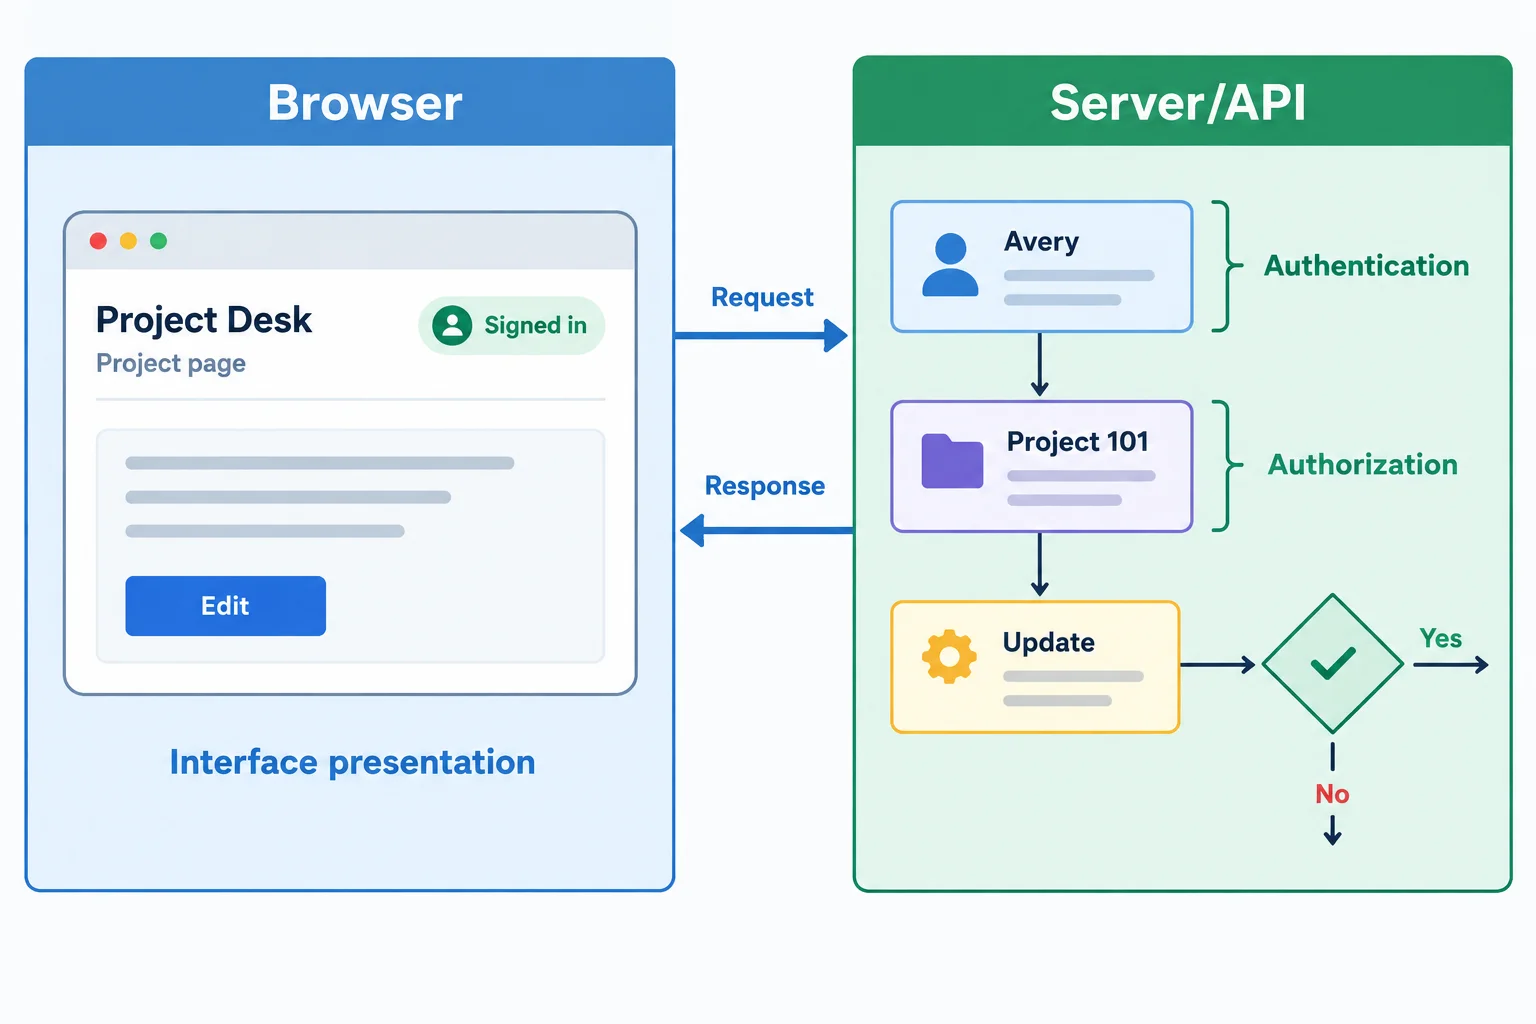
The browser can represent signed-in status and available controls; authentication and authorization answer different questions about a request.
Tip
A browser can show that a user is signed in, but that display is interface presentation. It is not itself proof that a particular request is allowed.
Think in this order:
Project Desk has two fictional users and owner-specific projects. The policy applies to a particular user, project, and action—not merely to whether someone is signed in.
Both roles can read their own project. Only an editor can update their own project. Neither role grants access to another user's project.
| User | Role | Own project | Read own project | Update own project |
|---|---|---|---|---|
| Avery (u-1) | editor | 101 | Allowed | Allowed |
| Blair (u-2) | viewer | 102 | Allowed | Not allowed |
Example
Compare these requirements:
For example, Avery may be signed in and still not be allowed to read Blair’s project 102. The identity is known; the requested resource is simply not permitted for that identity.
Match each Project Desk requirement to its category.
Tap an item and then its matching pair.
Step 2 of 7
Identify why browser-side route and control restrictions cannot enforce access to protected resources.
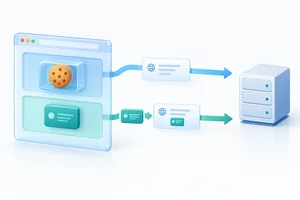
A route guard and conditional controls are interface presentation: they can guide a person away from /projects/101 or omit an Edit button. That is useful behavior, but it happens in the Browser, a user-controlled environment.
The protected resource is not protected merely because the route or control is hidden. The Server/API must make its own authorization decision before it returns protected data or accepts a change. Changing what the browser displays must not change that decision.
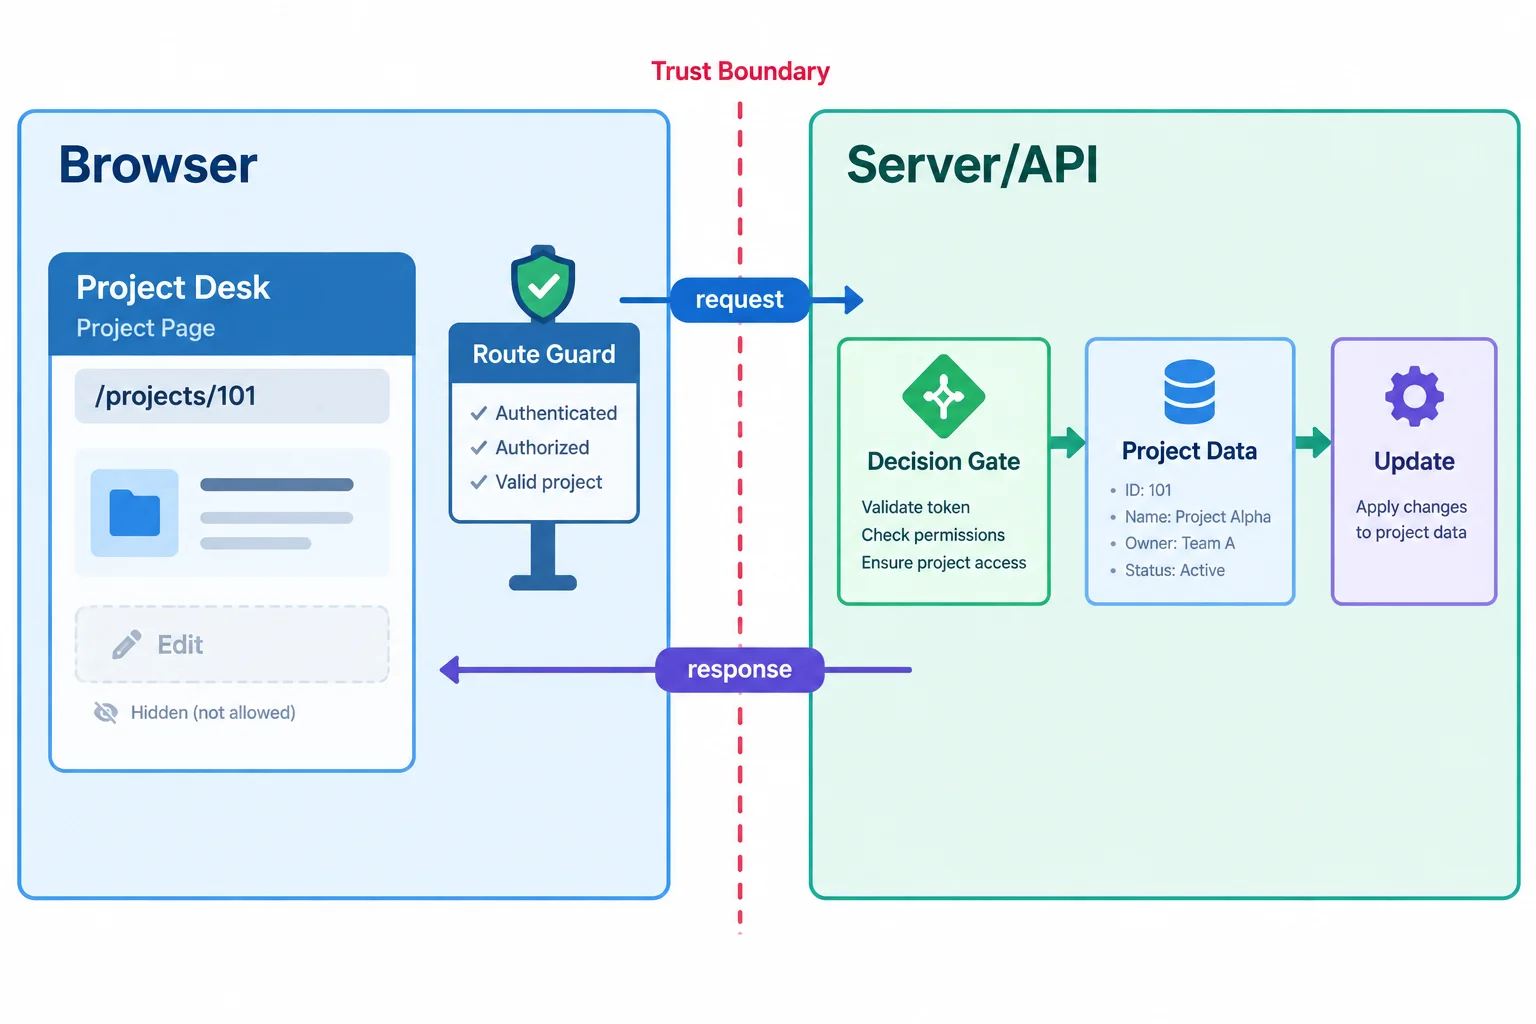
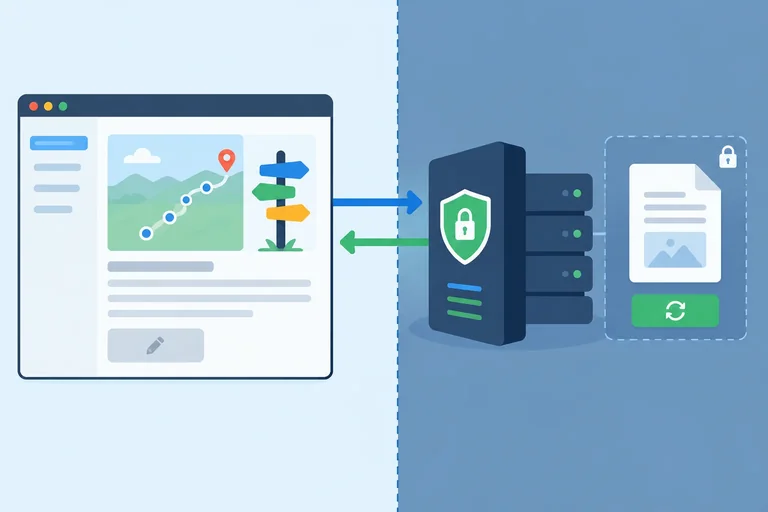
Browser controls can guide the interface. The Server/API must decide access before a response or change crosses the boundary.
Consider Project Desk. A browser can redirect someone away from a project route, and it can hide or disable Edit when its local permissions.canEdit hint is false. Those choices improve navigation and reduce misleading actions.
But a person can alter browser state, enter a route directly, or send a request without using the visible control. Therefore, a hidden Edit control does not stop an independent request such as PATCH /api/projects/101. An altered interface must never turn a refused request into an allowed one.
Warning
Post-download filtering is too late. If the API sends protected project data to the browser and the interface hides some fields afterward, that data has already crossed the boundary. Browser code, developer tools, or altered rendering can inspect what was delivered.
To prevent disclosure, the Server/API must refuse access before returning protected data. To prevent an unwanted change, it must refuse before applying the change.
Example
A route guard can still be valuable: it can keep a signed-out person from landing on a confusing detail screen, or avoid showing an Edit control that the interface does not expect them to use. Treat those as interface presentation. They complement—rather than replace—the Server/API access decision.
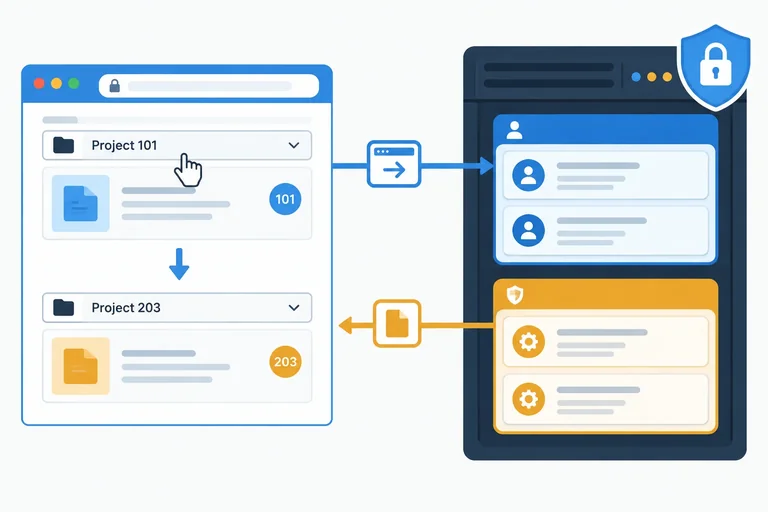
Which design actually blocks unauthorized access before protected data is disclosed or a project change is made?
Step 3 of 7
Recognize that browser-supplied identifiers and claims can select or describe a request but cannot prove permission.
A route parameter or API resource identifier selects a target; it does not prove that the requester may use that target.
For example, /projects/102 and GET /api/projects/102 identify Project 102. The identifier is syntactically valid, but that only means it has a usable format. It does not establish that Avery is permitted to read Blair’s project.
Treat values the browser can send or change as inputs, not as permission evidence.
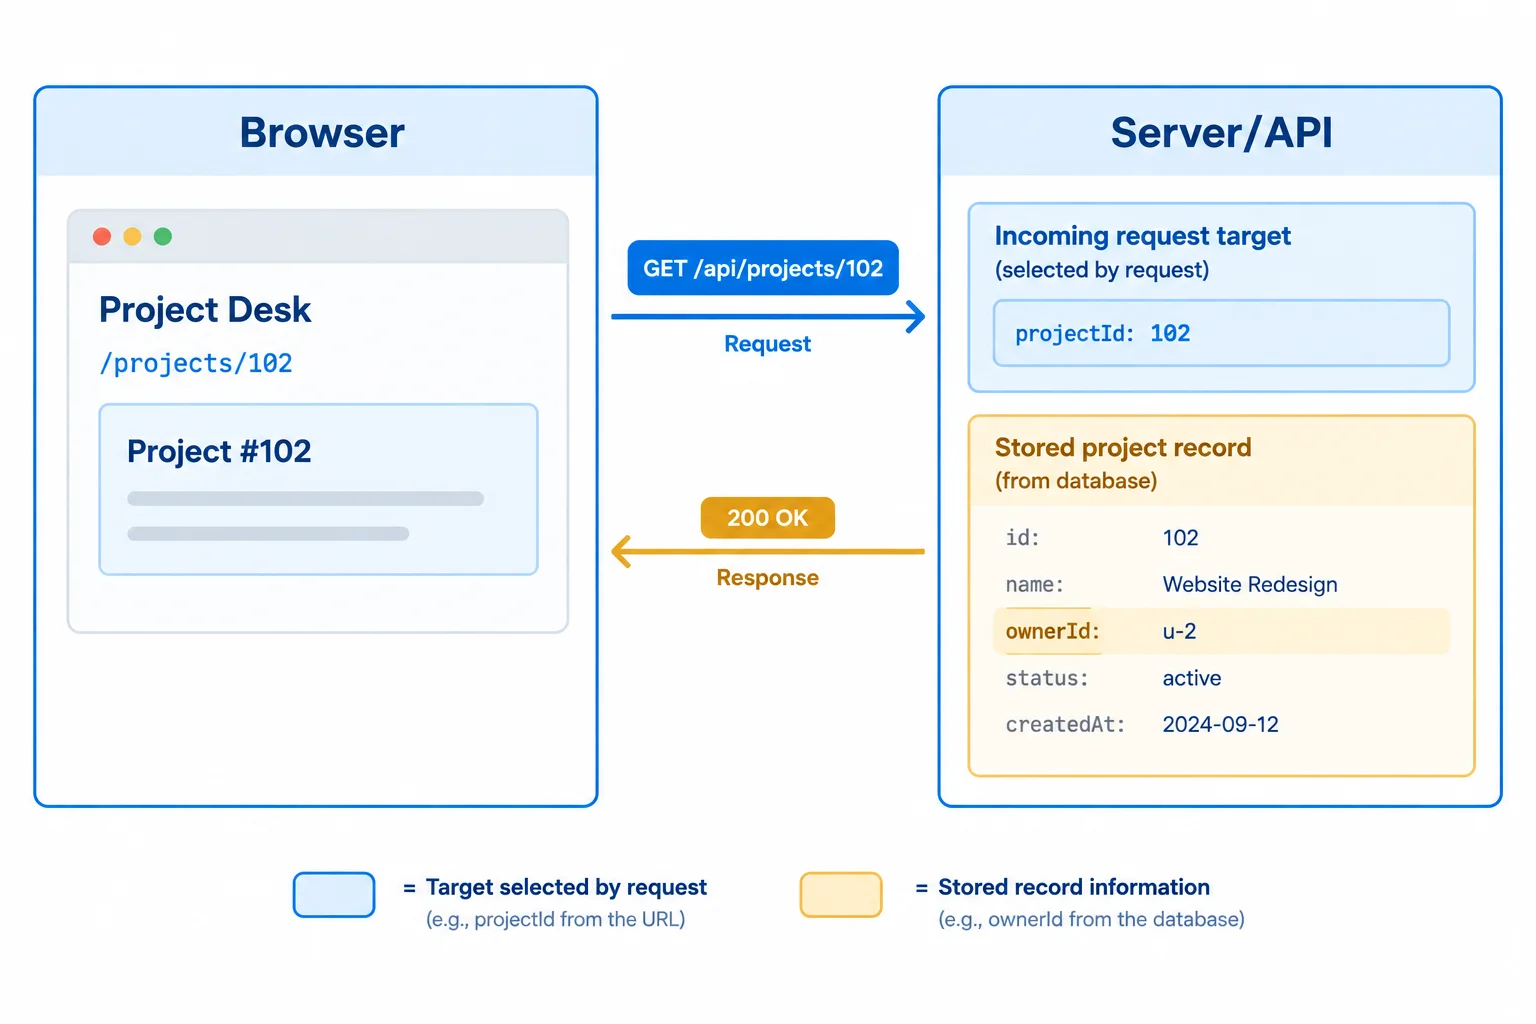
The request names a target. It does not supply trustworthy proof that the requester may access that target.
Changing the target is not the only untrusted access claim. A browser can also send a role, a user ID, an owner ID, or any payload field it chooses.
These values can be useful for interface presentation, but they cannot override the trusted authorization context or the resource information held by the Server/API. A caller cannot make a project their own merely by submitting a different ownerId, and cannot gain editor ability by submitting a different role.
This browser-side fixture may help decide which control to display. Its values must not be treated as proof by a Server/API.
const currentUser = { id: "u-1", role: "editor" };
const projectId = "102";
const submittedOwnerId = "u-1";
const claimedRole = "editor";

const updatePayload = {
  ownerId: submittedOwnerId,
  role: claimedRole,
  name: "Updated project name"
};
Example
In this example, projectId chooses a target, while submittedOwnerId and claimedRole are caller-supplied claims. Their different purposes do not make either one authoritative permission evidence.
Match each browser-supplied value to what it attempts to describe.
Tap an item and then its matching pair.
A Project Desk browser displays Avery and sends PATCH /api/projects/102. The request is changed to include "role": "editor" and "ownerId": "u-1" in its JSON payload.
In 2–4 sentences, explain what the project ID selects, what the role and owner ID claim, and why changing these values must not grant Avery update access.
Write at least 120 characters (0/120).
Step 4 of 7
Determine the trusted server-side checks required before Project Desk returns protected project data or applies an update.
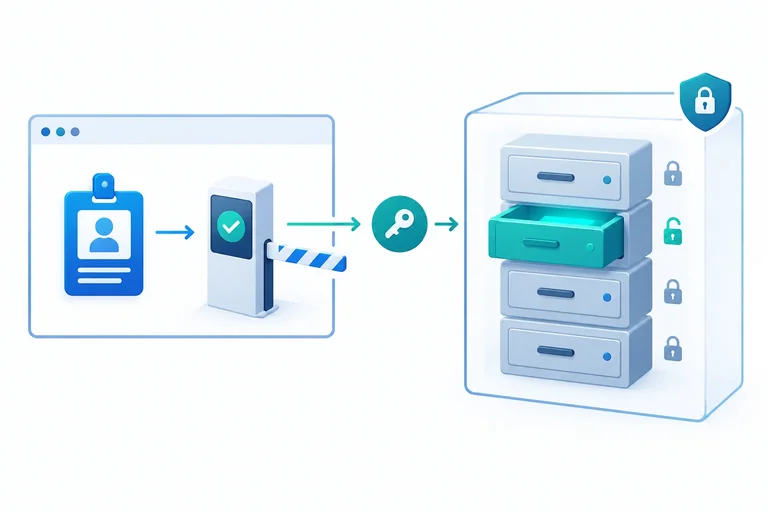
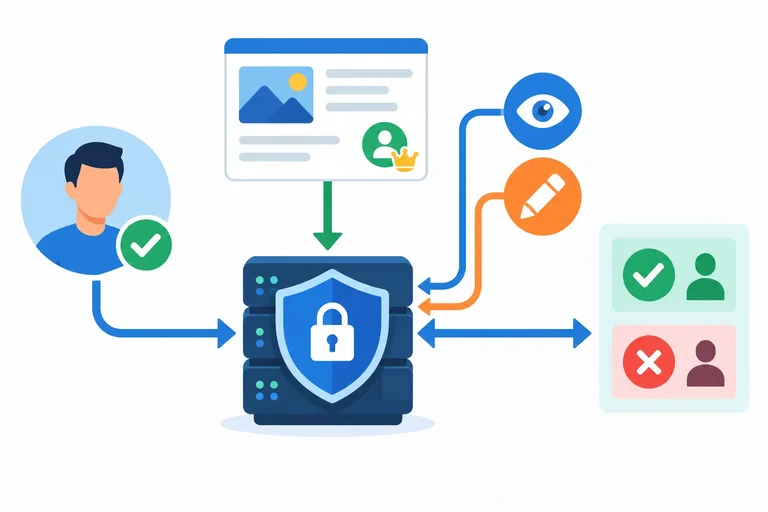
Every protected request needs a decision at the Server/API. The server establishes a trusted authentication context for the request; it does not treat a browser-supplied user ID, role, or owner claim as proof.
The requested project ID selects a record to resolve. The server then uses that record’s stored ownerId, together with the trusted identity, role, and requested action, for authorization. This must happen before protected data is returned or a change is applied.
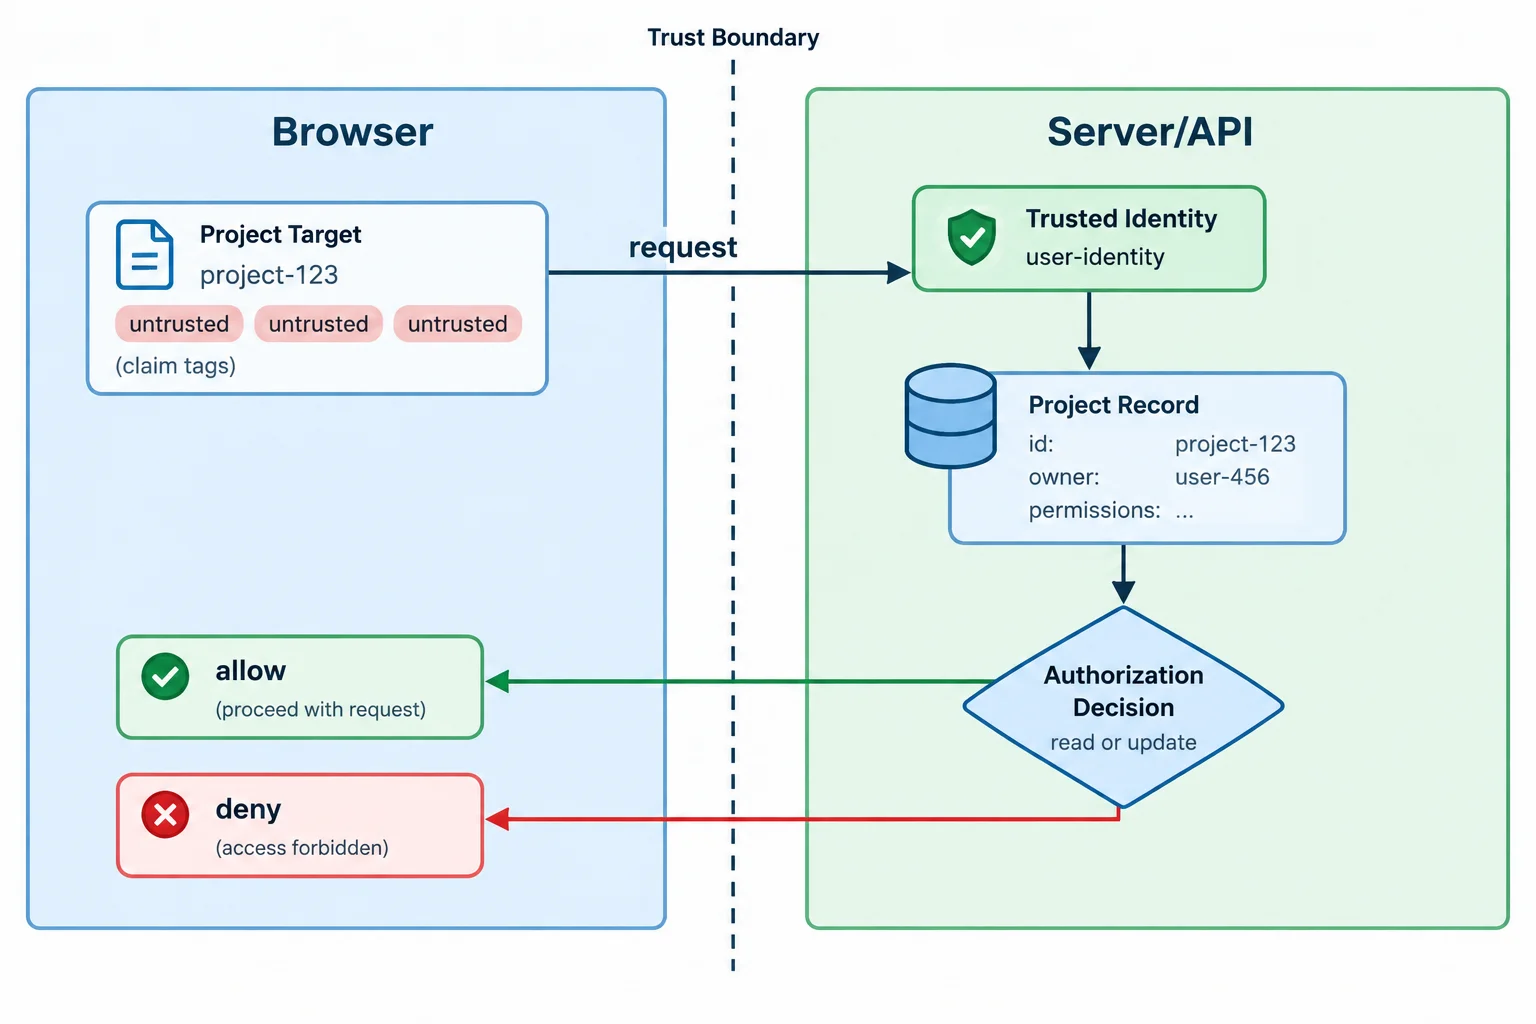
The browser can request a target, but the Server/API makes the access decision from trusted context and stored resource data.
Project Desk applies ownership and action rules separately for every request. A prior allowed read is not permission for a later update: GET /api/projects/102 and PATCH /api/projects/102 require distinct authorization decisions.
The fixed policy below is evaluated against the project record’s stored ownerId and the trusted user identity and role.
| Trusted user | Target project | Read | Update |
|---|---|---|---|
| Avery (editor) | 101, owned by Avery | Allowed | Allowed |
| Avery (editor) | 102, owned by Blair | Denied | Denied |
| Blair (viewer) | 102, owned by Blair | Allowed | Denied |
| Blair (viewer) | 101, owned by Avery | Denied | Denied |
Arrange the server-side dependencies for one protected request.
Choose the complete server decision plan for these representative requests: Avery makes GET /api/projects/101; Avery makes PATCH /api/projects/102; Blair makes GET /api/projects/102; Blair makes PATCH /api/projects/102.
Step 5 of 7
Choose accurate sign-in-required or access-denied feedback for representative API refusals without exposing protected details or misreporting a refused update.
The API response is a signal for the interface, but its meaning comes from the API’s documented contract.
In this tutorial’s representative cases, 401 means valid authentication is missing or was not accepted. Its historical HTTP label, “Unauthorized,” does not mean that a signed-in person was evaluated and lacked a resource permission.
A representative 403 means the Server/API understood the request but refuses access. In the signed-in examples, authentication succeeded but authorization failed: the identity lacks permission for that resource or action.
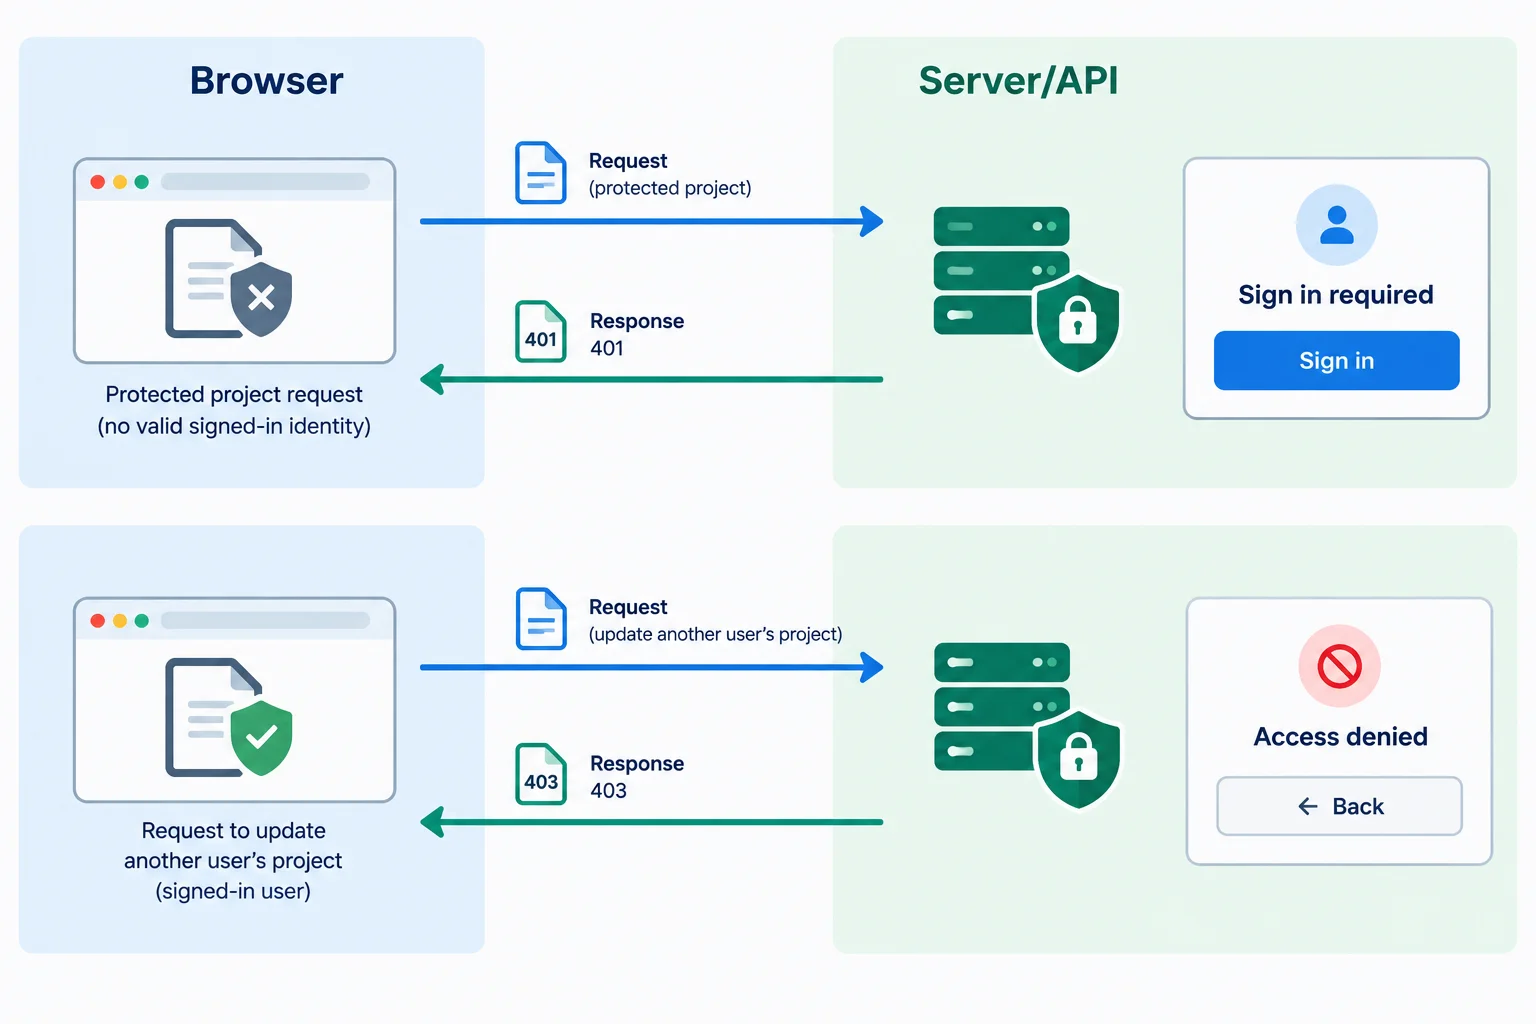
Both outcomes stop the requested operation, but they call for different interface guidance.
Use these as representative interface branches; a real API may document different details or additional response fields.
| Response | Representative meaning | Interface state | Safe next step |
|---|---|---|---|
| 401 | Valid authentication is missing or not accepted | Sign in required | Show “Sign in to continue.” and offer Sign in |
| 403 | The request is understood but access is refused | Access denied | Show “You do not have permission to do that.” and offer safe navigation |
Keep protected details out of a blocked read view. If a request to load a project is refused, replace any stale project content from that view with the relevant access state rather than leaving old details visible.
For a refused update, do not show a saved confirmation and do not retry the refusal indefinitely. A 403 for an update does not automatically mean that a separately authorized read must disappear: read permission and update permission remain separate decisions.
Use a documented response status to select presentation. This branch does not make an access decision; the Server/API already made it.
function getAccessFeedback(responseStatus) {
  if (responseStatus === 401) {
    return {
      heading: "Sign in required",
      message: "Sign in to continue.",
      action: "Sign in"
    };
  }

  if (responseStatus === 403) {
    return {
      heading: "Access denied",
      message: "You do not have permission to do that.",
      action: "Back to projects"
    };
  }

  return null;
}
Example
Blocked read: If GET /api/projects/101 receives a representative 403, show the Access denied state, the permission message, and safe navigation. Do not leave project details in that blocked view.
Refused update: If PATCH /api/projects/101 receives a representative 403, do not report that the project was saved. Show the Access denied state instead. If the person is separately allowed to read the project, its existing read view can remain; the refused write is not a reason to invent a broader access loss.
Match each representative API outcome to the appropriate interface message and recovery action.
Tap an item and then its matching pair.
Step 6 of 7
Build and inspect a small browser-only Project Desk simulation, then explain why its fixtures demonstrate interface presentation rather than secure access control.
This local exercise lets you switch among four interface presentation branches in Project Desk. The single file contains browser-only fixtures for identity, permission hints, an allowed project response, and a simulated API outcome.
It is useful for seeing what a browser should display after an outcome. It does not establish authentication or enforce authorization: there is no protected API, network request, or real sign-in in this exercise.
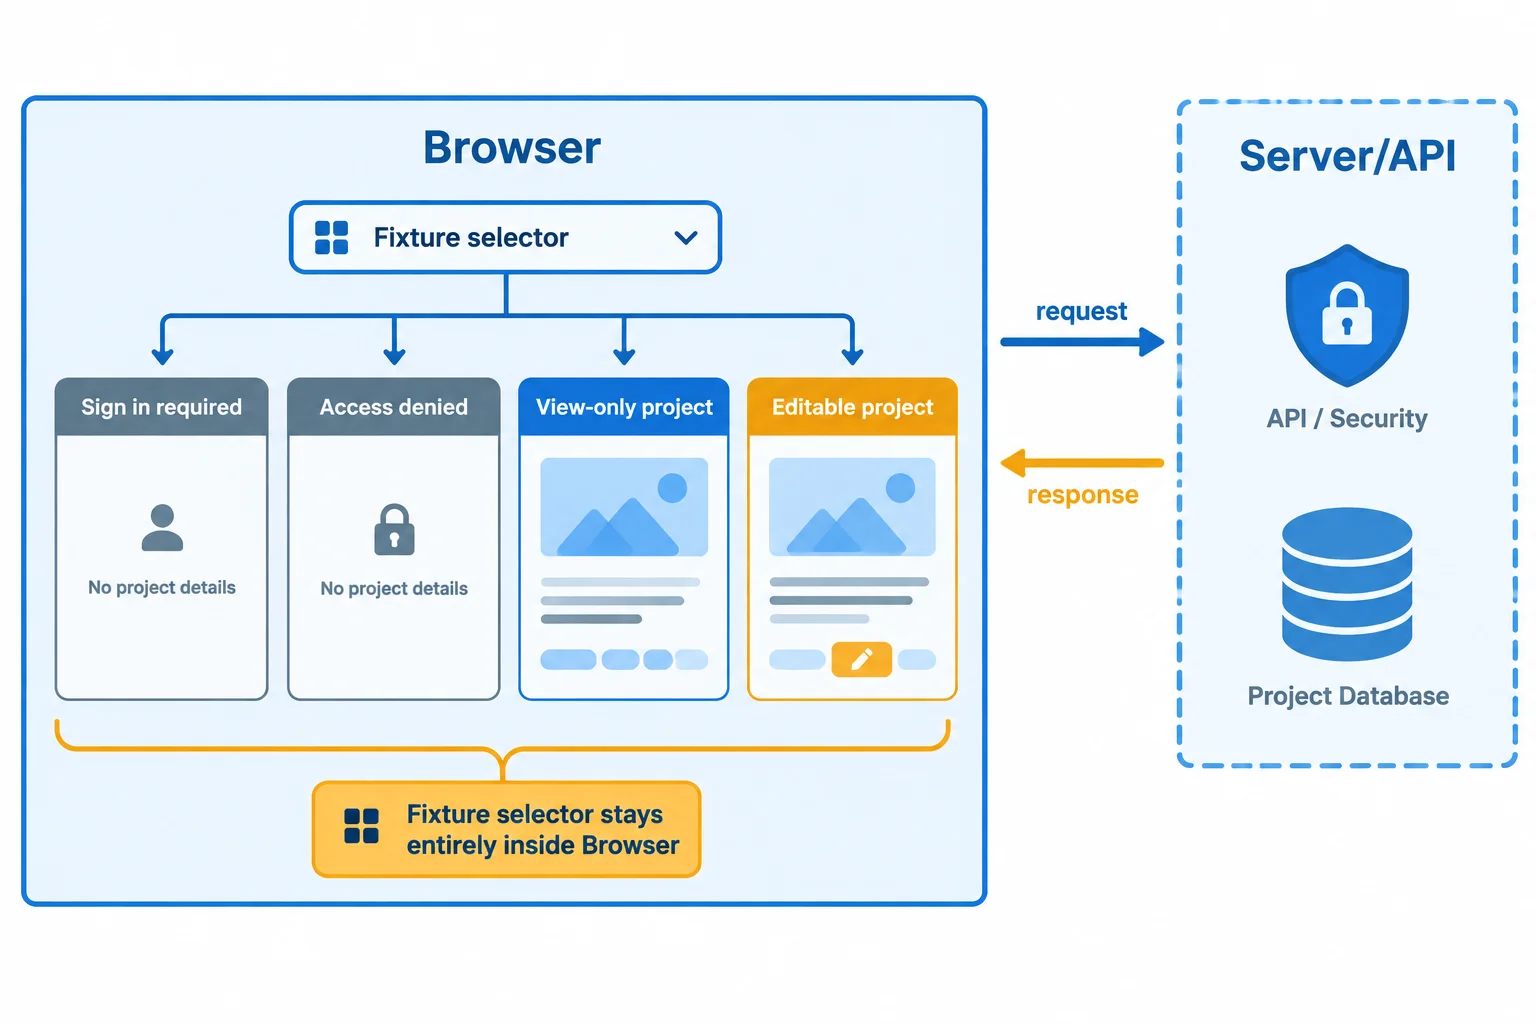
The local fixture selector changes only Browser presentation. A real Server/API would decide access before returning protected content.
Warning
The page must display this exact notice: UI simulation—not an access-control system.
The refused fixtures deliberately contain no project object or protected project fields, and the renderer clears previously displayed project content before each branch. That makes the simulated refused response and rendered view accurate.
It still provides no security: every fixture in this standalone file is browser-controlled. Changing a fixture can demonstrate a different interface branch; it cannot grant access to a real project or prove that authorization is secure.
Create a new file named access-demo.html. Paste this first block into it. Leave the <script> element open: the next blocks continue the same file.
Paste this first into access-demo.html.
<!doctype html>
<html lang="en">
<head>
  <meta charset="UTF-8">
  <meta name="viewport" content="width=device-width, initial-scale=1.0">
  <title>Project Desk access demo</title>
  <style>
    body { font-family: system-ui, sans-serif; margin: 2rem; max-width: 42rem; }
    .panel { border: 1px solid #9ca3af; border-radius: 8px; padding: 1rem; margin-top: 1rem; }
    #notice { color: #7c2d12; font-weight: 700; }
    button { padding: 0.5rem 0.8rem; }
  </style>
</head>
<body>
  <main>
    <h1>Project Desk</h1>
    <p id="notice">UI simulation—not an access-control system.</p>

    <label for="caseSelect">Fixture case</label>
    <select id="caseSelect">
      <option value="signedOut">Signed out</option>
      <option value="denied">Signed in, denied</option>
      <option value="viewOnly">Allowed to read</option>
      <option value="editAllowed">Allowed to read and edit</option>
    </select>

    <section class="panel" aria-live="polite">
      <h2 id="stateTitle"></h2>
      <p id="stateMessage"></p>
      <div id="projectContent" hidden>
        <p id="projectName"></p>
        <button id="editButton" type="button" hidden>Edit project</button>
      </div>
    </section>
  </main>

<script>Paste this directly after the first block, inside its open <script> element. Notice that the two refused cases have no project property.
const fixtureCases = {
  signedOut: {
    currentUser: null,
    permissions: { canView: false, canEdit: false },
    responseStatus: 401
  },
  denied: {
    currentUser: { id: "u-2", name: "Blair", role: "viewer" },
    permissions: { canView: false, canEdit: false },
    responseStatus: 403
  },
  viewOnly: {
    currentUser: { id: "u-2", name: "Blair", role: "viewer" },
    project: { id: "102", ownerId: "u-2", name: "Research notes" },
    permissions: { canView: true, canEdit: false },
    responseStatus: 200
  },
  editAllowed: {
    currentUser: { id: "u-1", name: "Avery", role: "editor" },
    project: { id: "101", ownerId: "u-1", name: "Website refresh" },
    permissions: { canView: true, canEdit: true },
    responseStatus: 200
  }
};

const caseSelect = document.querySelector("#caseSelect");
const stateTitle = document.querySelector("#stateTitle");
const stateMessage = document.querySelector("#stateMessage");
const projectContent = document.querySelector("#projectContent");
const projectName = document.querySelector("#projectName");
const editButton = document.querySelector("#editButton");Paste this final block after the fixtures. Save the file; this block closes the script and document.
function renderCase() {
  const fixture = fixtureCases[caseSelect.value];
  const { currentUser, permissions, responseStatus } = fixture;

  projectName.textContent = "";
  projectContent.hidden = true;
  editButton.hidden = true;

  if (responseStatus === 401) {
    stateTitle.textContent = "Sign in required";
    stateMessage.textContent = "Sign in to continue.";
  } else if (responseStatus === 403) {
    stateTitle.textContent = "Access denied";
    stateMessage.textContent = "You do not have permission to do that.";
  } else if (!permissions.canView) {
    stateTitle.textContent = "Access denied";
    stateMessage.textContent = "You do not have permission to do that.";
  } else {
    const { project } = fixture;
    stateTitle.textContent = "Project available";
    stateMessage.textContent = `${currentUser.name} can view this project.`;
    projectName.textContent = project.name;
    projectContent.hidden = false;
    editButton.hidden = !permissions.canEdit;
  }
}

caseSelect.addEventListener("change", renderCase);
renderCase();
  </script>
</body>
</html>Signed out Heading: Sign in required Message: Sign in to continue. Project content: hidden Edit control: hidden Signed in, denied Heading: Access denied Message: You do not have permission to do that. Project content: hidden Edit control: hidden Allowed to read Heading: Project available Message: Blair can view this project. Project: Research notes Edit control: hidden Allowed to read and edit Heading: Project available Message: Avery can view this project. Project: Website refresh Edit control: visible
This is the expected browser display after selecting each fixture case. The initial selection is Signed out; the display changes when you select another case.
Open access-demo.html in your browser and change Fixture case. The refused simulated responses have no project field, and renderCase() first clears the old project name and hides its container. Therefore, switching from an allowed case to a refused case leaves no project details in the rendered view.
The allowed cases demonstrate presentation hints: permissions.canEdit controls whether the Edit control is visible. These values remain local fixtures, not authorization evidence.
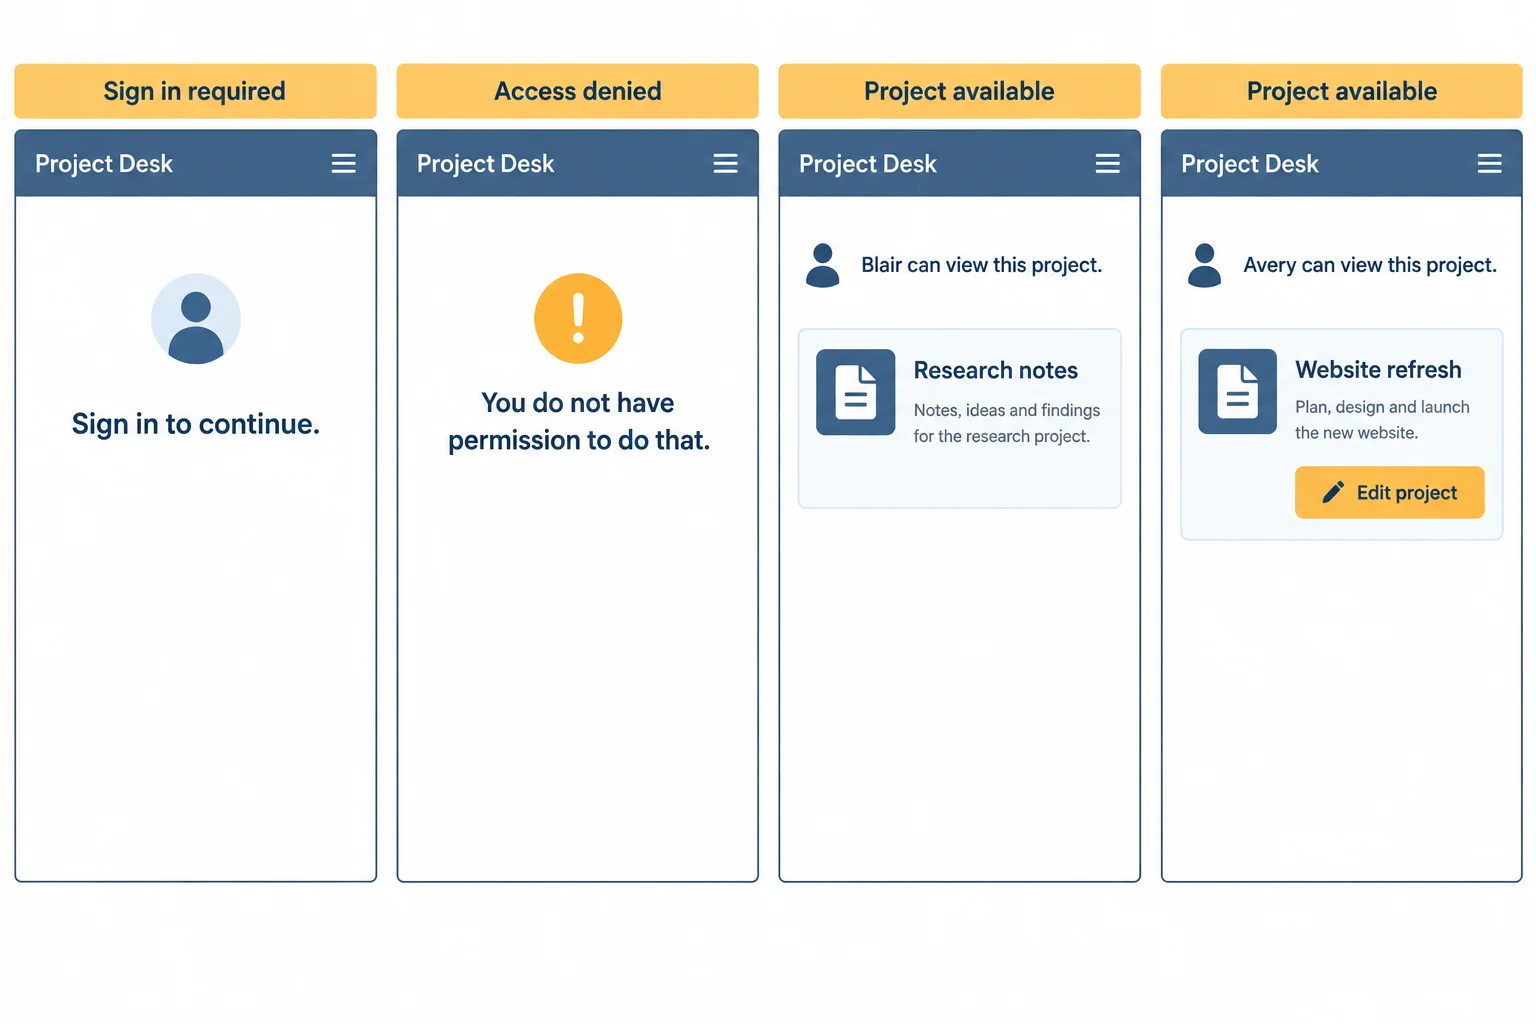
Compare the exact headings and messages, then check whether project content and the Edit control are present in each state.
Complete the simulated outcome and Edit-control branches.
if (responseStatus === ) {
  stateTitle.textContent = "Sign in required";
} else if (responseStatus === ) {
  stateTitle.textContent = "Access denied";
} else if (permissions.canView) {
  editButton.hidden = !permissions.;
}After saving your local file, select Signed out and then Allowed to read. In 2–4 sentences, report the exact message in the signed-out state, whether the Edit control is visible in the read-only state, and why editing fixtures with browser tools cannot demonstrate a secure access-control system.
Write at least 120 characters (0/120).
Step 7 of 7
Audit Project Desk access decisions by separating Browser presentation from Server/API authentication and authorization.
A complete access review asks four questions for every request: who is making it, which project is targeted, which action is requested, and what may the interface show afterward?
In Project Desk, the browser can guide a person with a route or a hidden control. That is interface presentation. The Server/API must establish identity through authentication and decide the specific project action through authorization.
Use the response status and permitted data together: a refusal must not include protected project details or claim that a refused update was saved.
Use this compact audit table to connect each situation to its authoritative decision.
| Situation | Primary category | Server/API decision | Browser outcome |
|---|---|---|---|
| Signed out → GET 101 | authentication | No accepted identity → 401; no project data | Sign in required |
| Blair → GET 101 | authorization | Stored ownerId differs → 403; no project data | Access denied |
| Blair → PATCH 102 | authorization | Viewer cannot update → 403; no saved change | Access denied |
| Hidden Edit control | interface presentation | Endpoint still checks every request | Display is not permission |
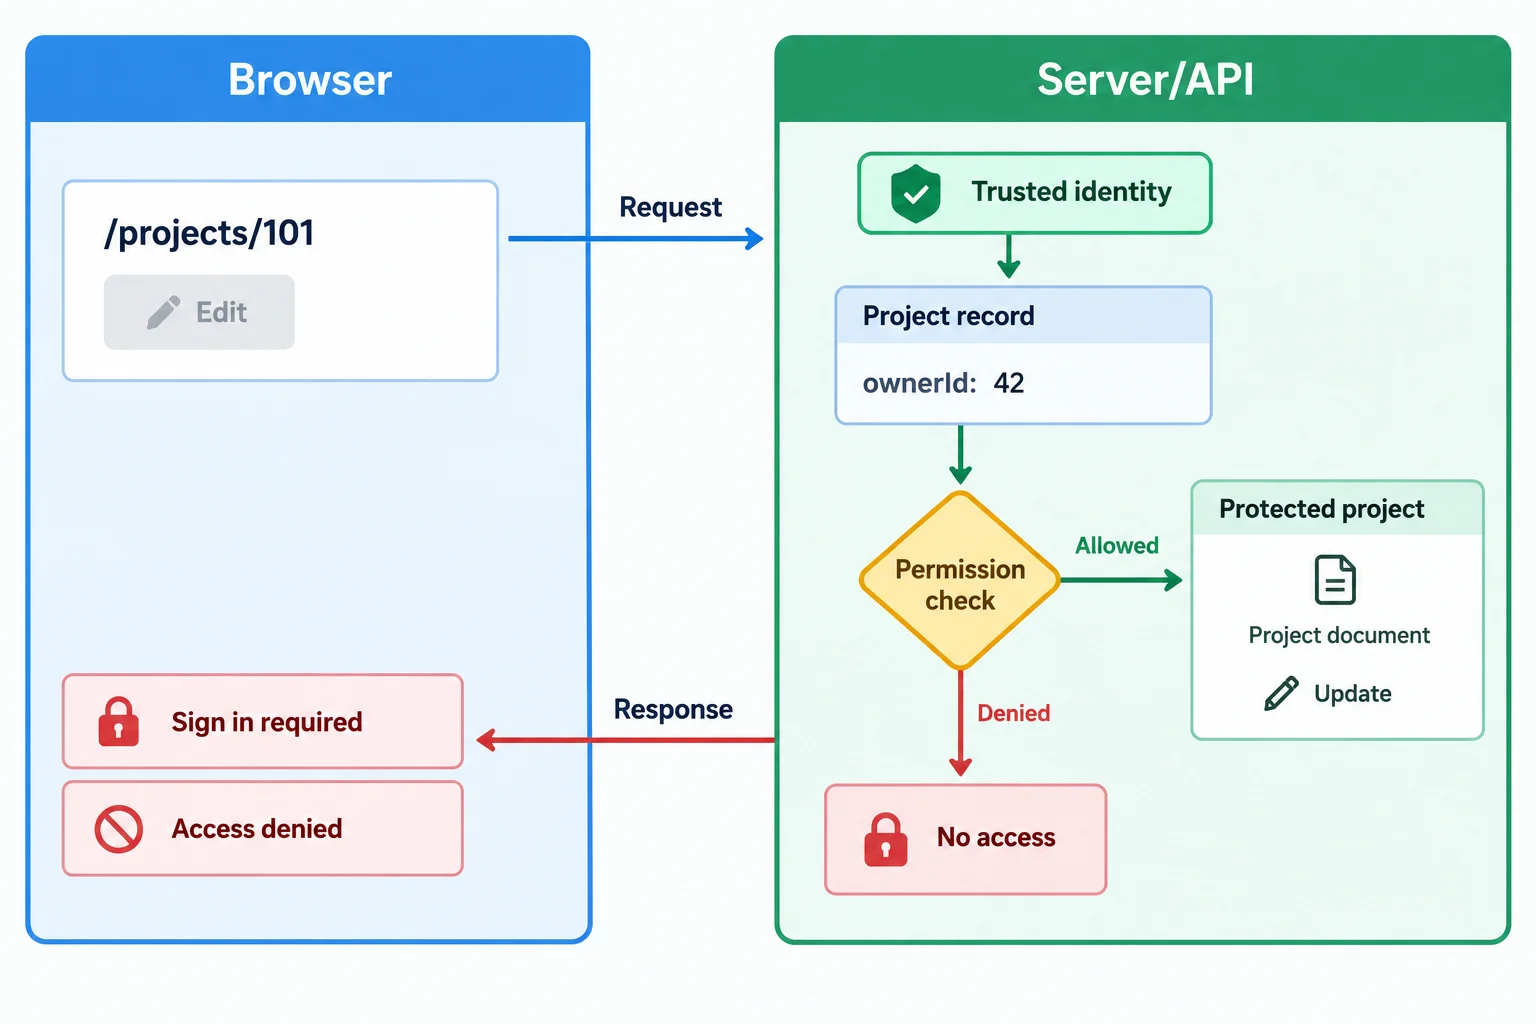
A route and Edit control shape interface presentation; they do not replace Server/API authentication and authorization.
Blair is signed in as a viewer. On /projects/102, the Browser hides Edit because permissions.canEdit is false. Blair changes local Browser code to show Edit and sends PATCH /api/projects/102.
Which correction protects the update?
Audit this draft design for Project Desk:
“/projects/:projectIdredirects signed-out visitors. The Browser hides Edit whenpermissions.canEditis false. For updates, the API trusts theownerIdand role sent in the request body.”
Use these cases: a signed-out request for GET /api/projects/101; Blair (u-2, viewer) requesting project 101, which belongs to Avery (u-1); and Blair sending PATCH /api/projects/102, which Blair owns.
In 5–8 sentences, identify the client-only flaw and explain why bypassing a route or control cannot grant access. Classify the responsibilities as authentication, authorization, or interface presentation. Then specify the trusted Server/API checks for the read and update, and give the suitable status plus interface label and message for each refused case.
Write at least 350 characters (0/350).
Summary
The reusable access rule is simple: interface presentation communicates access, while the Server/API enforces access for the requested resource and action.
A route parameter selects a target. A hidden control guides the interface. Neither establishes identity nor grants permission. For each protected read or write, the Server/API uses trusted authentication context, stored resource information, and the requested action to make an authorization decision.
Congratulations! You completed: Distinguish Authentication from Authorization
Thousands of online courses in video, ebooks and audiobooks.
To test your knowledge during online courses
Generated directly from your cell phone's photo gallery and sent to your email

Download our app via QR Code or the links below:.



Carry knowledge in your pocket.
Download the Cursa app.
There are hundreds of free courses available, with a free certificate of completion that is saved in your mobile image gallery.
Download the app to access the Course Completion Certificate for Free.


+ 10 million
students

Free and Valid
Certificate

60 thousand free
exercises

4.8/5 rating in
app stores

Free courses in
video and ebooks