
Step 1 of 8
Add React to the Local Vite Workflow
Install React and its local development tooling, then register Vite's React integration while preserving the existing workflow.

Learning path · Level 9 · Tutorial 1
Configure React in a local TypeScript and Vite project, render a semantic interface with JSX, and extend the existing checking workflow to cover TSX and official React Hooks rules.

 Add React to the Local Vite Workflow
Install React and its local development tooling, then register Vite's React integration while preserving the existing workflow. 3 min
Add React to the Local Vite Workflow
Install React and its local development tooling, then register Vite's React integration while preserving the existing workflow. 3 min
 Enable Strict Checking for TSX
Configure TypeScript to recognize and strictly check TSX source while preserving the existing local browser workflow. 3 min
Enable Strict Checking for TSX
Configure TypeScript to recognize and strictly check TSX source while preserving the existing local browser workflow. 3 min
 Mount the First Function Component
Connect the HTML entry point to a safely mounted React function component. 4 min
Mount the First Function Component
Connect the HTML entry point to a safely mounted React function component. 4 min
 Build the Semantic JSX Structure
3 min
Build the Semantic JSX Structure
3 min
 Add Expressions and Native Attributes
Render component-local values in JSX, use React DOM attribute conventions, and retain native label and input behavior. 3 min
Add Expressions and Native Attributes
Render component-local values in JSX, use React DOM attribute conventions, and retain native label and input behavior. 3 min
 Extend ESLint Coverage to React Source
Extend the local ESLint flat configuration so it checks React TSX source while preserving JavaScript and TypeScript coverage. 3 min
Extend ESLint Coverage to React Source
Extend the local ESLint flat configuration so it checks React TSX source while preserving JavaScript and TypeScript coverage. 3 min
 Enable and Verify the Official Hooks Rules
3 min
Enable and Verify the Official Hooks Rules
3 min
 Verify the Complete Local React Workflow
Verify the rendered Study Desk interface and collect end-to-end evidence that TypeScript, ESLint, and the official Hooks rules cover the local React source. 4 min
Verify the Complete Local React Workflow
Verify the rendered Study Desk interface and collect end-to-end evidence that TypeScript, ESLint, and the official Hooks rules cover the local React source. 4 min
Step 1 of 8
Install React and its local development tooling, then register Vite's React integration while preserving the existing workflow.
React changes how an interface is produced. Instead of application code selecting and manually replacing DOM nodes in an interface subtree, a component describes the intended interface output. React coordinates the corresponding DOM work.
In this tutorial, you will build a self-contained local workspace named study-desk. Vite remains the local development tool, while TypeScript and ESLint remain separate checking tools. Adding React extends that familiar workflow rather than replacing it.
The local workflow has distinct responsibilities: source code describes the interface, Vite serves and transforms it during development, React coordinates the interface output in the browser.

Your source passes through Vite to the browser. React describes and coordinates the application interface; Vite remains the local development tool.
From a parent folder, create the local workspace and initialize its package metadata. The mkdir and cd commands do not print output; npm init -y writes the initial package.json.
Run these commands from a parent folder.
mkdir study-desk
cd study-desk
npm init -yWrote to /path/to/study-desk/package.json:
{
"name": "study-desk",
"version": "1.0.0",
"description": "",
"main": "index.js",
"scripts": {
"test": "echo \"Error: no test specified\" && exit 1"
},
"keywords": [],
"author": "",
"license": "ISC"
}The absolute path and default metadata written by npm can vary. The folder-creation and directory-change commands normally produce no output; the shown output is from `npm init -y`.
Install the established Vite, TypeScript, and ESLint baseline as development dependencies. globals is included explicitly because the later flat ESLint configuration imports it directly. npm records every installation in package.json and creates or updates package-lock.json; keep that lockfile in the project.
Run this inside the study-desk folder.
npm install --save-dev vite typescript eslint @eslint/js typescript-eslint globalsadded 120 packages, and audited 121 packages in 4s 24 packages are looking for funding run `npm fund` for details found 0 vulnerabilities
The number of added packages, audit total, timing, funding notices, and vulnerability result vary by package versions and date. npm should finish successfully and update both package.json and package-lock.json.
Now add React's browser runtime packages, followed by the TypeScript declarations and Vite integration that support React development. Runtime packages are used by the browser application; development dependencies support typing or Vite processing.
Install the browser runtime packages.
npm install react react-domadded 3 packages, and audited 124 packages in 1s 24 packages are looking for funding run `npm fund` for details found 0 vulnerabilities
Exact package counts, timing, and audit messages vary. This command adds `react` and `react-dom` as dependencies.
Install the React declarations and Vite integration.
npm install --save-dev @types/react @types/react-dom @vitejs/plugin-reactadded 48 packages, and audited 172 packages in 3s 26 packages are looking for funding run `npm fund` for details found 0 vulnerabilities
The exact package count, timing, funding notices, and audit result vary by package versions and date. The Vite React plugin brings several transitive development dependencies.
Set the project to use ES modules and define the three separate commands used throughout this tutorial. The development server, type checker, and linter have different jobs, so keep their scripts separate.
Run this command in study-desk. It replaces npm's default test script with the required scripts.
npm pkg set type=module scripts.dev="vite" scripts.typecheck="tsc --noEmit" scripts.lint="eslint ."
npm pkg delete scripts.testVerify that package.json includes this metadata and these scripts. Dependency versions are managed by npm and are not shown here.
{
  "type": "module",
  "scripts": {
    "dev": "vite",
    "typecheck": "tsc --noEmit",
    "lint": "eslint ."
  }
}React supplies the component API. React DOM is the browser-specific renderer that will connect the application to the page in a later step. The @types packages provide TypeScript declarations, while the Vite plugin lets Vite process React source.
React-related package roles in study-desk.
| Package | Dependency kind | Role |
|---|---|---|
| react | Runtime | Core API for component output |
| react-dom | Runtime | Browser DOM renderer for React output |
| @types/react | Development | TypeScript declarations for React |
| @types/react-dom | Development | TypeScript declarations for React DOM |
| @vitejs/plugin-react | Development | Vite integration for React source |
Create vite.config.js with this complete configuration. Because package.json contains "type": "module", this configuration uses ES module imports.
The plugin belongs in Vite's plugins array. It adds React-aware source processing while npm run dev still starts Vite's local development server. The plugin does not render an application into the browser; the browser connection is added later.
Create vite.config.js. This is the project's single Vite configuration file.
import { defineConfig } from 'vite';
import react from '@vitejs/plugin-react';

export default defineConfig({
  plugins: [react()],
});
Tip
At this point, study-desk has its local dependencies, lockfile, scripts, and Vite integration. The next step configures TypeScript to check React's TSX source format; a later step supplies the browser entry and first component.
Match every React-related package to its primary role.
Tap an item and then its matching pair.
Complete the missing parts of vite.config.js using the project's single-quote convention. This registers the React integration with Vite; npm run dev still starts Vite's local development server.
import { defineConfig } from 'vite';
import react from ;

export default defineConfig({
  plugins: [()],
});
Step 2 of 8
Configure TypeScript to recognize and strictly check TSX source while preserving the existing local browser workflow.
A .tsx file is TypeScript source that contains JSX. Keep ordinary TypeScript without JSX in .ts files. This distinction lets TypeScript parse each source file correctly while preserving the project’s existing TypeScript coverage.
Set "jsx": "react-jsx" to use React’s automatic JSX runtime. JSX in a .tsx file does not require a default React import just to compile.
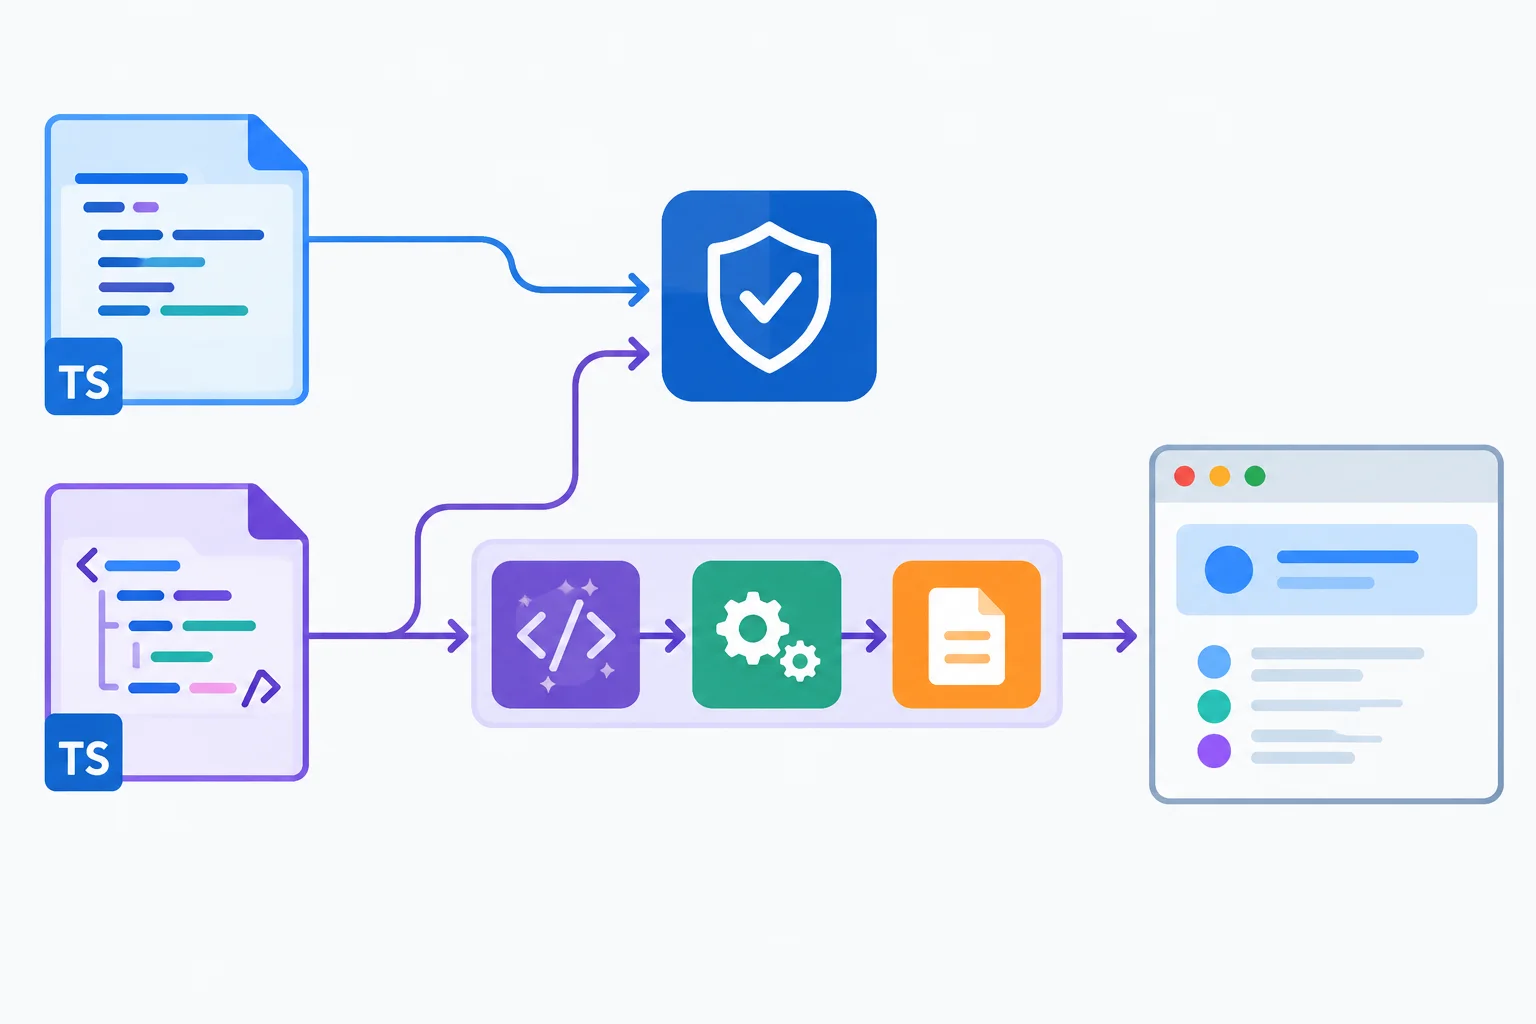
TSX is checked by TypeScript. Vite transforms and serves the source for the browser, but that browser path is separate from an explicit type-check.
File extension and responsibility
| Source file | Contains JSX? | Use extension |
|---|---|---|
| Utility or configuration-free browser logic | No | .ts |
| React interface source | Yes | .tsx |
Update tsconfig.json by adding the JSX setting and extending include. Keep the established strict, browser-oriented options: this is an extension of the local TypeScript configuration, not a replacement for it.
tsconfig.json
{
  "compilerOptions": {
    "target": "ES2022",
    "lib": ["ES2022", "DOM", "DOM.Iterable"],
    "module": "ESNext",
    "moduleResolution": "Bundler",
    "allowImportingTsExtensions": true,
    "noEmit": true,
    "strict": true,
    "skipLibCheck": true,
    "jsx": "react-jsx"
  },
  "include": ["src/**/*.ts", "src/**/*.tsx"]
}
Tip
noEmit keeps npm run typecheck as a checking command: it reports diagnostics without generating JavaScript files. moduleResolution: "Bundler" and allowImportingTsExtensions: true remain in place, so later local imports can retain their explicit TypeScript extensions.
Complete the JSX compiler mode and both source inclusion patterns.
{
  "compilerOptions": {
    "target": "ES2022",
    "lib": ["ES2022", "DOM", "DOM.Iterable"],
    "module": "ESNext",
    "moduleResolution": "Bundler",
    "allowImportingTsExtensions": true,
    "noEmit": true,
    "strict": true,
    "skipLibCheck": true,
    "jsx": ""
  },
  "include": ["", ""]
}Why does a page loading through Vite not, by itself, prove that its TypeScript is valid?
Step 3 of 8
Connect the HTML entry point to a safely mounted React function component.
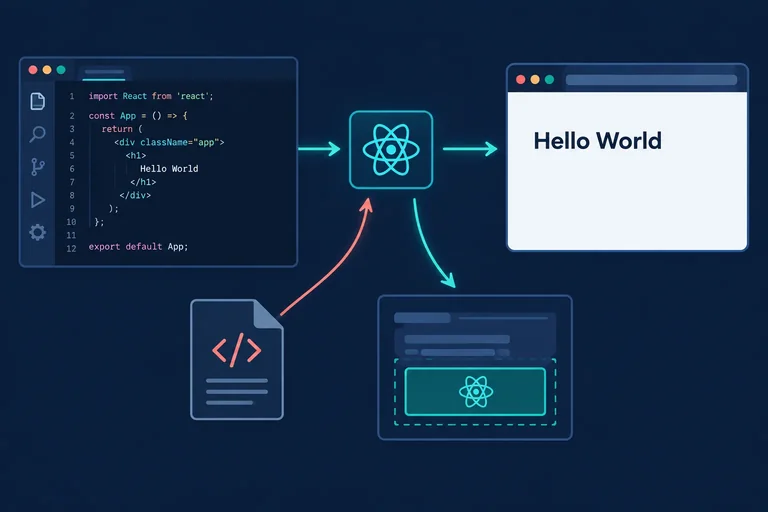
React starts from one mount point. The module script in index.html loads src/main.tsx. That file finds the #root element, creates one React root, and renders the capitalized App function component into it.
React owns the subtree inside #root. Replace the earlier browser-entry code rather than keeping manual DOM rendering beside React. StrictMode enables development checks; it does not create a visible HTML element.
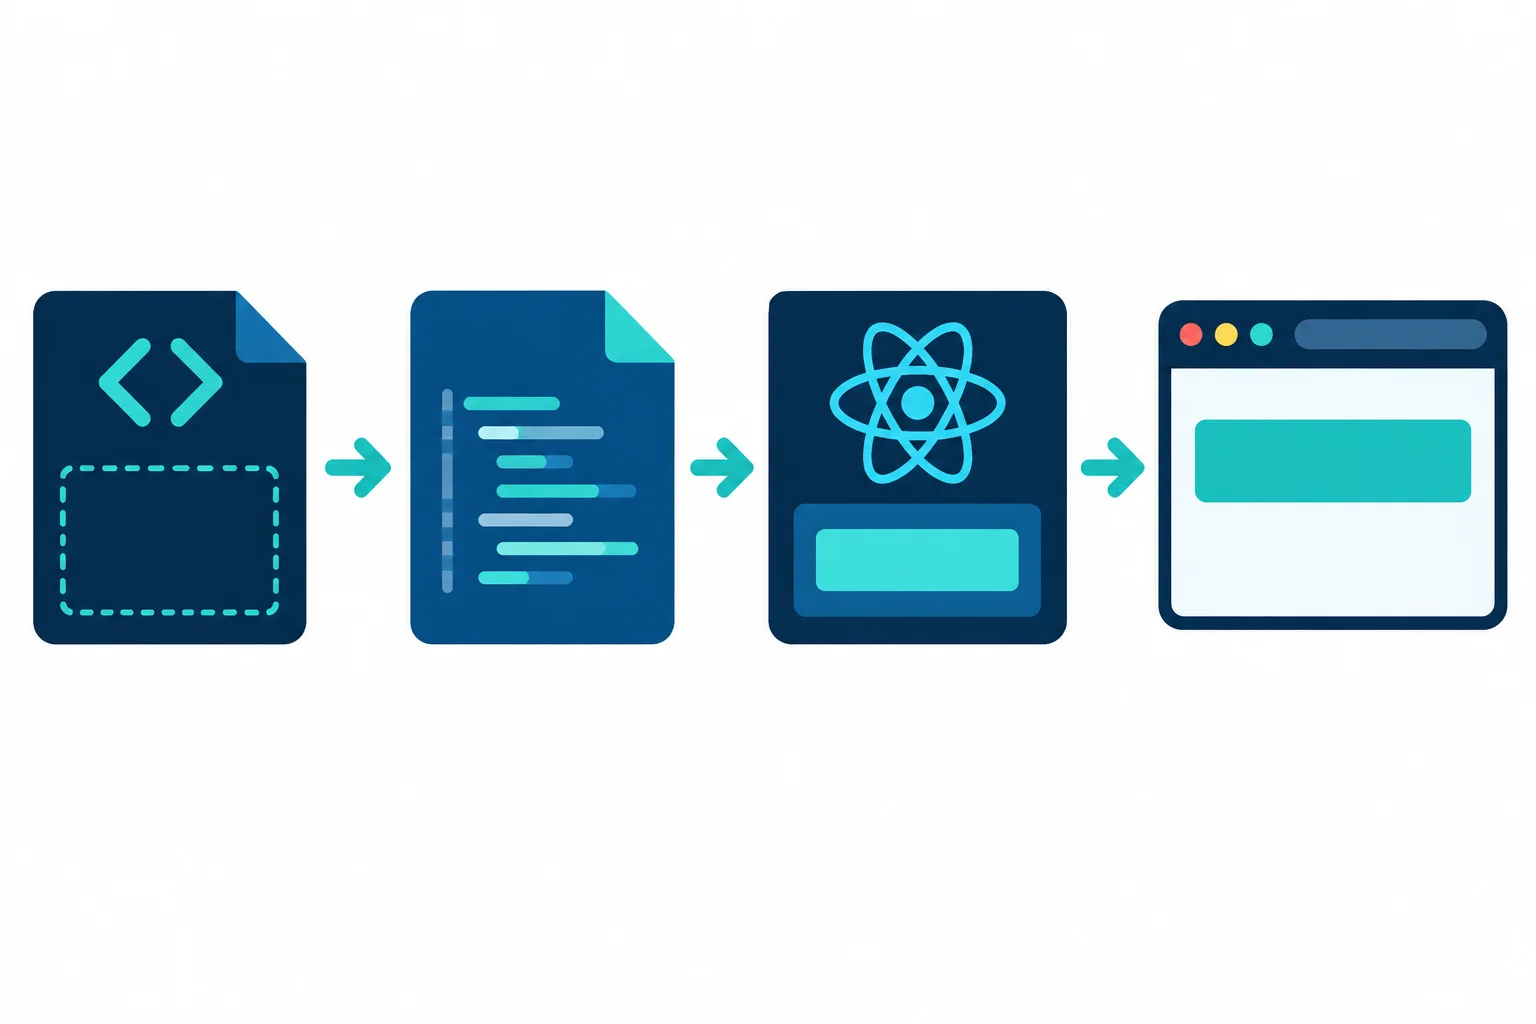
The HTML mount area leads to the TypeScript entry module, which renders the App component into the browser.
Replace the previous browser entry in index.html. The module script now points to the TSX entry file, and the empty root element is React's mount location.
<!doctype html>
<html lang="en">
  <head>
    <meta charset="UTF-8" />
    <meta name="viewport" content="width=device-width, initial-scale=1.0" />
    <title>Study Desk</title>
  </head>
  <body>
    <div id="root"></div>
    <script type="module" src="/src/main.tsx"></script>
  </body>
</html>Create the initial application component in src/App.tsx. Component names begin with a capital letter, and this function returns JSX.
export default function App() {
  return <h1>Study Desk</h1>;
}Create src/main.tsx. The null guard narrows the DOM lookup before React receives the element. Keep one root creation and wrap the application in StrictMode.
import { StrictMode } from 'react';
import { createRoot } from 'react-dom/client';
import App from './App.tsx';

const rootElement = document.getElementById('root');

if (!rootElement) {
  throw new Error('Root element not found.');
}

createRoot(rootElement).render(
  <StrictMode>
    <App />
  </StrictMode>
);Save the three files, then start the existing local development workflow. Open the Local address shown by Vite. The browser should display the Study Desk heading.
npm run dev> study-desk@1.0.0 dev > vite VITE v6.0.0 ready in 180 ms ➜ Local: http://localhost:5173/
The Vite version, startup time, and local port can vary. Use the Local address printed in your terminal.
Put the mounting operations in the order used by main.tsx.
Use the partial main.tsx code below to rehearse the three essential operations. Then apply the completed version in your local file and refresh the browser running your Vite server to confirm that Study Desk appears.
Fill the three missing parts of this mounting excerpt.
const rootElement = document.('root');

if () {
  throw new Error('Root element not found.');
}

createRoot(rootElement).(
  <StrictMode>
    <App />
  </StrictMode>
);
Step 4 of 8
JSX can express the same semantic structure you already use in HTML. In App, the page will have a main area containing a heading and a section, followed by a sibling footer.
Each opened JSX element must be closed, and child elements must close before their parent closes. This nesting is part of both the interface meaning and the structure React renders.
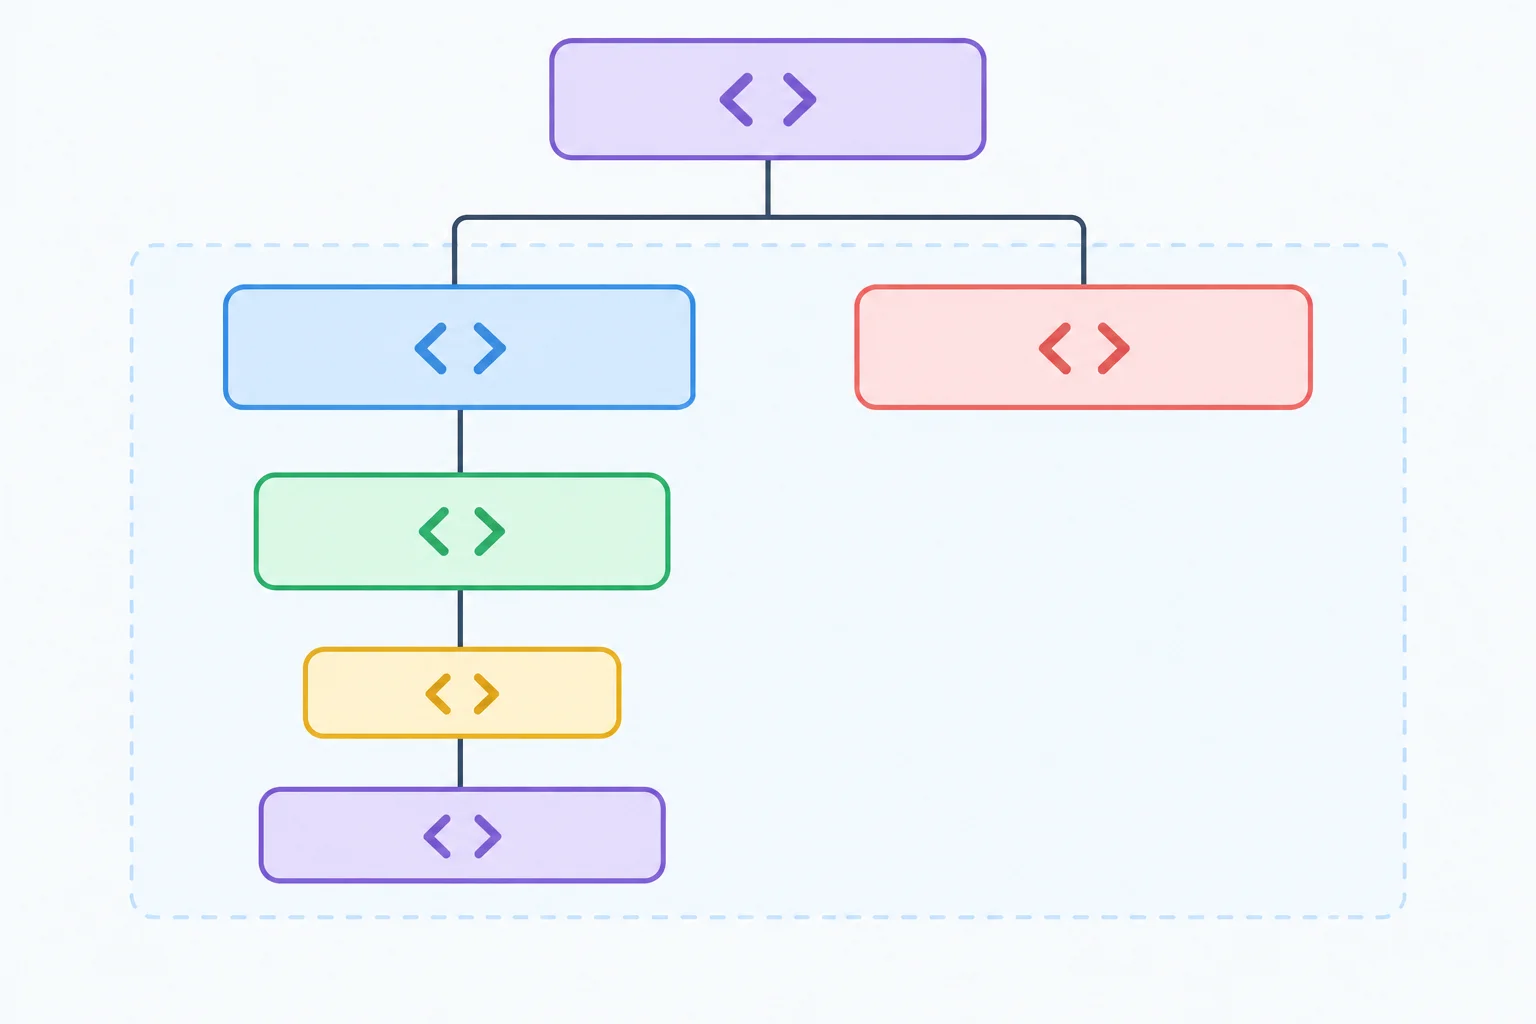
The fragment groups the returned siblings for React, while main and footer remain the elements that appear in the DOM.
A component must return one JSX expression. Here, a fragment (<>...</>) groups main and footer without adding an unnecessary wrapper element to the browser DOM.
Lowercase names such as main, section, and footer are native browser elements. A capitalized name such as App refers to a React component. Void native elements have no closing tag; write them with self-closing syntax, such as <hr />.
In src/App.tsx, replace the component body with this semantic structure.
export default function App() {
  return (
    <>
      <main>
        <h1>Study Desk</h1>
        <section>
          <h2>Next session</h2>
          <p>Prepare your desk for focused local practice.</p>
        </section>
      </main>
      <footer>
        <p>Built locally with React.</p>
      </footer>
    </>
  );
}
Example
The fragment is not a visible HTML element. It solves the single-return-expression requirement while preserving main and footer as siblings.
Complete the two missing closing tags so the JSX nesting is valid.
export default function App() {
  return (
    <>
      <main>
        <h1>Study Desk</h1>
        <section>
          <h2>Next session</h2>
          <p>Prepare your desk.</p>
        </section>

      <footer>
        <p>Local React practice</p>
      </footer>

  );
}After this component renders, what does the fragment add to the browser DOM around main and footer?

Step 5 of 8
Render component-local values in JSX, use React DOM attribute conventions, and retain native label and input behavior.
To render a component-local value as JSX text, place a JavaScript expression inside braces: {topic} or {sessionMinutes + 5}.
Braces accept expressions that produce a value. They do not accept statements such as const total = 25;. Declare constants in the component body before return, then read them from the JSX you return.
Expressions calculate or read a value; statements structure the program outside returned JSX.
| Inside JSX braces | Kind | Result |
|---|---|---|
| `topic` | Expression | Reads a component-local value |
| `sessionMinutes + 5` | Expression | Calculates a value to render |
| `const total = 25;` | Statement | Declare it before `return` instead |
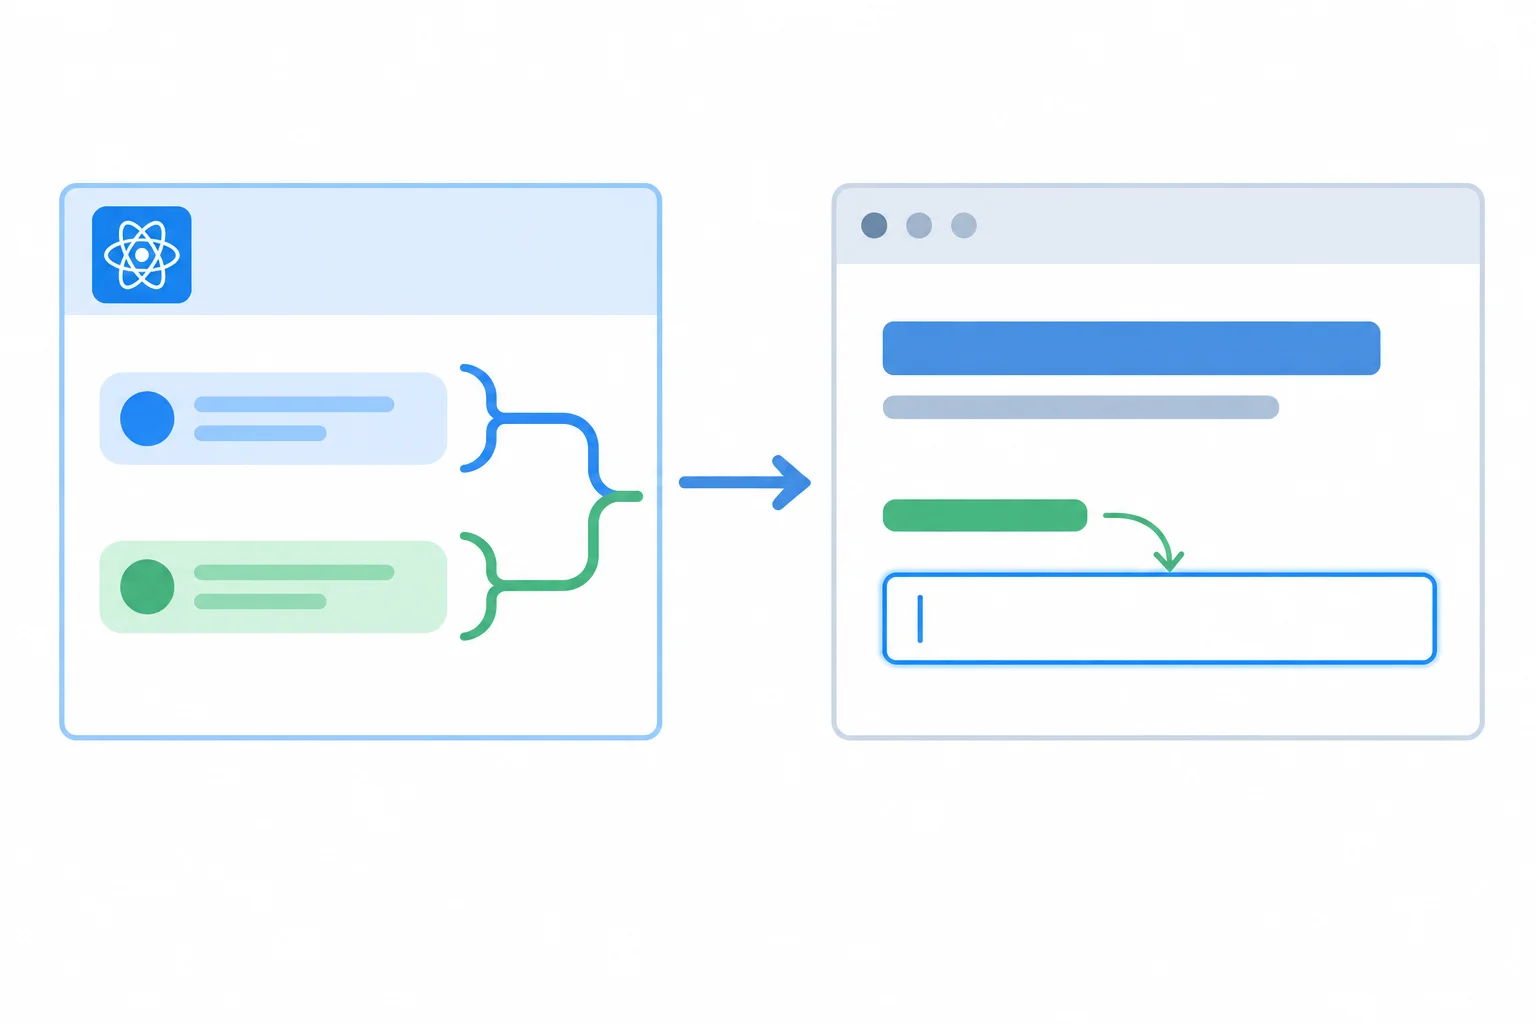
JSX expressions supply displayed values, while native label and input semantics remain available in the browser.
Replace src/App.tsx with this component. The constants stay inside App, and braces insert their values into the paragraph.
React DOM uses className and htmlFor because these JSX properties map to native HTML attributes. Native aria-* and data-* names remain hyphenated. The input has no value, defaultValue, or event handler, so it remains a native, unbound text input.
src/App.tsx
export default function App() {
  const topic = 'React with TypeScript';
  const sessionMinutes = 25;

  return (
    <>
      <main className="study-desk">
        <h1>Study Desk</h1>
        <section
          className="session-card"
          aria-labelledby="session-heading"
          data-section="next-session"
        >
          <h2 id="session-heading">Next session</h2>
          <p>{topic} · {sessionMinutes} minutes</p>
          <label htmlFor="session-note">Session note</label>
          <input id="session-note" name="sessionNote" type="text" />
        </section>
      </main>
      <footer>
        <p>Plan one focused session at a time.</p>
      </footer>
    </>
  );
}
Tip
Keep the visible label and the input identifier identical. Clicking the label then gives the native text input focus without any React event code.
Load the local stylesheet from the existing entry file. Add this import alongside the other imports in src/main.tsx. Keep the safe root lookup and React mounting code from the previous step unchanged.
Add to src/main.tsx
import './style.css';
src/style.css
:root {
  font-family: system-ui, sans-serif;
  color: #172033;
  background: #f4f7fb;
}

body {
  margin: 0;
}

.study-desk,
footer {
  width: min(42rem, calc(100% - 2rem));
  margin: 0 auto;
}

.study-desk {
  padding: 3rem 0 1rem;
}

.session-card {
  padding: 1.5rem;
  border-radius: 0.75rem;
  background: #ffffff;
  box-shadow: 0 0.25rem 1rem rgb(23 32 51 / 12%);
}

label,
input {
  display: block;
}

label {
  margin-top: 1rem;
  font-weight: 700;
}

input {
  width: 100%;
  box-sizing: border-box;
  margin-top: 0.4rem;
  padding: 0.65rem;
}

footer {
  padding-bottom: 2rem;
  color: #526079;
}
Complete the component values, the JSX expressions, and the label association properties.
const topic = ;
const sessionMinutes = ;

<p> ·  minutes</p>
<label ="session-note">Session note</label>
<input ="session-note" name="sessionNote" type="text" />Apply the completed component in src/App.tsx, then run npm run dev. In one or two sentences, report whether the session line matches the component constants and what happens when you click the visible Session note label.
Write at least 20 characters (0/20).
Step 6 of 8
Extend the local ESLint flat configuration so it checks React TSX source while preserving JavaScript and TypeScript coverage.
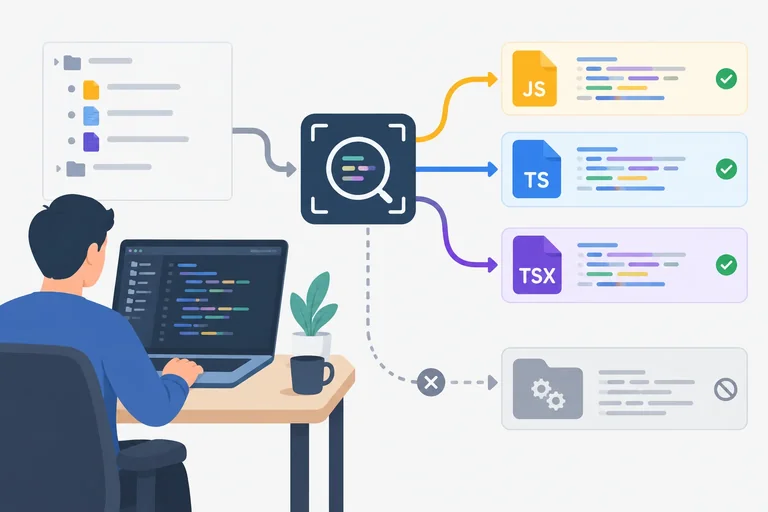
Your existing local workflow stays in place. The change is in ESLint’s flat configuration: it must discover JavaScript, TypeScript, and TSX source without scanning generated output.
A .tsx file is still source code for ESLint. Vite serves the app, TypeScript checks types, and ESLint checks source-quality rules; run each command for its own purpose.
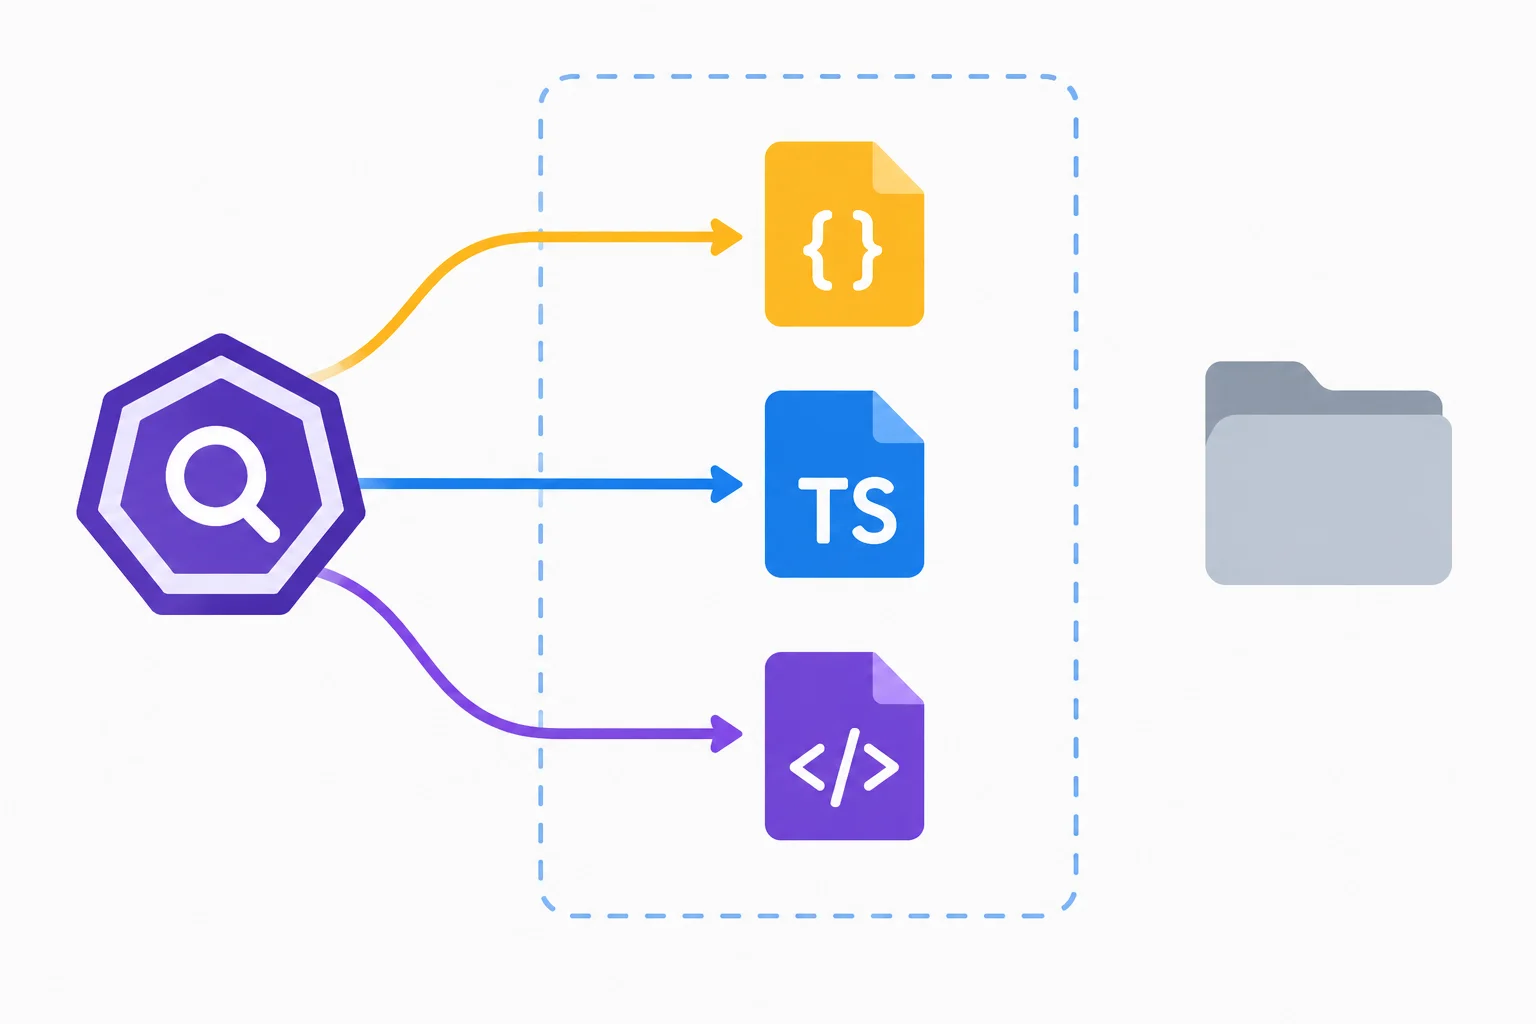
The source patterns include authored JavaScript, .ts, and .tsx files. The global ignore keeps generated dist output out of linting.
Keep these commands separate, even when you run them one after another during development.
| Command | Primary job | Does not replace |
|---|---|---|
| npm run dev | Serve the Vite application locally | Type and lint checks |
| npm run typecheck | Check TypeScript without emitting files | Serving and lint rules |
| npm run lint | Check configured ESLint rules | Serving and TypeScript checking |
Edit the existing eslint.config.js; do not replace it with a separate React starter configuration. This version preserves authored JavaScript coverage, extends the TypeScript scope to TSX, supplies browser globals to browser source, and globally ignores generated output.
The typescript-eslint recommended configuration supplies TypeScript-aware parsing and recommended rules for the .ts and .tsx scope.
Replace the existing flat configuration with this scoped version.
import js from '@eslint/js';
import globals from 'globals';
import tseslint from 'typescript-eslint';

export default tseslint.config(
  {
    ignores: ['dist/**']
  },
  {
    files: ['**/*.{js,mjs,cjs}'],
    extends: [js.configs.recommended],
    languageOptions: {
      globals: globals.browser
    }
  },
  {
    files: ['**/*.{ts,tsx}'],
    extends: [js.configs.recommended, ...tseslint.configs.recommended],
    languageOptions: {
      globals: globals.browser
    }
  }
);Keep existing dependency entries. Ensure the project remains an ES module and that its scripts include this exact set.
{
  "type": "module",
  "scripts": {
    "dev": "vite",
    "typecheck": "tsc --noEmit",
    "lint": "eslint ."
  }
}A temporary known violation proves that ESLint reaches App.tsx; a clean result alone would not prove that the file was discovered. Inside App, directly after the two existing local constants, add this one temporary statement. Do not leave it in the application.
Temporary statement inside src/App.tsx
debugger;Run the lint script while the temporary statement is present.
npm run lint> study-desk@1.0.0 lint > eslint . <project-path>/study-desk/src/App.tsx 4:3 error Unexpected 'debugger' statement no-debugger ✖ 1 problem (1 error, 0 warnings)
The absolute path varies by computer. The important evidence is that the diagnostic names src/App.tsx and the no-debugger rule.
Now delete only the temporary debugger; statement and run npm run lint again. A clean run has no ESLint diagnostics, confirming that the project is restored.
On your own computer, complete this acceptance check:
eslint.config.js uses **/*.{js,mjs,cjs} for JavaScript, **/*.{ts,tsx} for TypeScript and TSX, and a global dist/** ignore.lint script is eslint ..debugger; line in App.tsx, run npm run lint, and observe the no-debugger diagnostic for that TSX file.npm run lint again with no diagnostics.Report what you observed and distinguish the jobs of npm run dev, npm run typecheck, and npm run lint.
Write at least 180 characters (0/180).

Step 7 of 8
Install the official plugin, then add one focused configuration layer. Keep the JavaScript and TypeScript layers from the previous step: they continue to cover authored JavaScript, .ts, and .tsx files. The new layer applies only to React source under src.
This preset prepares checks that later lessons will use. You do not need to write or call any Hooks now.
Run this in the study-desk folder.
npm install --save-dev eslint-plugin-react-hooksReplace eslint.config.js with this complete flat configuration. The final scoped object extends the official recommended preset without replacing the existing JavaScript or TypeScript coverage.
import js from '@eslint/js';
import globals from 'globals';
import reactHooks from 'eslint-plugin-react-hooks';
import tseslint from 'typescript-eslint';

export default tseslint.config(
  {
    ignores: ['dist/**']
  },
  {
    files: ['**/*.{js,mjs,cjs}'],
    extends: [js.configs.recommended],
    languageOptions: {
      globals: globals.browser
    }
  },
  {
    files: ['**/*.{ts,tsx}'],
    extends: [js.configs.recommended, ...tseslint.configs.recommended],
    languageOptions: {
      globals: globals.browser
    }
  },
  {
    files: ['src/**/*.{ts,tsx}'],
    extends: [reactHooks.configs.flat.recommended]
  }
);
Tip
reactHooks.configs.flat.recommended provides the plugin and its recommended rules together. Leave those recommended rules intact. Later tutorials will show how the checks respond to real Hook code.
A successful npm run lint means the rules currently applied found no violations. It does not prove that every possible rule is enabled. App.tsx has no Hook calls yet, so inspect ESLint’s resolved configuration for that specific TSX file to verify the official checks directly.
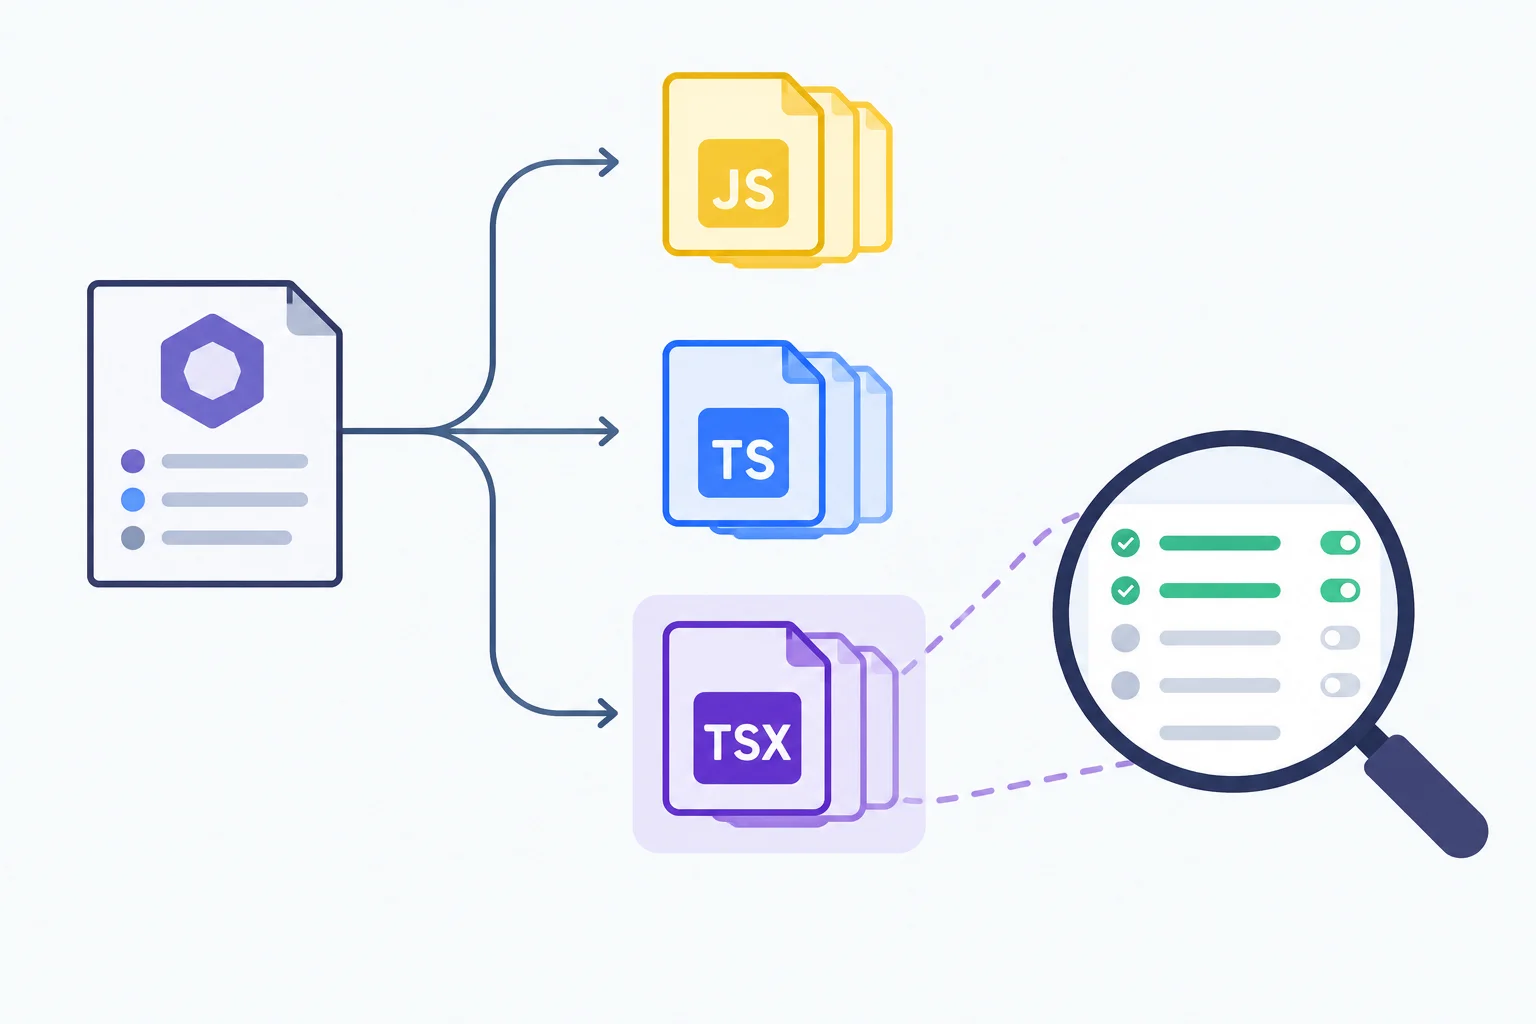
The resolved configuration answers which rules apply to this file; a lint run answers whether the current code violates them.
The first number in a resolved rule entry is its severity. Any nonzero severity means the rule is enabled.
| Resolved rule key | What it checks | Typical severity |
|---|---|---|
| react-hooks/rules-of-hooks | Hook placement | 2 (error) |
| react-hooks/exhaustive-deps | Effect dependencies | 1 (warning) |
After saving the plugin configuration, run this command from the study-desk folder.
npx eslint --print-config src/App.tsx{
"rules": {
"react-hooks/rules-of-hooks": [
2
],
"react-hooks/exhaustive-deps": [
1
]
}
}The command prints a complete JSON configuration whose other entries vary with installed package versions. This is the relevant excerpt: both rule keys have nonzero severities.
Why is npm run lint alone insufficient evidence that the two official Hooks rules are enabled for src/App.tsx?
In your local study-desk project, install the plugin and apply the complete configuration from this step. Then run npx eslint --print-config src/App.tsx.
Report all four pieces of evidence from your local result:
src/**/*.{ts,tsx};react-hooks/rules-of-hooks;react-hooks/exhaustive-deps.Report each severity as the first number in its resolved rule entry. Do not use only a successful lint run as evidence.
Write at least 90 characters (0/90).

Step 8 of 8
Verify the rendered Study Desk interface and collect end-to-end evidence that TypeScript, ESLint, and the official Hooks rules cover the local React source.
Work in your local study-desk folder. In src/App.tsx, confirm that the component-local values are restored to the required final values. Then start the application with npm run dev and open the local address Vite reports.
Check the rendered page, not just the source code:
Study Desk is the main heading.Next session section shows the topic and duration from the constants.Session note label moves focus to its native text input.This is an acceptance check of the existing application. Do not add state, handlers, or extra components.
Required component-local values in src/App.tsx
const topic = 'React with TypeScript';
const sessionMinutes = 25;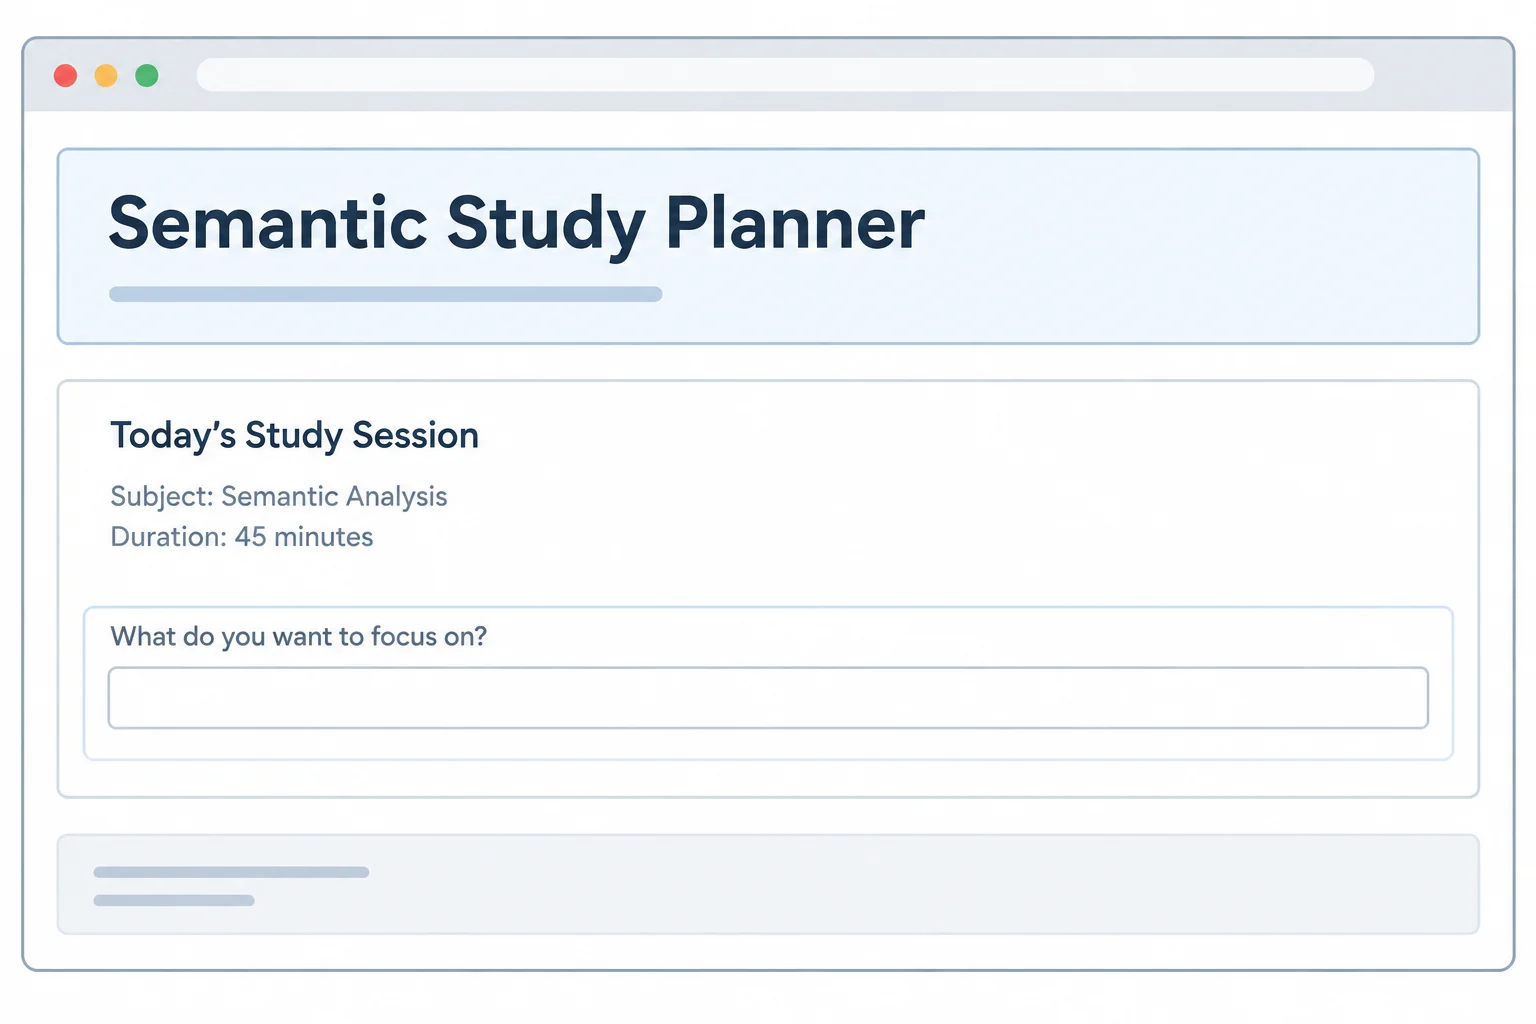
The visible interface should preserve semantic structure while the label activates the native input.
A page that renders can still contain a type error. Make a temporary, deliberate error in src/App.tsx by replacing the duration declaration with the line below. Save the file, run npm run typecheck, and observe the diagnostic.
Immediately restore the required numeric declaration from the previous screen. Run npm run typecheck again. A clean run has no TypeScript diagnostics.
This probe is only evidence that the checker reaches TSX; it must not remain in the project.
Temporary replacement in src/App.tsx
const sessionMinutes: number = 'twenty-five';Run while the temporary replacement is present
npm run typecheck> study-desk@1.0.0 typecheck > tsc --noEmit src/App.tsx(4,7): error TS2322: Type 'string' is not assignable to type 'number'.
The path prefix and line number can differ on your computer. The important evidence is a TS2322 diagnostic referring to `src/App.tsx`.
Tip
After restoring const sessionMinutes = 25;, run npm run typecheck once more. Record that the restored project is clean before continuing to lint.
Keep the tools separate:
npm run typecheck checks TypeScript without emitting files.npm run lint checks the authored files ESLint discovers.--print-config shows the effective ESLint configuration for one target file.Use the file-list command to confirm that both src/App.tsx and src/main.tsx are included by TypeScript. Check effective ESLint configuration for App.tsx, main.tsx, and the authored JavaScript Vite configuration. A clean lint command should report no diagnostics.
TypeScript file coverage and a clean lint run
npm run typecheck -- --listFilesOnly
npm run lint/your-path/study-desk/src/App.tsx /your-path/study-desk/src/main.tsx > study-desk@1.0.0 lint > eslint .
The TypeScript list also contains many TypeScript library files and uses machine-specific absolute paths. The excerpt below shows the two relevant application files. A clean lint run may display only the npm script header.
Inspect resolved ESLint configurations
npx eslint --print-config src/App.tsx
npx eslint --print-config src/main.tsx
npx eslint --print-config vite.config.js{
"rules": {
"react-hooks/rules-of-hooks": [2],
"react-hooks/exhaustive-deps": [1]
}
}Each command prints a large JSON object. Inspect the `rules` object in the App configuration. The excerpt shows the relevant Hooks entries; other resolved settings and formatting can vary. The other two commands provide evidence that `.tsx` and authored `.js` targets are still covered.
Tip
For src/App.tsx, verify that both exact rule keys appear with a nonzero severity. Typically, rules-of-hooks is 2 and exhaustive-deps is 1. This resolved configuration—not merely a clean component with no Hooks—is the evidence that the official checks remain active.
Match each observed failure to the configuration area most directly responsible.
Tap an item and then its matching pair.
Submit one short acceptance report after completing the diagnostic. Include: the rendered topic and duration; what happened when you clicked Session note; the result after restoring the temporary type probe and running both check commands; evidence that App.tsx and main.tsx were listed; evidence that ESLint also resolved configuration for a .tsx file and authored JavaScript file; and the enabled severities you observed for both Hooks rules.
Write at least 250 characters (0/250).
Summary
You now have a complete local baseline for later React work.
Congratulations! You completed: Build a Local React App with TypeScript
Thousands of online courses in video, ebooks and audiobooks.
To test your knowledge during online courses
Generated directly from your cell phone's photo gallery and sent to your email

Download our app via QR Code or the links below:.



Carry knowledge in your pocket.
Download the Cursa app.
There are hundreds of free courses available, with a free certificate of completion that is saved in your mobile image gallery.
Download the app to access the Course Completion Certificate for Free.


+ 10 million
students

Free and Valid
Certificate

60 thousand free
exercises

4.8/5 rating in
app stores

Free courses in
video and ebooks