Step 1 of 8
Define What the Image Must Do
Identify the intended use and checkable content requirements of a concrete visual brief.

Learning path · Level 4 · Tutorial 1
Turn a concrete visual brief into an image and refine it using an available free-tier tool. If generation is unavailable, prepare a generation-ready brief and practice visual inspection with on-screen examples.
 Define What the Image Must Do
Identify the intended use and checkable content requirements of a concrete visual brief. 2 min
 Plan the Frame and Layout
Plan framing, viewpoint, placement, and aspect ratio for the Morning Table website header. 3 min
 Describe the Look Without Changing the Subject
Add a concrete, coherent style direction to the Morning Table visual brief without changing its required objects or layout. 2 min
 Turn the Brief into a Generation Request
Convert the completed Morning Table visual brief into a self-contained, portable plain-English image-generation request. 2 min
 Generate a First Version—or Prepare the Specification
Use an available free-tier image tool to obtain Version 1, or create a clearly labeled specification that is ready for later generation and inspection. 2 min
 Inspect the Image Against the Brief
Evaluate a first image against the visual brief using observable evidence for subject accuracy, composition, artifacts, and intended-use suitability. 3 min
 Revise One Mismatch and Compare Versions
Revise one visible mismatch without losing the constraints that make the Morning Table image usable, then compare both versions against the same brief. 3 min
 Complete the Brief-to-Image Review
Consolidate the Morning Table brief, request, inspection evidence, and revision into an evidence-based final decision. 2 min
Step 1 of 8
Identify the intended use and checkable content requirements of a concrete visual brief.
A visual brief is a checkable description of what an image must communicate and contain before anyone writes a generation request.
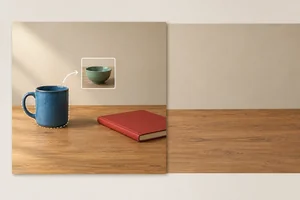
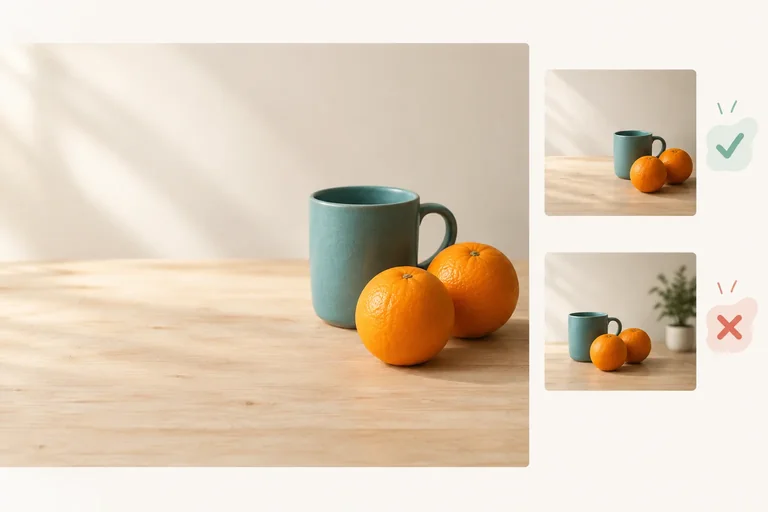
Start with the image’s job. For Morning Table, the image will be a website header, and a headline will be added separately. That use creates an observable requirement: part of the image must remain clear enough for the later headline.
An image can look appealing yet fail its job if there is no usable space for that headline. At this stage, focus on what a viewer must be able to confirm—not on how to generate the image.

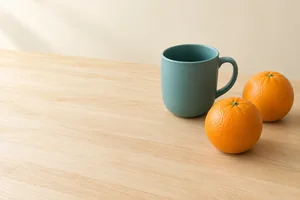
Illustrative example: the open, low-detail area supports a headline that will be added separately.
Separate non-negotiable requirements from flexible preferences.
A non-negotiable requirement is necessary for the brief to succeed and can be checked in the image: the specified mug, the exact orange count, the tabletop setting, no people, and no extra objects.
A flexible preference can vary without breaking those requirements. For example, the two oranges may touch or have a small gap, and their exact rotation can vary. Flexibility does not permit a conflict with a required detail.
Write requirements as visible facts. “Appealing breakfast image” is a taste judgment; it does not tell a reviewer what must be present or absent.
Example
Replace a vague request with brief notes that a viewer can verify.
Example
Vague request:
“Make an appealing breakfast image for Morning Table.”
Checkable brief notes:
Intended use: Website header for Morning Table; a headline will be added separately.
Subject: One matte teal ceramic mug with one handle and exactly two whole oranges.
Required details: Keep every required object whole and visible.
Setting: A pale wooden tabletop against a warm off-white background.
Avoid: People, additional objects, lettering, and logos.
Tip
The brief does not need to control every tiny visual variation. It must control the facts that determine whether the image is usable for Morning Table.
Match each Morning Table note to its role in the current visual brief.
Tap an item and then its matching pair.
Step 2 of 8
Plan framing, viewpoint, placement, and aspect ratio for the Morning Table website header.
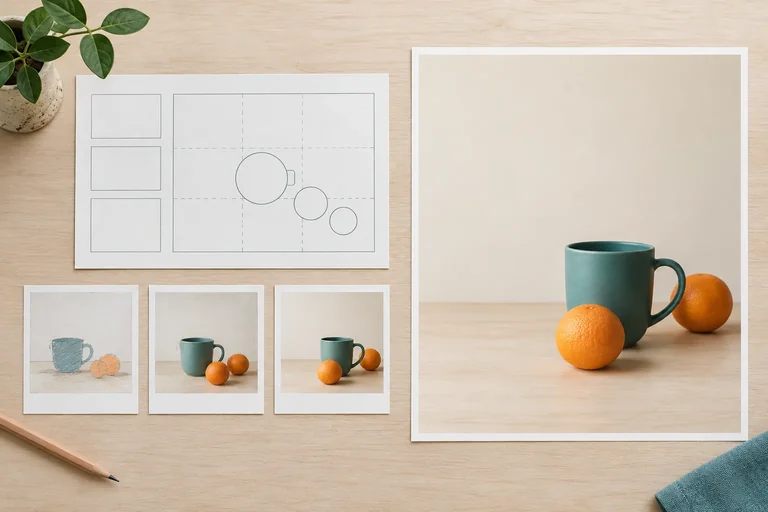
A website header needs more than the required objects: it needs a usable arrangement. Framing decides how much of the tabletop scene appears. Viewpoint is the angle from which the scene is seen. Placement decides where the subject cluster sits within that frame.
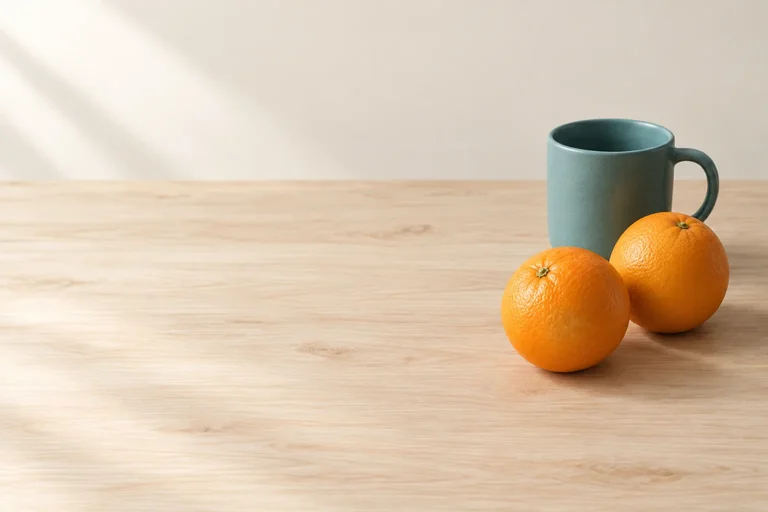
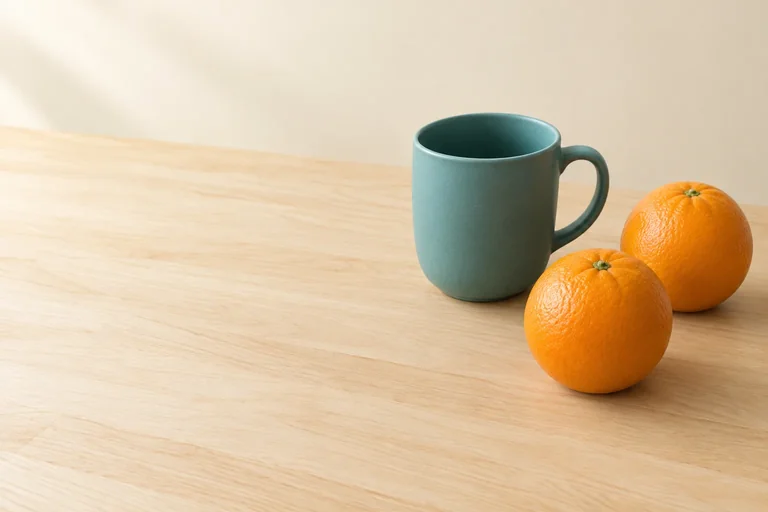
For Morning Table, use a wide tabletop view from a slightly elevated three-quarter viewpoint. Keep the mug and both oranges fully visible in the right half. The low-detail left half is negative space: intentional open area where a headline can be added later.
Do not ask the image generator to add the headline. The image should provide room for it, not contain lettering.
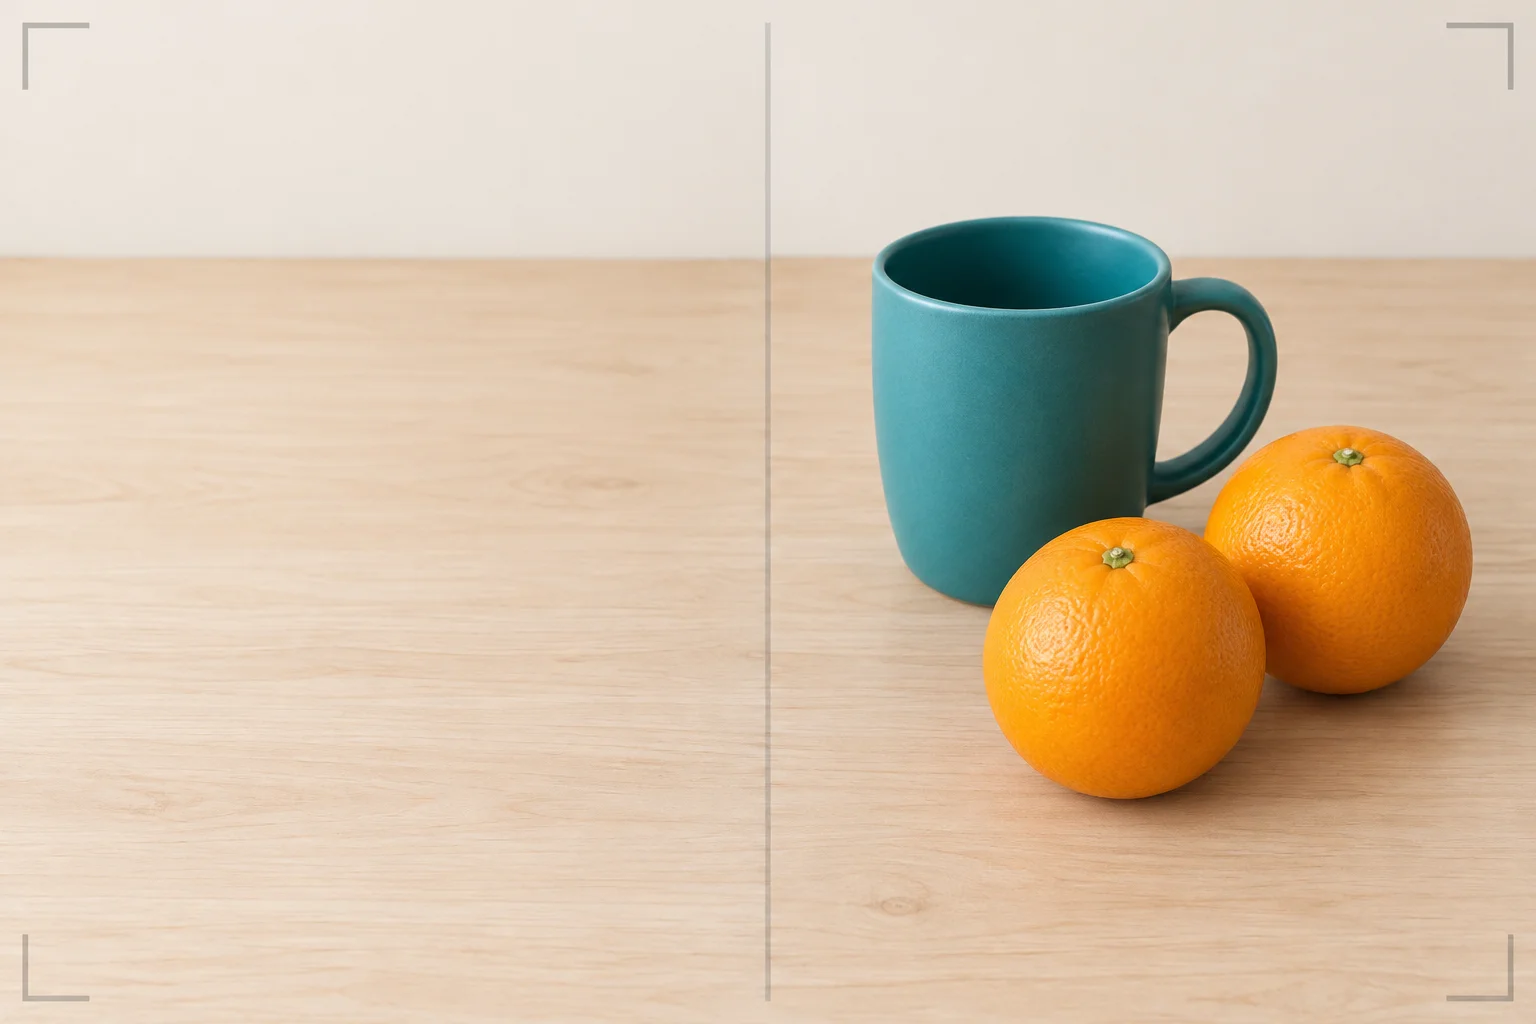
The open left area is planned negative space; the objects remain complete on the right.
An aspect ratio describes a frame's width relative to its height, written as width:height. It is not a pixel resolution. For example, a 1920 × 1080 px image has a 16:9 aspect ratio.
A landscape ratio creates more horizontal opportunity for a headline area and a subject cluster. But ratio alone does not create a good composition: a 16:9 image can still fail if objects fill or clutter the left side.
Compare frame shapes by how they support this specific header, not by which shape looks best in general.
| Aspect ratio | Frame shape | Effect on this header |
|---|---|---|
| 16:9 | Wide landscape | Supports open space on the left and the subject cluster on the right. |
| 1:1 | Square | Provides less horizontal separation between headline space and subjects. |
| 4:5 | Portrait | Prioritizes height, leaving limited side-to-side room for this layout. |
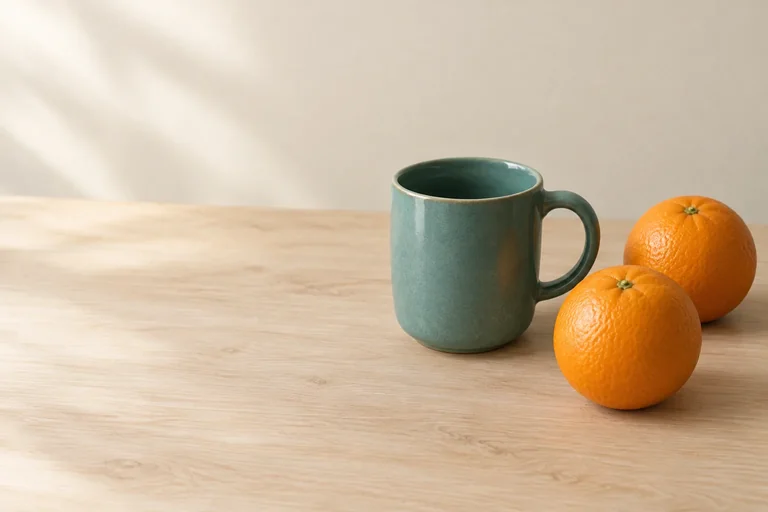
Which Illustrative example follows the Morning Table placement requirement?
Which specification best matches the Morning Table website-header layout?
Step 3 of 8
Add a concrete, coherent style direction to the Morning Table visual brief without changing its required objects or layout.
A Style entry tells the generator how the scene should look—not what the scene must contain or where it must sit.
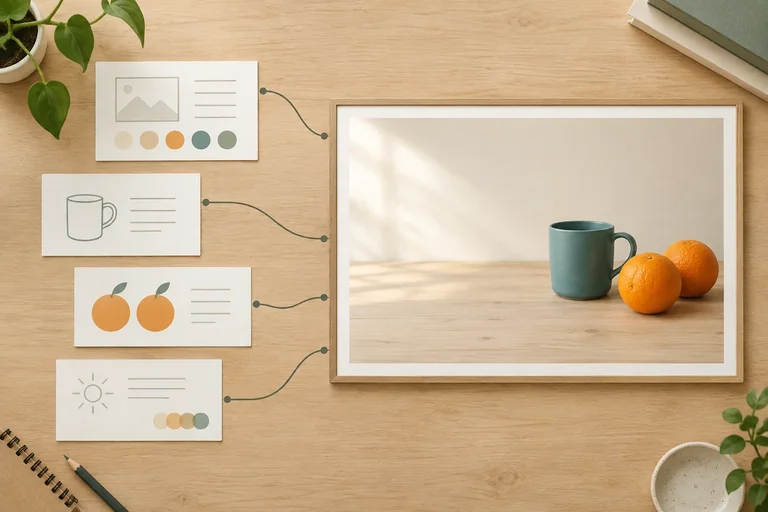
Describe five observable choices:
The earlier Subject, Required details, Setting, Composition, and Aspect ratio entries remain in force. Style cannot turn the clear left half into a decorated area or replace the required mug and oranges.

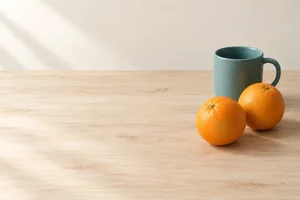
Illustrative example — Notice the soft upper-left light, restrained palette, realistic ceramic and fruit textures, and calm mood. The objects and layout still follow the brief.
Example
Style
Photographic still life with natural material texture; soft daylight from the upper left; a muted teal, orange, pale wood, and warm off-white palette; calm, warm mood.
Concrete descriptors give a reviewer something to look for. Words such as “beautiful” or “professional” express a preference, but do not specify lighting, realism, palette, or mood.
A style treatment may vary while the scene remains accurate. For Morning Table, the chosen treatment is photographic still life. A different treatment can be useful for comparison, but it does not replace the selected Style entry.
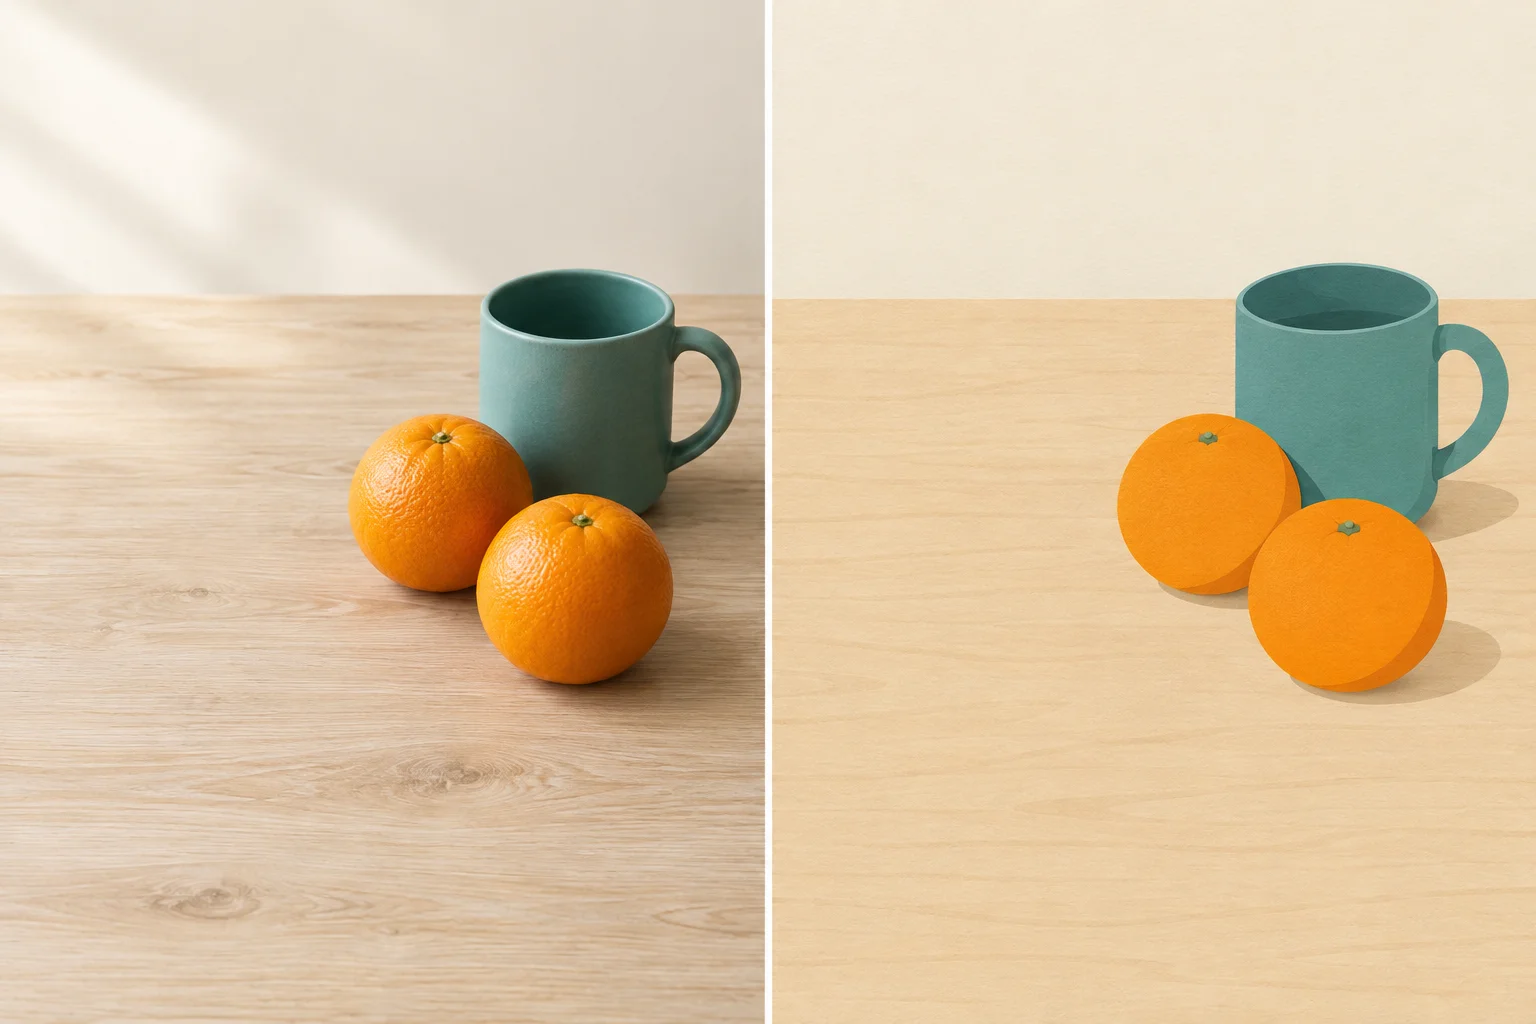
Illustrative example — The treatments differ, but both panels preserve the required content and composition. Assess accuracy separately from which look you personally prefer.
Warning
Check for internal conflicts before treating a phrase as a Style choice.
Keep the selected direction coherent: photographic still life, soft upper-left daylight, muted warm palette, and a calm, warm mood. Do not let style add objects or occupy the headline area.
Which Style description gives a clear visual direction while preserving the established Morning Table brief?
Step 4 of 8
Convert the completed Morning Table visual brief into a self-contained, portable plain-English image-generation request.
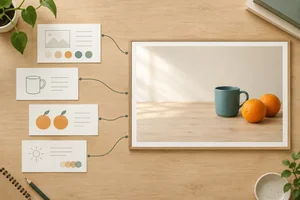
A visual brief is a checklist; a generation request is the self-contained description you can give to an image tool. Preserve every non-negotiable: the object identities and counts, the setting, the layout, the aspect ratio, the visual treatment, and the exclusions.
Write what should be visible in ordinary English. Do not assume the tool has read your brief. Object counts, placement, and exclusions are requests—not guarantees—so they will need checking later.

The request must carry over both the objects and the usable empty area; an attractive still life alone is not enough.
Write for image creation, not for later page assembly. Describe the clear area that will support a headline, but do not ask the image itself to contain the headline, lettering, or a logo.
Keep a portable record with three parts: your completed visual brief using its existing headings, one full generation request, and Requested settings. For this project, record the requested aspect ratio as 16:9. Do not record Applied settings until you actually use a tool.
Example
Create a 16:9 photographic still life for a website header. Show one matte teal ceramic mug with one handle and exactly two whole oranges on a pale wooden tabletop against a warm off-white background. Use a wide tabletop view from a slightly elevated three-quarter viewpoint. Keep the mug and both oranges fully visible in the right half, leaving the left half clear and low-detail for a headline added separately. Use soft daylight from the upper left and a calm, warm mood. Include no people, lettering, logos, or additional objects.
Use this record whether you generate now or prepare a text-only specification.
| Record part | What it contains |
|---|---|
| Visual brief | Existing headings: Intended use through Avoid |
| Generation request | One self-contained plain-English scene description |
| Requested settings | Aspect ratio: 16:9 |
| Applied settings | Record only after a tool is used |
Which addition keeps the generation request focused on the image rather than on later page design?
Create a generation-ready request for the Morning Table image. First, write one self-contained plain-English request in 2–4 sentences. Then add a line beginning “Coverage check:” and mark each item Included or Missing:
If you mark anything Missing, revise your request before submitting it.
Write at least 300 characters (0/300).
Step 5 of 8
Use an available free-tier image tool to obtain Version 1, or create a clearly labeled specification that is ready for later generation and inspection.
You have a complete brief and a complete request. Now choose the route your current access supports:
Both routes are valid. Do not purchase access or depend on making a second image to continue. The goal is an accurate record of what happened, not a claim that every requested control was available.
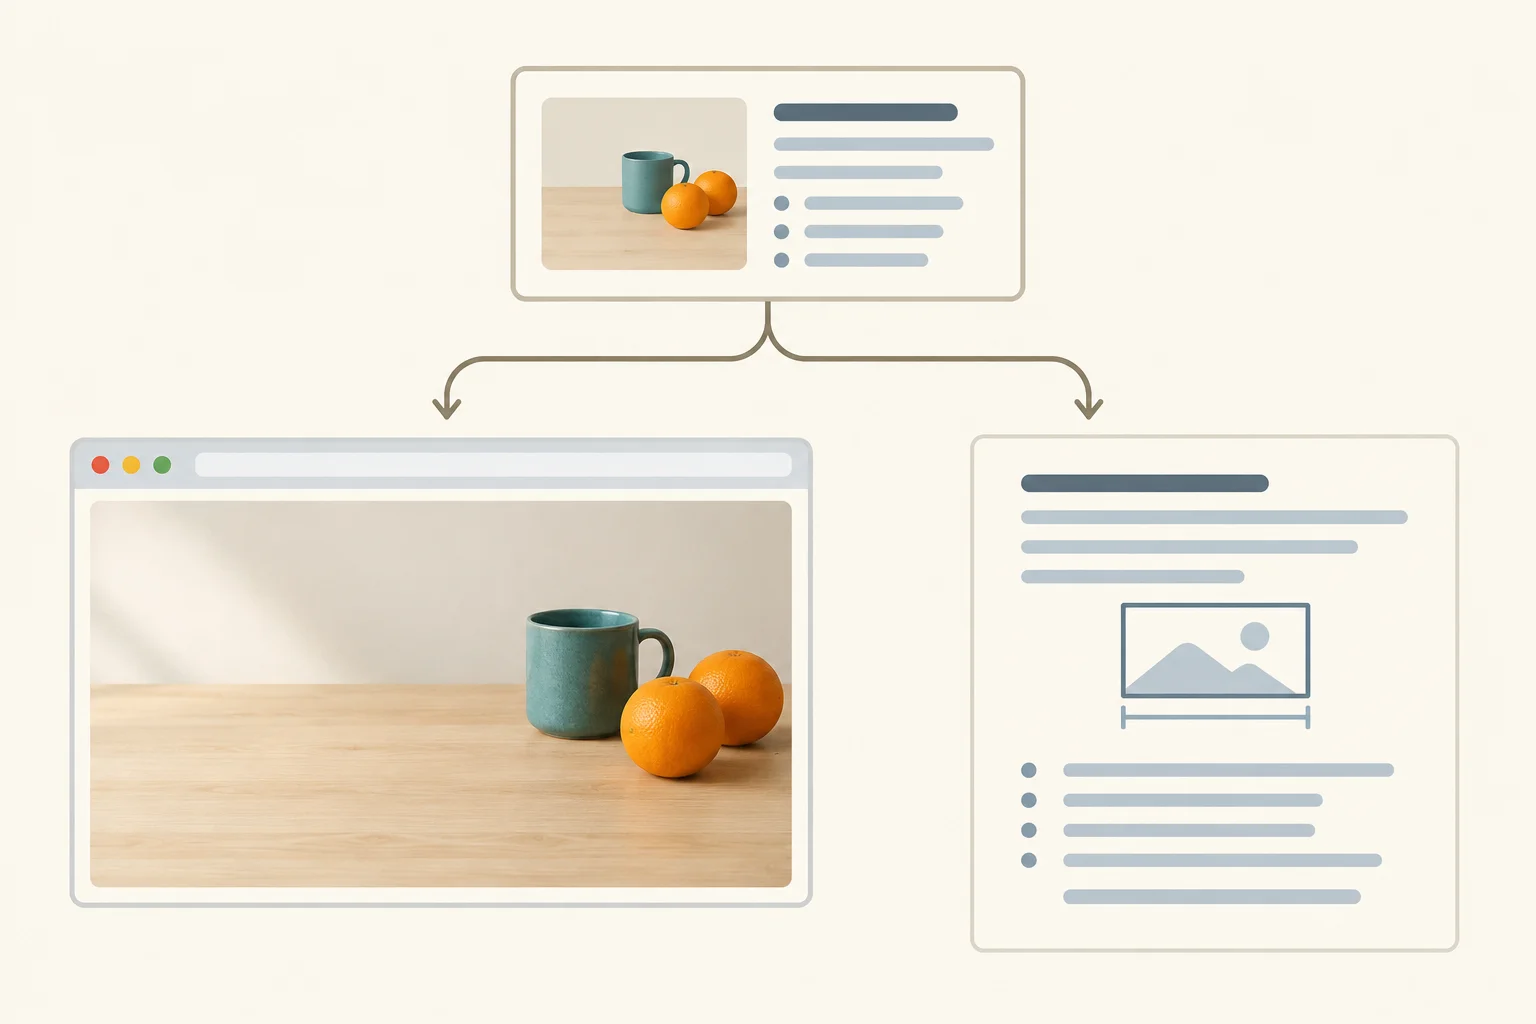
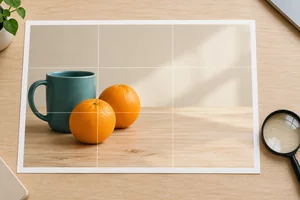
Illustrative example — a generated image and a written specification are different outcomes. This tutorial image is for inspection only, not a file to download or upload.
Tip
The Morning Table activity requires no uploads. If a tool offers optional reference material, you can simply leave that feature unused. For any separate work where you choose to use a reference, use only material you own or are authorized to use, and avoid private information.
Use this one self-contained request for either route. In the tool route, paste it into an available image generator in your own browser or application. If an aspect-ratio control is offered, select 16:9 before generating. If no such control exists, keep 16:9 in the request, but do not report it as an applied setting.
An actual image is evidence that the tool route produced Version 1. A submitted request without an image is not an output.
Example
Create a 16:9 photographic still life for a Morning Table website header. Show one matte teal ceramic mug with one handle and exactly two whole oranges on a pale wooden tabletop against a warm off-white background. Use a wide tabletop view from a slightly elevated three-quarter viewpoint. Keep the mug and both oranges fully visible in the right half, leaving the left half clear and low-detail for a headline added separately. Use soft daylight from the upper left and a calm, warm mood. Include no people, lettering, logos, or additional objects.
Record what the tool actually did, not what you hoped it would do. Keep Requested settings separate from Applied settings.
For this project, the request specifies 16:9. It becomes an applied setting only when the interface offered that control and you selected it. If the interface did not offer it, say so plainly. Tool names, free-tier access, credits, and controls can vary; that variation does not invalidate the text-only route.
Use the record that matches your route.
| Route | Requested settings | Applied settings | Output status |
|---|---|---|---|
| Tool route | Aspect ratio: 16:9 | List only controls visibly selected; otherwise note unavailable | Version 1 exists only if an image appeared |
| Text-only route | Aspect ratio: 16:9 | No tool used; no settings applied | Specification awaiting generation |
Tip
If you use the text-only route, retain the complete request and the record above. In the next steps, you will inspect on-screen images labeled Illustrative example. They support practice, but they are not your generated images and are not inputs for another tool.
Write your completed record. State the route you completed, copy the full generation request, record the requested settings and any applied settings, then state whether you have an actual Version 1 or a specification awaiting generation.
Write at least 180 characters (0/180).
Step 6 of 8
Evaluate a first image against the visual brief using observable evidence for subject accuracy, composition, artifacts, and intended-use suitability.
Inspect Version 1 against the brief—not against whether it simply looks appealing. Use four headings: Subject accuracy, Composition, Artifacts, and Intended-use suitability.
For each heading, record only what the displayed image supports. Check identity, count, color, and completeness; then check the viewpoint, placement, and usable empty space. A polished-looking image can still fail its intended use.

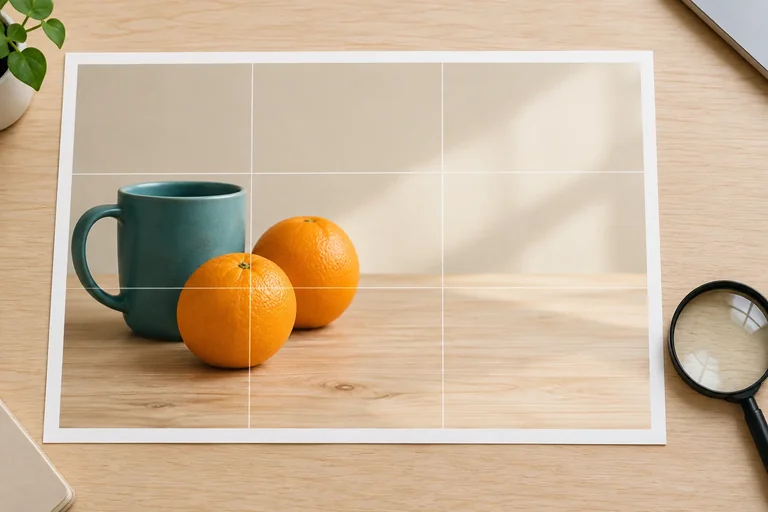
Illustrative example — Version 1. The required objects are present, but inspect whether the left side is genuinely usable for a separately added headline.
A useful inspection note connects a requirement to visible evidence and a status. Use Meets when the displayed image satisfies the check, Needs revision when it visibly does not, and Not verifiable when the image cannot establish the claim.
Example inspection record for the illustrative Version 1.
| Heading | Brief check | Visible evidence | Status |
|---|---|---|---|
| Subject accuracy | One teal mug with one handle; exactly two whole oranges; all complete | One teal handled mug and two whole oranges are visible. | Meets |
| Composition | Objects fully in the right half; left half clear and low-detail | The object cluster extends into the left half, reducing open space there. | Needs revision |
| Artifacts | No malformed handle, fused shapes, implausible edges, or inconsistent shadows | No obvious artifact is visible at this displayed scale. | Meets |
| Intended-use suitability | Website header with room for a headline added separately | The left side does not provide a broad, low-detail headline area. | Needs revision |
Tip
Describe what you can see: “the cluster extends into the left half.” Do not invent a cause, such as claiming the tool misunderstood an instruction. If a technical claim cannot be seen in the image, mark it Not verifiable rather than guessing.
For the illustrative Version 1, which note is both supported by visible evidence and connected to the brief?
Use the illustrative Version 1 from this step or your own initial image. Under one inspection heading, identify one mismatch. State the exact brief requirement it conflicts with and describe the visible evidence. Do not guess why the tool produced it or describe a solution yet.
Write at least 100 characters (0/100).

Step 7 of 8
Revise one visible mismatch without losing the constraints that make the Morning Table image usable, then compare both versions against the same brief.
A revision is not a request to “make it better.” Start with the highest-priority visible mismatch, then state one concrete correction. For Morning Table, the priority is the usable headline area: the subject cluster must move out of the left half.
Treat a new generation as a new output. It may correct the chosen mismatch while changing something else, so every version must be checked against the same original brief.
Illustrative example: compare both versions with the same brief, not with each other’s visual appeal.
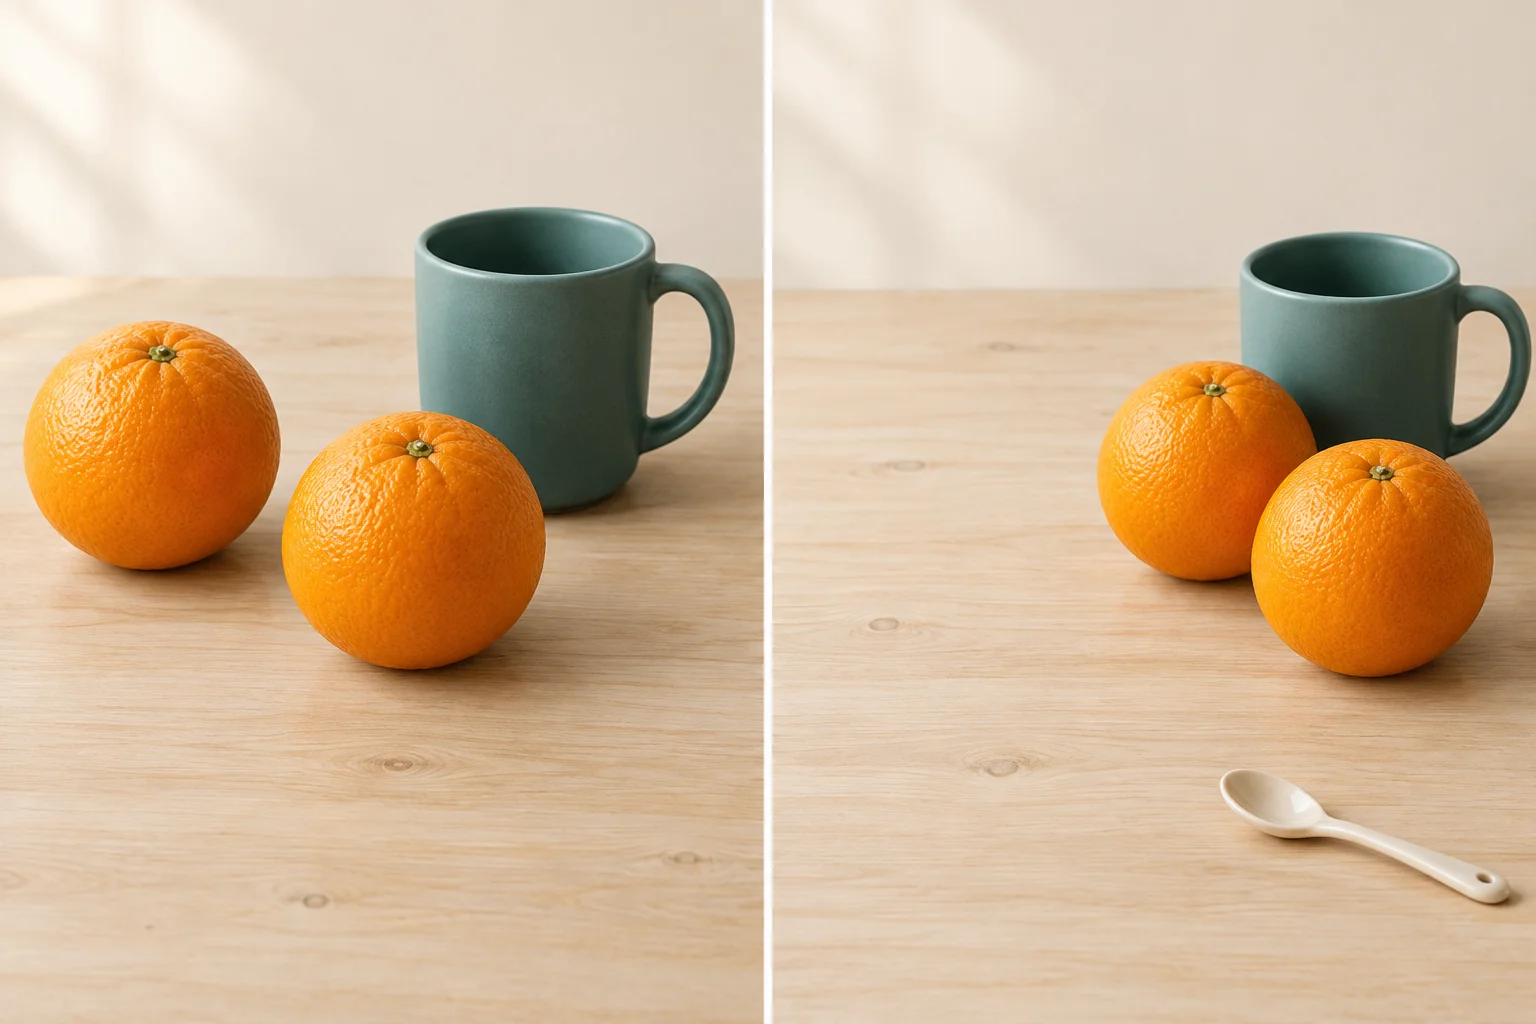
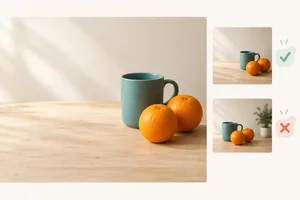
Illustrative example — Version 1 blocks the planned headline area. Version 2 restores that clear area, but introduces an extra object.
Write revision notes in two parts. Change names the mismatch to correct. Keep protects every requirement that still matters. Then turn both parts into a complete request; do not replace the brief with a vague improvement instruction.
If you cannot generate again, this is still a valid text-only revision specification. It records what Version 2 should request without claiming that an image was made.
A targeted revision changes the placement problem while retaining the original visual brief.
| Note | Content |
|---|---|
| Change | Move the complete subject cluster into the right half. |
| Keep | One matte teal ceramic mug with one handle; exactly two whole oranges. |
| Keep | Pale wooden tabletop; warm off-white background; no people or added objects. |
| Keep | Slightly elevated three-quarter view; low-detail left half. |
| Keep | Photographic still life; soft daylight from upper left; calm, warm mood. |
| Keep | Wide 16:9 header image with no lettering or logos. |
Example
Change
Move the complete mug-and-orange cluster fully into the right half so the left half is clear, low-detail space for a headline added separately.
Keep
Keep one matte teal ceramic mug with one handle, exactly two whole oranges, the pale wooden tabletop, warm off-white background, slightly elevated three-quarter viewpoint, photographic still-life style, soft daylight from the upper left, and calm, warm mood. Keep all objects fully visible. Include no people, lettering, logos, or additional objects.
Revised request for Version 2
Create a wide 16:9 photographic still life for a Morning Table website header. Show one matte teal ceramic mug with one handle and exactly two whole oranges, all fully visible and grouped in the right half. Use a pale wooden tabletop against a warm off-white background, viewed from a slightly elevated three-quarter angle. Leave the left half clear and low-detail for a headline added separately. Use soft daylight from the upper left and a calm, warm mood. Include no people, lettering, logos, or additional objects.
Which revision request best targets the Morning Table headline-area mismatch while preserving the original brief?
Review the illustrative Version 1 and Version 2 from this step. Write a four-part revision review:
Base your decision on the brief’s requirements, not on which image feels more attractive.
Write at least 180 characters (0/180).
Step 8 of 8
Consolidate the Morning Table brief, request, inspection evidence, and revision into an evidence-based final decision.
A final record does not restart the work. It preserves one traceable chain: what the image had to do, what you requested, what happened or was specified, what inspection showed, what you changed, and the decision that evidence supports.
Use the original brief as the acceptance standard. An attractive image is not automatically the stronger result if it blocks the headline area, changes a required object, or adds an unwanted one.
Use this sequence for either route. It distinguishes actual outputs from plans and tutorial examples.
| Record part | What to record |
|---|---|
| Visual brief | The eight headings and their requirements |
| Generation request | The complete plain-English request |
| Settings | Requested settings and only actually applied settings |
| Inspection | Evidence under the four inspection headings |
| Revision and decision | Change, Keep, version status, and next correction |
Tip
Be accurate about the route.
Compare versions against the same brief, not against visual appeal. For each displayed version, check the required subject and layout, then look for unwanted objects or visible artifacts. A revision can fix its target mismatch and still introduce a regression.
In this Illustrative example, Version 2 improves the headline area: the subject cluster is fully in the right half. However, it introduces a spoon, which conflicts with the requirement for no additional objects. Version 2 is therefore stronger on composition but is not yet accepted.
Compare the placement of the subject cluster, the usable empty space, and any extra object.
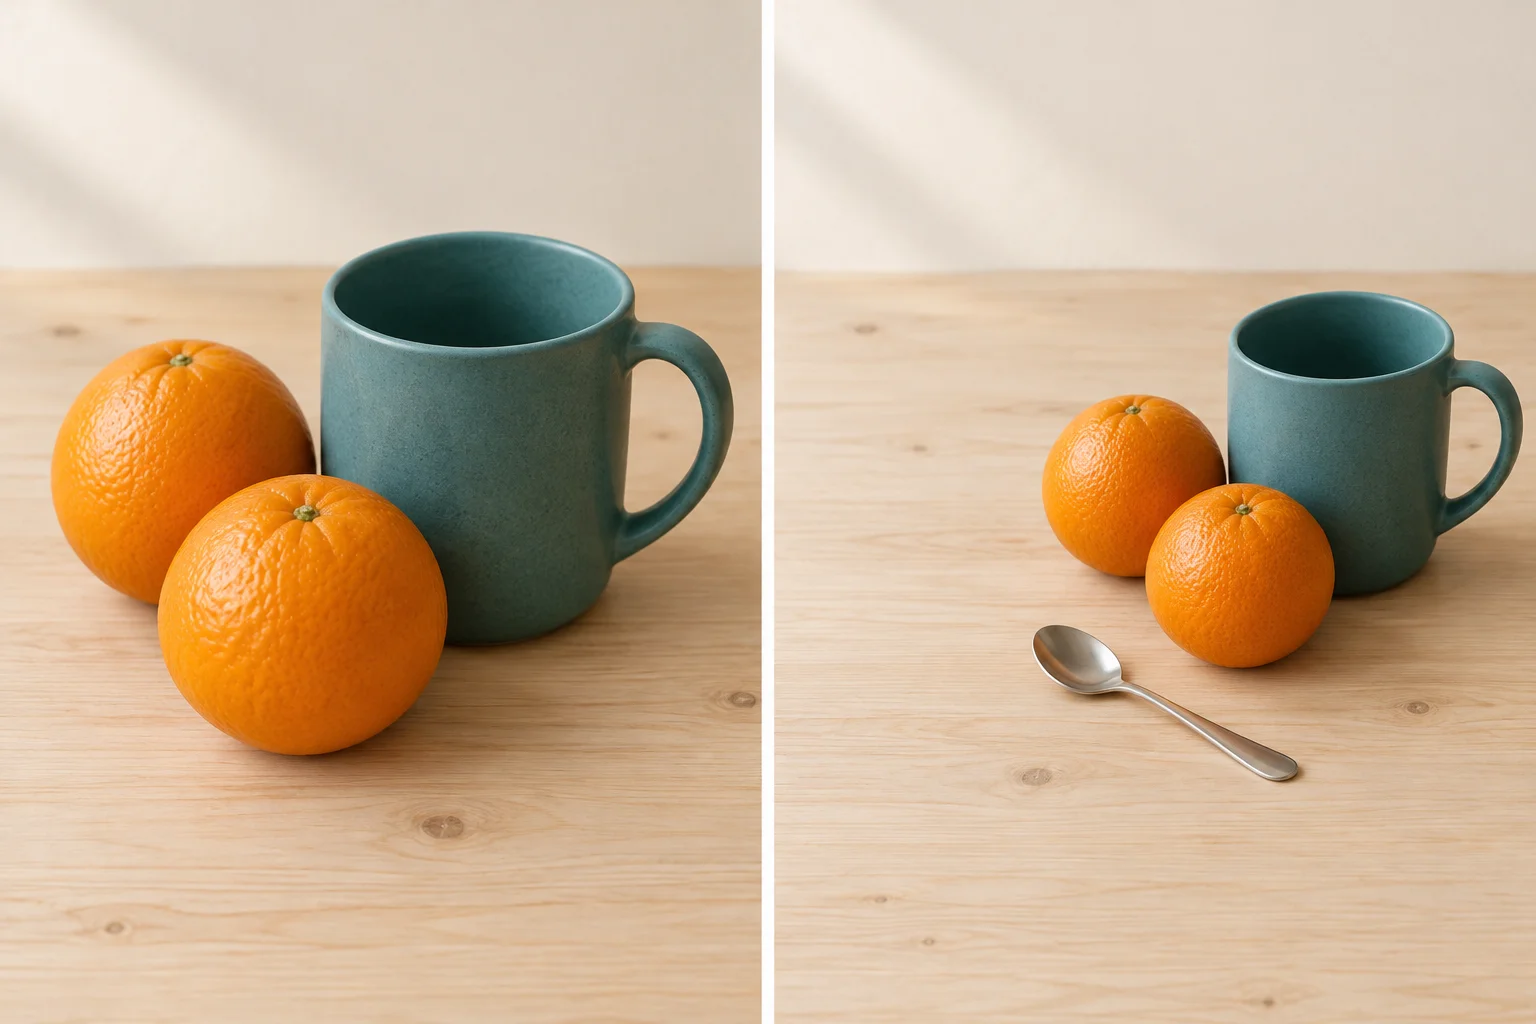
Illustrative example — Version 1 is on the left. Version 2 improves placement but adds a spoon, so it still needs revision.
These notes use only visible evidence from the Illustrative examples.
| Inspection heading | Version 1 | Version 2 |
|---|---|---|
| Subject accuracy | Meets: teal mug with one handle; two whole oranges | Meets: teal mug with one handle; two whole oranges |
| Composition | Needs revision: cluster enters the headline area | Meets: cluster stays right; left area is clear |
| Artifacts | Meets: no obvious malformed or fused shapes | Needs revision: an added spoon is an unwanted object |
| Intended-use suitability | Needs revision: headline space is not usable | Needs revision: layout works, but extra object violates the brief |
Create a compact final brief-to-decision record for the case that honestly matches your work.
Start with Route:
Then include: (1) all eight visual-brief headings in compact form; (2) the complete generation request; (3) Requested settings and, only if relevant, Applied settings; (4) evidence under Subject accuracy, Composition, Artifacts, and Intended-use suitability for every image that actually exists or is being evaluated as an Illustrative example; (5) one Change and Keep revision; and (6) a final evidence-based decision and next specific correction, if needed.
Write at least 450 characters (0/450).
Summary
Congratulations! You completed: Generating Images from a Visual Brief
Thousands of online courses in video, ebooks and audiobooks.
To test your knowledge during online courses
Generated directly from your cell phone's photo gallery and sent to your email

Download our app via QR Code or the links below:.


Carry knowledge in your pocket.
Download the Cursa app.
There are hundreds of free courses available, with a free certificate of completion that is saved in your mobile image gallery.
Download the app to access the Course Completion Certificate for Free.

+ 10 million
students

Free and Valid
Certificate

60 thousand free
exercises

4.8/5 rating in
app stores

Free courses in
video and ebooks