Great editing isn’t only about cool transitions or flashy effects—it’s about a workflow that keeps your media organized, your timeline responsive, and your final exports consistent across platforms. Whether you’re cutting short-form content, interviews, or course lessons, a repeatable process helps you edit faster and avoid the most common “where did that file go?” disasters.
This guide walks through a practical, tool-agnostic workflow you can apply in any editor, then points you to free learning paths for popular software like Premiere, After Effects, DaVinci Resolve, CapCut, Filmora, Canva, and more.
1) Pre-edit planning: define the goal before you touch the timeline
Before importing footage, clarify three things: (1) the audience, (2) the purpose (inform, sell, teach, entertain), and (3) the target platform (YouTube, TikTok, course player, Instagram, etc.). These decisions determine pacing, aspect ratio, graphic style, and export settings. A 30-second vertical video and a 12-minute lesson need different structure—even if they use the same raw footage.
Quick planning tip: write a one-sentence “edit brief” (e.g., “Cut a 3–5 minute tutorial that feels calm, clear, and professional, optimized for 1080p course playback”). That brief becomes your decision filter for music, titles, and cuts.
2) Ingest and backups: protect the project before you create it
The easiest way to lose hours is to start editing from a messy downloads folder or a memory card. A safer ingest routine is: copy footage to a dedicated project folder, verify playback, then create a backup to a second drive (or cloud). If you’re working with large files, an external SSD for active editing plus a separate backup location keeps things fast and safe.
Folder structure that scales (example):
- 01_Footage (Camera A, Camera B, ScreenRecord)
- 02_Audio (VO, Music, SFX)
- 03_Graphics (Logos, Thumbnails, LowerThirds)
- 04_ProjectFiles (editor project, autosaves)
- 05_Exports (Review, Final)
3) Project setup: get settings right to avoid technical headaches later
Match your project to your source footage whenever possible—especially frame rate and resolution. Common pitfalls include mixing 24/30/60 fps without a plan, editing in the wrong color space, or building a vertical edit in a horizontal sequence. Set your sequence (or timeline) intentionally, then build templates for recurring work like course lessons.
When performance is an issue, proxies (lower-resolution editing files) can make editing dramatically smoother—particularly with 4K/6K footage or highly compressed codecs.

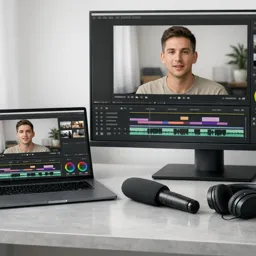
4) Organize inside the editor: bins, labels, and metadata
Good bin organization is speed. Create bins that mirror your folder structure, apply color labels (e.g., A-cam, B-cam, VO, music), and use consistent naming for sequences (e.g., Lesson_03_RoughCut, Lesson_03_PictureLock). If your editor supports it, add markers for key moments and notes (retakes, best takes, mistakes to remove).
Advanced organization trick: create a “Selects” sequence where you drop only your best takes. Editing from selects reduces decision fatigue and keeps the main timeline clean.
5) The rough cut: build structure first, polish later
In the rough cut, focus on story and clarity: remove dead air, pick the best takes, and ensure the content flows. Avoid spending time on effects too early. A strong rough cut answers: “Does this make sense?” and “Is it engaging?”—without needing fancy visuals.
If you’re editing tutorials or lessons, consider “pace anchors”: keep intros short, show outcomes early, and add quick chapter-like moments (title cards or on-screen headings) so viewers can follow along.
6) Audio cleanup and mix: the fastest way to look professional
Viewers forgive imperfect visuals faster than they forgive messy audio. Prioritize clean dialogue: remove noise, reduce room reverb if possible, tame harsh sibilance, and keep levels consistent. Then add music and sound effects subtly to support the message (not fight it).
Want to go deeper on audio? Explore dedicated learning on https://cursa.app/free-online-courses/sound-design to understand layering, ambience, and mixing decisions that make edits feel “finished.”
External resource worth bookmarking: https://www.adobe.com/creativecloud/video/discover/audio-mixing.html(useful principles even if you edit in other software).
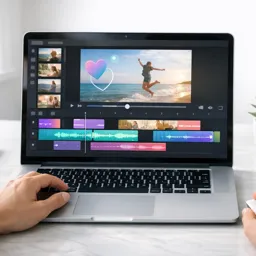
7) Motion, titles, and graphics: clarity beats decoration
Use titles and lower-thirds to reduce confusion and improve retention—especially in educational content. Keep typography readable: high contrast, safe margins, consistent font sizes, and short phrases. Motion should guide attention, not distract.
For deeper motion design, learn key concepts in https://cursa.app/free-online-courses/adobe-after-effects. If you want fast, template-driven graphics, https://cursa.app/free-online-courses/adobe-express and https://cursa.app/free-online-courses/canva-for-video can speed up social formats and thumbnails.
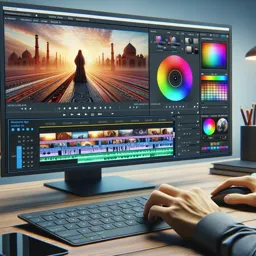
8) Color correction (then grading): fix first, stylize second
Start by correcting exposure and white balance so shots match. Then apply a look (grading) only after the footage is consistent. Even simple adjustments—balanced skin tones, controlled highlights, and matched contrast—can elevate perceived quality.
If you want structured training on this topic, check https://cursa.app/free-online-courses/color-grading and the workflow-oriented tools inside https://cursa.app/free-online-courses/davince-resolve.
9) Export settings: choose deliverables based on where the video will live
Export is not one-size-fits-all. Define your deliverable specs early: resolution, frame rate, bitrate, audio format, and whether you need captions burned in or provided as a separate file. For course lessons, consistency matters more than extreme compression; for social platforms, file size and speed can matter more.
Helpful external reference: https://support.google.com/youtube/answer/1722171 (useful guidance for many web exports).

10) Quality control checklist: catch issues before viewers do
- Watch once with sound, once muted (to check pacing and readability).
- Check dialogue loudness consistency and peaks (no clipping).
- Scan for jump cuts, flash frames, and accidental gaps.
- Verify titles spelling, safe margins, and timing.
- Confirm aspect ratio for the platform (16:9, 9:16, 1:1).
- Test playback on mobile and desktop.
Learn video editing with free courses and certification paths
To build this workflow inside a specific tool, explore the free learning tracks in the https://cursa.app/free-courses-art-and-design-en-online subcategory, part of the broader https://cursa.app/free-online-art-and-design-en-coursescatalog. Popular software learning paths include:
- https://cursa.app/free-online-courses/adobe-premiere for timeline editing and efficient production workflows
- https://cursa.app/free-online-courses/adobe-after-effects for motion graphics and compositing
- https://cursa.app/free-online-courses/davince-resolve for editorial plus powerful color workflows
- https://cursa.app/free-online-courses/capcut for fast social edits and mobile-first content
- https://cursa.app/free-online-courses/filmora-wondershare for approachable editing and quick effects
- https://cursa.app/free-online-courses/canva-for-video for template-driven videos and graphics
- https://cursa.app/free-online-courses/sound-design to level up dialogue, ambience, and impact
Once you adopt a consistent workflow, your creative energy goes into decisions that matter—story, clarity, rhythm—while the technical side becomes reliable and repeatable.