Great animation rarely starts with software—it starts with clarity. Before opening a 3D tool or keyframing a single move, a simple workflow can help you turn an idea into a finished video animation that feels intentional, readable, and professional. This guide walks through a practical, repeatable process you can use for motion graphics, short animated scenes, product explainers, and more.
If you’re exploring training paths, the https://cursa.app/free-courses-art-and-design-en-online collection sits inside https://cursa.app/free-online-art-and-design-en-courses, with topics spanning 3D modeling, animation fundamentals, and production skills.
1) Define the “one-sentence outcome”
Start by writing a single sentence describing what viewers should understand or feel at the end.
Examples:
- “Show how the app reduces busywork in 15 seconds.”
- “Reveal the product’s features with a satisfying mechanical unfold.”
This sentence becomes your filter for every decision: camera moves, pacing, effects, and sound.
2) Write a micro-script and beat list
Even non-dialogue animations benefit from a script. Keep it short: a beat list of 5–12 moments is often enough.
Each beat should state:
- What changes on screen
- Why it matters
This prevents “beautiful but confusing” animation—one of the most common beginner pitfalls.
3) Storyboard with thumbnails (fast, not perfect)
Thumbnail storyboards are quick sketches that capture composition and flow.
Focus on:
- Silhouettes
- Big shapes
- Motion arrows
- Rough timing per shot
Example timing notes:
- 12 frames
- 1 second
- 3 seconds
When your thumbnails already communicate the story, production becomes dramatically easier.

4) Build an animatic to lock timing early
An animatic is a slideshow of storyboard frames timed to your intended pace, often with temporary sound.
This step reveals pacing problems immediately:
- Shots that linger too long
- Transitions that feel abrupt
- Moments that need emphasis
Fixing timing here is far cheaper than fixing it after you’ve polished models and lighting.
5) Choose an animation style and constraints
Style is not just how something looks—it also defines what you will and won’t do.
Decide early:
- Visual style: realistic, stylized, low-poly, toon, or minimal shapes
- Motion style: snappy graphic motion or cinematic smooth movement
- Scene complexity: few hero objects vs many background elements
- Technical limits: render time budget, resolution, and deadline
Constraints prevent scope creep and help the animation stay cohesive.
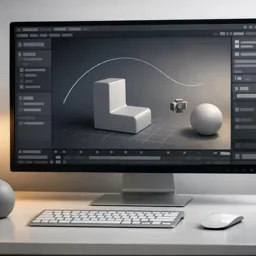
6) Block the scene before polishing
Blocking means assembling the scene with simple shapes and rough motion.
During blocking you will:
- Place cameras
- Set object scale and layout
- Create the main keyframes
- Test staging and readability
In 3D workflows, you don’t worry about materials or detailed curves yet.
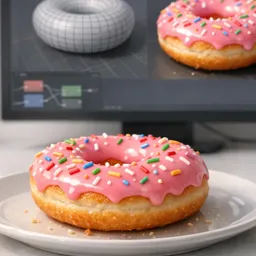
To practice this stage, explore:
https://cursa.app/free-online-courses/blender
or strengthen your foundation with:
https://cursa.app/free-online-courses/3d-animation
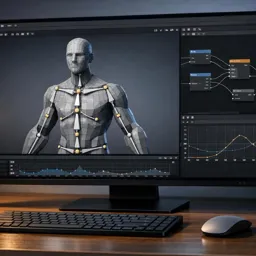
7) Add motion principles: spacing, arcs, and easing
The difference between average and polished animation often comes from how motion behaves between keyframes.
Focus on three fundamentals:
- Spacing: controls speed and emphasis
- Arcs: natural movement follows curved paths
- Easing: objects accelerate and decelerate rather than start or stop instantly
These principles improve everything from logo animation to cinematic camera moves.
8) Use camera language intentionally
Camera framing directs attention.
Typical shot types include:
- Wide shots to establish context
- Medium shots for interaction
- Close-ups to emphasize detail
A useful rule:
If the scene is complex → keep camera motion simple.
If the scene is simple → allow more dynamic camera movement.

9) Plan lighting and materials for readability
Instead of chasing realism, focus on clarity.
Good lighting separates elements by using:
- Light vs dark contrast
- Rim lighting
- Controlled highlights
Consistent materials and limited shader variety usually produce cleaner results than overly complex setups.
10) Render smart: test early, then scale up
Rendering can consume the most time in production.
Avoid surprises by doing test renders early:
- Render a few seconds at low resolution
- Check lighting and noise levels
- Verify motion clarity
Once approved, gradually increase render quality.
Organize versions carefully so you can revert changes if needed.
11) Finish with editing, sound, and simple color polish
Editing is the final storytelling pass.
Refine the animation by:
- Removing unnecessary frames
- Tightening transitions
- Aligning cuts with music or rhythm
Sound adds clarity:
- Whooshes for motion
- Clicks for interactions
- Impacts for transitions
Final color adjustments such as contrast and saturation can unify the entire sequence.
12) Build a small practice loop (and repeat)
One of the fastest ways to improve animation is repetition through small projects.
Try this format:
- 5–10 seconds of animation
- One clear idea
- One new technique
Examples:
- Camera move practice
- New material style
- Motion graphics transition
Over time these small exercises build a strong portfolio.
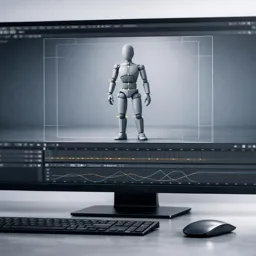
When you’re ready to expand toward expressive movement, explore:
https://cursa.app/free-online-courses/character-animation

Next steps: choose your learning path
If you want a structured way to practice this workflow, explore:
https://cursa.app/free-courses-art-and-design-en-online
Pick one short project and complete it end-to-end.
The goal is not perfection—it’s finishing, reviewing, and improving through iteration. That’s how creative ideas consistently become polished animations.