Polished video animation rarely comes from adding more effects—it comes from controlling motion. The difference between “it moves” and “it feels alive” is usually timing, spacing, and how your motion curves are shaped. Whether you’re animating a logo reveal, a product shot, a short scene, or a looping social clip, mastering these fundamentals will instantly raise the perceived quality of your work.
This guide focuses on animation principles you can apply in any tool, with practical notes for Blender users. If you’re exploring more learning paths, browse https://cursa.app/free-courses-art-and-design-en-online or the broader https://cursa.app/free-online-art-and-design-en-courses catalog to build a well-rounded animation skill set.
Timing vs. spacing: the two levers behind every movement
Timing is how long an action takes (e.g., 12 frames vs. 48 frames). Spacing is how far an object travels from frame to frame. You can keep the same start and end poses and still completely change the feel by adjusting either lever.
Try this quick exercise: animate a sphere moving from left to right in exactly 1 second. Now make it feel heavy without changing the duration. You’ll do it by changing spacing: small gaps at the start (slow acceleration), larger gaps in the middle (fast travel), and small gaps near the end (gentle settle).
Why “linear” motion looks mechanical
Linear interpolation moves at a constant rate, which is rare in the real world. Most actions ease in (accelerate) and ease out (decelerate). When animations feel stiff, it’s often because motion is too evenly distributed over time—or because everything eases the same way.
In practice, aim to reserve perfectly linear motion for deliberate stylistic choices (like UI cursors, robotic elements, or certain motion-graphics beats). For character-like movement, natural objects, or camera animation, use easing and varied curve shapes to create intention.
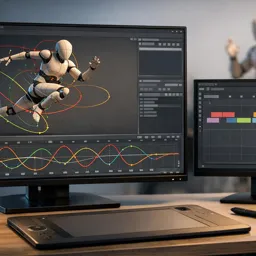
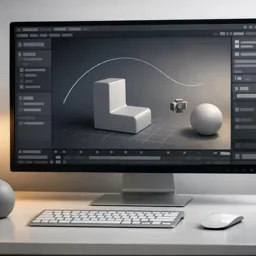
Motion curves: your most powerful animation tool
If you only animate in the timeline by moving keyframes around, you’re missing half the craft. The curve editor (graph editor) lets you sculpt the speed of motion directly. Here’s what to look for:
- Steeper slope = faster motion. A steep curve segment means the value changes quickly.
- Flat slope = slow motion. Flat sections indicate near-stops or holds.
- Overshoot = energy. A curve that goes past the target and comes back can create bounce and liveliness.
In Blender specifically, the Graph Editor is where “good” becomes “great.” Pair this concept with dedicated learning in https://cursa.app/free-online-courses/blender to get comfortable refining F-curves and interpolation modes.

Ease in, ease out—then break the symmetry
Beginner animations often use the same smooth ease-in-out everywhere. It’s better than linear, but it can still feel generic. Real motion is usually asymmetric: an object may accelerate quickly and decelerate slowly, or vice versa, depending on forces and intent.
Examples of intentional asymmetry:
- Snappy start, soft stop: UI panels, kinetic typography, many motion-graphics reveals.
- Slow start, fast stop: A cautious reach that suddenly retracts; a suspense beat.
- Fast start, fast stop: Impacts, hits, glitchy or punchy transitions (often with a tiny settle afterward).
Holds, pauses, and contrast: the secret to readable animation
Great animation isn’t constant motion—it’s controlled contrast. A brief hold (no movement) can make the next action feel faster and clearer. Pauses also give viewers time to understand what they’re seeing, which matters for explainer clips, product animations, and social content.
Use holds to:
- Emphasize a pose before a big movement
- Let a logo or headline breathe after a reveal
- Sell weight (heavy objects often “settle” before moving again)
Arcs and path clarity: make motion feel physical
Even simple objects look more natural when they follow arcs rather than perfectly straight lines. Hands swing, cameras drift, and most real-world movement traces curves due to rotation and inertia.
Two practical checks:
- Turn on motion paths (or use a path visualization) to inspect whether movement feels intentional.
- Avoid accidental wiggles. Tiny unintended curve bumps can create jitter—especially noticeable in camera moves.
If you’re building toward more advanced projects, it helps to explore structured learning in https://cursa.app/free-online-courses/3d-animation to connect arcs with staging, camera language, and scene rhythm.
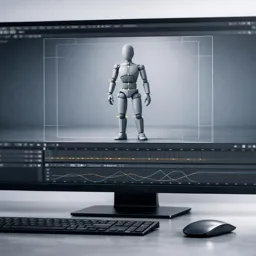
Secondary motion: small details that add life
Secondary motion is the “after-effect” of a main action: a dangling cable catching up, a backpack settling, a sleeve lagging behind an arm swing, or a UI element slightly overshooting. It reinforces materials, scale, and energy.
To keep it clean:
- Animate the primary action first
- Add overlap (secondary parts start later and stop later)
- Reduce amplitude (secondary motion should usually be subtler than the main action)
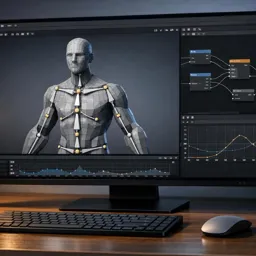
If your projects include animated characters, structured practice in https://cursa.app/free-online-courses/character-animation helps you apply overlap and follow-through to believable body mechanics.
A simple workflow to polish any shot in minutes
Use this repeatable pass system whenever an animation feels “off”:
- Silhouette pass: Check that the action reads clearly without details.
- Timing pass: Adjust how long each beat takes (fast/slow choices).
- Spacing pass: Ensure acceleration/deceleration supports the idea.
- Curve pass: Sculpt F-curves to remove mushy motion and add intent.
- Detail pass: Add small overshoots, settles, and secondary motion.
This approach works for everything: logo stings, product spins, camera moves, and character gestures. The key is not to do it all at once—polish emerges from focused passes.

Keep learning: build your animation fundamentals into a skill stack
Timing, spacing, and motion curves are fundamentals that scale with you—from beginner exercises to professional reels. To keep progressing, explore lessons that match your goals: fundamentals in https://cursa.app/free-courses-art-and-design-en-online, tool-focused practice in https://cursa.app/free-online-courses/blender, broader concepts in https://cursa.app/free-online-courses/3d-animation, and performance-focused work in https://cursa.app/free-online-courses/character-animation.
Your next big improvement often comes from one small change: a sharper ease-out, a cleaner arc, a purposeful pause, or a better-shaped curve. Make those choices intentionally, and your animations will immediately feel more professional.
Optional external reference for deeper theory on core principles: https://en.wikipedia.org/wiki/12_basic_principles_of_animation