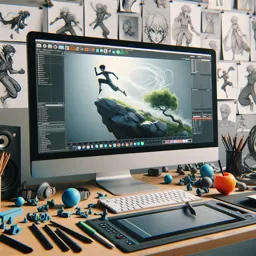
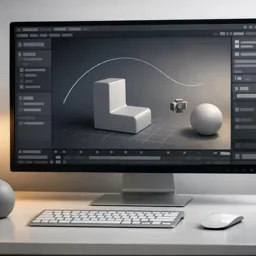
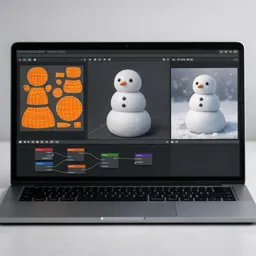
Procedural animation is a powerful way to create believable motion without keyframing every detail. Instead of animating frame-by-frame, you build a “motion system” using tools like modifiers, constraints, drivers, and noise. The payoff is huge: cleaner timelines, reusable setups, easy iterations, and seamless loops—perfect for motion graphics, abstract visuals, and stylized 3D scenes.
This approach is especially useful when you want repeatable motion (like oscillations, sways, bounces, conveyor belts, or floating UI elements) and when you need to scale an idea across many objects. If you’re exploring free learning paths, browse the https://cursa.app/free-courses-art-and-design-en-online collection or expand into the broader https://cursa.app/free-online-art-and-design-en-courses catalog.
What “procedural” means for video animations
In practical terms, procedural animation means your motion is generated by rules. Those rules can be as simple as a sine wave driving rotation or as complex as a network of constraints and drivers that respond to scene parameters.
You still get artistic control—but instead of editing dozens of keyframes, you adjust a few parameters such as:
- Speed
- Amplitude
- Offset
- Randomness
When these parameters change, the animation updates everywhere automatically.
Looping motion with modifiers: the quickest win
Modifiers are one of the fastest ways to turn a simple animation into a perfect loop. The Cycles modifier in the Graph Editor repeats animation curves before and after your keyed range.
A simple workflow:
- Keyframe a short animation segment (for example one bounce).
- Open the Graph Editor.
- Add the Cycles modifier to the curve.
- The motion now repeats automatically.
For seamless loops, ensure your animation begins and ends at compatible values. For example:
- Rotation from 0° to 360°
- Position returning to the original value
Once this is done, Cycles will repeat the motion indefinitely.
Add “life” with Noise and controlled randomness
Perfectly uniform motion can feel robotic. Blender’s F-Curve Noise modifier introduces subtle variation.
Noise works well for:
- Floating objects
- Idle character motion
- Subtle camera shake
- Ambient scene movement
For believable motion:
- Use small strength values
- Use longer scale values
- Avoid rapid jitter unless it is intentional
A common technique is combining:
- A clean looping driver or keyframe motion
- A subtle noise layer on top
This preserves clarity while adding organic detail.

Drivers: connect animation to “smart” controls
Drivers allow one property to control another. This transforms animation into a flexible system.
Examples of useful driver setups:
- Drive multiple object rotations from a single Speed control
- Link bounce height to object scale
- Offset animation timing across objects
- Synchronize loops throughout a scene
A common workflow:
- Create a controller object (often an Empty).
- Add custom properties such as
speed. - Use drivers to link other objects to that property.
Now adjusting a single value can control the entire animation system.
Make a clean, art-directable loop using sine motion
For mathematically perfect loops, sine waves are extremely useful.
A common driver expression looks like this:
sin(frame * frequency) * amplitude
This creates smooth oscillating motion.
You can expose frequency and amplitude as controller properties, turning them into simple motion controls. By adjusting just two parameters, the animation updates instantly across the scene.
Constraints for procedural follow, aim, and secondary motion
Constraints help objects relate to each other without manual animation.
Common constraints used in procedural setups include:
- Follow Path – ideal for conveyor belts or camera moves
- Track To / Damped Track – makes objects automatically face a target
- Copy Rotation / Copy Location – shares motion between objects
For loopable scenes, path-based animation works particularly well:
- Set the curve to cyclic
- Animate the offset factor
- The object moves in a repeating loop
Combining this with subtle noise creates believable continuous motion.
A practical mini-project: procedural “floating icons” loop
Try this quick exercise to create a reusable loop.
- Create several simple icon-like meshes.
- Add a controller Empty with properties
speed,height, andspread. - Add a driver to each icon’s Z location using a sine expression.
- Offset each icon using a unique value or object index.
- Add small rotational noise for subtle variation.
The result is a clean looping animation where icons float naturally.
This type of setup is useful for:
- Motion graphics backgrounds
- UI explainers
- Intro animations
- Ambient loops for websites

How procedural setups improve your Blender workflow
Procedural animation is not just a technique—it improves your workflow.
Advantages include:
- Fewer keyframes and cleaner timelines
- Faster iteration during creative exploration
- Reusable animation setups
- Easier adjustments across complex scenes
You essentially build motion tools that can be reused in future projects.
To expand your skills further, explore learning paths in:
https://cursa.app/free-online-courses/blender
https://cursa.app/free-online-courses/3d-animation
If your goals include expressive character movement, you can also explore:
https://cursa.app/free-online-courses/character-animation
Procedural techniques are especially helpful for secondary motion and repeatable animation cycles.
Recommended next steps (quick checklist)
Try building this procedural workflow step-by-step:
- Create one looping animation using keyframes + Cycles
- Rebuild the same motion using a sine driver
- Add subtle Noise for natural variation
- Use constraints to link objects
- Save the setup as a reusable motion preset
Once you become comfortable with these tools, you’ll be able to produce complex-looking video animations that remain easy to control—because the motion is driven by systems rather than tangled keyframes.