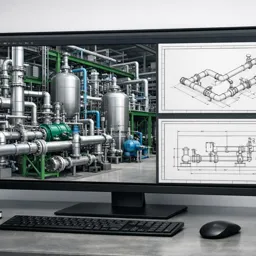
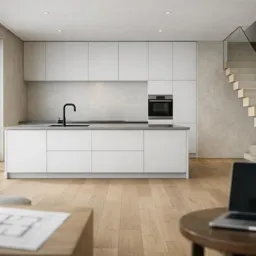
Achieving photorealism in 3D art is a goal for many digital artists, and one of the key factors in reaching this level of realism is texture creation. In Blender, the open-source 3D software, realistic textures can transform a simple model into a lifelike object. Whether you’re working on character models, architectural visualizations, or product renders, mastering the art of creating detailed and accurate textures is essential.
In this article, we’ll explore techniques for creating realistic textures in Blender, covering everything from material properties to UV mapping and node setups.
Understanding the Role of Textures in Photorealism
Textures are visual representations of surface details, adding depth and complexity to 3D models. Photorealistic textures mimic real-world materials by incorporating details such as roughness, bump maps, reflections, and imperfections. To achieve this, a combination of high-quality images, procedural textures, and proper shading is needed.
In Blender, textures are applied using the Shader Editor and Node System, allowing for complex combinations of different properties. Before diving into texture creation, it’s important to understand the different types of maps used:
- Diffuse/Albedo Map: Defines the base color of the surface.
- Roughness Map: Controls how shiny or matte the surface appears.
- Normal/Bump Map: Simulates surface detail and small imperfections.
- Specular Map: Determines how reflective the surface is.
- Displacement Map: Alters the actual geometry of the surface for high-detail modeling.
Using High-Resolution Image Textures
High-resolution image textures are a cornerstone of photorealistic rendering. When creating textures in Blender, always start with high-quality images, ideally 2K or 4K resolution, to ensure sharp details.
- Finding High-Quality Textures: Websites like Poliigon, Textures.com, and CC0 Textures offer a variety of free and paid textures suitable for different projects.
- Seamless Textures: Look for seamless textures to avoid visible seams when wrapping them around a 3D model.
- Creating Custom Textures: If existing resources aren’t enough, consider creating your own textures using photography or image editing software like Photoshop.
After importing an image texture into Blender, use the Mapping Node to adjust its placement on the model and the Texture Coordinate Node to ensure that the texture fits correctly.
Perfecting UV Unwrapping
UV unwrapping is a technique used to map 2D image textures onto a 3D model. Getting the UV mapping right is crucial for ensuring that textures look natural and are free of distortion. In Blender, UV unwrapping can be done through the UV Editor.
- Step 1: Select the model and switch to Edit Mode.
- Step 2: Mark seams where the mesh should be “cut” to lay flat (similar to unfolding a cardboard box).
- Step 3: Use Unwrap to generate the UV map.
- Step 4: Adjust the UV islands in the UV Editor to minimize stretching and distortion.
To check the accuracy of your UV map, apply a Checker Texture and inspect the surface. If the squares are evenly distributed and not stretched, the UV map is ready for applying detailed textures.
Using Procedural Textures for Realism
Procedural textures are generated using mathematical algorithms rather than images, allowing for infinite detail and customization. Blender’s node-based system is ideal for creating procedural textures like wood grain, stone, or complex abstract patterns.
- Noise and Musgrave Textures: Use these nodes to create surface irregularities, such as scratches, rust, or organic details.
- Voronoi Texture: Ideal for simulating cells, veins, or crystalline structures.
- Mixing Procedural and Image Textures: Combine procedural textures with image textures to add imperfections and variations, making the material appear more lifelike.
For example, when creating a wooden surface, start with an image texture for the wood grain, then overlay a procedural noise texture to simulate small dents or scratches. Adjust the mix factor to blend them naturally.
Mastering the Node System for Photorealistic Shading
Blender’s Node System offers immense flexibility for creating complex materials. The key to photorealism lies in combining different textures and shaders to simulate how light interacts with the surface.
- Principled BSDF Shader: Use this shader as the base for most realistic materials. It combines multiple shader types (Diffuse, Glossy, Subsurface, etc.) into a single node.
- Mix Shader Node: Blend different shaders, such as mixing a Glossy Shader with a Diffuse Shader to simulate polished surfaces.
- Bump and Normal Maps: Use these nodes to add fine details like pores, wrinkles, or surface imperfections. Connect them to the Normal input of the shader to influence the surface lighting.
Experiment with Layer Weight and Fresnel Nodes to control reflections and edge highlights, adding a subtle but powerful level of realism.
Adding Imperfections for Authenticity
Perfect surfaces rarely exist in the real world. Adding imperfections like dirt, scratches, or fingerprints can elevate a model from looking “good” to “believable.” Use the following techniques to introduce imperfections:
- Grunge Maps: Overlay grunge textures using Mix RGB nodes to add dirt or wear and tear.
- Edge Wear: Use the Pointiness Attribute in the Geometry Node to highlight edges and simulate chipped paint or worn surfaces.
- Roughness Variations: Add subtle variations in the roughness map to simulate oil stains, dust, or smudges.
By layering imperfections, you create surfaces that react realistically to light and look much more convincing.
Choosing the Right Render Engine: Cycles vs. Eevee
Blender offers two main render engines: Cycles and Eevee. Choosing the right engine is crucial for achieving the best results.
- Cycles: A path-tracing render engine that provides highly realistic lighting, shadows, and reflections. Use Cycles for photorealistic renders, as it accurately simulates light behavior.
- Eevee: A real-time render engine ideal for previews and projects that require fast render times. While Eevee can produce impressive results, it lacks the physical accuracy of Cycles.
For most photorealistic projects, Cycles is the preferred choice due to its superior handling of light and material interactions.
Conclusion
Creating realistic textures in Blender requires a blend of technical skill and artistic finesse. By mastering techniques like UV unwrapping, procedural textures, and advanced node setups, you can achieve stunning photorealistic results. Remember to pay attention to the details—imperfections, lighting, and subtle variations are what make a 3D model truly come to life.