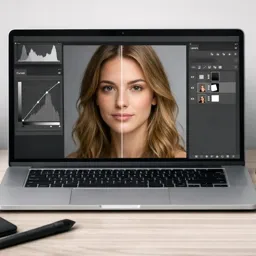
One of the fastest ways to level up in image editing is to stop “baking in” decisions too early. In Adobe Photoshop, Smart Objects make that possible by letting you transform, filter, and reuse elements while preserving original quality—perfect for anyone building repeatable design workflows, social templates, or polished composites.
This guide focuses on Smart Object workflows (not general layers/masks, not color correction, and not retouching). You’ll learn how to use Smart Objects to scale safely, swap content instantly, and build reusable assets—skills that translate directly into professional-grade edits and design-ready deliverables.
What is a Smart Object (and why it matters)?
A Smart Object is a layer that contains image data from raster or vector sources in a protected container. Instead of permanently changing pixels when you transform or filter, Photoshop remembers your settings and keeps the source intact. That means you can resize up and down, rotate, skew, and apply filters with far less risk of degrading the image.
Smart Objects vs. regular layers: the practical difference
With a standard raster layer, scaling down and then scaling back up often leads to soft, blurry results because pixels were discarded. With a Smart Object, Photoshop keeps a reference to the original content (or embedded data), so transformations are effectively reinterpreted rather than permanently applied.
Core workflow #1: Convert to Smart Object before you transform
Any time you’re about to do heavy transforms (free transform, warp, perspective), convert first:
Select the layer(s) → right-click → Convert to Smart Object.
This is especially useful for logos, placed photos, and design elements you may want to reposition across multiple compositions.
Core workflow #2: Replace contents to swap images instantly
Smart Objects shine when you want to keep the same layout but change the image.
Use:
Layer → Smart Objects → Replace Contents
The replaced file inherits the Smart Object’s transformations, masks, and effects—ideal for making variations (for example, multiple product photos in the same frame or different hero images for a landing page).

Core workflow #3: Edit contents once, update everywhere (linked instances)
When you duplicate a Smart Object layer normally, Photoshop creates another instance that references the same embedded content.
If you double-click the Smart Object thumbnail and edit it, every instance updates—perfect for repeating elements like badges, icons, or a branded device screen used across a composition.
When you need independent copies: “New Smart Object via Copy”
Sometimes you want similar elements that start the same but diverge.
Use:
Layer → Smart Objects → New Smart Object via Copy
This creates an independent Smart Object that won’t update when the original changes—useful for A/B variations or multiple images with the same initial styling.
Core workflow #4: Smart Filters for flexible effects
Applying filters to a Smart Object creates Smart Filters—editable effects you can toggle, reorder, and fine-tune later.
This is powerful for effects like blur, sharpening, noise, and stylization because you can revisit settings without starting over.
Use cases that make Smart Objects feel “essential”
1) Template-driven creative
Design a reusable layout once (text, shapes, effects), then replace Smart Object contents to produce a whole set of consistent assets.
2) Compositing with safe transforms
When combining images (for example, placing a subject into a new scene), Smart Objects let you refine size and perspective multiple times without gradually ruining detail.
3) Reusable brand elements
Keep a single Smart Object for a logo, watermark, or badge. Edit once, and every placement updates—saving time and preventing mismatched versions.
Common pitfalls (and how to avoid them)
File size can grow
Embedded Smart Objects increase PSD size. If you’re placing many high-resolution assets, consider organizational discipline (naming, grouping) and remove unused layers. In workflows where appropriate, explore linked Smart Objects to keep documents lighter.
Rasterizing too early breaks flexibility
Rasterizing a Smart Object “commits” it to pixels and throws away Smart Filter editability. Keep Smart Objects live until you’re certain you’re at final output.
Quality still depends on source resolution
Smart Objects preserve what you have—they don’t create detail that wasn’t there. Start with the highest quality source you can, especially for print or large-format outputs.

How to practice Smart Object skills efficiently
A great exercise is building a simple template:
Create a background, add a frame, place an image as a Smart Object, apply a couple of Smart Filters, and then generate 10 variations using Replace Contents.
This trains the exact workflow used in real production tasks.
Free learning paths to go deeper
To expand your skills in Photoshop and image editing, explore curated free courses and structured learning tracks.
Start with the broader catalog in
https://cursa.app/free-online-art-and-design-en-courses
Then narrow into the image editing subcategory:
https://cursa.app/free-courses-art-and-design-en-online
For focused practice, browse:
https://cursa.app/free-online-courses/adobe-photoshop
You can also expand your workflow knowledge with:
https://cursa.app/free-online-courses/adobe-lightroom
https://cursa.app/free-online-courses/gimp
Optional external resources for deeper reference
If you want official documentation and feature notes, Adobe’s help center is a reliable reference point:
https://helpx.adobe.com/photoshop/using/create-smart-objects.html
Takeaway
Smart Objects are less about a single tool and more about a professional mindset: preserve originals, iterate quickly, and build reusable systems. Once you start converting before transforming, using Replace Contents for variations, and stacking Smart Filters, you’ll notice your edits stay cleaner—and your workflow gets dramatically faster.