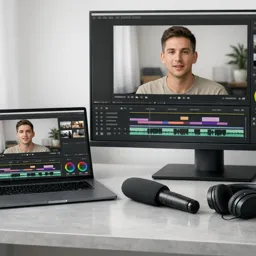
Adobe Premiere is a powerful video editing tool embraced by professionals and enthusiasts alike in the world of Design and Art. While its editing features are renowned, one aspect that truly elevates video projects is color grading. In this article, we will delve into how Premiere’s color grading suite empowers creators to transform raw footage into visually stunning works of art.
What is Color Grading?
Color grading is the process of adjusting and enhancing the color and tone of video footage. It sets the mood, conveys emotion, and can dramatically improve the overall story of your video. Unlike color correction, which balances colors to appear more natural, grading is about creating a unique visual style.
Getting Started in Adobe Premiere
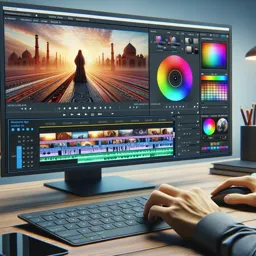
Premiere provides a robust set of color grading tools, most notably through the Lumetri Color panel. To access it, select your clip on the timeline and navigate to Color in the workspace menu. Here, you’ll find controls for:
- Basic Correction: Adjust exposure, contrast, highlights, shadows, and white balance.
- Creative: Apply cinematic LUTs (Look Up Tables), adjust vibrance, and add unique looks.
- Curves: Refine color channels and adjust luma and chroma for precise control.
- Color Wheels & Match: Target shadow, midtone, and highlight adjustments individually.
Practical Tips for Effective Color Grading
- Start with Color Correction: Ensure your footage is balanced before creative grading. Fix exposure, reduce unwanted tints, and normalize skin tones.
- Create a Mood: Decide on the emotional tone of your project. For drama, try cooler tones; for warmth, increase the yellows and reds.
- Use Adjustment Layers: Apply grading globally with adjustment layers above your video tracks. This keeps your timeline organized and allows for quick comparisons.
- Reference Stills: Import still images or screenshots for visual consistency, especially when matching shots filmed in different conditions.
- Save Presets: Store your favorite looks as presets in Lumetri, streamlining future projects.
Finishing Touches and Export
After perfecting your color grade, always preview your footage on multiple displays when possible. This ensures consistency across devices. When satisfied, use Premiere’s export options to finalize your video for web, broadcast, or film.
Conclusion
Color grading in Adobe Premiere transforms simple edits into visually rich stories. By exploring and mastering these tools, you’ll unlock new creative possibilities and give your videos a professional finish.