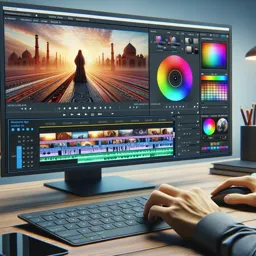
DaVinci Resolve is renowned for its powerful color grading capabilities, making it the go-to software for professional filmmakers and editors. Whether you’re working on a feature film, a commercial, or a YouTube video, learning how to color grade like a pro can dramatically improve the visual quality of your project. Here’s a guide to mastering color grading in DaVinci Resolve.
1. Understanding the Color Page
The Color page is where all the magic happens in DaVinci Resolve. It features a wide array of tools that allow you to adjust the color, contrast, saturation, and exposure of your footage. At the core of the Color page are the Color Wheels, Scopes, and Nodes.
Key Tools in the Color Page:
- Color Wheels: Control the overall look of your footage by adjusting shadows, midtones, and highlights.
- Scopes: Help you analyze the luminance, chroma, and waveform of your video to ensure accuracy.
- Nodes: These are the building blocks of your color grade, allowing you to apply and organize adjustments in a non-linear fashion.
2. Setting Up Your Color Workspace
Before diving into color grading, it’s essential to organize your workspace and prepare your footage. Start by balancing your clips to ensure consistency across the project.
Steps to Set Up Your Color Workspace:
- Ensure that all your clips are properly exposed.
- Use the Color Match tool to match different shots.
- Apply basic Color Temperature and Tint adjustments to balance your footage.
3. Balancing Exposure
Exposure is the foundation of any good color grade. You’ll want to adjust the overall brightness and contrast to make sure your footage is neither too dark nor too bright. The Lift, Gamma, and Gain wheels allow you to tweak the shadows, midtones, and highlights respectively.
How to Balance Exposure:
- Use the Scopes to evaluate the brightness levels.
- Adjust the Lift (shadows), Gamma (midtones), and Gain (highlights) to create a balanced exposure.
- Make sure to avoid clipping in the shadows or highlights by keeping the values within the 0-100 range on the scopes.
4. Adjusting Contrast and Saturation
Once your exposure is balanced, it’s time to adjust the contrast and saturation to give your footage more depth and vibrancy. Increasing the contrast can help create more definition between the highlights and shadows, while boosting the saturation brings out more vibrant colors.
Steps to Adjust Contrast and Saturation:
- Use the Contrast slider to enhance the tonal range of your footage.
- Adjust the Saturation slider to bring out the colors, but be careful not to oversaturate, which can make your footage look unnatural.
5. Color Correcting with the Color Wheels
The Color Wheels are where you’ll make detailed adjustments to the colors in your footage. You can adjust the Shadows, Midtones, and Highlights to correct the color balance of your footage. This is especially useful for fixing issues like color casts or enhancing skin tones.
How to Use the Color Wheels:
- Adjust the Shadow Wheel to correct color in the darkest areas of your footage.
- Use the Midtone Wheel to adjust the overall color balance.
- Apply fine-tuning to the Highlight Wheel to ensure the brightest areas of the image are properly colored.
6. Using Nodes for Advanced Grading
Nodes are a powerful feature in DaVinci Resolve that allow you to apply different adjustments in a structured way. You can create multiple nodes to separate color corrections for exposure, contrast, and specific areas of your footage. This non-destructive workflow ensures you have complete control over each stage of the color grade.
Types of Nodes:
- Serial Nodes: Apply color corrections sequentially.
- Parallel Nodes: Allow you to work on different areas of the footage simultaneously.
- Layer Nodes: Combine different adjustments into one final look.
7. Using LUTs (Look-Up Tables)
LUTs are pre-made color grading presets that can be applied to your footage to achieve a specific look quickly. DaVinci Resolve comes with a wide range of built-in LUTs, and you can also import custom LUTs for more advanced looks.
How to Apply LUTs:
- Go to the LUTs panel in the Color page.
- Browse through the available LUTs and apply one to your footage.
- Adjust the intensity of the LUT by lowering the Opacity of the node.
8. Final Touches: Vignettes and Sharpening
Once you’ve completed the main color grade, you can add finishing touches such as vignettes to draw attention to the subject or sharpening to make the details pop.
Steps to Add Vignettes and Sharpening:
- Use the Power Window tool to create a vignette around your subject.
- Apply a Sharpening filter to enhance the details in your footage.
Conclusion
Color grading in DaVinci Resolve can take your projects to the next level, making them look more professional and visually stunning. By mastering the Color page, using tools like Color Wheels and Nodes, and experimenting with LUTs, you can create beautiful, cinematic color grades that bring your footage to life.


