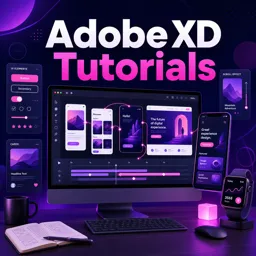
Adobe XD is a powerful tool that allows UI/UX designers to create interactive prototypes that closely mimic real-world app and web experiences. With its intuitive interface and robust features, Adobe XD makes it easy to build interactive elements, transitions, and animations to bring static designs to life. In this step-by-step guide, we’ll walk through the process of creating an interactive prototype in Adobe XD, from setting up your design to adding interactions and sharing your prototype for feedback.
1. Setting Up Your Design for Prototyping
Before diving into interactivity, it’s essential to set up your design properly in Adobe XD. Start by creating a new project or importing an existing design file.
- Create a New Project: Open Adobe XD and click File > New to create a new project. Choose the appropriate artboard size based on your project (e.g., 1920×1080 for desktop, 375×812 for mobile).
- Import Design Assets: If you’re working with assets from another tool like Photoshop or Illustrator, you can import them directly by clicking File > Import. Alternatively, copy and paste your design components directly into XD.
- Organize Your Artboards: Create multiple artboards to represent different screens in your app or website. Label each artboard clearly (e.g., Home, Login, Profile) to keep track of your project structure.
Setting up your design correctly will make it easier to manage interactions and ensure a smooth prototyping process.
2. Switching to Prototype Mode
Once your design is ready, switch to Prototype Mode by selecting the Prototype tab at the top of the screen. This mode allows you to link artboards, define triggers, and create interactions.
- Select the Object for Interaction: Click on any object in your design (e.g., a button, image, or text box) that you want to make interactive.
- Drag the Blue Connector to the Target Artboard: After selecting the object, you’ll see a blue connector appear. Drag it to the artboard you want to navigate to when the object is clicked.
- Choose an Interaction Type: In the Prototype panel, choose the type of interaction you want to apply. Common interactions include Tap, Drag, Hover, and Time.
Prototype Mode is where you define how users will navigate through your prototype, making it an essential part of creating interactive experiences.
3. Adding Transitions and Animations
Transitions and animations help make your prototype feel more polished and engaging. Adobe XD offers several options to animate objects and create smooth transitions between screens.
- Choose a Transition Type: After linking two artboards, select a transition type from the Action menu in the Prototype panel. Options include Dissolve, Slide Left/Right, Push, and Overlay.
- Use Auto-Animate for Complex Effects: Auto-Animate is a powerful feature that animates changes between two artboards, such as moving objects, resizing elements, or changing colors. To use Auto-Animate, ensure that the same elements exist on both artboards and have identical layer names.
- Adjust Duration and Easing: Customize the animation duration and easing options to control the speed and flow of your animations. Options like Ease In, Ease Out, and Snap help create natural movement.
By leveraging these animation techniques, you can bring static screens to life and provide a more dynamic user experience.
4. Using Overlays for Pop-Ups and Menus
Overlays allow you to create interactive pop-ups, modals, and dropdown menus without duplicating artboards. This technique is useful for adding navigation elements or supplementary information to your prototype.
- Select the Trigger Object: Choose the object that will trigger the overlay, such as a menu button or a notification icon.
- Link to a New Artboard: Create a new artboard for the overlay content (e.g., a dropdown menu or modal window) and link it to the trigger object.
- Set the Overlay Option: In the Prototype panel, select Overlay as the transition type. You can customize the position, size, and background color of the overlay.
Overlays are perfect for adding interactive elements that don’t require full-screen transitions, making your prototype feel more responsive and intuitive.
5. Creating Micro-Interactions with Component States
Component States in Adobe XD allow you to define multiple states for a single component (e.g., buttons, switches, cards), enabling micro-interactions like hover effects and toggle animations.
- Create a Component: Select the object you want to animate, right-click, and choose Make Component.
- Add a New State: In the Component panel, click + to add a new state (e.g., Hover, Pressed). Each state can have different properties, such as color changes, size adjustments, or text updates.
- Use Auto-Animate to Link States: Switch to Prototype Mode and link the component’s default state to its new state using Auto-Animate to create smooth transitions between states.
Component States are ideal for designing interactive elements that provide instant feedback to users, enhancing the overall usability of your prototype.
6. Testing and Previewing Your Prototype
Before sharing your prototype, it’s crucial to test and preview the interactions to ensure everything works as expected.
- Use the Preview Window: Click the Play button in the top-right corner to open the preview window. Navigate through your prototype by interacting with buttons, menus, and other interactive elements.
- Check for Animation Smoothness: Ensure that all transitions and animations flow smoothly and that there are no abrupt movements or delays.
- Test Different Devices: Use XD’s device preview options to test your prototype on different screen sizes (e.g., mobile, tablet, desktop) and make adjustments as needed.
Testing your prototype thoroughly will help you identify any issues and refine the user experience before sharing it with stakeholders.
7. Sharing Your Prototype for Feedback
Adobe XD makes it easy to share your prototype with clients, team members, or stakeholders for feedback and collaboration.
- Generate a Shareable Link: Click Share in the top-right corner and select Share for Review. This generates a shareable link that anyone can use to view and comment on your prototype.
- Set Permissions: Customize the link settings to control who can view or edit the prototype. Options include Public, Private, and Invite Only.
- Enable Commenting: Allow viewers to leave comments directly on your prototype by enabling commenting in the link settings. This feature is useful for gathering feedback and making iterative improvements.
By sharing your prototype, you can gather valuable insights and collaborate with others to refine your design.
Conclusion
Creating interactive prototypes in Adobe XD is a powerful way to showcase your design vision and test user flows before moving to development. With its robust set of prototyping tools, including transitions, overlays, and component states, Adobe XD enables designers to build dynamic and realistic experiences that engage users and provide valuable feedback.