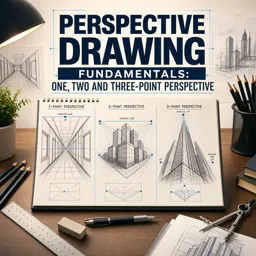
Have you ever drawn a road or a hallway and felt that it looked flat? The problem is usually perspective. Perspective is a set of simple rules that helps a flat sheet of paper look three-dimensional. The easiest place to start is one-point perspective, a technique used for roads, corridors, rooms and city streets.
What is one-point perspective?
In one-point perspective, all the lines that move away from the viewer seem to meet at a single spot on the horizon, called the vanishing point. It works best when you look straight at a scene, with one side of an object facing you directly. Think of standing in the middle of a railway track: the rails look like they come together in the distance.
The key terms
| Term | Meaning |
|---|---|
| Horizon line | A horizontal line at the viewer’s eye level |
| Vanishing point | The point on the horizon where receding lines meet |
| Orthogonals | The diagonal guide lines that run toward the vanishing point |
| Frontal planes | Surfaces facing you directly; their edges stay horizontal and vertical |
What you need
- A sheet of paper
- A pencil and an eraser
- A ruler
Rulers are very helpful at the start, because straight lines make the system easy to see. Later, you can practice freehand.
Step by step: drawing a cube
- Draw the horizon line. Use your ruler to draw a light horizontal line across the page. This is your eye level.
- Mark the vanishing point. Place a small dot on the horizon line, near the center or to one side.
- Draw the front face. Draw a square or rectangle anywhere on the page. It will be the face of the cube that is closest to you. Its sides stay perfectly horizontal and vertical.
- Draw the orthogonals. From each corner of the square, draw a light line toward the vanishing point. You only need the lines for the corners that you can see.
- Decide the depth. Choose how far back the cube extends and draw a vertical and a horizontal line to close the back face. These lines must also be parallel to the edges of the front face.
- Erase the guides. Remove the extra parts of the orthogonals and darken the edges of the cube.
If the cube is above the horizon line, you will see its underside. If it is below, you will see its top. If it crosses the horizon line, you will see neither: this simple fact helps you check whether your drawing makes sense.
Drawing a room or a hallway
A classic exercise is drawing the inside of a room. Begin with a rectangle that represents the back wall. Place the vanishing point inside it, then draw orthogonals from the corners of the rectangle toward the edges of the page. These lines become the floor, ceiling and side walls. After that, add doors, windows and furniture, always using the same vanishing point to guide their edges.
To place objects such as tiles or windows at consistent spacing, draw a diagonal across the back wall. Its intersections with the orthogonals help you find equal intervals as they get closer together in the distance.
How the horizon line changes the picture
The position of the horizon line changes the feeling of a drawing. A low horizon makes buildings look tall and powerful, as if you were standing at street level looking up. A high horizon gives the effect of an aerial view, in which you see more of the ground. A horizon at the middle produces a calm, neutral scene.
Add depth with more than lines
- Size: objects of the same size look smaller as they move away.
- Overlap: placing one object in front of another suggests distance.
- Detail: distant objects have fewer details and softer contrast.
- Shading: a consistent light source helps shapes feel solid.
Where you can see one-point perspective every day
Once you know the idea, you will notice it everywhere: a long corridor in a school, the aisles of a supermarket, a straight road with power poles on both sides, a bookshelf seen from the front. Artists and designers use the same technique in comics, architecture sketches, storyboards and video-game backgrounds. Photographing these scenes and drawing lines over the picture is an excellent way to see how the orthogonals really meet at one point.
Try this quick exercise: take a photo of a hallway, print it or open it on a tablet, and draw lines along the floor and ceiling edges. They should meet at a single spot. Then draw your own version of the same hallway from memory and compare the two.
Common mistakes
- Drawing the vanishing point away from the horizon line, which breaks the system.
- Letting vertical edges lean instead of staying straight up and down.
- Pressing too hard with the pencil, which makes the guide lines hard to erase.
- Using several vanishing points in a drawing that should have only one.
A short practice plan
Spend a few minutes each day on short exercises: five cubes at different positions, a row of boxes along a street, then a simple room. Next, practice in a sketchbook while looking at real hallways and roads. Spotting the horizon line in real life trains your eye faster than any book.
Conclusion
One-point perspective is a small set of rules with a big payoff: after a few exercises, your drawings will gain depth and credibility. If you want to keep improving, the free drawing, painting and design courses at Cursa offer guided lessons to help you practice step by step.