Introduction to Studio Lighting
Studio lighting is an essential element in photography, giving you control over how your subject is illuminated. Whether you are a beginner or a seasoned photographer, mastering studio lighting enhances creativity and helps achieve professional-quality images.
The Basics of Studio Lighting Setup
Creating a proper studio lighting setup involves several key components:
- Key Light: The main and brightest light source, shaping the subject’s features.
- Fill Light: Softens shadows created by the key light for balanced exposure.
- Back Light (Rim Light): Positioned behind the subject to separate them from the background and add depth.
- Background Light: Illuminates the background to control brightness and tone.
Types of Studio Lighting Equipment
Different tools help customize lighting for your shoot:
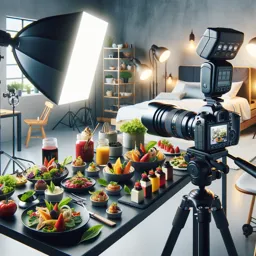
- Softboxes and Umbrellas: Diffuse light for soft, even illumination.
- Reflectors: Bounce light back to the subject, reducing shadows or adding highlights.
- Light Modifiers: Gels, grids, and snoots adjust the color, direction, or focus of light.
Mastering Light Ratios and Temperature
Balancing light intensity and color temperature is crucial. Use ratios (like 2:1 or 3:1 between key and fill lights) to adjust contrast and mood. Adjusting color temperature (in Kelvins) helps create either a cool or warm atmosphere for the shoot.
Tips for Creative Studio Lighting
- Experiment with different light placements to explore new moods and dimensions.
- Use colored gels to add artistic flair or evoke emotions.
- Shoot with a single light source for dramatic shadows.
- Adapt setups continuously based on the subject, background, and desired effect.
Conclusion
Studio lighting unlocks endless creative possibilities for photographers. Understanding fundamental principles and experimenting with setups allows you to craft stunning, professional images and elevate your visual storytelling.


