A stunning set of nails starts long before color, art, acrylic, or gel. The real “secret” behind smooth application, crisp edges, and long wear is professional nail prep paired with consistent sanitation. Whether you’re practicing on yourself or training for clients, mastering this foundation instantly upgrades every service you perform.
In online training, prep and hygiene often separate beginners from confident technicians. Prep reduces lifting and chipping, sanitation reduces risk. Together, they build trust—because beautiful results mean little if the service isn’t safe. If you’re exploring structured learning paths, start from the broader field of esthetics and then specialize:
https://cursa.app/free-online-aesthetics-courses → https://cursa.app/free-courses-aesthetics-online
Why prep is the foundation of retention (and how it prevents common problems)
When polish wrinkles, gel peels, or enhancements lift, the cause is often invisible: oils on the nail plate, cuticle residue on the proximal nail fold area, or product applied over rough/uneven surfaces. Proper prep focuses on creating a clean, uniform, product-ready nail surface—without over-filing or thinning the natural nail.
Key retention concept: product sticks best to a surface that is clean, lightly etched, and free of non-living tissue. Many learners mistakenly focus on “roughing up” the nail, when the real goal is controlled refinement. If you’re building fundamentals, pair prep practice with the service you’re learning:
https://cursa.app/free-online-courses/manicure
https://cursa.app/free-online-courses/pedicure
Sanitation vs. disinfection vs. sterilization (in plain language)
These terms are often used interchangeably online, but they mean different things:
Sanitation lowers the number of germs on surfaces (think: cleaning and tidying in a hygienic way).
Disinfection kills many microorganisms on non-porous surfaces using an EPA-registered (or locally approved) disinfectant, following the manufacturer’s contact time.
Sterilization destroys all forms of microbial life (commonly used for critical tools in medical contexts; nail services more often rely on cleaning + proper disinfection, depending on local rules).
For nail services, the practical takeaway is simple: clean first, then disinfect correctly. Disinfectant doesn’t work well on dirty tools—debris blocks contact.
A pro prep sequence you can practice step-by-step
Use this sequence as a repeatable checklist for hands (and adapt it for feet):
1) Initial assessment: check for visible contraindications (irritation, open cuts, infection-like changes). If something looks abnormal, pause and refer to appropriate medical advice rather than proceeding.
2) Cleanse: wash hands/feet and dry thoroughly.
3) Shape: refine free edge shape before product (it reduces filing over fresh color later).
4) Cuticle softening (optional): apply cuticle remover as directed—don’t soak longer than needed.
5) Cuticle work: gently push back and remove non-living tissue. Focus on precision, not force.
6) Surface refinement: lightly buff to remove shine only when required by the system you’re using.
7) Dust removal: use a clean, disinfected brush or lint-free wipe.
8) Dehydration/priming: apply products compatible with your system (especially important for enhancements).
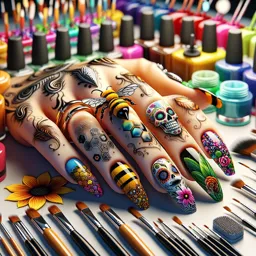
This same foundation supports every direction you may study next—whether you’re going into
https://cursa.app/free-online-courses/nail-art
https://cursa.app/free-online-courses/nail-extension
https://cursa.app/free-online-courses/acrylic-nail

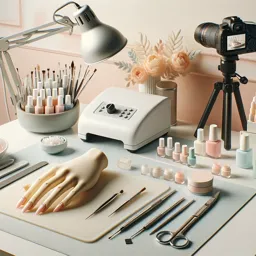
Tool hygiene workflow: how to set up your station like a technician
A clean station isn’t just visually appealing—it prevents cross-contamination and keeps you efficient. Build a workflow that separates “clean,” “used,” and “disinfected/ready” tools.
Try this layout:
• Clean zone: sealed/disinfected tools, unused files, fresh towels.
• Service zone: only what you need for the current client/set.
• Used zone: a tray or container for tools that must be cleaned and disinfected.
Single-use items (like many buffers, porous files, wooden sticks, toe separators) should be treated as disposable unless your local regulations and product types explicitly allow safe reprocessing. When in doubt, choose single-use for porous items.
Pedicure-specific hygiene habits that elevate your results
Pedicures add variables: footwear moisture, larger surface area, and higher chance of micro-cuts from shaving or friction. Strong habits protect both comfort and finish quality.
Upgrade points for pedicures:
• Avoid aggressive callus cutting—aim for smoothing and gradual improvement.
• Keep foot soaking times reasonable and follow product directions (over-soaking can swell the nail plate and affect polish wear).
• Disinfect foot baths and basins exactly as directed by the manufacturer and local board guidelines.
Common prep mistakes (and what to do instead)
Mistake: filing the nail plate too aggressively.
Do instead: use minimal pressure; your goal is to remove shine/residue, not thin the nail.
Mistake: leaving invisible cuticle on the nail plate (causes lifting around the base).
Do instead: focus on careful cuticle detailing and thorough dust removal.
Mistake: touching the nail after prep (adds oil back).
Do instead: hold fingers by the sidewalls and proceed to product promptly.
Mistake: skipping disinfectant contact time.
Do instead: set a timer—disinfectants need the full dwell time listed on the label.

Build your training plan around foundation + specialization
If your goal is certification-level confidence, learn in layers: first prep and hygiene, then service flow, then advanced systems. A strong sequence is:
- https://cursa.app/free-online-courses/manicure
- https://cursa.app/free-online-courses/pedicure
- Specialize into https://cursa.app/free-online-courses/nail-art or enhancement systems like https://cursa.app/free-online-courses/acrylic-nail and https://cursa.app/free-online-courses/nail-extension
Optional: keep a simple sanitation checklist for every practice session
Consistency is what makes hygiene professional. Use a quick checklist:
• Wash hands before and after
• Disinfect the work surface
• Use a clean towel and fresh disposables
• Clean tools, then disinfect with proper contact time
• Store disinfected tools in a clean container
• Dispose of single-use items immediately
When your prep and sanitation become automatic, everything else gets easier: color looks smoother, nail art lines get cleaner, enhancements last longer, and clients feel safe. That’s the kind of skill that translates across every manicure, pedicure, and advanced nail service you’ll ever learn.
External resource for deeper guidance on disinfectants and contact times:
https://www.epa.gov/pesticide-registration/selected-epa-registered-disinfectants