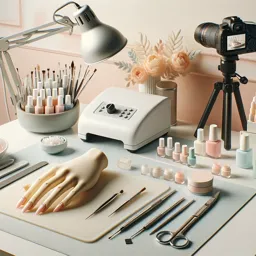
Great nails start long before polish touches the plate. The real differentiator between “pretty for a day” and consistently high-quality results is a strong consultation: gathering the right information, spotting risk factors early, and matching the service to the client’s lifestyle and nail condition. This article breaks down how to run a professional nail consultation that supports safe practice, better retention, and happier clients—whether you’re a beginner building confidence or a pro tightening your systems.
Why consultation is a technical skill (not small talk)
A consultation is a structured assessment. It helps you decide: what services are appropriate, what products to avoid, what prep level is needed, and what aftercare to emphasize. It also protects your work—lifting, chipping, and premature wear often trace back to missed details like frequent sanitizer use, glove requirements at work, medication changes, or a client picking habit.
Step 1: Use a simple intake form that actually gets used
A one-page form is enough if it captures decision-making information. Include:
• Contact details and emergency contact (for professional recordkeeping)
• Allergies/sensitivities (especially acrylates, fragrances, latex)
• Medical considerations (diabetes, poor circulation, skin conditions, immune suppression)
• Current medications that may affect skin/nails (e.g., retinoids, chemotherapy—client can answer generally without details)
• Nail history (recent removals, damage, biting, previous reactions)
• Lifestyle factors (manual work, keyboard-heavy job, sports, cleaning/chemicals, glove use)
• Service goals (length, shape, natural look vs statement, maintenance frequency)
Keep it clear that you’re not diagnosing—your goal is safe service selection and appropriate referral when needed.
Step 2: Run a quick visual and tactile assessment
Before you choose a service, look and feel—gloves on when appropriate and always with hygiene in mind. Check:
• Nail plate: peeling, ridges, surface damage, discoloration, thinning
• Free edge: splits, delamination, stress points
• Cuticle area: inflammation, hangnails, dryness, signs of picking or cutting trauma
• Surrounding skin: dermatitis, fissures, abrasions
• For feet: callus patterns, pressure points, cracked heels, and any areas that should not be aggressively reduced
If you see signs of infection or a condition outside your scope, pause the service and recommend medical guidance. Clear boundaries build trust.
Step 3: Ask the “wear and tear” questions that predict retention
These questions are more useful than “What color do you want?” early on:
• How often do your nails break, and where?
• Do you type all day, lift weights, climb, or do hands-on work?
• Do you use cuticle oil regularly (or never)?
• Do you use hand sanitizer frequently (hospital, teaching, travel)?
• Do you pick at product when it lifts?
• For pedicures: are you in closed shoes most of the time, do you run, and do you get ingrowns or calluses?
Your goal is to map the client’s habits to realistic length, shape, and maintenance timing.

Step 4: Match the service to the client (service mapping)
Service mapping is the decision framework that turns consultation data into a plan. Examples:
• Short, durable, low-maintenance: structured manicure approach, conservative length, rounded or squoval shapes, emphasis on prep and aftercare.
• Client wants length but has weak nails: consider a gradual plan—short enhancements first, then extend as the nail improves and the client learns aftercare. Explore options within nail extension training to understand which systems best fit different nail types.
https://cursa.app/free-online-courses/nail-extension
• Frequent lifting history: focus on prep accuracy, avoid over-oiling before service, refine product compatibility, and set expectations on fill timing.
• Feet with heavy callus buildup: prioritize safe reduction, hydration plan, and shoe/pressure education, supported by deeper study in pedicure techniques.
https://cursa.app/free-online-courses/pedicure
This is where education pays off: the broader your training across nails, manicure and pedicure courses, the more confidently you can recommend a safe, flattering option.
https://cursa.app/free-courses-aesthetics-online
Step 5: Hygiene protocol—explain it briefly, then do it consistently
Clients notice professionalism in your setup. A consultation is the perfect time to reinforce standards without overexplaining. Key pillars:
• Hand hygiene for both technician and client
• Clean/disinfected surfaces between clients
• Proper tool cleaning and disinfection (and single-use items disposed responsibly)
• Product decanting or no double-dipping where applicable
• Safe handling of files and buffers (single-use or properly sanitized according to material)
If you’re building your foundation, explore broader best practices through the Esthetics category to connect hygiene with overall client safety and comfort.
https://cursa.app/free-online-aesthetics-courses
Step 6: Set expectations with a maintenance and aftercare “contract”
Not a legal contract—just clear guidance that prevents misunderstandings. Cover:
• Expected wear time and what “normal” looks like
• Maintenance schedule (fills, rebalancing, or refresh appointments)
• Home care basics: cuticle oil routine, gentle filing rules, glove use for cleaning, avoiding picking
• What requires a quick fix visit (lifting, cracks, pain, irritation)
When clients know the plan, they follow it—and your results improve.
Step 7: Document like a pro (it makes you faster over time)
After each appointment, note what matters:
• Products used (brand/system, shade, base/top, primer/bond)
• Nail shape/length and any changes made
• Issues observed (weak corners, peeling, dryness, callus hot spots)
• Client feedback and wear results at follow-up
Good notes turn repeat visits into a streamlined experience and help you troubleshoot systematically rather than guessing.
Consultation scripts you can steal (and adapt)
Try these quick, professional lines:
• “Tell me what you need your nails to survive week to week—work, hobbies, chores.”
• “Have you ever had itching, heat, or swelling with nail products?”
• “If you could change one thing about your nails, what would it be: strength, length, shape, or growth?”
• “For your pedicure, are you dealing with calluses, ingrowns, or just maintenance?”
Pairing confident communication with technical training in manicure, pedicure, and enhancement systems like acrylic nail helps you recommend services that fit the client rather than forcing a one-size approach.
https://cursa.app/free-online-courses/manicure
https://cursa.app/free-online-courses/pedicure
https://cursa.app/free-online-courses/acrylic-nail

Build your consultation workflow like a checklist
A repeatable flow reduces mistakes and makes you look (and feel) confident:
- Intake form + allergy check
- Visual/tactile assessment
- Lifestyle questions
- Service mapping recommendation
- Hygiene confirmation + setup
- Aftercare and maintenance plan
Once this is second nature, you can spend more energy on artistry, precision, and speed—without sacrificing safety.
Next steps: train across the full nail service spectrum
Consultation mastery grows as your technical range grows. Expanding your skills across prep, shaping, product chemistry, and foot care makes your recommendations more accurate and your results more consistent.
Browse the full Nails, manicure and pedicure learning path:
https://cursa.app/free-courses-aesthetics-online
Then specialize into focused topics like nail extension:
https://cursa.app/free-online-courses/nail-extension
Or creative finishes in nail art:
https://cursa.app/free-online-courses/nail-art