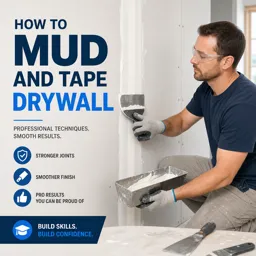
Holes and cracks in drywall are common issues that homeowners encounter, but they are relatively easy to fix with the right tools and techniques. Whether it’s a small crack or a larger hole, you can restore your walls to their original smooth finish with this step-by-step DIY guide.
1. Assess the Damage
Before starting the repair, assess the size and type of damage to determine the appropriate method. Small cracks and nail holes require different approaches than larger holes caused by impacts.
Types of Damage:
- Small Cracks or Nail Holes: These are easy to fix with basic patching materials.
- Medium Holes (1-6 inches): Often caused by accidents, these require a patch kit or a cutout repair.
- Large Holes (greater than 6 inches): These require a more involved process, often involving drywall replacement.
2. Gather the Necessary Tools and Materials
For a successful drywall repair, you’ll need some basic tools and materials. Here’s a list to get you started:
Tools and Materials:
- Spackling compound or joint compound
- Drywall patches (for medium to large holes)
- Drywall knife or putty knife
- Sanding block or fine-grit sandpaper
- Painter’s tape (for cracks)
- Utility knife
- Paint and primer (to finish the job)
3. Repairing Small Cracks and Nail Holes
For small cracks and nail holes, the process is straightforward:
Steps to Repair:
- Clean the Area: Use a damp cloth to remove dust and debris from the damaged area.
- Apply Spackling Compound: Use a putty knife to apply spackling or joint compound over the crack or hole. Smooth the surface as much as possible.
- Let it Dry: Allow the compound to dry completely (check manufacturer’s instructions for drying times).
- Sand Smooth: Once the compound is dry, sand it smooth with a sanding block or fine-grit sandpaper.
- Prime and Paint: Apply a coat of primer and paint to blend the repair with the surrounding wall.
4. Repairing Medium Holes
For medium-sized holes, use a drywall patch kit. These kits contain self-adhesive mesh patches that make the repair process quick and easy.
Steps to Repair:
- Prepare the Hole: Use a utility knife to clean the edges of the hole.
- Apply the Patch: Place the adhesive patch over the hole.
- Apply Joint Compound: Use a drywall knife to cover the patch with joint compound, extending it beyond the edges of the patch to blend it into the surrounding wall.
- Let it Dry and Sand: Let the compound dry and sand it smooth.
- Prime and Paint: Finish by priming and painting the area.
5. Repairing Large Holes
For larger holes, you’ll need to replace the damaged section of drywall. This process is more involved but still manageable for DIYers.
Steps to Repair:
- Cut Out the Damaged Area: Use a utility knife or drywall saw to cut out a square around the damaged area.
- Install a New Piece of Drywall: Cut a new piece of drywall to fit the hole and screw it into place using drywall screws.
- Tape and Mud the Joints: Apply drywall tape over the seams and cover with joint compound. Use a drywall knife to smooth the compound.
- Let it Dry and Sand: Allow the compound to dry and then sand it smooth.
- Prime and Paint: Finish by priming and painting the repaired section.
Conclusion
Repairing holes and cracks in drywall is a straightforward process that can be accomplished with basic tools and materials. Whether it’s a small crack or a large hole, following these steps will help you achieve a smooth, professional-looking finish.