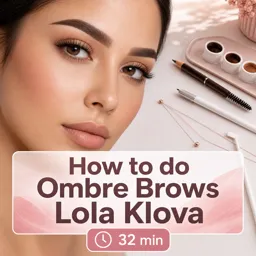


Walk into any beauty aisle and you will find a wall of brow products: pencils, powders, gels, pomades, pens and more. They all promise fuller, neater eyebrows, but each one behaves differently. Choosing the right product depends on your brow hair, your skill level and the finish you want. This guide explains how the main types work, how to match a shade and how to apply them for a natural result.
Start with your brow goals
Before picking a product, decide what you want to achieve. Do you need to fill sparse patches, define the shape, tame unruly hairs or simply add a little color? Someone with full brows that only need grooming has different needs from someone with gaps or very light hair. Having a clear goal keeps you from buying products you will never use.
The main product types compared
| Product | Finish | Best for | Things to watch |
|---|---|---|---|
| Pencil | Defined, precise strokes | Filling gaps and drawing hair-like lines | Can look harsh if pressed too hard |
| Powder | Soft, natural, diffused | Adding gentle fullness to oily or fine brows | Needs a brush and may fade sooner |
| Gel (tinted or clear) | Light color and hold | Setting hairs and adding subtle tint | Does not fill big gaps on its own |
| Pomade | Creamy, high pigment | Strong definition and longer wear | Needs a precise brush and can look heavy |
| Pen or micro-stroke liner | Fine hair-like strokes | Mimicking individual hairs | Needs a steady hand, can look unnatural if overdone |
Pencils: control and detail
Pencils are the classic option because they are easy to find and easy to control. Choose a firm, slightly dry formula if you want light, feathered strokes, and a creamier one for more intense color. A thin tip lets you draw short strokes in the direction of hair growth. Avoid drawing a solid line along the bottom of the brow, since that is one of the most common causes of a harsh, artificial look.
Powders: soft and natural
Brow powders are applied with a small angled brush, which builds color gradually. This makes them forgiving for beginners, because you can start lightly and add more if needed. Powder tends to look softer than a pencil and works well on those who want a subtle enhancement. People with very oily skin sometimes find powder lasts better than creamy products, although results vary by formula.
Gels: shape, set and tint
A brow gel is applied with a small spoolie-style wand and coats the hairs to hold them in place. Clear versions give you a groomed look without color. Tinted versions add a hint of shade and a little density. Gels are often the last step of a routine, brushed upward and then slightly outward to lift the hairs and set the shape. They are a good choice if you like a natural brushed-up style.
Pomades: pigment and staying power
Pomades come in small pots and are applied with a thin angled brush. They provide rich pigment and a smooth, defined finish, which can be useful for sparse brows or for those who want a more polished look. Because they are concentrated, use only a small amount. Wipe excess product from the brush before applying, and blend the front of the brow lightly so it does not look blocky.
How to choose the right shade
Color matching is where many people go wrong. A few guidelines help:
- Stay close to your hair color: dark brows can use a shade similar to their natural color, while those with lighter hair often look better with a slightly deeper tone than their hair.
- Avoid pure black unless it is your natural color: it can look severe against skin.
- Consider undertones: warm brown shades suit warm hair colors, while cooler taupe or ash tones can suit cooler hair colors.
- Test in natural light: store lighting can distort colors.
- Match the product to the brow, not the head hair: hair that has been dyed may not match the brow color you need.
A simple application routine
- Brush the hairs upward with a clean spoolie to see the natural shape and any gaps.
- Map the structure: the brow should begin roughly above the inner edge of the nostril, reach its highest point above the outer edge of the iris and end along a line from the nostril past the outer corner of the eye. Use this as a guide, not a strict rule.
- Fill the gaps lightly with short strokes in the direction of hair growth.
- Keep the front softer: use less product at the start and concentrate color in the middle and tail.
- Blend with a spoolie to soften any lines.
- Set with gel if you want extra hold, and clean up the edges with a small amount of concealer if needed.
Hygiene and skin sensitivity
Keep brushes and spoolies clean, and avoid sharing products. Sharpen pencils regularly, and replace products that dry out, change smell or irritate the skin. People with sensitive skin or known allergies should read ingredient lists and consider testing a small area first. If redness, itching or swelling appears, stop using the product.
Mistakes to avoid
- Drawing a sharp, heavy line instead of building hair-like strokes.
- Using too dark a shade or starting too thick at the inner corner.
- Applying product onto brows that are damp or oily without prepping the skin.
- Ignoring the natural shape and trying to create a completely different arch.
- Using too many layers, which can look cakey.
Conclusion
There is no single best brow product. Pencils give detail, powders give softness, gels give hold and pomades give strength, and many people combine two or three for a polished finish. Start with a shade close to your natural color, build the look gradually and respect your natural shape. If you are curious about the techniques behind professional brows, from mapping to shaping and design, take a look at the eyebrow design and aesthetics courses available on Cursa.