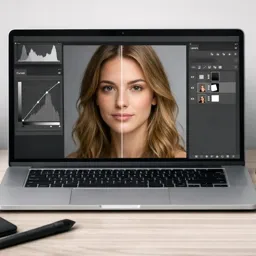
Layers and masks are the backbone of Adobe Photoshop, allowing designers and photo editors to create complex compositions with ease. Understanding how to use layers and masks effectively can take your Photoshop skills to a professional level. In this guide, we’ll explore the fundamentals of layers and masks, along with practical tips for mastering these powerful tools.
1. Understanding Layers: The Building Blocks of Photoshop
Layers in Photoshop work like transparent sheets stacked on top of each other, each containing different elements of your design. This non-destructive editing method allows you to work on different parts of your image without affecting others.
- Layer Types: Photoshop supports multiple layer types, including Image Layers, Adjustment Layers, Shape Layers, and Text Layers. Each type serves a unique purpose in building your composition.
- Tip: Always name your layers. This simple habit helps keep your projects organized, especially in complex compositions.
2. Creating and Managing Layers
To create a new layer, go to Layer > New > Layer, or use the shortcut Shift + Ctrl + N (Windows) or Shift + Command + N (Mac). You can also duplicate layers by dragging them to the New Layer icon at the bottom of the Layers Panel.
- Tip: Use the Group Layers feature to organize similar layers into folders (Ctrl + G) for better management.
3. Adjustment Layers for Non-Destructive Editing
Adjustment Layers allow you to apply changes like brightness, contrast, and color balance without altering the original image. You can add an Adjustment Layer by clicking the Adjustments button in the Layers Panel.
- Common Adjustment Layers:
- Brightness/Contrast: Adjusts the light and dark areas of an image.
- Hue/Saturation: Changes the overall color tone.
- Levels: Adjusts shadows, midtones, and highlights.
- Tip: Use Adjustment Layers with masks (explained later) to apply changes only to specific parts of an image.
4. Layer Styles for Enhanced Visuals
Layer Styles, such as Drop Shadow, Bevel and Emboss, and Stroke, add special effects to layers. Access Layer Styles by double-clicking on a layer or selecting Layer > Layer Style.
- Tip: Experiment with Blending Modes in the Layer Styles panel to combine multiple effects creatively.
5. Working with Layer Masks
A Layer Mask allows you to control the visibility of a layer by painting black or white onto the mask. Black conceals parts of the layer, while white reveals them.
- How to Add a Mask: Select a layer and click the Add Layer Mask button at the bottom of the Layers Panel.
- Tip: Use a soft brush with low opacity for gradual blending, creating smooth transitions between visible and hidden areas.
6. Clipping Masks for Targeted Adjustments
Clipping Masks are used to apply an effect to a single layer without affecting others. They’re perfect for adding highlights, shadows, or textures to specific parts of an image.
- How to Create a Clipping Mask: Place the adjustment layer above the target layer, right-click on it, and choose Create Clipping Mask.
- Tip: Use Clipping Masks to enhance details like eyes, lips, or product textures in portraits and product photography.
7. Combining Layer Masks and Adjustment Layers
You can use Layer Masks with Adjustment Layers to create selective edits. For example, if you want to brighten only a portion of an image, add a Brightness/Contrast Adjustment Layer, then paint on the mask to reveal or hide the effect as needed.
- Tip: Use Gradient Masks to create smooth transitions between different adjustments.
8. Smart Objects for Flexible Editing
Converting a layer to a Smart Object allows for non-destructive transformations and effects. You can resize, skew, or apply filters to Smart Objects without losing quality.
- How to Create a Smart Object: Right-click on a layer and select Convert to Smart Object.
- Tip: Use Smart Objects when working with high-resolution images or applying multiple filters that need fine-tuning.
9. Blend If for Precise Blending
The Blend If feature, found in the Blending Options panel, allows you to blend layers based on the brightness of the underlying layers.
- How to Use It: Double-click on a layer to open the Blending Options and use the sliders under Blend If to control which parts of the layer are visible.
- Tip: Use Alt/Option to split the sliders for smoother blending transitions.
10. Shortcut Mastery for Faster Layer Management
Mastering shortcuts can dramatically speed up your workflow. Here are a few essential layer shortcuts:
- Ctrl + J (Windows) / Command + J (Mac): Duplicate a layer.
- Ctrl + [ or ]: Move a layer up or down.
- Alt + Click on Layer Mask: View the mask independently.
Conclusion
Mastering layers and masks in Photoshop is crucial for creating complex and polished designs. By understanding the fundamentals and exploring advanced techniques like Clipping Masks, Adjustment Layers, and Smart Objects, you can unlock the full potential of Photoshop for both creative and professional projects.


