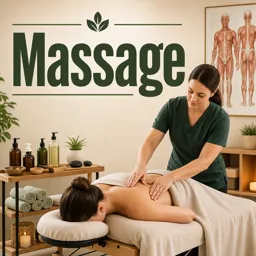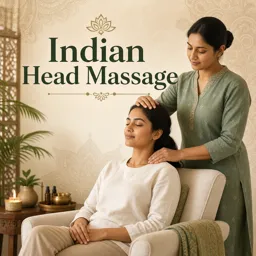


Whether you are curious about massage as a career or simply want to understand what a therapist is doing during a session, it helps to know the basic strokes. Most Western massage styles are built from a small set of classic movements, many with French names that have stayed in use for generations. In this guide, you will learn the four core strokes, what they feel like and how therapists combine them into a smooth sequence.
Why strokes matter
Each stroke has a purpose. Some warm up the tissues, others work deeper into muscle, and others stimulate or finish the session. A skilled therapist chooses the stroke, the pressure and the speed based on the person’s needs, comfort and goals. The same movement can feel very different when performed lightly or firmly, slowly or quickly.
Before any technique, a professional also checks for situations where massage may not be appropriate, asks about health conditions and adjusts pressure to the client’s feedback. Communication is part of the technique.
1. Effleurage: long, gliding strokes
Effleurage (from the French word for "to skim") uses long, smooth, gliding strokes with the palms, fingers or forearms. It is usually the first and last stroke in a sequence. Therapists use it to spread oil or lotion, to warm the tissues, to help the client relax and to transition between other techniques.
- Feel: flowing, soothing and continuous.
- Pressure: light to moderate, depending on the goal.
- Typical use: opening and closing a session, moving between areas.
2. Petrissage: kneading the muscle
Petrissage involves lifting, squeezing, rolling and kneading the soft tissue, much like kneading dough. The therapist grasps the muscle with the hands or fingers and works it rhythmically. This stroke reaches deeper than effleurage and is commonly used on larger muscle groups such as the shoulders, thighs and calves.
- Feel: firm, rhythmic squeezing and lifting.
- Pressure: moderate, adjustable.
- Typical use: working through muscle areas after the tissues are warmed.
3. Friction: focused, small movements
Friction uses the thumbs, fingertips or the heel of the hand to make small, concentrated movements on a specific spot. The strokes may be circular, or move across or along the direction of the muscle fibers. Because it is a focused technique, it requires careful attention to the client’s comfort and feedback.
- Feel: targeted and more intense in a small area.
- Pressure: light to firm; should never cause sharp pain.
- Typical use: localized tension areas.
4. Tapotement: rhythmic tapping
Tapotement is a percussive technique made of quick, rhythmic taps using the edges of the hands, cupped palms or fingertips. You might hear it described as "hacking", "cupping" or "tapping", depending on the hand position. It tends to feel stimulating and is generally used briefly and with care, avoiding bony or sensitive areas.
- Feel: brisk, light and energizing.
- Pressure: light to moderate; the hands bounce off the tissue.
- Typical use: short bursts for stimulation, mostly on fleshy areas.
Quick comparison
| Stroke | Movement | Main purpose |
|---|---|---|
| Effleurage | Long, gliding | Warm up, relax, connect movements |
| Petrissage | Kneading, lifting | Work muscle groups |
| Friction | Small, focused circles | Target specific tension spots |
| Tapotement | Rhythmic tapping | Stimulate briefly |
How a typical sequence flows
There is no single right order, but many sessions follow a logical pattern for each body area:
- Begin with effleurage to apply oil and warm the area.
- Move to petrissage to work the larger muscles.
- Use friction on specific points that need extra attention.
- Add tapotement briefly if stimulation is appropriate.
- Finish with effleurage again to calm the area and connect it to the next one.
Choosing the right stroke for the moment
Beginners often wonder how to decide which stroke to use. A helpful rule is to follow the client’s response. If the muscles feel tight and guarded, start with slower effleurage to build trust and warmth before moving deeper. If an area feels warm and pliable, petrissage or focused friction may be welcome. If the client seems tired or sluggish and the setting is appropriate, a brief round of tapotement can add some energy. The goal is not to use every technique in every session, but to select the ones that fit the person on the table.
Pressure, pace and body mechanics
Good technique is not about pushing as hard as possible. Therapists learn to use their body weight rather than just their hands, keep their wrists and shoulders aligned and move from the legs and core. This protects the practitioner from strain and delivers more consistent pressure to the client. Pace matters as well: slower movements tend to feel more calming, while faster ones are more stimulating.
Safety and good practice
- Ask about the client’s health history, injuries and areas to avoid.
- Check in about pressure throughout the session.
- Avoid working directly on bones, joints or any area that is painful or irritated.
- Keep the client properly draped and comfortable.
- Refer the client to a healthcare professional when something falls outside your scope.
Conclusion
Effleurage, petrissage, friction and tapotement form the foundation of many massage routines. Once you understand what each stroke does, it becomes easier to follow a session or to start practicing safely under guidance. If you would like to study massage therapy in a structured way, take a look at the massage and wellness courses available on Cursa as a natural next step.