What “User Activity Artifacts” Mean in Windows
Windows user activity artifacts are traces left by the operating system and applications that describe what a person did on a device: which accounts logged in, which programs were launched, which files were opened, which websites were visited, which USB devices were attached, and when these events occurred. In digital forensics, these artifacts are used for two closely related goals: attribution (linking actions to a specific user account, device, or session) and timeline building (ordering events to understand sequence, causality, and scope).
Unlike a single log entry that might be missing or tampered with, user activity is usually recorded redundantly across multiple locations: event logs, registry keys, shortcut files, Jump Lists, prefetch files, browser databases, and application telemetry. Your job is to correlate them. A strong finding typically comes from at least two independent sources that agree on the “who, what, when, where” of an action.
Attribution: Turning “Something Happened” into “This User Did It”
Attribution on Windows is rarely about proving a human identity; it is about tying activity to an account, a logon session, and a machine. Start by identifying the relevant user profiles on the system (for example, C:\Users\Alice, C:\Users\Bob) and the corresponding Security Identifiers (SIDs). Many artifacts store SIDs rather than usernames, and usernames can be renamed. Mapping SIDs to profile paths and account names early prevents misattribution.
Also distinguish between local accounts, domain accounts, and service accounts. A scheduled task running under SYSTEM or a service account can create artifacts that look like “user activity” but are not interactive. When possible, use logon type and session data (interactive vs remote vs service) to decide whether an action likely involved a person at the keyboard.
Key attribution questions to answer
- Which user account (SID) performed the action?
- Was the action interactive (console) or remote (RDP), or automated (service/task)?
- Did the action occur in the user’s profile context (HKCU, AppData) or system context (HKLM, ProgramData)?
- Do multiple artifacts corroborate the same action and time window?
Timeline Building: A Practical Correlation Mindset
A Windows timeline is a structured list of events with timestamps and context. The most common mistake is to treat every timestamp as equally reliable. Different artifacts record different “time meanings”: file creation time, last write time, last access time (often disabled), program execution time, logon time, or “last time this item was displayed.” Some are updated only under specific conditions. A good timeline notes the artifact type and what the timestamp represents.
- Listen to the audio with the screen off.
- Earn a certificate upon completion.
- Over 5000 courses for you to explore!

Download the app
Another common mistake is ignoring time normalization. Windows artifacts may store time as FILETIME (UTC-based), Unix epoch, or local time. Event logs are typically stored with UTC context but displayed in local time depending on the viewer. Always record the system time zone configuration and any evidence of time changes (for example, time service events). When you present a timeline, pick a standard (often UTC) and convert consistently.
Practical workflow for building a defensible timeline
- Pick a time standard (UTC recommended) and keep it consistent.
- Start with “anchor events” that are hard to dispute: logon/logoff, RDP connections, device insertions, and program executions.
- Add “supporting events” that enrich context: file opens, recent items, browser history, Jump Lists.
- Corroborate key claims with at least two artifact families (for example, Prefetch + Event Log, or LNK + Jump List).
- Document gaps and ambiguity rather than forcing certainty.
Windows Event Logs for User Activity
Event logs are often the backbone of attribution because they can include account names, SIDs, logon types, source IPs, and process details. The most relevant logs for user activity are typically Security, System, and Microsoft-Windows-* operational logs. Availability depends on audit policy and Windows version, but you should always check what exists before assuming it is missing.
Logon, logoff, and session artifacts (Security log)
Interactive and remote logons can be reconstructed using Security events when auditing is enabled. Focus on events that indicate successful logons, logoffs, and special privileges. Pay attention to logon type values (for example, interactive console vs remote interactive). If you see a successful logon for a user followed by program execution artifacts in that same window, attribution becomes stronger.
Step-by-step: correlate a suspected activity window with logon sessions. First, identify the time range of interest. Second, filter Security events for successful logons for the user or SID. Third, note the logon type and source (workstation name, IP if present). Fourth, look for logoff or session disconnect events to bound the session. Finally, align program execution artifacts (Prefetch, Jump Lists) within that bounded session.
RDP and remote access indicators
Remote Desktop activity may appear in multiple places: Security log (logon type indicating remote interactive), TerminalServices operational logs, and sometimes firewall logs. When attributing actions to a user, it matters whether the user was local or remote, because remote sessions can explain why a user appears active while physically absent.
Step-by-step: verify RDP session context. Check for remote interactive logons in Security. Then review TerminalServices logs for session creation, reconnection, and disconnection times. If available, correlate with network telemetry (source IP) recorded in the logon event. Use these times as anchors for subsequent file and program activity.
Process creation auditing (when enabled)
If process creation auditing is enabled, Security events can show which executable ran, command line arguments, parent process, and the user context. This is extremely valuable for attribution because it can distinguish a user launching powershell.exe interactively from a scheduled task running it silently. If it is not enabled, you must rely more heavily on Prefetch, Amcache, and other execution artifacts.
Registry Artifacts that Reflect User Behavior
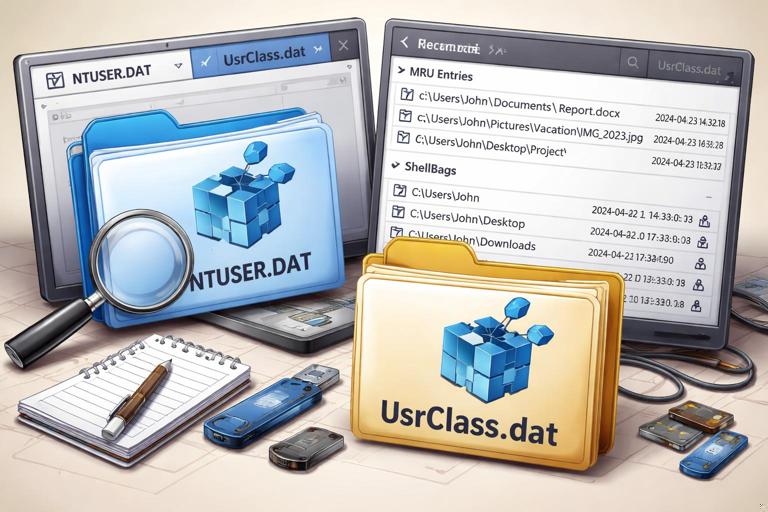
The registry stores both system-wide and per-user configuration. For user activity, per-user hives (NTUSER.DAT and UsrClass.dat) are especially important because they record “recently used” items, shellbag navigation, and application MRUs (most recently used lists). These artifacts are powerful for attribution because they are tied to a specific user profile and SID.
Run dialog history and typed paths
Many investigations need to know whether a user manually executed a command or navigated to a path. The Run dialog history and typed paths can show evidence of user-entered commands and locations. These entries are not perfect proof of execution, but they are strong indicators of intent and interaction.
Step-by-step: validate a suspected manual command. Identify the user profile. Extract the relevant registry values from the user hive. Record the command string and the last write time of the key. Then corroborate with other artifacts: Prefetch for the executed program, event logs for process creation (if available), and file system timestamps for any output files created by the command.
RecentDocs and Open/Save MRUs
Windows and many applications maintain MRU lists for files opened or saved. These can help answer: “Did the user open this document?” and “What else were they working on around that time?” MRUs often store file names, sometimes full paths, and ordering information. Treat them as “user interface evidence”: they show what was presented to or selected by the user, not necessarily what was fully read or executed.
Step-by-step: build a “working set” list. For the user in question, extract RecentDocs and Open/Save MRUs. Normalize paths and identify the storage location (local disk, network share, removable drive). Then cross-check with LNK files and Jump Lists for the same filenames to strengthen the claim that the file was accessed.
ShellBags for folder navigation
ShellBags record folder view settings and can indicate that a user browsed to a folder in Explorer, even if the folder no longer exists. This is useful for showing that a user navigated to a particular directory (for example, a staging folder used for data collection). ShellBags are not a file-open artifact; they are a folder-browsing artifact, so use them to support “user visited this location” rather than “user opened this file.”
Step-by-step: corroborate folder access. Extract ShellBag entries from the user’s registry hives. Identify the folder paths and timestamps associated with the entries. Then look for complementary artifacts: LNK files pointing into the folder, Jump List entries referencing files within it, or file system evidence of recently modified content in that directory.
LNK Shortcut Files: Evidence of File Access and Location
Shortcut files (.lnk) are created when a user opens a file from Explorer or certain dialogs, and they often store the target path, volume serial number, drive type, and timestamps related to the target. LNKs are valuable because they can preserve evidence of access to files on removable media or network locations, even after the media is removed.
Step-by-step: use LNKs to attribute access to a removable drive file. First, locate LNK files in the user’s Recent items locations. Second, parse the LNK to extract the target path and volume information. Third, note any timestamps stored in the LNK and compare them to the target file’s timestamps (if the file still exists). Fourth, correlate the volume serial number with USB storage artifacts to show that a specific device was present when the link was created.
Jump Lists: Application-Centric Recent Activity
Jump Lists record recent and frequent items opened by specific applications (for example, documents opened in Word, folders opened in Explorer). They are stored per user and per application, making them excellent for attribution. Jump Lists can include paths, timestamps, and sometimes additional metadata about the item.
Step-by-step: reconstruct a user’s document activity. Identify the user profile. Enumerate Jump List files for common productivity applications and Explorer. Parse entries to extract file paths and last accessed times recorded by the Jump List. Group entries by application to show how the user interacted with the data (for example, “opened in Excel” vs “browsed in Explorer”). Corroborate key items with LNK files and MRU lists.
Prefetch: Program Execution Evidence (with Caveats)
Prefetch files are created by Windows to speed up application startup. They can provide strong evidence that an executable ran on the system, often including last run times and referenced file paths. Prefetch is especially useful when process creation auditing is not available. However, Prefetch behavior varies by Windows version and configuration, and prefetch files can be deleted. Treat Prefetch as “evidence of execution,” not “evidence of user intent,” unless you can tie it to a user session through logons, interactive artifacts, or per-user traces.
Step-by-step: validate suspected execution of a tool. Search for a Prefetch file matching the executable name (noting that names may be truncated). Extract last run time(s) and run count. Compare the last run time to logon sessions and to other execution artifacts such as Amcache. If the executable was run from a user directory (Downloads, Desktop), add LNK and Jump List checks to connect it to the user’s interactive activity.
Amcache and Shimcache: Execution and Installation Traces
Amcache and Shimcache (AppCompatCache) can record information about executed programs and file paths. They are often used to show that a binary existed and may have been executed, even if it is later deleted. These artifacts are helpful for timeline building around tool usage, installers, and portable executables. They are not perfect “run logs,” and their timestamps can represent different events (such as file modification time or first-seen time depending on the artifact and OS behavior), so corroboration is essential.
Step-by-step: corroborate a deleted executable. Identify the file name and suspected path. Query Amcache and Shimcache for entries matching that path or hash (if available in your tooling). Record the associated timestamps and metadata. Then look for supporting evidence: Prefetch (if it existed), LNK pointing to the executable, and event log entries for file creation or security alerts around the same time.
Browser and Web Activity for User Attribution
Web activity is often central to investigations: downloads, logins, searches, and cloud access. Modern browsers store history, downloads, cookies, and session data in SQLite databases and cache structures within the user profile. Because these are per-user, they can strongly support attribution, but you must consider shared accounts and multiple browser profiles.

Step-by-step: tie a download to subsequent execution. Extract browser download records (file name, source URL, download path, start/end time). Confirm the file exists or once existed at the download path using file system metadata or recovery. Then check for Mark-of-the-Web indicators (where applicable), LNK creation pointing to the downloaded file, and Prefetch/Amcache evidence that the downloaded executable or document was opened. Align these with logon session times to show the user context.
USB and External Device Artifacts for “Where Did the Data Go?”
Removable storage is a frequent exfiltration vector. Windows records device installation and usage in multiple places, including registry keys and event logs. For attribution and timeline building, you want to answer: which device was connected, when it was first seen, when it was last connected, and which user accessed files on it.

Step-by-step: build a USB connection and access story. Identify the device identifiers (vendor/product, serial number) from USB-related registry entries and/or event logs. Record first/last connection times where available. Then correlate with LNK and Jump List entries that reference drive letters or volume serial numbers associated with the device. Finally, look for file copy indicators: recently accessed files, MRUs pointing to the removable drive, and any application logs that show export/save locations.
Recycle Bin and Deletion Activity
Deletion is user activity too. The Recycle Bin can preserve metadata about deleted files, including original path and deletion time, and it is organized per user SID. This can help attribute deletion actions to a specific user profile and show when a file was removed from its original location.
Step-by-step: attribute a deletion event. Identify the user SID associated with the Recycle Bin subfolder. Parse the metadata files to recover original file name, original path, and deletion timestamp. Corroborate by checking whether the file appears in MRUs, LNKs, or Jump Lists prior to deletion, and whether the deletion time aligns with an interactive session for that user.
Putting It Together: A Step-by-Step Correlation Example
Scenario: You need to determine whether a specific user account copied a sensitive spreadsheet to a USB drive and then deleted local traces. Your goal is not to rely on a single artifact but to build a chain of corroboration that survives scrutiny.
Step 1: Identify the user and session window
Start with the user profile and SID. Review logon events to find interactive or remote sessions during the suspected timeframe. Note session start and end boundaries. This gives you a time window in which user-driven actions are plausible.
Step 2: Confirm the spreadsheet was accessed
Check per-user artifacts: RecentDocs and Open/Save MRUs for the spreadsheet name and path. Look for LNK files pointing to the spreadsheet. Then check Jump Lists for the application likely used (for example, Excel) to see if the document appears with a recent timestamp. If at least two of these sources reference the file, you have stronger evidence of access.
Step 3: Confirm the USB device presence
Extract USB device identifiers and connection times. If event logs show a device arrival around the same time as the document access, treat that as an anchor. If you can map volume serial numbers or drive letters, do so, because LNK and Jump List entries often preserve volume details that can link file activity to that specific device.
Step 4: Link the document to the USB destination
Search for LNKs or Jump List entries that reference the spreadsheet on a removable drive path (for example, E:\) or that reference folders on the removable drive used as a destination. Check Open/Save MRUs for save locations pointing to the removable drive. If the user saved or opened the file from the USB path, that is a strong indicator of copying or working from the removable media.
Step 5: Identify deletion or cleanup behavior
Review the user’s Recycle Bin metadata for deletion entries related to the spreadsheet or related staging files. Check whether the deletion time falls within the user’s session window. If Prefetch indicates execution of cleanup tools or command shells around the same time, note it as supporting context, but avoid overstating intent unless you can tie it to interactive artifacts.
Step 6: Build the timeline with confidence levels
Create a timeline table (in your notes or tooling) where each row includes: timestamp (normalized), artifact source, user/SID context, event description, and confidence. For example, “High confidence: Excel Jump List shows spreadsheet opened,” “Medium confidence: ShellBag indicates user browsed to staging folder,” “High confidence: USB device connected.” This approach makes your reasoning transparent and helps reviewers understand which claims are strongly supported and which are inferential.
Common Pitfalls and How to Avoid Them
One pitfall is equating “presence” with “use.” A file can exist in Downloads without being opened; a browser history entry can be created by prefetching or background processes; a Prefetch file can be created by automated execution. Avoid this by pairing artifacts: for example, a download record plus a Jump List entry for opening the file is stronger than either alone.
Another pitfall is confusing machine-level activity with user-level activity. System services can create network connections, write files, and execute binaries. Use per-user artifacts (HKCU MRUs, Jump Lists, LNKs) and session boundaries (logon types) to keep attribution grounded.
A final pitfall is timestamp overconfidence. Some artifacts record “last time seen,” others record “last time executed,” and some record metadata copied from the target file rather than the action time. When in doubt, label the timestamp meaning explicitly (for example, “Prefetch last run time,” “Registry key last write time,” “Jump List item last accessed time”) and corroborate with at least one additional source.