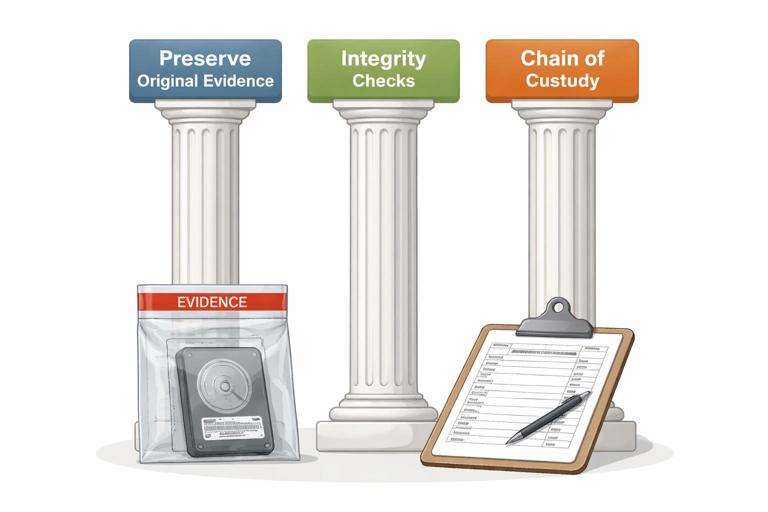
What “forensically sound” really means
In digital forensics, “forensic soundness” means you can explain, defend, and reproduce how evidence was collected and handled without materially altering the original data. It is not a magical guarantee that nothing changed at the physical level; rather, it is a disciplined approach that minimizes change, measures any unavoidable change, and documents every action so another examiner can reach the same results. A forensically sound process focuses on three pillars: (1) preserving the original evidence (or preserving it as close to original as technically possible), (2) maintaining integrity checks that detect alteration, and (3) keeping a clear chain of custody and audit trail that ties the evidence to your actions and findings.
In practice, forensic soundness is achieved by using read-only acquisition methods when possible, creating verified forensic images instead of working on originals, using hashing to prove integrity, and recording tool versions, settings, timestamps, and storage locations. When you must interact with a live system (for example, collecting volatile memory or cloud data that changes continuously), forensic soundness shifts from “no change” to “controlled change with measurement and documentation.”
Evidence integrity: what you are trying to protect
Evidence integrity means the evidence remains complete and unaltered from the moment it is collected through analysis and reporting. Integrity is broader than “file contents did not change.” It includes: the identity of the evidence (what device/account it came from), the completeness of the acquisition (did you capture all relevant partitions, metadata, and timestamps), and the continuity of handling (who had access, when, and what they did). Integrity failures often happen through small mistakes: copying files without preserving metadata, analyzing directly on the original drive, storing images on a shared folder without access controls, or failing to record which hash algorithm was used.
Think of integrity as a promise you must be able to prove. Hashes provide a mathematical proof that a specific set of bytes has not changed. Documentation provides the human proof that the bytes you hashed are the bytes you claim they are, and that the evidence was protected from unauthorized modification.
Hashing fundamentals for beginners
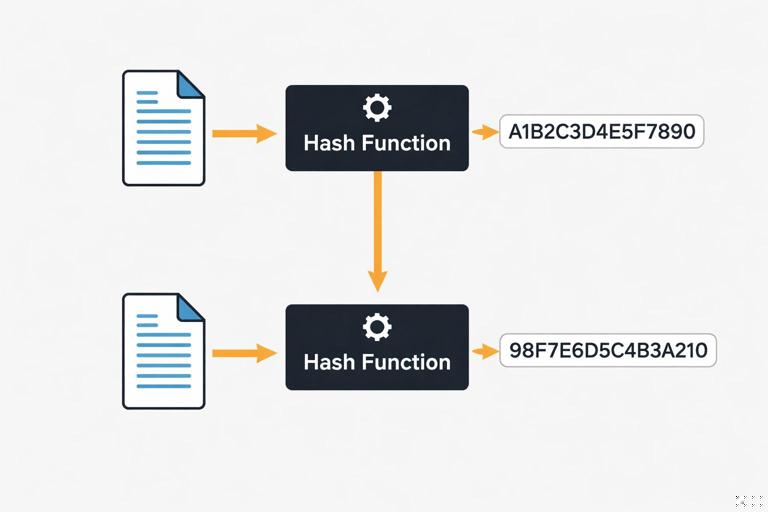
A cryptographic hash function takes input data (a file, a disk image, a partition, or even a text string) and produces a fixed-length “digest” (hash value). Good cryptographic hashes have properties that make them useful for integrity: small changes in input produce completely different outputs (the avalanche effect), and it is computationally infeasible to find two different inputs with the same hash (collision resistance) or to reconstruct the original input from the hash (one-way function). In forensics, you use hashes to show that evidence you acquired is identical to the evidence you later analyzed, and to detect accidental corruption or tampering.
- Listen to the audio with the screen off.
- Earn a certificate upon completion.
- Over 5000 courses for you to explore!

Download the app
Common algorithms you will see
- MD5: fast and widely supported, but collision weaknesses exist. Still commonly used for legacy compatibility and quick triage, but best practice is to pair it with a stronger hash.
- SHA-1: stronger than MD5 but also has known collision attacks. Often seen in older workflows.
- SHA-256 (SHA-2 family): widely recommended for integrity verification today; strong collision resistance for practical forensic use.
- SHA-512: also strong; sometimes used for additional assurance, though SHA-256 is typically sufficient.
In many labs, you will compute both MD5 and SHA-256. The goal is not to “double secure” the evidence in a magical way; it is to satisfy tool compatibility and provide a modern, defensible hash alongside a legacy one.
What exactly should be hashed?
You can hash at different levels depending on what you are trying to prove:
- Full physical image hash: proves the entire acquired image file has not changed.
- Partition or volume hash: useful when acquiring specific volumes or when imaging is segmented.
- Individual file hash: used for known-file filtering, malware identification, or proving a specific exported artifact did not change.
- Export package hash: if you export selected files or reports, hash the export container (ZIP, tar, case package) to prove what you delivered is unchanged.
Whenever possible, hash the largest, most authoritative representation you have (for example, the full disk image), and then hash derived outputs you plan to share or rely on (for example, a folder of exported artifacts).
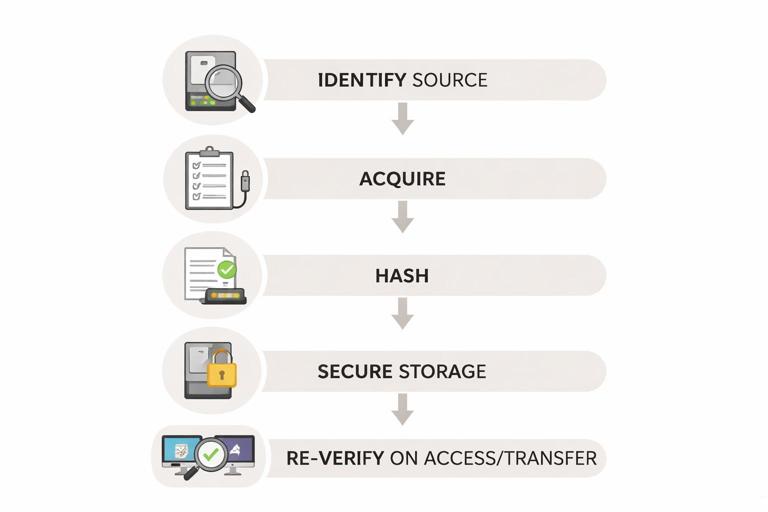
Forensic imaging and verification: the integrity workflow
A typical integrity workflow is: identify the evidence source, acquire it in a controlled way, compute hashes during or immediately after acquisition, store the evidence securely, and re-verify hashes whenever the evidence is moved or accessed for analysis. The key idea is that hashing is not a one-time event; it is a repeated control that detects change across the evidence lifecycle.
Step-by-step: hashing a file or image on Windows (built-in tools)
Windows includes a built-in command that can compute hashes: certutil. This is useful when you need a quick, tool-independent verification. Use it on forensic images, exported artifacts, or any file you want to verify.
certutil -hashfile E:\Cases\Disk01.E01 SHA256The output includes the SHA-256 hash. Record it exactly as shown (including noting the algorithm). Repeat with MD5 if your workflow requires it:
certutil -hashfile E:\Cases\Disk01.E01 MD5Practical tips: (1) hash the file after copying it to your evidence storage to confirm the copy is identical, (2) store the hash values in your case notes and also in a separate manifest file, and (3) if the file is very large, expect hashing to take time; do not interrupt the process.
Step-by-step: hashing with PowerShell (more automation-friendly)
PowerShell’s Get-FileHash is convenient for scripting and generating manifests.
Get-FileHash -Algorithm SHA256 -Path "E:\Cases\Disk01.E01"To hash every file in an export directory and write a CSV manifest:
Get-ChildItem "E:\Cases\Exports" -File -Recurse | ForEach-Object { $h = Get-FileHash -Algorithm SHA256 -Path $_.FullName; [PSCustomObject]@{ Path=$_.FullName; SHA256=$h.Hash } } | Export-Csv "E:\Cases\Exports\hash_manifest_sha256.csv" -NoTypeInformationThis creates a repeatable integrity check for everything you exported. If you later re-run the script and compare manifests, you can detect any changed or missing files.
Step-by-step: hashing on macOS/Linux (if you handle evidence there)
If your workflow includes macOS or Linux systems, you will commonly use sha256sum or shasum:
sha256sum Disk01.E01To create a manifest for a directory:
find ./Exports -type f -print0 | xargs -0 sha256sum > hash_manifest_sha256.txtEven if your primary analysis is on Windows, knowing these commands helps when verifying evidence received from another examiner or lab.
Write blockers and “do not touch the original” discipline
A major threat to forensic soundness is writing to the original storage media. Operating systems can modify a connected drive automatically (mounting, indexing, updating metadata, creating system files). Hardware or software write blockers reduce this risk by preventing write commands from reaching the evidence drive. The practical rule is: if you can image the drive with a write blocker, do it. If you cannot, you must document why and what compensating controls you used.
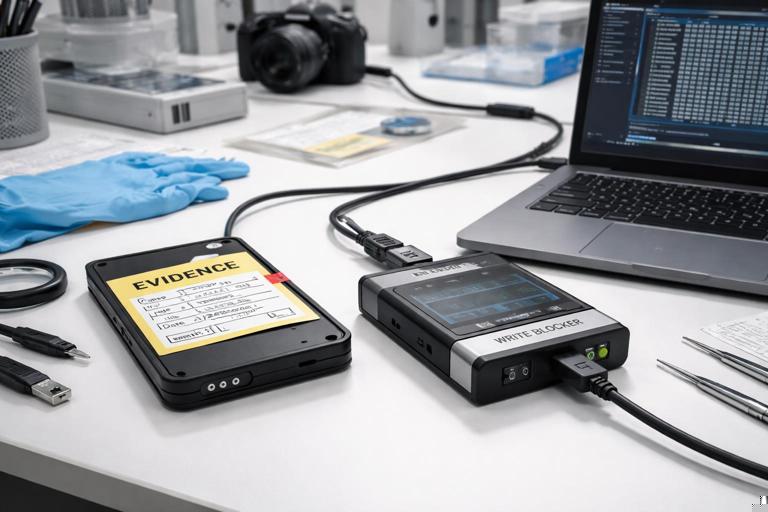
Even with a write blocker, you should avoid browsing the evidence drive in a normal file explorer. Instead, acquire an image and work from the image. If you must validate that the drive is visible to your imaging tool, do so in the least invasive way and document the steps.
Understanding forensic image formats and integrity checks
Forensic images can be stored in different formats. Raw images (often .dd or .img) are a sector-by-sector copy. EWF formats (like .E01) support compression, segmentation, and embedded metadata, and often store internal hash values. The integrity principle is the same: you must be able to verify that the image you analyze matches what you acquired.
Important nuance: for segmented images (for example, Disk01.E01, Disk01.E02, etc.), you should verify integrity in a way that covers the entire set. Many forensic tools compute a “logical” hash of the reconstructed image content, not just each segment file. If you use external hashing tools, you may hash each segment file as stored, but also record the tool-generated image hash that represents the reconstructed evidence. Document which method you used so another examiner can replicate it.
Chain of custody meets hashing: making integrity defensible
Hash values are strongest when tied to clear handling records. A chain of custody log should identify the evidence item, who collected it, when and where it was collected, how it was packaged, where it was stored, and every transfer or access event. Hashing complements this by proving that the bytes did not change between those events.
What to record alongside hash values
- Evidence identifier: device serial number, asset tag, account ID, or image filename and case ID.
- What was hashed: full disk image, specific partition, exported file set, memory dump, etc.
- Hash algorithm: SHA-256, MD5, etc.
- Hash value: exact digest string.
- Tool and version: e.g., “PowerShell Get-FileHash (Windows 11 build …)” or the forensic suite version.
- Date/time and timezone: include timezone to avoid confusion later.
- Operator: who performed the hashing.
- Storage location: where the evidence was stored after hashing (evidence locker path, encrypted drive ID, etc.).
This level of detail prevents common disputes such as “which file did you hash?” or “did you use a weak algorithm?” or “could the hash have been computed after the file was modified?”
Practical workflow: acquiring and verifying a disk image
The following is a practical, tool-agnostic workflow you can adapt to many imaging tools. The exact buttons and menus differ, but the integrity checkpoints are consistent.
Step-by-step: a defensible imaging routine
- Step 1: Prepare clean storage. Use a dedicated evidence drive or secure evidence share with sufficient space. Confirm it is healthy and has access controls. Create a case folder structure (e.g.,
\Evidence\Case-2026-001\Images,Exports,Notes). - Step 2: Connect the source via write blocker. Record the source device identifiers (model, serial, capacity). Record the write blocker model/serial if applicable.
- Step 3: Acquire the image. Choose a format (raw or E01) and enable verification if the tool supports it. If the tool offers “hash during acquisition,” select SHA-256 (and MD5 if required by your lab).
- Step 4: Capture acquisition logs. Save the tool’s log output into your case notes folder. Logs often include sector counts, read errors, and computed hashes.
- Step 5: Independently hash the resulting image file(s). After acquisition, compute SHA-256 using an independent method (e.g., PowerShell or certutil) and record it. This is a practical cross-check that reduces reliance on a single tool.
- Step 6: Verify after transfer. If you move the image to another drive or server, re-hash and confirm the hash matches. Record the verification event.
- Step 7: Lock down the master copy. Treat one copy as the “master evidence image” and make it read-only at the filesystem level where possible. Perform analysis on a verified working copy.
If any verification fails (hash mismatch), stop and investigate: confirm you hashed the same file, check for partial copies, confirm storage health, and review whether the file was modified by an automated process (for example, antivirus scanning that quarantined or altered a file). Do not proceed with analysis until you can explain and resolve the mismatch.
Integrity pitfalls and how to avoid them
Pitfall: analyzing the only copy
If you only have one copy of the evidence image and you mount it read-write or store it on a system that can modify it, you risk losing integrity. Maintain at least two verified copies: a protected master and a working copy. Hash both and document their roles.
Pitfall: confusing “hash of container” vs “hash of content”
Some formats are containers (E01 segments, ZIP exports). Hashing the container file proves that container did not change, but it may not directly match a tool’s “content hash” of the reconstructed data. Record both when relevant and be explicit about what each hash represents.
Pitfall: forgetting metadata and timestamps
Copying files with normal drag-and-drop can change timestamps or omit alternate data streams and other metadata. When exporting artifacts, use forensic tools or robust copy methods that preserve metadata, and then hash the exported set. If you must use standard copying, document what metadata may have changed and prefer exporting from an image rather than from the live source.
Pitfall: weak documentation of hashing steps
A hash value without context is easy to challenge. Always record the command used, the path, the algorithm, and the environment. For example, “SHA-256 computed with PowerShell Get-FileHash on workstation DFIR-WS01, file path E:\Cases\Case-2026-001\Images\Disk01.E01, 2026-01-07 14:22 UTC.”
Hash sets for known files: practical integrity and triage use
Hashes are not only for proving evidence integrity; they are also used to identify known files. A “known-good” hash set can help you exclude standard operating system files from review, while a “known-bad” set can flag malware or contraband. The integrity concept here is that you are matching exact bytes: if a file’s hash matches a known-bad hash, you have strong evidence it is the same file version. If it does not match, it may still be related (different version, packed, or modified), so treat hash matching as a precise indicator, not a broad detection method.
When you use hash sets, document the source and version of the hash database and the matching method used by your tool. This keeps your process reproducible and helps explain why a file was categorized as known-good or known-bad.
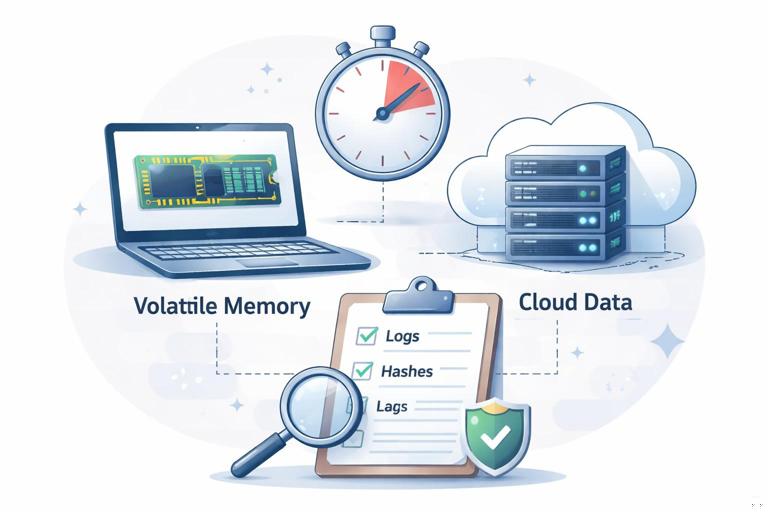
Integrity for volatile and cloud data: controlled change and repeatable capture
Not all evidence is static. Volatile memory changes constantly, and cloud data can change between collection steps due to sync, retention policies, or user activity. For these sources, forensic soundness relies on (1) capturing data as quickly and consistently as possible, (2) hashing what you captured, (3) recording precise timestamps and collection parameters, and (4) preserving original exports and logs.
Step-by-step: integrity-minded export packaging
- Step 1: Export to a dedicated folder. Keep exports separated by source and time window (e.g.,
Exports\CloudAccountA\2026-01-07T1400Z). - Step 2: Preserve the raw export. Keep original JSON/CSV/PST/ZIP files exactly as produced by the platform or tool.
- Step 3: Hash the raw export files. Compute SHA-256 for each file and store a manifest in the same folder.
- Step 4: Hash the manifest itself. Create a second-level hash for the manifest file so you can detect edits to the manifest.
- Step 5: Store logs and receipts. Save API responses, audit logs, export job IDs, and tool logs that show what was requested and delivered.
This approach gives you a defensible snapshot: even if the cloud data changes later, you can prove what you collected at that time and that your copy has not changed since.