By the end of this chapter you will be able to form all twenty-six letters of the American Sign Language manual alphabet, tell apart the letters that beginners confuse most, and fingerspell your own first and last name cleanly. Every description follows the format from Chapter Two: handshape first, then palm orientation, then location, then movement. Since fingerspelling happens in one fixed place with one hand, the location stays the same for almost every letter, so you can put most of your attention on the shape of your fingers and the direction your palm faces.
Where your hand lives while you spell
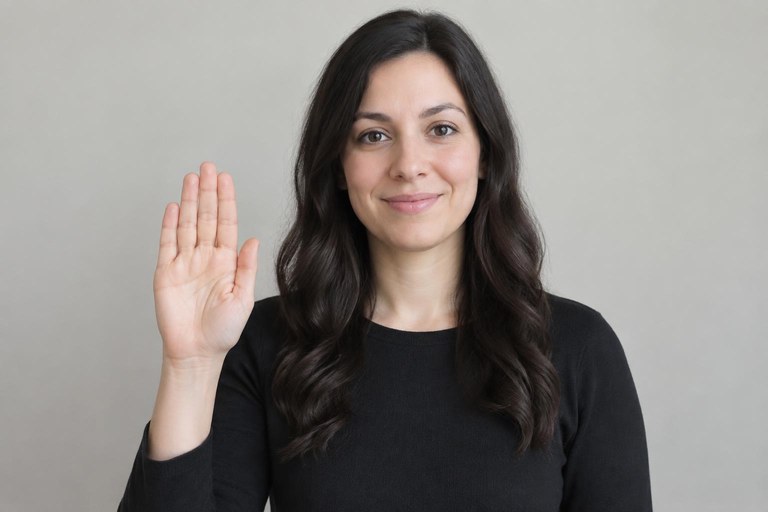
Before the letters, set up your hand correctly, because good position makes sloppy letters readable and bad position makes perfect letters hard to follow.
- Spell with your dominant hand only. Your non-dominant hand rests quietly at your side or in your lap.
- Hold your hand at about shoulder height, slightly off to your dominant side, roughly level with your chin and a hand's width away from your body. Never in front of your face, and never down by your waist.
- Keep your palm generally facing the person you are talking to. A few letters turn, and those are noted below.
- Let your elbow hang relaxed near your ribs. A raised, stiff elbow tires you out and makes your letters shake.
- Keep your hand still in space. Only your fingers change. New signers bounce the whole hand with each letter, which is exhausting to read. Think of your wrist as parked.
The twenty-six letters
Work through these slowly with a mirror. Unless a letter says otherwise, your palm faces out toward the viewer and your hand stays in the parked position described above.
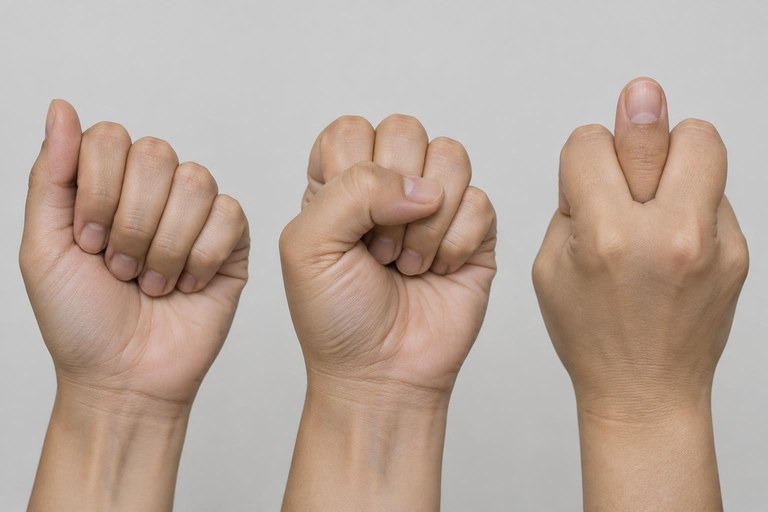
- A. Close your fingers into a fist and lay your thumb straight up alongside your index finger, palm out.
- B. Flat B hand: fingers straight up and pressed together, thumb folded flat across your palm, palm out.
- C. Curve all four fingers and your thumb into the shape of the letter C, palm facing to your non-dominant side so the viewer sees the open curve.
- D. Index finger straight up; the other three fingertips touch the pad of the thumb to make a small circle beneath it, palm out.
- E. Curl your fingers down so the fingertips rest on the thumb, which lies flat across the palm, palm out.
- F. Thumb and index finger touch to make a circle; the other three fingers point up and spread slightly, palm out.
- G. Close your hand and extend the index finger and thumb parallel, about an inch apart, pointing sideways across your body, palm facing in toward you.
- H. Extend the index and middle fingers together, side by side, pointing sideways across your body, palm facing in toward you.
- I. Pinky finger straight up, all other fingers closed with the thumb across them, palm out.
- J. Start in the I handshape, palm out, then draw the hook of a letter J in the air with your pinky: down, curve to the side, and up, with a small twist of the wrist.
- K. Index and middle fingers point up in a V; the thumb sits between them, touching the base of the middle finger, palm out.
- L. Index finger straight up and thumb straight out to the side, making a right angle, other fingers closed, palm out.
- M. Tuck the thumb under the first three fingers so those three drape over it; the pinky stays closed, palm out.
- N. Tuck the thumb under the first two fingers only, palm out.
- O. All fingertips curve down to meet the thumb, making a round hole, palm facing out and slightly to the side.
- P. The K handshape tipped over: index finger points forward and down, middle finger points down, thumb between them, palm facing down.
- Q. The G handshape tipped over: index finger and thumb point straight down, parallel, palm facing back toward you.
- R. Index and middle fingers straight up and crossed over each other, other fingers closed, palm out.
- S. A fist with the thumb crossing in front of the closed fingers, palm out.
- T. A fist with the thumb poking up between the index and middle fingers, palm out.
- U. Index and middle fingers straight up and pressed together, palm out.
- V. Index and middle fingers straight up and spread apart, palm out.
- W. Index, middle, and ring fingers straight up and spread; the thumb holds the pinky down, palm out.
- X. Index finger bent into a hook, all other fingers closed, palm out.
- Y. Thumb and pinky extended, the three middle fingers closed, palm out.
- Z. Point your index finger out at the viewer and draw the letter Z in the air: across, diagonally down, then across again.
Notice that only J and Z have movement. Every other letter is a still shape. Hold each one just long enough to be seen, then change to the next.
Letters that look alike
Most beginner errors come from a handful of families. Learn the difference by asking one question about each pair.
- Listen to the audio with the screen off.
- Earn a certificate upon completion.
- Over 5000 courses for you to explore!

Download the app
- A, S, and T: where is the thumb? A has the thumb beside the fingers, S has the thumb in front of the fingers, T has the thumb poking up between the index and middle fingers.
- E, O, and C: how big is the hole? E has no hole at all, with fingertips pressed onto the thumb. O has a small round hole. C has a big open curve.
- M and N: how many fingers cover the thumb? M covers with three fingers, N covers with two. Say "M is more" to remember it.
- K and P: which way does it point? Same shape, different orientation. K points up with the palm out, P points down with the palm down.
- G and Q: which way does it point? Again the same shape. G points sideways, Q points straight down.
- D and F: which finger is up? In D the index is up and the circle is below it. In F the circle is made by the index and thumb and three fingers are up.
- U, V, R, and W: what are the two fingers doing? U is together, V is spread, R is crossed, and W adds a third finger.
These are true minimal pairs, in the sense you learned in Chapter Two. K and P differ only in palm orientation, and that single parameter is the whole difference between the letters.
Spelling your own name
Your name is the first thing you will ever fingerspell to a Deaf person, so it deserves real practice. Work in this order.
- Write your first name on paper and list the letters one by one.
- Form each handshape on its own, checking it against the descriptions above. Fix any thumb that is in the wrong place.
- Spell the whole name very slowly, keeping your wrist parked and your palm facing forward. Do not bounce.
- Repeat it ten times, a little smoother each round, and then do the same with your last name.
- Finally, spell first name, small pause, last name. That pause is how a viewer knows where one name ends.
If your name has a double letter, do not just hold the shape longer, because a held letter reads as a single letter. For now, make the letter twice with a small bounce or slide the hand a little to the side as you repeat it. The polished way to handle double letters comes in the next chapter.
Expressive practice drills
These drills build producing skill only. Reading other people's fingerspelling comes next.
- Alphabet ladder. Spell A through Z three times a day, slowly, watching your palm orientation. Stop the moment your elbow lifts or your hand starts bouncing. Stop also if you feel pain, aching, tingling, or numbness in your fingers, wrist, or forearm; shake the hand out, rest, and build up your practice time gradually rather than pushing through discomfort.
- Confusion pairs. Alternate between the tricky partners for thirty seconds each: A and S, M and N, K and P, G and Q, U and R.
- Everyday words. Spell these ten words cleanly: cat, dog, milk, book, work, name, water, phone, coffee, Friday.
- Environment spelling. Look around the room and silently spell whatever you see. This is the single fastest way to make the alphabet automatic.
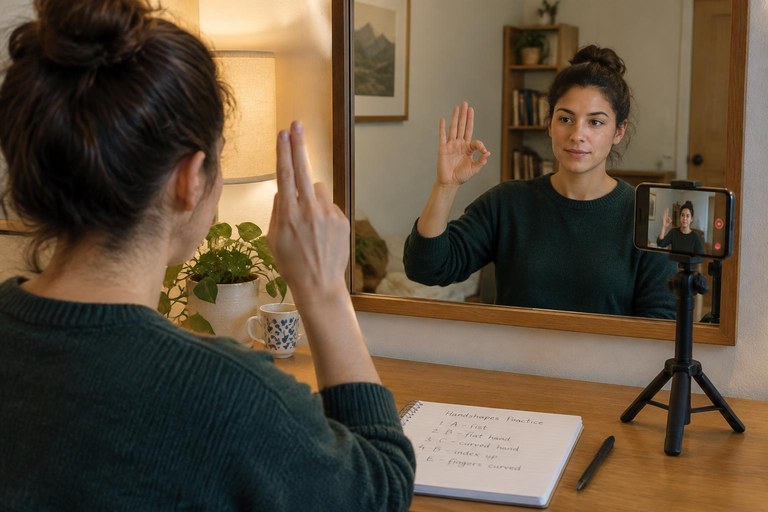
- Camera check. Record thirty seconds of yourself spelling your full name and three words. Watch it back and ask three questions: is my hand parked, is my palm facing the camera, and can I identify each letter?
Recap
You now have all twenty-six letters, a parked hand position at shoulder height with a relaxed elbow, the two moving letters J and Z, and a way to sort out the lookalike families by asking about the thumb, the hole, or the direction of pointing. Clean beats fast every single time. A beginner who spells slowly and clearly is easy to understand, and a beginner who spells fast and sloppily is not.
Review checklist
- I can form all twenty-six letters without looking at the descriptions.
- I hold my hand at shoulder height, slightly to my dominant side, palm toward the viewer.
- My elbow is relaxed and my wrist stays parked; I do not bounce my hand with each letter.
- I can explain the difference between A, S, and T, and between M and N.
- I know that K and P are the same shape in different orientations, and so are G and Q.
- I can draw the J hook with my pinky and the Z with my index finger.
- I can spell my first and last name slowly and cleanly, with a small pause between them.
- I have recorded myself once and watched it back.