Scenario Setup and Learning Objectives
What you are practicing: ransomware triage with evidence preservation under time pressure. The goal is to (1) stabilize the situation without destroying volatile clues, (2) capture the minimum evidence needed to answer “what happened, when, and how far did it spread,” and (3) preserve artifacts that enable later decryption attempts, negotiation decisions, insurance reporting, and law-enforcement support.
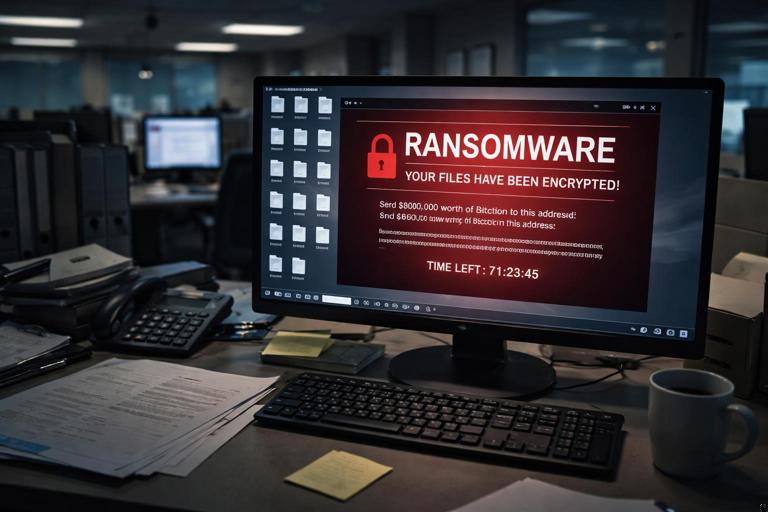
Scenario: A Windows workstation in Finance shows a ransom note on the desktop and files renamed with a new extension. The user reports that “everything is slow,” a shared drive is now inaccessible, and a popup claims data was exfiltrated. You are the first responder. You have admin access, an incident ticket, and permission to collect evidence. You do not yet know whether encryption is still running, whether lateral movement occurred, or whether data theft is real.
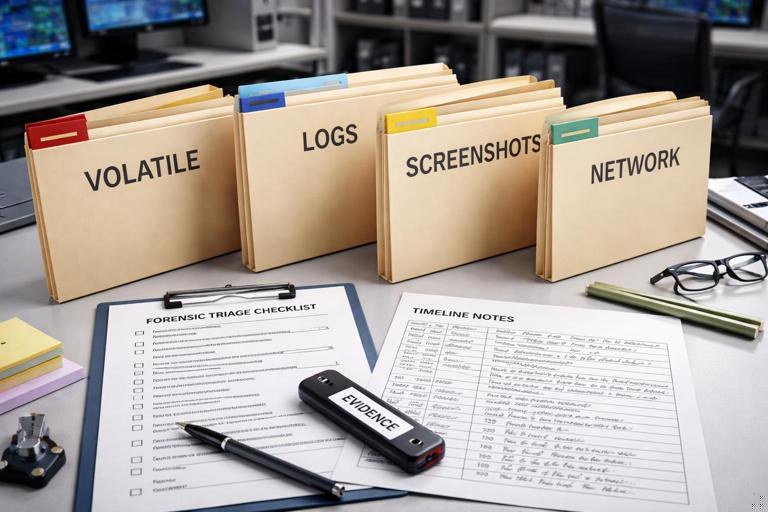
Outputs you must produce: a short triage package (volatile + key disk artifacts), a list of impacted systems and shares, a preliminary timeline of key events, and a set of preserved ransomware indicators (note, extension, mutex/process names, C2 domains/IPs, scheduled tasks/services, and any encryption keys or configuration files left behind).
Concept: Ransomware Triage Versus Ransomware Investigation
Ransomware triage is the immediate, minimal set of actions that helps you decide containment and recovery steps while preserving evidence that will be needed later. It focuses on: confirming ransomware activity, determining whether encryption is ongoing, identifying the ransomware family or at least its behavioral cluster, and mapping the blast radius (local machine, mapped drives, servers, cloud sync folders).
Ransomware investigation is the deeper follow-on work: full root cause analysis, complete timeline, attribution, and comprehensive scoping. In this lab chapter, you stay in triage mode but preserve enough high-value evidence so that deeper investigation remains possible.
- Listen to the audio with the screen off.
- Earn a certificate upon completion.
- Over 5000 courses for you to explore!

Download the app
Key principle for this scenario: ransomware changes the system rapidly. Every minute can overwrite logs, rotate keys, delete shadow copies, and remove itself. Your triage must be structured and repeatable so you do not miss ephemeral evidence.
Immediate Safety and Containment Decisions (Without Destroying Evidence)
Decision point: isolate or observe? If encryption is actively running or spreading, isolation is urgent. If you isolate too aggressively, you may lose network indicators and remote command evidence. In most real incidents, the priority is to stop further damage, so you isolate while capturing volatile data first when feasible.
Step-by-step: “60–120 second” on-host check before isolation
- Photograph/screenshot the screen: ransom note, file extension, any timer, contact info, and claimed exfiltration statement.
- Record system time: note the displayed time and timezone; later you will reconcile with log timestamps.
- Check whether encryption is active: open Task Manager quickly and look for high disk usage, suspicious processes, or many file operations. Do not start hunting extensively yet—just confirm whether something is still running.
- Identify logged-in user and machine name: needed for scoping and correlating authentication events.
Isolation options: prefer network isolation that preserves power (e.g., disable switch port, remove Ethernet, disable Wi‑Fi) rather than powering off. Powering off can destroy volatile evidence and may complicate later decryption attempts if keys are memory-resident. If the system is a virtual machine or a server, coordinate with operations before isolation to avoid cascading outages.
Volatile Evidence Capture: What to Grab First and Why
Why volatile evidence matters in ransomware: you may capture the running payload, command lines, network connections to C2, and sometimes encryption context. Even if you cannot fully analyze memory now, preserving it enables later validation of the ransomware family and potential key recovery research.
Step-by-step: minimal volatile capture package
- Process list with command lines: capture running processes and their command lines. Command lines often reveal the dropper path, encryption mode flags, or targeted directories.
- Network connections and listening ports: capture active connections, remote IPs, and DNS cache if available. This helps identify C2, exfil endpoints, or lateral movement tooling.
- Logged-on sessions and remote access: capture current sessions (interactive, RDP, SMB). This can reveal whether an attacker is still present.
- Scheduled tasks/services snapshot: a quick snapshot can show persistence or “run once” tasks used to relaunch encryption.
- Memory capture (if your playbook supports it): acquire RAM using an approved tool in your environment. If you cannot do full memory, at least capture process dumps for the suspicious process (only if your tooling and policy allow it and you can do so safely).
Practical tip: store volatile outputs to an external drive or a secured network share that is not mapped on the victim (to avoid encrypting your collection destination). If you must use a network share, ensure it is read-only from the victim context or isolated from the affected domain credentials.
Disk-Level Triage: High-Value Artifacts Specific to Ransomware
This section focuses on ransomware-specific evidence you should preserve early because it is frequently deleted, overwritten, or modified during cleanup and recovery.
Step-by-step: collect ransomware “fingerprint” artifacts
- Ransom note files: collect the note from the desktop and any directories where it appears. Preserve multiple copies if the note differs per folder.
- Encrypted file samples: collect a small set (3–10) of encrypted files of different original types (docx, xlsx, pdf, jpg) plus their unencrypted originals if any exist in email attachments or backups. These samples help identify family and validate decryption tools later.
- File extension and naming pattern: record the new extension and any appended IDs. Many families embed a victim ID or campaign marker.
- Ransomware executable and droppers: search common staging locations (user profile temp, downloads, public folders, programdata, appdata). Preserve the binary and any sidecar config files.
- Batch scripts and PowerShell scripts: many ransomware operations use scripts to disable defenses, stop services, and delete backups.
- Shadow copy deletion evidence: preserve outputs or logs indicating use of vssadmin/wmic/powershell to remove shadow copies. Even if you do not analyze logs deeply now, capturing relevant log files early matters.
- Backup and recovery tampering: look for disabled backup agents, stopped database services, or modified backup schedules. Preserve configuration files and service state snapshots.
Practical tip: when collecting samples, keep directory context. If your collection method flattens folders, also export a directory listing (including timestamps and sizes) so later analysis can reconstruct where each artifact came from.
Scoping the Blast Radius: Local, Shares, and Sync Folders
Ransomware rarely stays local. It targets mapped drives, accessible SMB shares, and sometimes cloud-synced folders (OneDrive/Google Drive/Dropbox). Your triage must quickly determine what the compromised user could reach.
Step-by-step: scope access and impact
- Enumerate mapped drives and recent network paths: identify drive letters and UNC paths the user had access to.
- Check for encryption on shares: do not “open everything.” Instead, sample a few directories for the ransom note and new extension. Record the earliest observed encrypted timestamp if visible from directory listings.
- Identify high-value servers: if the user had access to finance shares, accounting systems, or HR shares, flag them for immediate containment review.
- Check cloud sync clients: determine whether a sync client is installed and active. If so, preserve sync logs and note the account used. Cloud sync can propagate encrypted files quickly and complicate recovery.
Containment note: if you find share encryption, coordinate to disable the compromised user account and revoke active sessions, then isolate affected servers. Do not start mass deletions or renames during triage; preserve evidence first.
Identify the Likely Initial Access and Execution Path (Triage-Level)
In triage, you are not building a full narrative yet, but you should capture enough to answer: “How did it start on this host?” Common paths include malicious email attachment, drive-by download, remote management abuse, stolen credentials with RDP, or a staged payload from a prior foothold.
Step-by-step: quick pivot questions and targeted checks
- Ask the user (if available): what were you doing right before it started? Did you open an attachment, run an installer, or see a security prompt?
- Look for recently created executables and scripts: focus on user-writable directories and recent timestamps around the reported onset.
- Check for remote execution tooling traces: many ransomware deployments use legitimate admin tools (PsExec-like behavior, remote service creation) or remote management agents. Preserve any logs/configs for remote tools present.
- Capture evidence of privilege escalation: if the ransomware ran as admin, note how it got elevated (UAC prompts, scheduled task run as SYSTEM, service installation). Preserve the relevant artifacts (task XML, service binary path).
Practical tip: do not “clean up” suspicious files. Even if you are confident they are malicious, preserve them first. Deleting them can remove the only copy of the payload and its configuration.
Ransomware Family Clues You Can Preserve Without Full Reverse Engineering
You may not have time to run full static/dynamic analysis. Still, you can preserve clues that later enable family identification and selection of the right decryptor or negotiation strategy.
Step-by-step: capture “family identification” indicators
- Ransom note text and filenames: preserve exact wording, email addresses, onion URLs, and any “personal ID.”
- Extension and file marker bytes: keep encrypted samples so analysts can inspect headers/footers for known markers.
- Mutex names and process names: if you captured memory or process listings, preserve these strings; they can map to known families.
- Registry/service/task names: many operators reuse naming conventions across campaigns.
- C2 domains/IPs and user-agent strings: from network snapshots and DNS cache. Even one domain can link to threat intel later.
Operational note: do not paste ransom note URLs into a normal browser on your corporate network. If you must validate a URL for reporting, do it from a controlled analysis environment according to your organization’s policy.
Evidence Preservation for Recovery Decisions: Backups, Shadow Copies, and Key Material
Recovery teams will ask: “Can we restore? Are backups safe? Are shadow copies intact? Is there any chance of decryption?” Your triage should preserve evidence that supports these decisions without performing the recovery itself.
Step-by-step: preserve recovery-relevant artifacts
- Snapshot backup agent state: record whether backup services are running, when last backup occurred, and whether backup repositories show signs of tampering.
- Preserve logs from backup software: collect recent logs/configs that show deletion attempts, authentication failures, or repository access from the compromised host.
- Check shadow copy status: record whether shadow copies exist and whether deletion commands were executed. Preserve any command outputs you captured during volatile collection.
- Preserve potential key/config files: some ransomware stores a local config, a public key, or an “ID” file. If you find such files near the payload or in programdata/appdata, preserve them with directory context.
Practical tip: if you plan to rebuild the machine quickly, preserve a full set of triage artifacts first. Reimaging can eliminate the only evidence of how the ransomware executed and what it touched.
Handling “Double Extortion” Claims: What to Preserve
Many ransom notes claim data exfiltration. In triage, you may not be able to prove or disprove it immediately, but you can preserve evidence that helps answer it later.
Step-by-step: exfiltration triage preservation
- Network indicators: preserve active connections, recent DNS lookups, and proxy/VPN client logs if present.
- Large archive creation evidence: look for recently created large ZIP/7z/RAR files in staging directories. Preserve them if found (they may contain stolen data).
- File transfer tools: preserve installers or binaries for common transfer utilities (rclone, ftp clients, cloud CLIs) if present, plus their config files.
- Cloud storage sync logs: if a sync client is used, preserve logs showing mass upload or unusual sync activity.
Containment note: if you suspect ongoing exfiltration, isolate the host immediately after capturing minimal volatile network evidence. Continuing to observe can increase data loss.
Practical Lab Walkthrough: A Repeatable Ransomware Triage Runbook
This walkthrough is written as a checklist you can follow in a lab VM. Adapt tool choices to your environment, but keep the order and intent.
Phase 1: Stabilize and capture the obvious (5–10 minutes)
- Capture screenshots/photos of ransom note and encrypted filenames.
- Record hostname, user, IP address, and current time.
- Quickly check disk activity and suspicious processes.
- If encryption appears active, prepare to isolate immediately after minimal volatile capture.
Phase 2: Minimal volatile capture (5–15 minutes)
- Export process list with command lines.
- Export network connections, routing table, and DNS cache (if available).
- Export logged-on users/sessions and remote connections.
- Capture a memory image if your playbook supports it; otherwise capture targeted process dumps for the suspected ransomware process.
Phase 3: Isolate the host (immediately after Phase 2)
- Disable network connectivity (unplug Ethernet/disable Wi‑Fi) while keeping the system powered on if possible.
- Document the exact isolation method and time.
Phase 4: Disk triage collection (20–45 minutes)
- Collect ransom note(s) and a small set of encrypted file samples.
- Collect suspected payload binaries and scripts from staging locations.
- Collect key configuration/log files for security tools, backup agents, and remote management tools present on the host.
- Export directory listings for impacted folders and any staging directories.
Phase 5: Scope and notify (parallelizable)
- Identify mapped drives/UNC paths and check a small sample for encryption markers.
- List potentially impacted servers/shares and the user account involved.
- Provide operations with a short “impact snapshot” so they can contain spread while you continue preservation.
Example Commands and Outputs to Capture (Windows)
The exact commands you use depend on your tooling and permissions. The following examples illustrate the type of outputs to preserve. Run from an elevated prompt when possible, and redirect outputs to your evidence destination.
whoami /all > whoami_all.txt 2>&1
hostname > hostname.txt
ipconfig /all > ipconfig_all.txt
netstat -ano > netstat_ano.txt
tasklist /v > tasklist_v.txt
wmic process get ProcessId,ParentProcessId,Name,CommandLine /format:csv > processes_cmdline.csv
query user > query_user.txt
net use > net_use.txt
What to look for in these outputs: unusual process names running from user-writable paths, command lines referencing encryption targets, remote IP addresses with established connections, and mapped drives pointing to sensitive shares.
Packaging the Triage Evidence Set
When you hand off to a deeper investigation team (or to yourself later), the triage package should be structured so someone can understand it quickly.
Recommended folder structure
Case_Ransomware_Triage_YYYYMMDD/
  00_Notes/
    responder_notes.txt
    timeline_initial.txt
  01_Screenshots/
    ransom_note_screen.png
  02_Volatile/
    processes_cmdline.csv
    netstat_ano.txt
    dns_cache.txt
    memory_image.raw (if collected)
  03_Ransomware_Fingerprint/
    ransom_note_files/
    encrypted_samples/
    suspected_payloads/
  04_Scoping/
    mapped_drives.txt
    impacted_paths.txt
  05_Logs_Config/
    backup_agent_logs/
    remote_tool_logs/
Responder notes should include: when you arrived, what you observed, what you collected, what you changed (e.g., network isolation), and which systems/shares appear impacted. Keep notes factual and time-stamped.
Common Pitfalls in Ransomware Triage (and How to Avoid Them)
Pitfall 1: rebooting too early. Reboots can wipe volatile evidence and may trigger re-encryption or cleanup tasks. Avoid reboot unless required for safety or containment, and document it if it happens.
Pitfall 2: collecting to a mapped drive. If the ransomware can see the destination, it may encrypt your evidence. Use a dedicated external drive or a hardened collection share not accessible to the compromised user context.
Pitfall 3: “hunting” interactively for too long. Clicking through folders and opening files can modify timestamps and create noise. Prefer command outputs and targeted collection over manual browsing.
Pitfall 4: ignoring shares and sync clients. Local encryption is only part of the story. Always check mapped drives and sync folders early and record what the user could access.
Pitfall 5: failing to preserve the ransom note and samples. These are often the fastest path to family identification and can influence recovery and negotiation decisions. Preserve them immediately.