Why automated imports matter in operations
Operations teams rarely receive data in one perfect, stable format. You might get daily CSV exports from a WMS, weekly files from a vendor portal, and monthly multi-sheet workbooks from finance. Manual copy/paste introduces delays and silent errors (wrong file, wrong sheet, partial paste, shifted columns). Automated imports solve this by making the refresh process repeatable: you point Excel to a location (a file, a folder, or a workbook), define rules once, and then refresh to pull the latest data with the same transformation logic every time.

This chapter focuses on three common automation patterns: importing from a single CSV, importing from a folder of many files, and importing from multi-sheet workbooks. The goal is to build imports that are resilient to new files arriving, small format changes, and growing row counts.
Core principles for error-proof imports (without re-teaching cleaning)
Even when you already know how to clean and shape data, automated imports require a few additional design principles:
- Prefer stable identifiers over positions. When possible, select columns by name rather than by column index. This reduces breakage when a source adds a new column.
- Separate “connection” from “business logic.” Keep the steps that locate files (paths, folder filters) distinct from steps that transform data (type changes, merges). This makes maintenance easier.
- Expect variability. Plan for missing columns, extra columns, empty files, and occasional header changes. Use defensive steps (for example, selecting only known columns, or adding missing columns with nulls).
- Make refresh deterministic. Define how “latest” is chosen (by modified date, by file name pattern, by a date embedded in the file name). Avoid manual selection at refresh time.
- Document assumptions inside the query. Rename steps clearly (e.g., “Filter to CSV only”, “Keep latest file per site”). This becomes your operational runbook.
Automated import from a single CSV
A single CSV import is ideal when you always receive one file with the same name (or you can overwrite the old file). Common examples: “OpenOrders.csv” exported from an ERP, or “DailyShipments.csv” downloaded each morning.
Step-by-step: connect to a CSV and make refresh reliable
1) Place the CSV in a stable location. In operations, a shared folder is common. If possible, keep the file name constant and overwrite it each day (e.g., always “OpenOrders.csv”).
- Listen to the audio with the screen off.
- Earn a certificate upon completion.
- Over 5000 courses for you to explore!

Download the app
2) In Excel, go to Data > Get Data > From File > From Text/CSV. Select the CSV.
3) In the preview window, confirm delimiter and encoding. Choose Transform Data (not “Load”) so you can set up the query properly.
4) In Power Query, verify the first row is headers. If needed, use Use First Row as Headers.
5) Set data types deliberately. For operational data, be careful with IDs that look numeric (SKU, order number). If leading zeros matter, keep them as text. Dates should be date type, quantities as whole number/decimal as appropriate.
6) Rename the query to something operationally meaningful (e.g., q_OpenOrders_CSV).
7) Load to a table or to the data model depending on your downstream usage. For dashboards, loading to a table is often simplest.
Hardening tips for CSV imports
- Prevent “changed type” surprises. Power Query often auto-adds a “Changed Type” step. If the CSV occasionally has blanks or mixed types, this step can cause errors. Replace it with explicit type conversions you control, or apply types after filtering out non-data rows.
- Handle occasional extra header lines. Some systems export a title line above the headers. Add a step to remove top rows until the header row is found, or filter out rows where a key column equals null.
- Normalize line endings and quotes. If you see broken rows due to embedded line breaks in text fields (e.g., address notes), you may need to adjust how the export is generated. Power Query can import it, but operationally it’s better to fix the export setting if possible.
Automated import from a folder of CSVs (append pattern)
Folder imports are the workhorse of operational automation. Instead of one file, you receive many files over time: one per day, one per site, one per carrier, or one per shift. The folder pattern lets you drop new files into a folder and refresh to automatically include them.
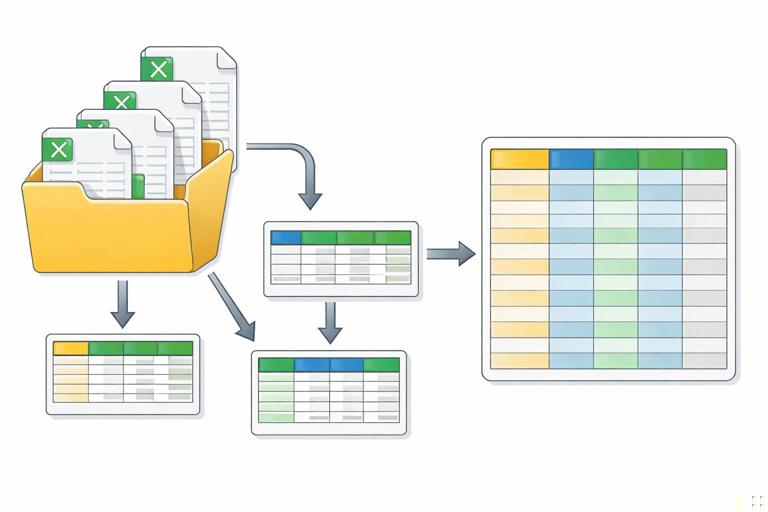
The key idea: Power Query reads the folder, applies the same transformation function to each file, and appends the results into one consolidated table.

Step-by-step: build a folder import that appends new files automatically
1) Standardize the drop location. Create a folder such as: \Operations\Inbound\Shipments\DailyCSVs. Avoid personal desktop paths.
2) In Excel, go to Data > Get Data > From File > From Folder. Select the folder.
3) In the folder preview, choose Transform Data. You will see a table of files with columns like Name, Extension, Date modified, and Content.
4) Filter to the files you actually want. Typical filters include:
- Extension equals “.csv”
- Name starts with “Shipments_”
- Exclude temporary files (names starting with “~$”)
5) Choose Combine (often “Combine & Transform”). Power Query will create:
- A main query that lists files and appends results
- A helper query (sample file)
- A function that transforms each file consistently
6) Open the generated “Transform File” function and verify it promotes headers correctly and applies the right types. This function is where you define the per-file logic once.
7) Return to the main query and confirm the appended output has the expected columns and row counts.
Choosing “latest file” vs “append all files”
Not every folder import should append everything. Two common operational patterns:
- Append all files (historical log). Use this when each file represents new records (e.g., daily shipments). Your consolidated table grows over time.
- Use latest file only (snapshot). Use this when each file is a full snapshot of the same dataset (e.g., “InventorySnapshot_YYYYMMDD.csv”). In this case, appending creates duplicates and confusion.
To use the latest file only, filter the folder list to the most recent file by Date modified, then invoke the transform function on that single file.
Practical example: keep only the latest snapshot in a folder
After importing from folder and filtering to CSV, sort by Date modified descending, keep top 1 row, then combine that one file. In M, the idea looks like this:
let Source = Folder.Files("\\Operations\\Inbound\\Inventory\\Snapshots"), CsvOnly = Table.SelectRows(Source, each [Extension] = ".csv"), Sorted = Table.Sort(CsvOnly,{{"Date modified", Order.Descending}}), Latest = Table.FirstN(Sorted, 1), Combined = Table.AddColumn(Latest, "Data", each Csv.Document([Content],[Delimiter=",", Encoding=65001, QuoteStyle=QuoteStyle.Csv])), Expanded = Table.ExpandTableColumn(Combined, "Data", {"Column1","Column2"}, {"Column1","Column2"}) in ExpandedYou would typically replace the simplistic expansion with your established header promotion and column selection steps, but the pattern is: filter files, pick the latest, then parse.
Hardening folder imports for real-world variability
- Guard against empty or corrupt files. Some systems create a zero-byte file during export. Filter out files where Size = 0, or wrap parsing in a try/otherwise pattern inside the function so one bad file doesn’t break the entire refresh.
- Enforce a known schema. If a new column appears in some files, appending can create unexpected nulls or shifted columns if headers differ. Inside the transform function, select only the columns you expect, and add missing columns with nulls so the output schema stays stable.
- Deduplicate when needed. If files can overlap (e.g., re-exported days), add a unique key (OrderID + LineID + Date) and remove duplicates after append.
- Track file lineage. Add a column with the source file name and/or modified date. This is invaluable for audits and troubleshooting.
Automated import from multi-sheet workbooks
Multi-sheet workbooks are common when a source system exports separate tabs (e.g., one sheet per site) or when a partner sends a template with multiple sections. The automation challenge is selecting the right sheets consistently and combining them without manual intervention.
Power Query can read an Excel workbook and return a list of objects (sheets, tables, named ranges). You then filter to the objects you want and expand the data.
Step-by-step: combine multiple sheets with the same layout
Scenario: a workbook contains sheets named “Site_001”, “Site_002”, etc., each with the same header structure (OrderID, SKU, Qty, ShipDate).
1) Go to Data > Get Data > From File > From Workbook and select the workbook.
2) In Navigator, choose Transform Data.
3) You will see a list of items with columns like Name, Data, Item, Kind (Sheet/Table), and Hidden.
4) Filter to Kind = “Sheet” (or “Table” if the workbook uses Excel tables). Then filter Name to the pattern you want (e.g., starts with “Site_”).
5) Add a column to capture the sheet name as metadata (e.g., “Site”). Often you can derive Site from the sheet name by splitting on “_”.
6) Expand the Data column to append all sheets into one table. Ensure headers are handled correctly. If each sheet includes headers, you typically promote headers within each sheet before expansion, or you expand first and then promote headers depending on the structure returned.
7) Apply consistent column selection and types so the combined output is stable.
Practical example: append all sheets that start with “Site_”
let Source = Excel.Workbook(File.Contents("\\Operations\\Inbound\\Partner\\WeeklyWorkbook.xlsx"), null, true), SheetsOnly = Table.SelectRows(Source, each [Kind] = "Sheet"), SiteSheets = Table.SelectRows(SheetsOnly, each Text.StartsWith([Name], "Site_")), AddSite = Table.AddColumn(SiteSheets, "Site", each Text.AfterDelimiter([Name], "_"), type text), Expanded = Table.ExpandTableColumn(AddSite, "Data", {"OrderID","SKU","Qty","ShipDate"}, {"OrderID","SKU","Qty","ShipDate"}) in ExpandedThis assumes the sheet data already has those column names. If not, you would add steps to promote headers and standardize names before expanding.
When sheets don’t share the same layout
Sometimes each sheet represents a different section (e.g., “Summary”, “Exceptions”, “RawData”). In that case, do not append everything. Instead:
- Create separate queries per section (one for RawData, one for Exceptions).
- Filter by sheet name explicitly (equals “RawData”).
- Keep transformations minimal and stable, then integrate downstream.
Trying to force mismatched sheets into one appended table usually creates fragile logic and confusing outputs.
Prefer tables over ranges when you control the source
If you can influence the workbook you import, ask for data to be provided as Excel Tables (Insert > Table) with stable table names (e.g., “tbl_RawOrders”). Power Query can connect directly to tables, which are less likely to shift when someone inserts a row above the header or adds notes on the side. In the workbook object list, tables appear as Kind = “Table” and are typically more reliable than raw sheets.
Automating across many workbooks in a folder (workbook + folder pattern)
A very common operational reality is receiving one workbook per site or per week, each containing multiple sheets. You can combine the folder pattern with the workbook pattern: read all files in a folder, open each workbook, select the relevant sheets/tables, and append them.
Step-by-step: folder of workbooks, extract a specific table from each
Scenario: each site sends a weekly workbook containing a table named “tbl_Orders”. You want one consolidated dataset.
1) Data > Get Data > From File > From Folder and select the folder.
2) Filter to extensions “.xlsx” (and “.xlsm” if needed). Exclude temporary files.
3) Instead of using the default Combine wizard blindly, create a custom extraction step: add a custom column that opens each workbook using Excel.Workbook([Content]).
4) Expand the resulting nested tables to find the object you want (Kind = “Table”, Name = “tbl_Orders”).
5) Expand the Data column from that table and append across all files.
6) Add metadata columns: source file name, site (parsed from file name), and week ending date (parsed from file name or from a cell/table column).
Practical example: extract a table named “tbl_Orders” from every workbook in a folder
let Source = Folder.Files("\\Operations\\Inbound\\Sites\\Weekly"), KeepXlsx = Table.SelectRows(Source, each ([Extension] = ".xlsx" or [Extension] = ".xlsm") and not Text.StartsWith([Name], "~$")), AddWB = Table.AddColumn(KeepXlsx, "WB", each Excel.Workbook([Content], null, true)), ExpandWB = Table.ExpandTableColumn(AddWB, "WB", {"Name","Kind","Data"}, {"ObjectName","Kind","Data"}), KeepOrdersTable = Table.SelectRows(ExpandWB, each [Kind] = "Table" and [ObjectName] = "tbl_Orders"), AddSourceFile = Table.AddColumn(KeepOrdersTable, "SourceFile", each [Name], type text), ExpandedData = Table.ExpandTableColumn(AddSourceFile, "Data", {"OrderID","SKU","Qty","OrderDate"}, {"OrderID","SKU","Qty","OrderDate"}) in ExpandedDataThis pattern is powerful because it avoids relying on sheet positions. If the table name is stable, the import remains stable even if the workbook adds new sheets.
Handling schema drift: missing or extra columns across files
Automated imports often fail when a source adds a column, renames a header, or omits a field for a subset of files. Your goal is to keep the output schema stable so downstream formulas, pivots, and visuals don’t break.
Pattern: select known columns and add missing ones
In the per-file transform function (for folder imports), implement a schema enforcement step:
- Define a list of required columns (by name).
- Add any missing columns with null values.
- Select columns in the required order.
In M, the concept looks like:
let Required = {"OrderID","SKU","Qty","OrderDate","Site"}, AddMissing = List.Accumulate(Required, CurrentTable, (state, col) => if Table.HasColumns(state, col) then state else Table.AddColumn(state, col, each null)), Final = Table.SelectColumns(AddMissing, Required, MissingField.UseNull) in FinalThis keeps your downstream model stable even if one site’s file is missing “Site” or a vendor temporarily removes “OrderDate”.
File naming conventions as part of the automation
Automated imports become dramatically more reliable when file names carry meaning. In operations, you can often enforce a convention like:
- Shipments_Site001_2026-01-07.csv
- InventorySnapshot_2026-01-07.csv
- Orders_WeekEnding_2026-01-05_Site002.xlsx
With consistent naming, you can:
- Filter to only the relevant files (starts with “Shipments_”).
- Extract metadata (site, date) from the name.
- Choose the latest file per site by sorting on the extracted date.
Step-by-step: extract a date from a file name and use it for filtering
1) In the folder query, create a custom column that parses the date portion of the file name (for example, split by “_” and take the last token, then remove extension).
2) Convert that token to a Date type.
3) Filter to a rolling window (e.g., last 30 days) or keep the latest per site.
This approach is often more reliable than Date modified, because modified dates can change when files are copied or re-saved.
Refresh behavior, credentials, and operational handoff
Automation is only useful if refresh works for the people who run it. A few practical considerations:
- Use accessible paths. If a query points to a local path (C:\Users\...), it will fail for others. Prefer shared network paths or SharePoint/OneDrive locations that the team can access.
- Set privacy and credentials intentionally. Power Query may prompt for credentials or privacy levels. Standardize these settings so refresh is consistent across machines.
- Control load destinations. Decide which queries load to sheets and which are connection-only. Keep staging queries connection-only to reduce clutter and accidental edits.
- Build a “Refresh Checklist” worksheet. Even with automation, operators need to know where to drop files, what naming convention to follow, and what to check if refresh fails (missing file, wrong extension, locked workbook).
Troubleshooting common failure modes
“The column ‘X’ of the table wasn’t found”
This usually happens when a header changed or a column is missing in some files. Fix by enforcing schema (add missing columns) and selecting columns with MissingField.UseNull. Also verify that header promotion happens correctly for every file.
“DataFormat.Error: We couldn’t convert to Number/Date”
A file contains unexpected text (e.g., “N/A”) in a numeric/date column. Fix by converting with error handling (try/otherwise) or by cleaning those values before type conversion. In automated imports, apply type conversions after you’ve removed non-data rows and standardized placeholders.
Refresh is slow after months of files
Folder appends can become heavy. Operational mitigations include:
- Archive old files to a separate folder not included in the query.
- Filter to a rolling time window (e.g., last 90 days) if older history isn’t needed for the dashboard.
- Ensure you are not expanding unnecessary columns or loading unnecessary intermediate queries.
Some files are locked or partially written
If a system drops files while you refresh, you can get intermittent errors. Operationally, schedule refresh after file delivery completes, or have a “landing” folder and a “ready” folder where files are moved once complete. In Power Query, filter out very recent files (e.g., modified in the last 2 minutes) to avoid partially written exports.