Why templates and checklists matter in scheduling execution
Once you already know how to build a workable CPM schedule, the fastest way to improve consistency is to standardize how you set up, review, publish, and maintain schedules. Templates and checklists reduce “reinventing the wheel,” prevent missed steps (like forgetting to lock a data date or failing to issue a revision log), and make your schedules easier for others to understand. They also help you scale: a superintendent can run the same weekly cadence on a small project that a project controls manager runs on a larger one.
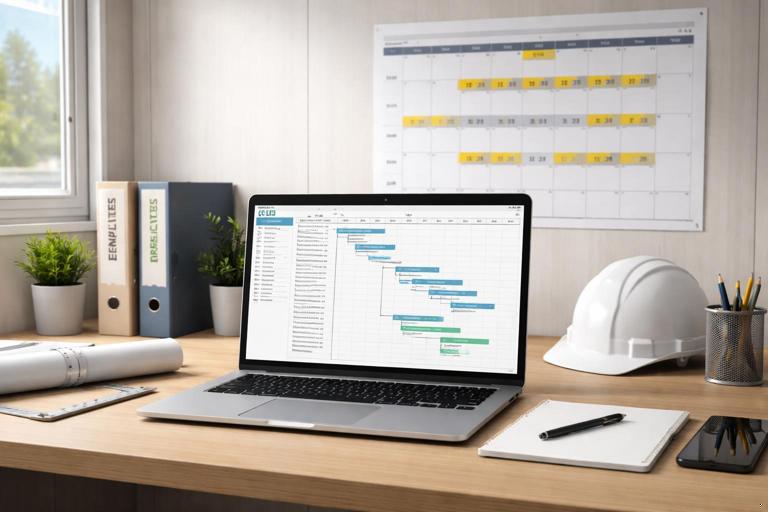
This chapter provides immediate-use templates, checklists, and sample schedules you can copy into your own tools (Excel, Google Sheets, Primavera P6, Microsoft Project, or any scheduling platform). The goal is not to prescribe one “perfect” format, but to give you proven structures that you can adapt without starting from a blank page.
Template pack overview (what you can reuse immediately)
Use the items below as a starter kit. You can implement them as documents, spreadsheets, or saved “views” in your scheduling software.
- Schedule Setup Template (coding, calendars, fields, naming rules)
- Schedule Quality Control (QC) Checklist (logic, dates, constraints, deliverables)
- Update Cycle Checklist (data date, progress entry, narrative, distribution)
- Two-Week Look-Ahead Export Template (filters, columns, formatting)
- Milestone & Deliverable Register (what, when, owner, acceptance criteria)
- RFI/Submittal/Procurement Tracker link fields (IDs, needed-by dates, status)
- Schedule Narrative Template (what changed, why, impacts, next actions)
- Meeting Agenda Template for schedule review (inputs, decisions, action log)
- Change/Revision Log Template (versioning and approvals)
Template 1: Schedule setup template (structure you set once)
A schedule setup template is a repeatable configuration: calendars, activity naming conventions, coding, and default views. The benefit is that every schedule you produce “looks and behaves” the same, which makes reviews faster and reduces errors during updates.
Recommended standard fields and rules
- Activity ID format: Discipline/Area + sequence (e.g., STR-1100, ARCH-2100, MEP-3100). Keep it short and sortable.
- Activity name rule: Verb + object + location (e.g., “Install GWB Level 2 East”). Avoid vague labels like “Work drywall.”
- WBS levels: Use a consistent hierarchy such as Project > Phase > Area > System. Keep it stable across updates.
- Calendars: Define a default workweek calendar and any special calendars (e.g., night shift, weekend work, inspection days). Ensure holidays are loaded.
- Milestone naming: Prefix with “MS-” and use outcome-based names (e.g., “MS-Substantial Completion”).
- Constraints policy: Only allow constraints when they represent a real external commitment. Track each constraint with a reason field.
- Relationships policy: Prefer finish-to-start unless there is a clear reason for another relationship. Track lags with a reason field.
- Percent complete method: Choose a consistent rule set (e.g., physical % complete, or units-based). Avoid mixing methods without a plan.
Step-by-step: create your schedule template in any tool
- Step 1: Create a “Template Schedule” file with your standard calendars already configured.
- Step 2: Build a WBS skeleton that matches how you report progress (phase/area/system).
- Step 3: Create custom fields (or columns) for: Responsible party, Area, Trade, Constraint reason, Lag reason, Deliverable ID, and Notes.
- Step 4: Save standard views: Baseline comparison view, Critical path view, Near-critical (low float) view, Look-ahead view, and Milestone-only view.
- Step 5: Save filters: “Activities starting next 14 days,” “Open constraints,” “Activities with lags,” “Activities with hard constraints,” “Activities missing predecessors/successors.”
- Step 6: Lock in naming conventions by documenting them on page 1 of your schedule narrative template so others follow the same rules.
Template 2: Schedule QC checklist (pre-issue and pre-update)
A QC checklist is your defense against avoidable schedule disputes and confusion. Run it before you issue a baseline, before each monthly update, and whenever you publish a recovery plan. The checklist below is written so it can be used by a scheduler, PM, or superintendent.
- Listen to the audio with the screen off.
- Earn a certificate upon completion.
- Over 5000 courses for you to explore!

Download the app
Schedule QC checklist (copy/paste)
- File control: Correct project name, correct version number, correct data date, and correct calendar assignments.
- Milestones: All contract milestones included; milestone dates match commitments; milestone descriptions are outcome-based.
- Open ends: No unintended activities without predecessors (except true project start) and no unintended activities without successors (except true project finish).
- Constraints: All constraints reviewed; each has a documented reason; no “placeholder” constraints used to force dates.
- Lags: All lags reviewed; each has a documented reason; no lags hiding missing work (e.g., “curing” should be an explicit activity if it needs tracking).
- Calendars: Correct workweek; holidays loaded; special calendars applied only where needed.
- Activity naming: Names are specific, measurable, and location-based; no duplicates that cause confusion in meetings.
- Deliverables: Key deliverables and inspections are represented and tied to the work that produces them.
- Near-critical: Identify activities below your float threshold (e.g., < 10 days) and confirm they are understood and owned.
- Progress readiness: Activities are sized so progress can be measured (not too large to update, not too tiny to manage).
- Reporting: Standard views and print layouts are correct; bars and labels are readable; dates are consistent across reports.
Template 3: Weekly update cycle checklist (a repeatable cadence)
Even if your formal update is monthly, a weekly internal update cadence keeps the schedule aligned with field reality. The checklist below assumes you are collecting progress from the field, updating the schedule, and publishing a short narrative and look-ahead.
Weekly update checklist
- Step 1: Set the data date. Confirm the cut-off time (e.g., end of day Friday). Do not mix progress after the cut-off into the same update.
- Step 2: Collect progress inputs. Completed activities, actual start/finish dates, current production status, and blockers. Capture who provided each input.
- Step 3: Update actuals. Enter actual starts/finishes and remaining durations (or physical % complete) per your standard method.
- Step 4: Review logic impacts. Confirm that changes in sequence are intentional and documented (e.g., resequencing due to access).
- Step 5: Run schedule calculation. Verify that the critical/near-critical paths make sense and that no unexpected open ends appear.
- Step 6: Identify variances. Compare to baseline or prior update: milestone drift, negative float, and major changes in near-critical work.
- Step 7: Draft the narrative. Summarize what changed, why, and what actions are required next week.
- Step 8: Publish outputs. Issue the updated PDF, look-ahead, and action list. Archive the native file with the same version number.
Template 4: Schedule narrative template (what to write every time)
A schedule narrative is not a long essay. It is a structured explanation that helps others interpret the schedule and reduces miscommunication. Keep it consistent so stakeholders can quickly find what they need.
Schedule narrative (copy/paste outline)
- 1. Update identification: Project, update number, data date, period covered, prepared by, reviewed by.
- 2. Summary of status: Overall status (on track/at risk/behind), key milestone dates, and any negative float.
- 3. Key changes since last update: List major logic changes, resequencing, added/removed scope items (if applicable), and major duration changes.
- 4. Drivers and constraints: Top constraints affecting near-term work (access, approvals, inspections, long-lead deliveries). Include owners and due dates.
- 5. Critical and near-critical focus: Identify the top 5–10 activities driving the finish or major milestones and what is being done to protect them.
- 6. Look-ahead summary: Next two weeks: planned starts/finishes, required decisions, and coordination needs.
- 7. Action items: Action, responsible party, due date, and status.
Template 5: Two-week look-ahead export template (field-friendly)
A look-ahead should be readable in a trailer meeting without scrolling through hundreds of lines. The format below is designed to be exported from your schedule and then lightly edited (if needed) for clarity.

Recommended look-ahead columns
- Area/Zone
- Trade/Owner
- Activity name
- Planned start
- Planned finish
- Prerequisites (short text)
- Constraints/Blockers
- Required inspections/hold points
- Notes for coordination (access, laydown, shutdowns)
Step-by-step: generate a look-ahead from your schedule
- Step 1: Filter activities with planned start or finish between Data Date and Data Date + 14 days.
- Step 2: Exclude completed activities and exclude long summary tasks that do not represent field work.
- Step 3: Sort by Area/Zone, then by Planned Start.
- Step 4: Add a “Constraints/Blockers” column and populate it from your constraint reason field or notes.
- Step 5: Export to PDF for distribution and to spreadsheet if you want to add meeting notes.
Template 6: Milestone and deliverable register (tie schedule to acceptance)
A milestone register is a simple table that clarifies what “done” means and who owns the acceptance. It prevents milestone dates from becoming abstract targets without clear deliverables.
Milestone Register (example format) ID | Milestone / Deliverable | Scheduled Date | Owner | Acceptance Criteria | Dependencies | Status | Notes MS-010 | Building dried-in | 2026-03-15 | GC/Super | Roof complete + WRB installed + openings protected | Roofing, framing, windows | At risk | Weather contingency needed MS-020 | Rough MEP complete Area A | 2026-04-10 | MEP PM | Rough-in inspected and passed | Framing complete, sleeves in place | On track | Coordinate inspection request MS-030 | Substantial completion | 2026-07-30 | PM | Punchlist manageable + life safety complete | All systems start-up | TBD | Owner training dates pendingUse this register in meetings to confirm that milestone dates are supported by specific acceptance criteria, not just “we think we’ll be done.”
Template 7: Constraint and commitment log (turn blockers into tracked work)
Many schedule failures are not caused by poor CPM technique, but by unmanaged constraints: missing decisions, incomplete design details, access restrictions, or coordination gaps. A constraint log turns vague blockers into commitments with owners and due dates.
Constraint / Commitment Log (example format) ID | Date Identified | Constraint | Affected Activity | Owner | Needed-By Date | Status | Resolution Notes C-101 | 2026-01-05 | Confirm ceiling height change | Install duct mains Level 2 | Architect/Owner | 2026-01-12 | Open | RFI-33 submitted C-102 | 2026-01-06 | Fire alarm device layout approval | Rough-in FA Level 1 | Engineer | 2026-01-15 | Open | Awaiting revised drawings C-103 | 2026-01-07 | Access to Room 210 blocked by storage | Paint Level 2 East | GC/Super | 2026-01-10 | Closed | Storage relocatedIn your weekly meeting, review only the constraints that affect the next 2–4 weeks and any that threaten a milestone. Keep the log short and actionable.
Template 8: Change and revision log (version control you can defend)
When multiple people are viewing schedule PDFs, it is easy for the team to reference the wrong version. A revision log prevents confusion and supports clean documentation.
Schedule Revision Log (example format) Rev | Date | Data Date | Prepared By | Reviewed By | Summary of Changes | Distribution 00 | 2026-01-02 | N/A | Scheduler | PM | Initial baseline issued | Owner, GC, Subs 01 | 2026-02-02 | 2026-01-31 | Scheduler | PM/Super | Progress update; resequenced Level 1 framing due to access | Internal + Owner 02 | 2026-03-02 | 2026-02-28 | Scheduler | PM | Added change work; updated milestone forecast | Owner, GCStore the native schedule file and the PDF with the same revision number. If you issue a look-ahead separately, label it with the same revision and data date.
Sample schedules for immediate use (copy and adapt)
The sample schedules below are intentionally simplified so you can adapt them quickly. They are not meant to represent full project detail; they demonstrate a practical structure, milestone placement, and how to group work so it is easy to manage. Replace the activity names and durations with your project’s values and apply your own calendars and coding standards.
Sample Schedule A: Small commercial tenant improvement (12–16 weeks) — activity list skeleton
Use this as a starting point for a tenant improvement where the space is mostly interior work with limited exterior scope. The structure is organized by phase and then by trade. Add areas/zones if the space is large or phased.
Tenant Improvement (TI) Skeleton 1. Mobilize & Site Setup - Mobilize and set up temporary facilities - Field verify existing conditions (as-built walk) - Layout and control lines established 2. Selective Demo & Prep - Protect existing finishes to remain - Selective demolition complete - Haul-off and clean 3. Framing & Backing - Frame new partitions - Install backing/blocking for specialties - Above-ceiling coordination walk (pre-MEP) 4. Rough MEP - Rough-in plumbing - Rough-in electrical - Rough-in HVAC (duct/pipe) - Rough-in low voltage - In-wall inspections (MEP rough) 5. Close-In - Insulation complete (if required) - Hang drywall - Tape/finish drywall - Prime walls 6. Ceilings & Overhead - Install ceiling grid - Above-ceiling inspections/closeout - Set ceiling tiles (late, after dusty work) 7. Finishes - Paint final coats - Install flooring - Install millwork/casework - Install doors/frames/hardware - Install specialties (toilet accessories, signage, etc.) 8. Trim-Out & Start-Up - Electrical trim (devices, fixtures) - Plumbing trim (fixtures) - HVAC start-up and balancing support - Controls checkout 9. Punch, Closeout, Turnover - Substantial completion walk - Punchlist correction - Final inspections and sign-offs - Owner training and turnover packageHow to use it: Copy the skeleton into your schedule tool, then add zones (Front/Back, Suite A/B, Level 1/2) as additional codes or WBS branches. If you have phased turnover, add separate milestones and duplicate the finish/turnover branch per phase.
Sample Schedule B: Residential new build (single-family) — milestone-driven skeleton
This skeleton is organized around common residential milestones. It is useful when you want a schedule that can be reviewed quickly with a homeowner or small builder team. Add detail only where you need control (long-lead items, inspections, and trade handoffs).
Residential New Build Skeleton - Mobilize / temp utilities - Foundation complete milestone - Framing complete milestone - Dried-in milestone - Rough MEP complete milestone - Insulation complete milestone - Drywall complete milestone - Interior trim complete milestone - Substantial completion milestone - Final completion / CO milestone Work branches to place between milestones: 1) Foundation & Slab - Excavate and form - Place footings - Foundation walls - Backfill and underground roughs - Slab prep and pour 2) Structure & Dry-In - Frame walls and roof - Install windows/exterior doors - Roofing complete - Weather barrier and flashings 3) Rough-Ins - Rough plumbing - Rough electrical - Rough HVAC - Rough low voltage (if applicable) 4) Interior Close-In - Insulation - Drywall hang/finish - Prime 5) Interior Finishes - Cabinets and countertops - Interior doors/trim - Paint - Flooring - Plumbing trim - Electrical trim - HVAC start-up 6) Exterior & Site (overlapping where feasible) - Siding/stone/stucco - Exterior paint (if applicable) - Flatwork/driveway - Landscaping allowances (if applicable) 7) Punch & Turnover - Punchlist - Final clean - Owner orientationHow to use it: Keep homeowner-facing schedules milestone-heavy, but keep an internal version with enough detail to manage trade handoffs. Use the same milestone IDs in both versions so you can compare status without confusion.
Sample Schedule C: Short-interval (3-week) coordination schedule for interior build-out
Sometimes you need a “micro-schedule” for a tight sequence (e.g., corridor work, restroom renovation, or a floor-by-floor turnover). This sample is designed for daily coordination and can be managed like a rolling wave plan.
3-Week Micro-Schedule (example) Week 1 - Day 1-2: Protect area + demo complete - Day 2-3: Layout + framing start - Day 3-5: Rough MEP in walls Week 2 - Day 6: Rough inspections - Day 7-8: Drywall hang - Day 9-10: Tape/finish (coat 1-2) Week 3 - Day 11: Prime - Day 12-13: Paint final + install ceiling grid - Day 14: Flooring - Day 15: Trim-out + punch startHow to use it: Treat this as a coordination tool tied to your master schedule. Keep the master schedule as the contractual/reporting schedule, and use the micro-schedule to manage daily handoffs and access constraints.
Checklists for common schedule-driven meetings (ready-to-run agendas)
Weekly schedule coordination meeting agenda
- Confirm data date and review last week’s planned vs. actual starts/finishes.
- Review next two weeks look-ahead by area/zone.
- Review constraints log: only items needed in the next 2–4 weeks and any milestone threats.
- Confirm inspections and hold points: who is requesting, when, and prerequisites.
- Confirm access, laydown, shutdowns, and safety constraints that affect sequence.
- Assign actions with owner and due date; update action log live.
Monthly owner/CM schedule review agenda
- Review milestone forecast vs. baseline and prior update.
- Explain key changes (logic, resequencing, added scope) using the narrative template.
- Review top near-critical items and what is being done to protect milestones.
- Confirm upcoming decisions/approvals required from owner/consultants.
- Confirm next reporting date and distribution list.
Implementation tips: how to roll these templates out without disruption
Templates only work if the team actually uses them. The easiest rollout is incremental: start with the schedule narrative template and revision log (immediate clarity), then add the QC checklist (fewer errors), then standardize the look-ahead export (better field adoption), and finally formalize the constraint log (better accountability).
Step-by-step rollout plan (practical)
- Step 1: Pick one project as the pilot and apply the revision log + narrative template for two update cycles.
- Step 2: Add the QC checklist before each issue; track the top 5 recurring QC misses and fix the root cause in your template.
- Step 3: Standardize the look-ahead columns and teach the superintendent how to read it in under 2 minutes.
- Step 4: Introduce the constraint log and require each constraint to have an owner and needed-by date.
- Step 5: Save the final configuration as your “Schedule Setup Template” and reuse it on the next project.