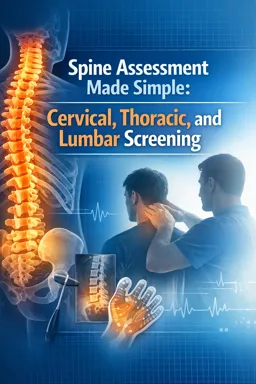
1) Pre-test Probability: Stop “Collecting Tests,” Start Testing Hypotheses
Special tests are most useful when they are chosen to answer a specific question. The same test can be helpful in one patient and nearly meaningless in another, depending on pre-test probability: your best estimate (before testing) of how likely a condition is, based on the patient’s presentation.
How pre-test probability guides test choice
- High pre-test probability (presentation strongly fits): a positive test may not add much, but a negative test can be valuable to rule out or redirect.
- Low pre-test probability (presentation doesn’t fit): a positive test is more likely to be a false positive; you should be cautious about over-interpreting it.
- Moderate pre-test probability: tests can meaningfully shift your confidence either way, especially when used in clusters.
A simple decision sequence (practical)
- State your working hypothesis in plain language (e.g., “neck pain with arm symptoms likely from cervical nerve root irritation”).
- Choose a test that stresses the suspected tissue in a way that matches the symptom behavior (provocation or relief).
- Define what counts as ‘positive’ before you do it (location, quality, and change in symptoms).
- Re-test a comparable sign (a movement or symptom) after the test to see if the test meaningfully changed the picture.
- Decide what to do next: confirm with a second test, modify the hypothesis, or stop and prioritize safety.
What “positive” should mean in spine special tests
In spine screening, “positive” is rarely just “it hurt.” A useful positive response is typically one of the following:
- Reproduction of the patient’s familiar symptoms (same distribution/quality), not just local discomfort.
- Symptom behavior change: symptoms peripheralize/centralize, intensify, or ease in a pattern consistent with the hypothesis.
- Structural differentiation changes symptoms (e.g., moving a distant joint alters symptoms, suggesting neural mechanosensitivity rather than local tissue strain).
2) Cervical-Related Tests: Rationale Over Recipes
Cervical special tests often revolve around two principles:
- Neural provocation/tension: does loading the nerve pathway reproduce familiar arm symptoms and change with structural differentiation?
- Compression vs. decompression: do maneuvers that narrow foraminal space provoke symptoms, and do maneuvers that unload relieve them?
A) Upper Limb Neurodynamic Test (ULNT) Concept (Median nerve bias example)
Purpose: To assess neural mechanosensitivity and whether arm symptoms behave like nerve-related symptoms rather than purely local muscle/joint pain.
Setup: Patient supine. Clinician stands to the side of the tested arm. Explain that the goal is to reproduce symptoms safely and that you will stop if symptoms are intense or unusual.
- Listen to the audio with the screen off.
- Earn a certificate upon completion.
- Over 5000 courses for you to explore!

Download the app
Procedure (step-by-step):
- Depress the shoulder gently (avoid aggressive force).
- Abduct the shoulder (often ~90° as tolerated).
- Externally rotate the shoulder.
- Supinate the forearm and extend the wrist/fingers.
- Extend the elbow gradually.
- Structural differentiation: add cervical side-bending (typically away may increase symptoms; toward may decrease—interpretation depends on the bias and patient).
Positive response definition: Reproduction of the patient’s familiar distal symptoms (e.g., tingling/numbness in a recognizable distribution) plus meaningful change with structural differentiation (neck movement changes symptoms without changing the arm position). Local stretch discomfort alone is not a strong positive.
What to do next:
- If positive and consistent with the history: pair with a compression/decompression principle test (below) and compare sides.
- If symptoms are vague or only “tightness”: reduce intensity, check irritability, and consider that the test may be non-specific.
- If symptoms are severe, widespread, or accompanied by dizziness/visual changes: stop and prioritize safety screening.
B) Cervical Compression Principle (Spurling-type rationale)
Purpose: To see whether foraminal loading reproduces familiar arm symptoms consistent with cervical radicular involvement.
Setup: Patient seated, posture comfortable. Clinician stands behind/side. Ensure the patient understands they must report any arm symptom reproduction immediately.
Procedure (step-by-step):
- Start in neutral head position; apply gentle axial compression only if tolerated.
- If neutral is tolerated and clinically appropriate, add slight extension and side-bending/rotation toward the symptomatic side (progress gradually).
- Apply gentle, controlled compression; avoid sudden force.
Positive response definition: Reproduction of the patient’s familiar radiating arm symptoms (not just neck pain). A response that stays local to the neck is less supportive of a nerve root hypothesis.
What to do next:
- If positive: consider adding a decompression test (traction/distraction principle) to see if symptoms ease with unloading.
- If negative but suspicion remains moderate/high: do not “force” the test; use additional evidence (neurodynamic behavior, symptom distribution, functional aggravators).
C) Cervical Distraction/Traction Principle
Purpose: To see whether unloading the cervical spine reduces familiar arm symptoms, supporting a compression-sensitive mechanism.
Setup: Patient supine or seated. Clinician positions hands to support occiput and chin/mandible (avoid pressure on throat).
Procedure (step-by-step):
- Begin with gentle upward traction in a comfortable neck position.
- Hold briefly and ask about symptom change (especially arm symptoms).
- Adjust angle slightly if needed (small changes only).
Positive response definition: Meaningful reduction of the patient’s familiar radiating symptoms during traction (not just “it feels nice”).
What to do next:
- If traction relieves and compression provokes: this pattern strengthens a compression-sensitive hypothesis.
- If traction worsens symptoms: stop; consider irritability, alternative mechanisms, or contraindications.
How cervical tests support or refute hypotheses (quick mapping)
| Hypothesis | Test behavior that supports it | Test behavior that weakens it |
|---|---|---|
| Cervical nerve root irritation | Familiar arm symptoms reproduced by compression; eased by distraction; neurodynamic test reproduces symptoms with structural differentiation | Only local neck pain; no symptom change with differentiation; inconsistent responses across tests |
| Peripheral nerve entrapment more likely than cervical source | Neurodynamic symptoms change more with distal components than neck position; cervical compression/distraction has little effect | Clear cervical loading/unloading pattern affecting arm symptoms |
| Non-neural musculoskeletal pain | Local pain without distal reproduction; neurodynamic test produces only stretch discomfort | Consistent distal symptom reproduction with differentiation |
3) Thoracic Considerations: Screening Mindset and Red-Flag Priority
In the thoracic region, “special tests” are often less about pinpointing a single structure and more about screening and triaging. Thoracic pain can be mechanical, but the clinician must keep a higher index of suspicion for non-musculoskeletal contributors compared with many neck/low back presentations.
When to prioritize medical red flags over special tests
- Disproportionate, unrelenting pain not matching mechanical patterns.
- Systemic features (fever, unexplained weight loss, night sweats).
- Significant trauma or osteoporosis risk.
- Cardiopulmonary-type symptoms (shortness of breath, chest pressure, exertional symptoms).
- Neurological signs suggesting spinal cord involvement (progressive gait issues, bilateral symptoms, new bowel/bladder changes).
In these scenarios, the “next step” is not more orthopedic testing—it is appropriate medical referral or urgent evaluation depending on severity.
Thoracic screening test example: Rib/Thoracic Springing (mobility + symptom response)
Purpose: To screen thoracic/rib mobility and see whether localized mechanical provocation reproduces the patient’s familiar thoracic pain (not to diagnose a single tissue).
Setup: Patient prone. Clinician places hands over the thoracic segments or rib angles, applying gentle anterior pressure.
Procedure (step-by-step):
- Start away from the most painful area.
- Apply gentle oscillatory pressure (small amplitude) to assess stiffness and symptom response.
- Compare side-to-side and segment-to-segment.
Positive response definition: Reproduction of the patient’s familiar, localized thoracic pain in a mechanical way (provoked by pressure, eased when pressure stops), without systemic or neurological features.
What to do next:
- If mechanical and localized: proceed with conservative mechanical management and monitor response.
- If pain is severe, atypical, or accompanied by red-flag features: stop and escalate screening/referral.
4) Lumbar-Related Tests: Straight Leg Raise and Slump as Concepts
Lumbar special tests commonly aim to determine whether leg symptoms behave like neural mechanosensitivity (often related to lumbar nerve root involvement) versus referred pain or local tissue pain. Two cornerstone concepts are the Straight Leg Raise (SLR) and the Slump.
A) Straight Leg Raise (SLR) Concept
Purpose: To assess whether symptoms in the leg are provoked by loading the lumbosacral nerve roots/sciatic nerve pathway, supporting a radicular-type hypothesis when matched to the presentation.
Setup: Patient supine. Clinician lifts the symptomatic leg with the knee straight. Keep the movement slow and controlled.
Procedure (step-by-step):
- Raise the leg in hip flexion with knee extended until symptoms appear or resistance limits motion.
- Ask the patient to describe symptoms precisely (location, quality, intensity).
- Structural differentiation: add ankle dorsiflexion or slight hip adduction/internal rotation (as tolerated) to see if distal neural loading changes symptoms.
- Optionally reduce symptoms by easing dorsiflexion or lowering the leg slightly to confirm behavior.
Positive response definition (symptom behavior terms): Reproduction of the patient’s familiar leg symptoms (often below the knee) that are sensitized by added neural loading (e.g., dorsiflexion increases symptoms) and desensitized when that component is removed. Hamstring stretch alone, confined to the posterior thigh without familiar symptoms, is not a strong positive.
What to do next:
- If positive and consistent: consider adding the Slump concept test to see if findings converge; monitor for peripheralization/centralization patterns with repeated movements or positional changes.
- If highly irritable (symptoms spike quickly): stop early and use gentler confirmation strategies (smaller ranges, fewer sensitizers).
B) Slump Concept
Purpose: To assess neural mechanosensitivity through a multi-segment posture that increases tension along the neural tract, with clear opportunities for structural differentiation.
Setup: Patient seated at edge of table with hands behind back or resting on lap. Clinician cues a relaxed slump posture without forcing.
Procedure (step-by-step):
- Ask the patient to slump through thoracic/lumbar flexion.
- Add cervical flexion (chin toward chest) if tolerated.
- Extend the knee on the symptomatic side gradually.
- Add ankle dorsiflexion.
- Structural differentiation: release cervical flexion (look up) while keeping the leg position—note symptom change.
Positive response definition (symptom behavior terms): Reproduction of familiar leg symptoms that change meaningfully with structural differentiation (e.g., symptoms ease when the neck is extended even though the leg position stays the same). Non-specific posterior thigh tightness without familiar symptom reproduction is less meaningful.
What to do next:
- If positive: interpret alongside distribution, neurological findings, and functional aggravators; consider test clusters rather than a single test.
- If negative but suspicion remains: consider whether symptoms are more consistent with referred pain, hip involvement, or non-neural drivers.
5) Limitations: False Positives, Irritability, and Why Clusters Matter
False positives: why “it reproduced something” isn’t enough
- Neurodynamic tests can provoke normal stretch sensations, especially in flexible or anxious patients.
- Compression tests can provoke local joint/muscle pain that mimics the patient’s complaint but doesn’t confirm nerve root involvement.
- Expectation and guarding can amplify responses; consistent symptom behavior and differentiation improve confidence.
Irritability: match test intensity to symptom reactivity
Highly irritable presentations require minimal provocation. Use smaller ranges, fewer sensitizers, and stop earlier. A test that flares symptoms for hours provides poor information and can harm trust and function.
Why clusters often matter
Single tests rarely “diagnose.” Confidence improves when multiple findings point in the same direction. A practical approach is:
- One provocation test (reproduces familiar symptoms).
- One relief/unloading test (reduces familiar symptoms) or a second provocation test with a different mechanism.
- One differentiation step (changes symptoms without changing the primary local structure position).
When findings conflict, return to the hypothesis and pre-test probability rather than repeating tests more aggressively.
6) Safety Rules, Contraindications, and Immediate Cessation Criteria
General safety rules (apply to all regions)
- Explain the goal and expected sensations before testing; obtain consent.
- Start low, go slow: begin with the least provocative version and progress only if needed.
- Prefer symptom reproduction that is brief and reversible. Avoid chasing strong pain.
- Monitor after-effects: if a test significantly worsens symptoms and does not settle quickly, document and avoid repeating.
Common contraindications/precautions (screen before testing)
- Suspected fracture, infection, malignancy, or other serious pathology.
- Severe, progressive neurological deficits or signs suggestive of spinal cord involvement.
- Known vascular compromise or symptoms suggestive of vascular involvement (especially with cervical testing).
- High irritability where minimal movement causes major symptom escalation.
- Recent surgery or unstable conditions where loading/unloading is restricted.
Immediate cessation criteria (stop the test right away)
- Dizziness, faintness, visual changes, drop attacks, new nausea, or unusual headache onset during cervical testing.
- New or rapidly worsening neurological symptoms: sudden weakness, spreading numbness, marked coordination changes.
- Severe pain spike that feels alarming to the patient or does not ease when the position is released.
- Shortness of breath, chest pressure, sweating, or systemic distress during thoracic-related assessment.
What to do when you stop
- Return the patient to a comfortable position and reassess symptoms.
- Document the exact position/procedure that triggered the response.
- If red-flag features are present or symptoms are concerning: escalate to appropriate medical evaluation.
- If symptoms settle quickly and no red flags: choose a lower-intensity alternative or defer special testing and rely on less provocative measures.