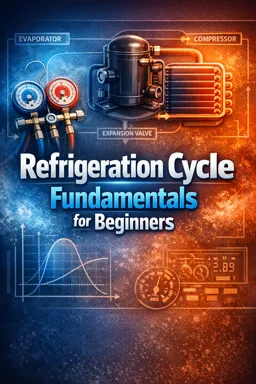
One Simple Cycle Diagram: The “Map” That Connects Every Component
You already know what each component does on its own. This chapter is about seeing the whole loop at once—so you can point to any spot in the system and say, “I know what the refrigerant is doing right here.” We’ll use two beginner-friendly views at the same time:
- Cycle schematic (the piping loop): shows where the refrigerant physically goes and where heat/work happen.
- Conceptual P–h or T–s style sketch: shows how the refrigerant’s “state” moves through the four processes.
We’ll label four main state points (1–4). Many technicians also talk about “extra” points for subcooling and superheat; we’ll show where those appear without turning this into a math chapter.
The Four State Points (Use These Labels Everywhere)
| State point | Where it is (component boundary) | Common name | Big idea |
|---|---|---|---|
| 1 | Evaporator outlet / compressor inlet | Suction | Low-pressure vapor (often slightly superheated) |
| 2 | Compressor outlet / condenser inlet | Discharge | High-pressure vapor (hot) |
| 3 | Condenser outlet / metering device inlet | Liquid line | High-pressure liquid (often subcooled) |
| 4 | Metering device outlet / evaporator inlet | Evaporator inlet | Low-pressure mixture (liquid + vapor) |
Keep these four points fixed in your mind. When you later add details (superheat/subcooling, pressure drops, line heat gain), you still anchor everything to 1–2–3–4.
Cycle Schematic: Where Heat Moves and Where Work Is Added
Use this simple loop as your “storyboard.” Arrows show refrigerant flow; labels show energy interactions.
(Work in) Ẇ to compressor (Heat out) Q̇out to ambient air/water ↓↓↓↓↓↓↓↓↓↓↓↓↓↓↓↓↓↓↓↓↓↓↓↓↓↓↓↓↓↓↓↓↓↓↓↓↓↓↓↓↓↓ 1 ──> [ COMPRESSOR ] ──> 2 ──> [ CONDENSER ] ──> 3 ──> [ METERING ] ──> 4 ──> [ EVAPORATOR ] ──> 1 ↑↑↑↑↑↑↑↑↑↑↑↑↑↑↑↑↑↑↑↑↑↑↑↑↑↑↑↑↑↑↑↑↑↑↑↑↑↑↑↑↑↑↑↑↑↑↑↑↑↑↑↑↑↑↑↑↑↑↑↑↑↑↑↑↑ (Heat in) Q̇in from cooled space/air/water- Work is added only across the compressor (1 → 2).
- Heat is rejected in the condenser (2 → 3) to the surroundings.
- Pressure is dropped in the metering device (3 → 4) without adding work.
- Heat is absorbed in the evaporator (4 → 1) from what you’re cooling.
When troubleshooting, you can often start by asking: “Is the problem about work input, heat rejection, pressure drop/feeding, or heat absorption?” This schematic keeps those roles separate.
- Listen to the audio with the screen off.
- Earn a certificate upon completion.
- Over 5000 courses for you to explore!

Download the app
Conceptual P–h Sketch: A Beginner’s “Shape” of the Cycle
A true pressure–enthalpy chart has curved saturation lines and lots of detail. You don’t need that here. You need a shape that helps you predict what changes across each component.
Below is a simplified P–h style sketch. Think “up” = higher pressure, “right” = higher heat content (enthalpy). The dome represents the two-phase region (mixture). Points 1–4 trace one loop.
Pressure (P) ↑ 2 (high P vapor) | /| | / | heat rejected in condenser (2→3) | / | | / | | / | | / | | / | | / | | / | | / | | / | | / | | / | | / | | / | |/ | | (saturation “dome”) | \\ | | \\ | | \\ | | \\ | | \\ | | \\ | | \\ | | \\ | | \\| | 3 (high P liquid) | | | | | 4 (low P mixture) | / evaporator heat absorbed (4→1) | / | / | / | 1 (low P vapor) +----------------------------------------------------→ Enthalpy (h)How to read it conceptually:
- 1 → 2 (compression): moves “up” to higher pressure and typically “right” (more energy in the refrigerant due to work input).
- 2 → 3 (condensing): stays at high pressure while moving “left” as heat is rejected; ends as liquid at point 3.
- 3 → 4 (expansion): drops pressure sharply; on a P–h view it’s often drawn as a near-vertical move (enthalpy roughly constant conceptually).
- 4 → 1 (evaporation): stays at low pressure while moving “right” as heat is absorbed; ends as vapor at point 1.
Where Superheat and Subcooling Appear on the Diagram
To show superheat and subcooling, add two “bonus” markers near points 1 and 3. You are not changing the four main points; you are clarifying what “extra” happens at the ends of the heat exchangers.
- Superheat appears at the evaporator outlet: after the refrigerant finishes boiling (reaches saturated vapor), any additional heat absorption raises vapor temperature. On the conceptual P–h sketch, that’s the tail end of 4 → 1 extending into the vapor region beyond the dome. You can imagine an intermediate point
1'at “just saturated vapor,” then1slightly to the right as superheated vapor. - Subcooling appears at the condenser outlet: after the refrigerant finishes condensing (reaches saturated liquid), any additional heat rejection lowers liquid temperature. On the sketch, that’s the tail end of 2 → 3 extending into the liquid region beyond the dome. Imagine an intermediate point
3'at “just saturated liquid,” then3slightly further left as subcooled liquid.
If you prefer a T–s mental picture: superheat is “to the right of saturated vapor,” subcooling is “to the left of saturated liquid.” The key is that both are extensions beyond phase change completion at essentially the same side pressure level (evaporator pressure for superheat, condenser pressure for subcooling).
Put Both Views Together: One Mental Model
Use this checklist to connect the schematic to the diagram every time:
- Across the compressor (1→2): identify it as the only place where work is added. On the diagram, it’s the “jump” to the high-pressure level.
- Across the condenser (2→3): identify it as the place where heat is rejected. On the diagram, it’s the high-pressure path moving toward liquid, possibly continuing into subcooling.
- Across the metering device (3→4): identify it as the place where pressure drops and a mixture forms. On the diagram, it’s the drop from high to low pressure into the two-phase region.
- Across the evaporator (4→1): identify it as the place where heat is absorbed. On the diagram, it’s the low-pressure path through the dome to vapor, possibly continuing into superheat.
Guided Activity: Trace the Refrigerant (Predict Before You Read)
Instructions: Start at point 1. For each step, pause and answer the prediction questions. Then check the “Expected direction of change.” You can do this with the schematic, the conceptual P–h sketch, or both.
Step A: Point 1 → Through the Compressor → Point 2
- Predict: Does pressure go up, down, or stay about the same?
- Predict: Does the refrigerant become “more vapor,” “more liquid,” or stay vapor?
- Predict: Is heat being absorbed/rejected here, or is work being added?
Expected direction of change: Pressure up; refrigerant remains vapor; work is added (this is the energy input to the cycle).
Step B: Point 2 → Through the Condenser → Point 3
- Predict: Is the refrigerant giving heat to the surroundings or taking heat in?
- Predict: Does it move toward liquid, toward vapor, or stay the same?
- Predict: Where would subcooling show up—near the beginning, middle, or end of this path?
Expected direction of change: Heat is rejected; refrigerant moves from vapor toward liquid; subcooling appears at the end after it is fully liquid.
Step C: Point 3 → Through the Metering Device → Point 4
- Predict: Does pressure rise, fall, or stay about the same?
- Predict: Does the refrigerant become a single phase or a mixture?
- Predict: Is work added here?
Expected direction of change: Pressure falls sharply; refrigerant becomes a mixture; no work is added (it’s a throttling/expansion process).
Step D: Point 4 → Through the Evaporator → Point 1
- Predict: Is heat absorbed or rejected?
- Predict: Does the refrigerant move toward vapor or toward liquid?
- Predict: Where would superheat show up—near the beginning, middle, or end of this path?
Expected direction of change: Heat is absorbed; refrigerant moves from mixture toward vapor; superheat appears at the end after it is fully vapor.
Quick Self-Check: Can You Label This Without Looking?
On a blank sheet, draw the four boxes (compressor, condenser, metering device, evaporator) in a loop. Then place the numbers:
- 1 between evaporator outlet and compressor inlet
- 2 between compressor outlet and condenser inlet
- 3 between condenser outlet and metering device inlet
- 4 between metering device outlet and evaporator inlet
Finally, add three arrows: Q̇in into the evaporator, Q̇out out of the condenser, and Ẇin into the compressor. If you can do that from memory, you have a working cycle model you can apply to real equipment.