Why Hallucinations Happen and What “Reduction” Really Means
In classroom use, a “hallucination” is when an AI system produces information that sounds confident but is incorrect, unverifiable, or not supported by the provided materials. This can look like invented citations, misquoted definitions, wrong dates or formulas, fabricated research findings, or “helpful” details that were never in your source text. Hallucinations are not a sign of malice; they are a predictable failure mode of systems that generate plausible language. Reducing hallucinations means designing prompts and workflows that (1) limit the model’s freedom to invent, (2) require evidence for claims, and (3) add checks that catch errors before students see them.
For educators, the goal is not “perfect truth” from the first draft. The goal is dependable outputs for instructional use: lesson materials that match your curriculum, quizzes whose answers are defensible, and feedback that references student work accurately. The most reliable approach is to treat AI output as a draft that must pass verification gates. Those gates can be lightweight (a quick cross-check) or formal (a structured sourcing table), depending on the stakes.
Three Levers: Verification, Sourcing, and Cross-Checks
Hallucination reduction becomes manageable when you separate it into three levers you can control. Verification is the act of checking whether a claim is true or matches a given source. Sourcing is the discipline of attaching each claim to evidence (a quote, a page number, a line from a provided text, a dataset row). Cross-checks are redundancy: you compare outputs against another reference, another method, or another model run to detect inconsistencies. Used together, these levers turn AI from a “single-shot answer machine” into a controlled assistant that must show its work.

In practice, you will choose a verification level based on risk. Low-stakes: a warm-up prompt or brainstorming examples might only need a quick plausibility scan. Medium-stakes: a quiz or study guide should require citations to your provided materials. High-stakes: anything graded, published, or shared widely should include a sourcing table and at least one independent cross-check (for example, checking against your textbook or a trusted reference you already use).
Verification Workflows Educators Can Use Without Coding
Verification is easiest when you decide in advance what “counts” as verified. A helpful rule is: if it can’t be traced to a source you trust, it can’t appear in the final student-facing material. This is especially important for factual statements, definitions, and claims about what a text says. Verification can be done by you, by the AI (with constraints), or by a combination, but the final responsibility remains with the educator.
- Listen to the audio with the screen off.
- Earn a certificate upon completion.
- Over 5000 courses for you to explore!

Download the app
Workflow A: “Source-First” Generation (Most Reliable)
In a source-first workflow, you provide the source material first (a passage, notes, a policy excerpt, a lab procedure, a dataset snippet) and instruct the AI to use only that material. This reduces hallucinations because the model is not asked to “know” the world; it is asked to transform a bounded input. You also require the AI to quote or point to the exact part of the source it used for each key claim.
Task: Create 8 comprehension questions and an answer key based ONLY on the provided passage. Do not use outside knowledge. For each answer, include a short evidence quote (5–15 words) from the passage that supports it. If the passage does not contain the information, write: “Not in passage.”Step-by-step: (1) Paste the passage. (2) Ask for questions plus an evidence quote per answer. (3) Scan for any answer that lacks a quote or uses “Not in passage.” (4) Revise the question set to remove or rewrite items that require outside knowledge. (5) Only then format for students.
Workflow B: “Claim Check” on AI-Generated Drafts
Sometimes you need the AI to draft first (for example, a set of examples or a summary), and then you verify. In a claim-check workflow, you ask the AI to extract its own claims and label them by verifiability. This is powerful because it turns a long paragraph into a checklist you can validate quickly.
Take the draft you just wrote. Extract every factual claim as a bullet list. For each claim, add: (a) confidence 1–5, (b) what source would verify it (textbook section, provided handout, class notes), and (c) whether it is directly supported by the provided materials. Do not add new claims.Step-by-step: (1) Generate the draft. (2) Run the claim extraction prompt. (3) Delete or rewrite any claim that is not directly supported by your materials. (4) If you want to keep a claim, verify it using a trusted reference you already rely on (for example, your adopted text or a vetted handout). (5) Re-run the claim extraction after edits to ensure the final version contains only verifiable claims.
Workflow C: “Answer-Key First” for Assessments
Hallucinations are especially harmful in assessments because a single wrong answer key can misgrade an entire class. A safer approach is to generate the answer key first with evidence, then generate the questions that match it. This flips the usual process and reduces the chance of mismatched distractors or ambiguous correct answers.
Using ONLY the provided reference sheet, create an answer key of 10 target facts/skills students should demonstrate. For each target, include: correct answer, evidence line/quote from the reference sheet, and a common misconception.Step-by-step: (1) Provide the reference sheet or notes. (2) Generate targets with evidence. (3) You review targets for accuracy and relevance. (4) Ask the AI to write questions that align to each target, explicitly using the approved evidence. (5) Spot-check by answering each question using only the reference sheet.
Sourcing: Making Evidence Visible and Auditable
Sourcing is the habit of requiring the AI to attach evidence to outputs. In education, sourcing is not just about citations; it is about traceability. If a student asks, “Where did this come from?” you should be able to point to the exact line in the provided text, the exact step in a procedure, or the exact row in a dataset. When you build sourcing into prompts, you reduce hallucinations because the model must stay anchored to something concrete.
Use “Evidence Tags” Inside the Output
Evidence tags are short markers that connect a statement to a source chunk. You can label your source text in advance (for example, [A], [B], [C]) and require the AI to tag each sentence. This is simple and effective for summaries, study guides, and teacher notes.
I will provide a passage labeled [A]–[F]. Write a 150-word summary. Every sentence must end with one or more evidence tags like [B][D]. If a sentence cannot be supported, omit it.Step-by-step: (1) Paste the passage and add labels to paragraphs. (2) Request a tagged summary. (3) Randomly select 3 sentences and verify the tags by checking the labeled paragraphs. (4) If tags are wrong, instruct the AI to correct tags without changing content, then re-check.
Create a “Sourcing Table” for High-Stakes Materials
A sourcing table is a two-column or three-column table (you can request it as plain text) that lists each claim and its evidence. This is especially useful for parent-facing communications, policy summaries, or any content that must be precise.
Create a sourcing table with columns: Claim | Evidence (exact quote) | Source location (paragraph label). Use ONLY the provided text. Then write the final handout using only claims that appear in the table.Step-by-step: (1) Generate the table. (2) Review the table for completeness and accuracy. (3) Approve or delete claims. (4) Generate the handout from the approved claims only. (5) Keep the table as your audit trail.
Require “No Citation, No Claim” Rules
A simple constraint can dramatically reduce hallucinations: any sentence that contains a factual claim must include evidence. If the AI cannot provide evidence, it must either ask a question or mark the statement as unknown. This is particularly helpful when summarizing multiple documents.
Rule: No citation, no claim. If you cannot cite the provided materials for a statement, replace it with: [Needs source]. Ask up to 3 clarifying questions if needed.Cross-Checks: Redundancy That Catches Errors Early
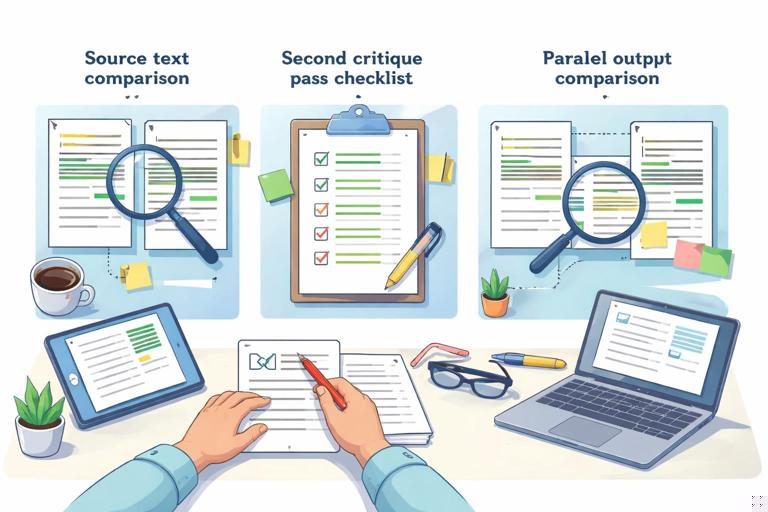
Cross-checks are deliberate redundancy. You compare the AI’s output against another reference or another method to find contradictions, missing pieces, or invented details. Cross-checks are valuable because hallucinations often “feel” correct; you need a process that reveals them. In education workflows, cross-checks can be quick and practical: compare to your source text, run a second pass with a different prompt, or ask the AI to critique its own work under strict rules.
Cross-Check Type 1: “Two-Pass with Different Tasks”
Instead of asking for a summary and trusting it, you ask for a summary and then ask for a list of what was omitted, what was uncertain, and what might be misinterpreted. The second pass is not allowed to add new facts; it only evaluates the first pass.
Pass 2: Review the summary you wrote. Identify (1) any sentence that could be misread, (2) any missing key idea from the source, and (3) any sentence that is not directly supported. Do not add new information—only critique.Step-by-step: (1) Generate the summary. (2) Run the critique pass. (3) Edit the summary based on critique. (4) Re-run the critique until no unsupported sentences remain.
Cross-Check Type 2: “Adversarial Reviewer”
You can instruct the AI to act as a skeptical reviewer whose job is to find errors, ambiguity, or unsupported leaps. The key is to constrain the reviewer to the same source materials so it cannot introduce new hallucinations while “correcting” the first output.
Act as a skeptical reviewer. Using ONLY the provided passage, flag any claim in the draft that is not explicitly supported. For each flag, quote the closest supporting line OR state “no support found.” Do not rewrite the draft.Step-by-step: (1) Provide the passage and the draft. (2) Get flagged items. (3) Remove or revise flagged claims. (4) If you revise, require evidence tags for the revised sentences.
Cross-Check Type 3: “Consistency Checks for Numbers, Steps, and Terms”
Hallucinations often appear as small inconsistencies: the number of steps changes, a term is defined two different ways, or a formula is slightly altered. You can ask for a consistency report that checks these mechanical elements.
Scan the document and report: (1) all numbers and quantities, (2) all defined terms and their definitions, (3) all procedures/steps. Identify any inconsistencies or places where the same item appears in two different forms.Step-by-step: (1) Run the consistency scan. (2) Fix inconsistencies in the draft. (3) Re-run the scan to confirm alignment.
Cross-Check Type 4: “Parallel Generation and Diff”
Another practical cross-check is to generate two versions independently and compare them. If the outputs disagree on key facts, that is a signal to verify. You can do this by running the same prompt twice, or by changing the format (for example, one summary as bullets, one as a concept map description). Differences reveal where the model may be guessing.
Create two independent outputs from the same source: Version 1 is a bullet summary; Version 2 is a Q&A study guide. Then list any points where Version 1 and Version 2 disagree or use different terminology. Do not resolve disagreements—only list them.Step-by-step: (1) Generate both versions. (2) Review disagreements. (3) Verify disputed points in the source. (4) Edit both outputs to match the verified source language.
Prompt Patterns That Reduce Hallucinations Immediately
Small prompt patterns can reduce hallucinations even before you add full workflows. These patterns work because they limit the model’s degrees of freedom and force it to surface uncertainty.
Bounded knowledge: “Use only the provided text. If it’s not there, say so.” This prevents the model from filling gaps with plausible inventions.
Forced uncertainty labels: Require labels such as “Directly stated,” “Inferred,” or “Not stated.” Then you can remove inferred items when you need strict accuracy.
Evidence-first formatting: Ask for evidence quotes before explanations. When the model must produce a quote, it is less likely to invent a claim that cannot be quoted.
Clarifying questions gate: “If you need missing information, ask up to 3 questions before drafting.” This reduces guesswork when your prompt is underspecified.
Restricted output types: Use templates (tables, bullet lists, short fields) instead of open-ended prose when accuracy matters. Structure makes verification faster.
Classroom Use Cases with Step-by-Step Prompts
Use Case 1: Turning a Reading Passage into a Verified Study Guide
Goal: create a student study guide that does not introduce outside facts. Method: source-first generation plus evidence tags.
Input: I will paste a passage labeled [P1]–[P6]. Task: Create a study guide with 6 key points and 6 vocabulary items. Constraints: Use ONLY the passage. Each key point must include an evidence quote (5–12 words) and a paragraph label. Each vocabulary definition must be supported by an evidence quote; if the passage does not define it, write “term appears but is not defined.”Step-by-step: (1) Label paragraphs and paste. (2) Generate the guide. (3) Check that every key point has a quote and label. (4) Remove any vocabulary item that is “not defined” unless your goal is to discuss context clues. (5) Optionally ask for a second pass: “Flag any key point that is inference rather than direct statement.”
Use Case 2: Creating a Lab Procedure Handout Without Invented Steps
Goal: produce a clear handout that matches your approved procedure exactly. Method: consistency check plus sourcing table for steps.
Using ONLY the procedure I provide, rewrite it as a student handout. Output two parts: (A) Step-by-step procedure numbered exactly as in the source, (B) a sourcing table with columns: Step # | Exact source sentence(s). Do not add safety steps unless they appear in the source; if safety info is missing, add a section titled “Missing safety information” listing what is absent without inventing it.Step-by-step: (1) Paste your procedure. (2) Review the numbered steps: count and order must match. (3) Compare 3 random steps to the source sentences. (4) If “Missing safety information” appears, decide whether to add your own approved safety notes (human-authored) and then re-run the handout generation with the updated source.
Use Case 3: Checking AI Feedback for Misreferences to Student Work
Goal: avoid feedback that claims a student did something they did not do. Method: quote-anchored feedback.

I will paste a student response. Provide feedback in two sections: (1) “What the student actually wrote” with 2–4 short direct quotes, (2) “Feedback” where every critique or praise must reference one of the quotes by repeating 3–8 exact words from it. If you cannot find evidence in the student text, write “cannot verify from student response.”Step-by-step: (1) Paste student response. (2) Ensure the quotes are exact. (3) Check that each feedback point references a quote. (4) Remove any point marked “cannot verify” unless you plan to ask the student a question instead of asserting.
Common Failure Modes and How to Design Around Them
Even with good prompts, certain failure modes appear repeatedly in educator workflows. Planning for them makes your verification faster.
Invented citations: The AI may fabricate page numbers, article titles, or links. Design around it by restricting sources to what you provide and using paragraph labels instead of external citations.
Overconfident paraphrase drift: A summary may subtly change meaning. Design around it with evidence quotes and a second-pass critique that flags inference.
Definition creep: Terms get defined more broadly than your curriculum intends. Design around it by requiring definitions to be directly quoted or explicitly marked “not defined.”
Procedure mutation: Steps are reordered or “improved.” Design around it by requiring step counts to match and by generating a sourcing table for each step.
Math and unit slips: Units or numbers change. Design around it with a consistency scan that lists all quantities and with manual spot-checking of calculations.
A Practical “Verification Ladder” for Educators
To make this sustainable, use a ladder: start with the lightest check that fits the risk, and climb only when needed. Level 1 is a quick scan for obvious errors and unsupported claims. Level 2 adds evidence tags for key statements. Level 3 adds a sourcing table for all claims. Level 4 adds cross-checks: critique pass, consistency report, and parallel generation. Level 5 is human verification against your trusted references plus a final read-through for clarity and alignment. The ladder helps you avoid overchecking low-stakes materials while still protecting students from errors in high-stakes contexts.

When you build verification, sourcing, and cross-checks into your routine, you also model good academic habits: claims require evidence, uncertainty is labeled, and drafts are improved through review. The result is not just fewer hallucinations; it is a more transparent workflow where you can explain why a material is accurate and where it came from.