Why these four factors belong in your schedule (not just in your notes)
Permits, inspections, subcontractor availability, and material lead times are not “administrative” details that sit outside the schedule. They are time-bound, dependency-driven events that can stop production even when crews are ready. In residential and small-to-mid commercial work, these items often create hidden gaps: the site is prepped but the permit is pending; drywall is ready but the rough-in inspection is not booked; the tile sub can’t start for three weeks; the switchgear is on a 20-week lead time. If these constraints are not represented as planned activities (or at least as explicit schedule constraints with dates and logic), the schedule will look achievable while the project is structurally unable to flow.
This chapter focuses on how to model these realities so your schedule becomes a tool for procurement and coordination—not just a sequence of construction tasks.
Permits: treating approvals as schedule-driving deliverables
What a permit really is in scheduling terms
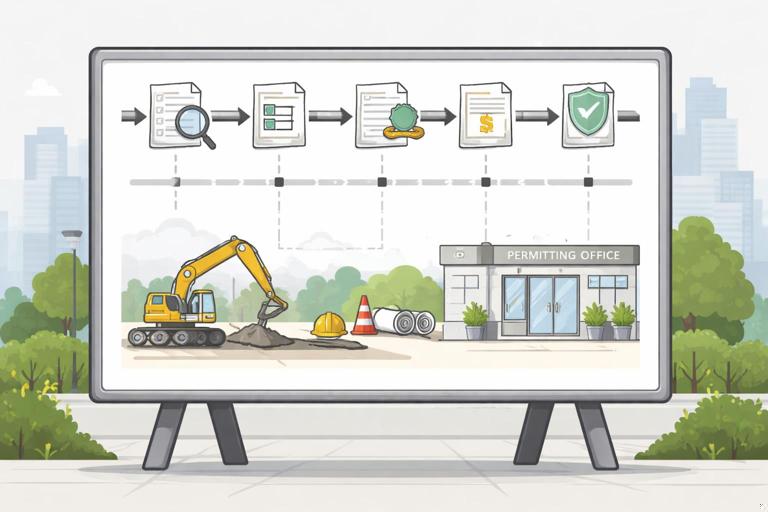
A permit is a gate that authorizes work to start or continue. Some permits are required before mobilization; others are required before a specific scope (e.g., electrical service upgrade, fire alarm, sprinkler, right-of-way work). From a scheduling perspective, a permit has: (1) a submission date you control, (2) a review cycle you partially control (through completeness and responsiveness), and (3) an approval date you must plan around.
Common permit-related schedule risks include incomplete submittals, plan review comments, resubmittals, agency backlogs, and missing supporting documents (engineering letters, energy calcs, product approvals, special inspections forms).
How to represent permits in the schedule
Model permits as a small chain of activities rather than a single “Permit” bar. This makes the schedule actionable because each step has an owner and a trigger.
- Listen to the audio with the screen off.
- Earn a certificate upon completion.
- Over 5000 courses for you to explore!

Download the app
- Prepare permit package (internal coordination, drawings, calcs, forms)
- Submit permit application (a milestone or short-duration activity)
- Plan review period (duration based on jurisdiction norms and project complexity)
- Respond to comments / resubmit (duration based on team capacity and expected comment volume)
- Permit issuance (milestone)
Link the Permit issuance milestone as a predecessor to the first field activity that legally requires it (e.g., “Start foundation excavation,” “Start framing,” “Start electrical rough-in,” depending on jurisdiction). Avoid leaving permit logic as a note; if it can stop work, it must be in the network.
Step-by-step: building a permit plan that protects the start date
Step 1: Create a permit register early. List each permit/approval, issuing authority, required documents, and the work it gates. Include utilities, right-of-way, environmental, fire marshal, elevator, health department, signage, and temporary power where applicable.
Step 2: Assign an “earliest submission date” and an owner. Many delays happen because nobody owns the package completeness. Assign a single accountable role (PM, permit expeditor, architect, engineer) and list dependencies like “final civil drawings” or “structural calc stamp.”
Step 3: Use realistic review durations. Don’t guess. Ask the jurisdiction for current cycle times, or use recent project data. If the agency is booking inspections two weeks out, assume plan review is also slower than normal.
Step 4: Add a comment-response allowance. Even strong submittals get comments. Add time for response and resubmission rather than assuming first-pass approval.
Step 5: Tie permit issuance to field start logic. If you can do limited work under a separate permit (e.g., grading permit before building permit), model that explicitly with separate gates and activities.
Practical example: grading permit vs. building permit
Suppose you can obtain a grading permit quickly while the building permit takes longer. If you model only “Building Permit” as a predecessor to “Mobilize,” you may miss a chance to start early. Instead, model:
- Prepare grading permit package → Submit grading permit → Review → Grading permit issued → Start erosion control → Start rough grading
- Prepare building permit package → Submit building permit → Review → Comments/resubmit → Building permit issued → Start foundations
This approach shows two parallel approval tracks and prevents the schedule from either (a) being overly conservative or (b) being unrealistically aggressive.
Inspections: converting “call for inspection” into planned time and logic

Why inspections cause schedule gaps
Inspections are not instantaneous. They require readiness, booking lead time, inspector availability, and sometimes re-inspections. They also create “hold points” where the next trade cannot proceed until approval is received. If inspections are not scheduled, teams tend to stack work, cover items prematurely, or idle crews waiting for sign-off.
Inspection types you should plan for
- Jurisdictional inspections: footing, foundation, framing, rough MEP, insulation, drywall, final
- Third-party/special inspections: soils compaction, structural steel, welding, post-installed anchors, fireproofing
- Owner/consultant inspections: above-ceiling, punch walks, commissioning prefunctional checks
- Utility inspections: service release, meter set, backflow test, gas pressure test
How to represent inspections in the schedule
For each inspection that gates work, include at least two activities:
- Prepare for inspection (complete work, internal QC, documentation)
- Inspection + approval (duration includes booking lead time and expected turnaround)
Then link “Inspection + approval” as a predecessor to the follow-on work (e.g., “Insulation inspection approval” → “Hang drywall”). If re-inspections are common in your jurisdiction, add a small allowance activity such as “Re-inspection window” or include contingency duration in the inspection activity.
Step-by-step: scheduling inspections so crews don’t wait
Step 1: Build an inspection matrix. For each inspection: what triggers it, what documents are required, who calls it, and what work is blocked until it passes.
Step 2: Add booking lead time explicitly. If the city is booking 3–5 business days out, your “Inspection + approval” activity should include that time. If approvals are posted same day, you can keep it short; if approvals take 24–48 hours, include it.
Step 3: Add an internal QC step. A 2-hour internal check can prevent a 3-day re-inspection delay. Model it as “QC walk for rough electrical” or “Pre-inspection checklist.”
Step 4: Coordinate multi-trade readiness. Rough-in inspections often require multiple trades to be complete. Create a readiness milestone like “Rough MEP ready for inspection” that is fed by electrical rough, plumbing rough, HVAC rough, and fire sprinkler rough (if applicable). Then the inspection follows that milestone.
Step 5: Protect downstream trades. If drywall crew is booked, do not schedule them to start the day after a rough inspection unless you have high confidence in passing and in inspector timing. Use a realistic buffer or schedule drywall start based on the inspection approval date plus a short stabilization window.
Practical example: rough-in inspection gating drywall
Instead of: “Rough MEP” → “Drywall,” use:
- Electrical rough complete → Rough MEP ready
- Plumbing rough complete → Rough MEP ready
- HVAC rough complete → Rough MEP ready
- QC pre-walk rough MEP → Rough MEP ready
- Rough MEP inspection (booking + pass) → Drywall start
This structure makes it obvious what must be done to avoid a drywall delay and gives you a clear coordination target: the “ready” milestone.
Subcontractor availability: scheduling around market reality

What “availability” means operationally
Subcontractor availability is the intersection of (1) the sub’s backlog, (2) crew size and skill mix, (3) geographic constraints, (4) sequencing constraints on your project, and (5) their willingness to commit to dates. In busy markets, the schedule is often constrained not by how fast the work can be performed, but by when the trade can show up and stay continuously productive.
Availability risk shows up as: delayed start, stop-and-go production, partial crews, or frequent remobilizations. Each of these increases duration and reduces predictability.
How to capture subcontractor availability in the schedule
You have three practical tools:
- Start-date commitments as constraints: If a subcontractor can only start “no earlier than” a certain date, represent that as a constraint on the start milestone for their scope (or as a predecessor from a “Sub available” milestone).
- Mobilization/lead-in activities: Add “Sub mobilize” or “Layout + material staging” activities that reflect the real ramp-up time.
- Continuity planning: Break work into zones/levels and ensure logic supports continuous flow, reducing the chance the sub leaves and returns later.
Avoid the common mistake of assuming a subcontractor will start immediately when the preceding trade finishes. If the sub is booked, the schedule must show the gap so you can either negotiate, resequence, or choose a different procurement strategy.
Step-by-step: turning trade commitments into schedule logic
Step 1: Ask for “earliest start” and “crew weeks,” not just duration. In precon or buyout, request: earliest start date, number of workers, expected production rate, and any blackout periods.
Step 2: Confirm what the sub needs to start. Examples: approved submittals, field dimensions, access, temporary power, hoist, laydown area, preceding inspection approvals.
Step 3: Add a “Subcontract executed” and “Precon meeting” milestone if it drives readiness. If you routinely see delays because contracts aren’t signed or kickoff meetings happen late, model these as administrative predecessors to mobilization.
Step 4: Use a “Sub available” milestone when dates are market-driven. Example: “Elevator installer available” milestone on a committed date, feeding “Elevator install start.” This makes the constraint visible and forces coordination around it.
Step 5: Plan for partial availability. If a sub can provide only a small crew initially, reflect that by splitting the activity into phases (e.g., “Rough-in Level 1,” “Rough-in Level 2”) or by adding a longer duration consistent with reduced manpower.
Practical example: drywall subcontractor booked out
Assume framing and rough MEP will be ready on March 10, but the drywall sub can’t start until March 24. If you leave drywall logic as “Rough inspection approval → Drywall start,” your schedule will show March 11 start and create false confidence. Instead, add:
- Drywall subcontractor available (constraint date: March 24) → Drywall start
- Rough MEP inspection approval → Drywall start
Now drywall start is driven by the later of the two: inspection approval and sub availability. This also prompts a management decision: can you negotiate an earlier slot, split the building into areas, or use a different subcontractor?
Material lead times: integrating procurement into the schedule
Lead time is not just “shipping”
Material lead time includes every step from selection to installation readiness. For many items, the longest portion is not transit; it is submittal approval, fabrication, and release. A realistic procurement timeline often includes:
- Finalize selection/spec
- Vendor quote and award
- Shop drawings/submittals
- Review/approval cycles (including resubmittals)
- Fabrication
- Shipping
- Receiving, inspection, and storage constraints
- Installation prerequisites (power, access, other trades complete)
Long-lead items commonly include switchgear, transformers, elevators, curtainwall/storefront, custom windows/doors, trusses, structural steel, mechanical equipment, generators, specialty lighting, tile/stone, casework, and certain roofing systems.
How to represent material lead times in the schedule
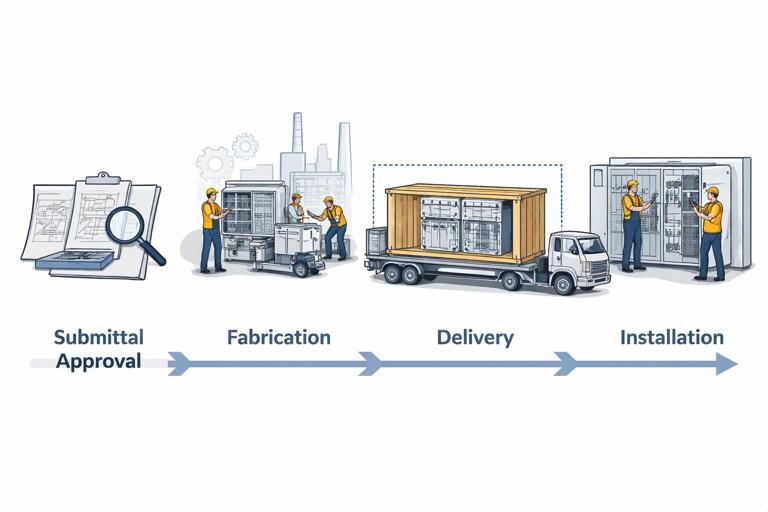
For schedule control, treat procurement as a mini-project with its own activities and milestones. At minimum, include:
- Approve submittals milestone
- Release for fabrication milestone
- Delivery to site milestone
- Install activity (already in your construction sequence)
Then link “Delivery to site” as a predecessor to the installation activity. If installation requires rough-in or embeds, link “Approved submittals” to those prerequisite tasks as well (e.g., “Approved storefront shop drawings” → “Install embeds/blocking”).
Step-by-step: building a procurement schedule that matches the field schedule
Step 1: Identify long-lead and “must-not-slip” items. Use a threshold (e.g., anything with lead time > 4 weeks or anything that gates inspections/occupancy). Create a log with required-on-site dates.
Step 2: Back-plan from the required-on-site date. If the air handling unit must be on site by June 1, and fabrication + shipping is 12 weeks, then release for fabrication must occur by roughly early March. If submittal approval takes 2–3 weeks, submittal must be submitted earlier still.
Step 3: Add review cycles as real durations. Submittals often bounce. Include at least one resubmittal cycle for complex items. If the design team historically takes 10 business days, do not schedule 2 days.
Step 4: Tie procurement milestones to field prerequisites. Examples: “Approved truss drawings” → “Frame roof” (or “Set trusses”); “Switchgear delivered” → “Electrical rough complete” may not be correct, but “Switchgear delivered” → “Set switchgear” → “Utility inspection” → “Permanent power” is often the gating chain.
Step 5: Include receiving constraints. If the site has limited laydown, delivery must be coordinated with installation windows. Model “Delivery window” or “Just-in-time delivery” as a milestone tied to “Install start.”
Practical example: switchgear lead time affecting permanent power
Many projects assume permanent power will be available “when electrical is done,” but the real driver is often utility coordination and switchgear delivery. A more realistic chain might be:
- Switchgear submittal approved → Release switchgear for fabrication
- Release switchgear for fabrication → Switchgear delivered
- Switchgear delivered → Set switchgear
- Set switchgear → Utility inspection / service release
- Utility service release → Permanent power available
- Permanent power available → Start commissioning / start HVAC startup / start certain finishes (as applicable)
By placing these procurement and utility milestones in the schedule, you can see early whether the project is actually capable of hitting startup and occupancy targets.
Coordinating the four constraints together: a workable integration method
Build a “constraints map” for each major phase
For each phase (sitework, structure, dry-in, rough-in, finishes, turnover), list the gates in four categories:
- Permits: what must be issued before work starts?
- Inspections: what must pass before work continues?
- Sub availability: which trades are market-constrained or require booking?
- Materials: what must be approved/released/delivered?
Then ensure each gate is represented as either an activity/milestone with logic or a constraint date that is visible and owned.
Use “readiness milestones” to avoid messy logic
When multiple prerequisites converge, a readiness milestone keeps the schedule readable. Examples:
- “Ready for foundation pour” fed by: footing inspection passed, rebar delivered, concrete booked, forms complete
- “Ready for rough MEP inspection” fed by: rough electrical complete, rough plumbing complete, rough HVAC complete, internal QC complete
- “Ready for ceiling close-in” fed by: above-ceiling inspection passed, fire/smoke dampers installed, insulation complete, low-voltage rough complete
This approach also supports weekly planning: the team can focus on achieving the readiness milestone rather than debating dozens of micro-predecessors.
Field-ready tools: registers and checklists that keep the schedule honest
Permit register (minimum fields)
- Permit name and authority
- Scope gated
- Submission target date
- Actual submission date
- Expected review duration
- Comments received date
- Resubmission date
- Issued date
- Owner (single accountable person)
Inspection plan (minimum fields)
- Inspection name
- Prerequisites checklist
- Who calls it
- Booking lead time assumption
- Pass/fail criteria notes
- Re-inspection process and typical delay
- Work blocked until pass
Procurement log (minimum fields)
- Item
- Required-on-site date (from schedule)
- Submittal due date
- Approval due date
- Release date
- Fabrication duration
- Ship duration
- Delivery date (forecast and actual)
- Storage/handling constraints
Subcontractor commitment tracker (minimum fields)
- Trade
- Earliest start date
- Committed start date (if obtained)
- Crew size assumption
- Mobilization requirements
- Constraints (access, power, inspections, submittals)
- Contact and escalation path
Common failure modes and how to prevent them in the schedule
Failure mode: “permit pending” is discovered after mobilization
Prevention: Make permit issuance a predecessor to the first gated field activity. If early work is allowed under a separate permit, model that explicitly rather than assuming the main permit covers it.
Failure mode: inspections are treated as zero-duration events
Prevention: Include booking lead time and approval turnaround in the inspection activity duration. Add internal QC activities to reduce re-inspection risk.
Failure mode: subcontractor start dates are assumed, not committed
Prevention: Add “Sub available” milestones with constraint dates when the market is tight. Update these dates as soon as commitments change, and let the schedule show the impact immediately.
Failure mode: long-lead items are tracked in emails but not tied to install dates
Prevention: Create procurement activities and link “Delivery to site” to installation. Back-plan submittals and release dates from required-on-site milestones.
Mini-workflow: implementing this on an active project in one week
Day 1–2: Collect constraints
- Pull permit requirements from drawings/specs and jurisdiction checklists
- List all inspections that gate work (including special inspections)
- Ask each key subcontractor for earliest start and crew availability windows
- Identify top 10–20 long-lead items and request current lead times from vendors
Day 3: Build registers and required-on-site dates
- Create permit register, inspection plan, procurement log, and sub commitment tracker
- For each long-lead item, define “required on site” based on the planned install start
Day 4: Insert schedule activities and milestones
- Add permit chains and link issuance to gated work
- Add inspection readiness and inspection approval activities
- Add procurement milestones (submittal approved, release, delivery)
- Add “sub available” milestones where needed
Day 5: Validate with the team
- Review permit dates with the permit owner/expeditor
- Review inspection assumptions with superintendent and local jurisdiction norms
- Review procurement dates with PM/buyer and key vendors
- Review start dates with subcontractors and request written confirmation where possible
After this workflow, your schedule will not just show construction tasks; it will show the gates that make those tasks possible.
// Example of a compact “gate” pattern you can reuse in your schedule structure: Prepare prerequisite(s) → Readiness milestone → Gate event → Next work Prepare rough area (multi-trade) → Rough ready → Rough inspection approval → Close walls Prepare equipment procurement → Submittal approved → Delivery → Install