What a Pediatric First Aid Kit Is (and What It Is Not)
A pediatric first aid kit is a curated set of supplies and information that helps you manage common, minor injuries and support a child safely until professional care is available when needed. The “pediatric” part is less about tiny bandages and more about planning for different sizes, sensitivities, and caregiver roles (parent, babysitter, teacher, coach). A good kit is designed around three goals: (1) protect the rescuer and the child (barriers, hygiene), (2) control simple problems early (clean, cover, support), and (3) reduce errors (clear labels, dosing tools, and a system for checking expiration dates).
A first aid kit is not a substitute for medical evaluation. It should not encourage “treating at home” when a child needs urgent care. It also should not become a “medicine drawer” where multiple caregivers give overlapping doses. The safest kits are organized, limited to what you can use correctly, and paired with a simple medication-safety system.
Build Strategy: Start With Where the Kit Will Live
Choose kit locations based on real life
- Home main kit: stored high, locked or latched, in a cool, dry place (not bathroom, not above stove). Accessible to adults quickly.
- Travel kit: smaller, lightweight, kept in diaper bag/backpack/carried by the adult (not left in a hot car).
- School/childcare kit (if allowed): supplies plus written care plans and caregiver contact info, aligned with facility policies.
- Sports/outdoor kit: focused on blisters, sprains, minor bleeding, sun exposure, and hydration support items (non-medication).
Pick a container that prevents chaos
Use a hard-sided box or a zip case with compartments. Clear containers help you see what is missing. If you use a bag, choose one with internal dividers. Avoid dumping everything into one pouch; it slows you down and increases mistakes.
Core Supplies: A Practical Pediatric Checklist
The list below aims to cover common minor needs while staying realistic. Adjust for allergies, chronic conditions, and your setting (home vs. school vs. travel).
1) Personal protection and hygiene
- Non-latex gloves (multiple pairs; consider different sizes)
- Alcohol-based hand sanitizer (for caregiver hands when soap/water not available)
- Antiseptic wipes (for intact skin around minor wounds)
- Disposable face mask (useful for caregiver illness or dusty environments)
- Small trash bags or sealable plastic bags (for contaminated materials)
2) Wound care and bleeding control (minor to moderate)
- Sterile gauze pads (variety of sizes)
- Non-adherent dressings (help prevent sticking to scrapes)
- Adhesive bandages (assorted sizes; include knuckle/fingertip shapes)
- Paper tape or medical tape (gentler on sensitive skin)
- Elastic wrap bandage (for support and to hold dressings)
- Saline wound wash or sterile saline pods (for gentle rinsing)
- Small scissors (blunt tip) and tweezers (for splinters; cleanable)
- Instant cold pack (for bumps and minor sprains; use with a cloth barrier)
- Hydrocolloid blister dressings (especially for active kids)
3) Skin and comfort items
- Burn gel dressing or burn pad (optional; prioritize cool water access and clean covering supplies)
- 1% hydrocortisone cream (for minor itching/irritation if appropriate for the child; follow label guidance)
- Calamine or anti-itch lotion (non-medicated options can be useful)
- Petroleum jelly (helps protect skin, prevent chafing, and can help with minor irritation)
- Sun protection plan (prefer shade/clothing; include sunscreen if your family uses it)
4) Tools and helpful extras
- Digital thermometer with spare battery (and instructions for your model)
- Measuring/dosing tools: oral syringe (1 mL and 5 mL), dosing cup (if used), medication spoon (optional)
- Small flashlight or headlamp (for power outages and checking wounds)
- Notepad and pen or a waterproof note card (to record times, doses, symptoms)
- Emergency contact card (caregiver numbers, pediatrician, preferred urgent care)
- Space blanket (travel/outdoor; warmth after getting wet or in cold conditions)
- Splinter removal aids (fine tweezers; consider magnifying card)
5) Condition-specific items (only if prescribed or relevant)
- Child’s prescribed rescue medications (for example, inhaler/spacer, epinephrine auto-injector) stored and labeled per plan
- Written action plans from the child’s clinician (asthma plan, allergy plan)
- Backup supplies that match the child’s device (spacer mask size, extra inhaler cap)
Do not add prescription medications that are not prescribed to that child. Avoid stocking “just in case” antibiotics or leftover prescriptions.
- Listen to the audio with the screen off.
- Earn a certificate upon completion.
- Over 5000 courses for you to explore!

Download the app
Medication Safety: The Most Important Part of the Kit
Many pediatric first aid errors happen with medication: wrong product, wrong concentration, wrong dose, double-dosing by multiple caregivers, or giving adult formulations. Your kit should make the safe choice the easy choice.
Principles to follow every time
- One child, one labeled bottle: keep medicines in original packaging with the child’s name when possible.
- Use the right measuring tool: use an oral syringe for liquid medicine. Kitchen teaspoons are inaccurate.
- Track doses in writing: record time, medication name, strength, and amount given.
- Avoid multi-symptom combination products: they increase the risk of giving duplicate ingredients (for example, acetaminophen in two different products).
- Know the active ingredient: brand names vary; the ingredient is what matters for safety.
- When in doubt, pause: if you are unsure about a dose or whether a medicine is appropriate, do not guess.
What medications belong in a pediatric kit?
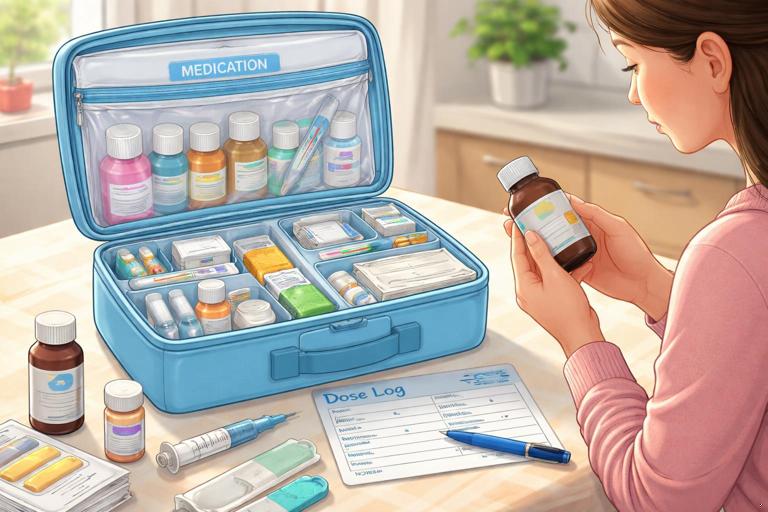
This depends on your child’s age, health conditions, and your clinician’s guidance. Many families keep a limited set of over-the-counter (OTC) medications at home, but not necessarily in a travel kit. If you choose to stock OTC medicines, keep them in a separate, clearly marked “Medication” pouch within the kit, ideally lockable.
- Fever/pain relievers: choose one primary product your household uses and understand its dosing. Keep only one formulation/strength to reduce confusion.
- Oral rehydration solution packets or ready-to-drink bottles: not a medication, but helpful for vomiting/diarrhea support. Store within expiration dates.
- Antihistamine: only if you have a clear plan for when and how to use it; avoid mixing multiple antihistamines.
- Topicals: simple options like petroleum jelly; be cautious with topical antibiotics if your child has sensitivities.
For infants and toddlers, medication decisions are more sensitive. Stocking fewer products and relying on clear pediatric guidance is often safer than having many options.
Prevent double-dosing: a simple household system
Double-dosing often happens at night or during handoffs (one caregiver gives a dose, another repeats it). Build a system that works even when you are tired.
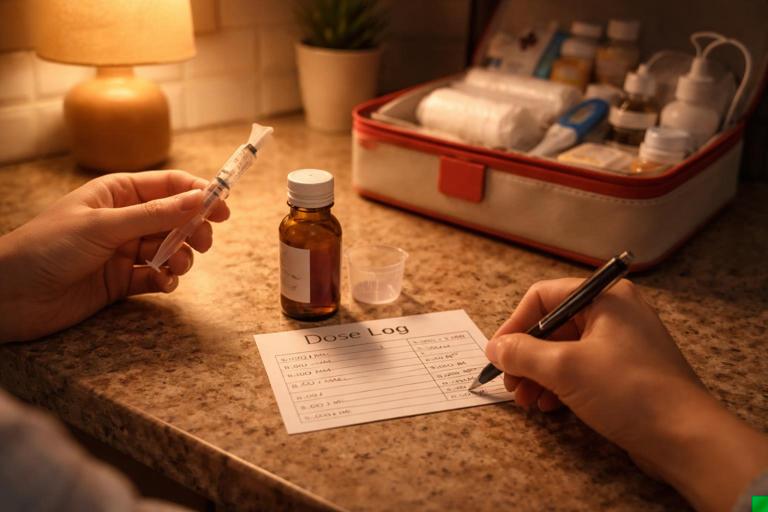
- Create a “Dose Log” card: a laminated card with columns for date/time/medication/amount/giver initials. Keep a dry-erase marker in the kit.
- Use a single “medication captain”: during illness, one adult is responsible for recording and confirming doses.
- Set a physical cue: place the dosing syringe in a labeled cup after use until the dose is logged and cleaned.
- Communicate at handoff: “Last dose was at __, amount __, next eligible time __.”
Safe storage rules (home, travel, and school)
- Lock and elevate: store all medicines and high-risk items (like alcohol wipes, scissors) out of reach and preferably locked.
- Temperature control: avoid heat and freezing. Do not store medicines in a car glove box. Some prescriptions have specific temperature requirements—follow the label.
- Original containers: keep child-resistant caps and original labels. Do not move pills into unmarked baggies.
- Separate look-alikes: keep similarly packaged products apart (for example, adult vs. child versions).
- School policy alignment: schools often require medications to be in original packaging with authorization forms. Prepare a dedicated school pouch with copies of forms.
Step-by-Step: Build Your Kit in One Hour
Step 1: Decide your kit type and size
Write down where it will be used: home only, home + travel, or home + school. Choose a container that fits that setting. A home kit can be larger; a travel kit should be minimal and lightweight.
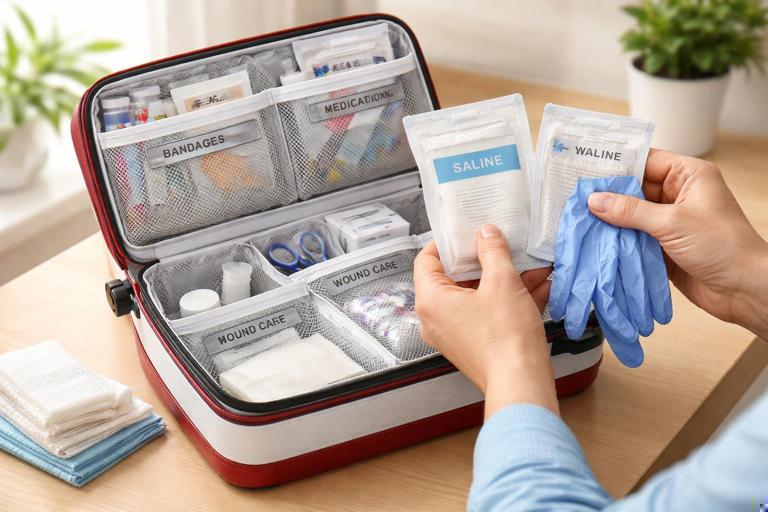
Step 2: Create sections (use pouches or labeled compartments)
- Section A: Barrier & hygiene
- Section B: Wound care
- Section C: Tools
- Section D: Comfort/skin
- Section E: Medications (locked or clearly separated)
- Section F: Documents (contacts, action plans, dose log)
If you cannot label the container, use colored zip pouches (for example, red for wound care, blue for meds) and keep a simple index card on top listing what goes where.
Step 3: Stock the core supplies first
Start with gloves, gauze, tape, bandages, saline, and a thermometer. These cover many everyday issues and are low-risk.
Step 4: Add child-specific items
Add only what you will use correctly. For example, if your child has a prescribed device, include the exact spacer/mask size and a copy of the plan. If your child has sensitive skin, choose paper tape and non-adherent dressings.
Step 5: Add medication safety tools
Include oral syringes, a dose log card, and a pen/marker. If you keep OTC medicines, store only one concentration per medication type and keep them in original packaging.
Step 6: Do a “two-minute drill”
Close the kit, then open it and try to find: gloves, gauze, tape, bandages, thermometer, and the dose log. If you cannot locate each item quickly, reorganize now—before you need it.
Maintenance: Keep the Kit Ready Without Making It a Project
A simple schedule that works
- Monthly (5 minutes): check that the kit is in its place, clean, and fully zipped/latched; replace used bandages; confirm thermometer works.
- Every 3 months (10 minutes): check expiration dates on sterile items and any OTC medications; inspect packaging for tears or moisture.
- Twice a year (15 minutes): do a full inventory against your checklist; update contact cards and action plans; replace batteries.
- Before travel or a new school term: restock and confirm forms/permissions for any school medications.
Expiration dates: what matters most
Prioritize replacing: (1) medications, (2) sterile saline and sterile dressings, (3) adhesive products that have dried out, and (4) instant cold packs that feel punctured or clumped. Many non-sterile items (scissors, elastic wraps) do not “expire” but should be clean and functional.
After-use reset (the rule that prevents an empty kit)
Any time you take something out, do one of these before putting the kit away: (1) replace it immediately, or (2) write it on a “Restock” sticky note attached to the kit handle. The kit goes back to storage only when the note is cleared.
Medication Handling Details That Prevent Common Mistakes
Use weight-based dosing information responsibly
Children’s dosing often depends on weight and product concentration. Because concentrations and age guidance vary by region and brand, the safest approach is to rely on your child’s clinician instructions and the specific product label you have. If you keep a dosing chart, make it specific: write the child’s current weight, date recorded, and the exact product name and concentration. Update it after well-child visits or any significant weight change.
Keep dosing tools with the medicine
Store the oral syringe in the same pouch as the medicine, ideally in a clean, labeled sleeve. If you have more than one child, consider color-coding syringes or labeling them to reduce mix-ups. Wash and air-dry syringes after use; replace if markings fade.
Avoid “adult medicine shortcuts”
- Do not split adult tablets unless a clinician specifically instructs you to do so and the medication is appropriate to split.
- Do not assume half a dose is safe; dosing is not always linear.
- Do not use adult topical products on children without checking age guidance (some contain ingredients that irritate or are absorbed differently).
Be cautious with essential oils and home remedies
Many “natural” products can irritate skin, trigger asthma symptoms, or be toxic if swallowed. If you choose to keep any non-prescription topical product, keep it minimal, clearly labeled, and stored like medication (out of reach, original container). Avoid placing attractive-smelling products where children can access them.
Special Considerations by Setting
Home kit: plan for multiple caregivers
Babysitters, grandparents, and older siblings may help. Place a one-page “Kit Map” on top of the kit with: where items are, where the dose log is, and where emergency contacts are stored. Keep instructions short and practical.
Travel kit: prioritize portability and heat safety
Travel kits should focus on barriers, wound care, and documentation. If you carry medications, keep them on your person (not in checked luggage, not in a hot trunk). Consider a small insulated pouch if temperature is a concern, but avoid direct contact between medicine and ice packs unless the medication label allows it.
School/childcare kit: align with policy and documentation
Many facilities require: original labeled containers, signed authorization forms, and a care plan. Prepare a dedicated packet that includes caregiver contacts, clinician instructions, and clear storage directions. Ask who is trained/authorized to administer medications and how handoffs are documented.
Sports and outdoor activities: add prevention-focused items
- Moleskin or blister pads
- Extra elastic wrap
- Small saline pods for eye rinse (if appropriate)
- Shade plan and water access reminders (non-medication)
For outdoor kits, also consider insect bite prevention tools (protective clothing) and a tick remover tool if you live in a tick-endemic area.
Practical Examples: How a Well-Organized Kit Helps
Example 1: Playground scrape with a crying toddler
You open the kit and go straight to the wound care pouch: gloves, saline pod, gauze, non-adherent dressing, tape. Because items are grouped, you do not rummage while the child is upset. You can clean gently, cover, and then document what you used on the restock note.
Example 2: Two caregivers managing nighttime fever
One caregiver gives a dose using the oral syringe and immediately writes it on the dose log card with time and initials. When the second caregiver wakes up later, they check the log before doing anything. The log prevents accidental repeat dosing and reduces stress.
Example 3: School field trip day
The travel kit includes a copy of the child’s action plan and emergency contacts. Medications (if prescribed) are in original packaging with the child’s name and are carried by the authorized adult. The kit also includes gloves, bandages, and a notepad for documenting times and observations.
What Not to Put in a Pediatric First Aid Kit
- Loose pills in unmarked containers
- Expired medications “just in case”
- Adult formulations intended for adults only
- Multiple versions of the same medication (different strengths/concentrations) that increase confusion
- High-risk items without training (for example, advanced airway tools)
- Anything a child might find appealing (gummy vitamins, flavored medicines) stored within reach
Quick Reference: A Simple Inventory Template
HOME PEDIATRIC FIRST AID KIT INVENTORY (update date: ____ ) SECTION A: Barrier & Hygiene - Gloves (pairs): ____ - Hand sanitizer: Y/N - Antiseptic wipes: ____ - Sealable bags/trash bags: ____ SECTION B: Wound Care - Gauze pads: ____ - Non-adherent dressings: ____ - Adhesive bandages: ____ - Medical tape: ____ - Elastic wrap: ____ - Saline pods/wash: ____ - Cold pack: ____ - Blister dressings: ____ SECTION C: Tools - Thermometer + battery: Y/N - Scissors: Y/N - Tweezers: Y/N - Flashlight: Y/N - Notepad/pen: Y/N SECTION D: Skin/Comfort - Petroleum jelly: Y/N - Hydrocortisone 1% (if used): exp ____ - Calamine/anti-itch (if used): exp ____ SECTION E: Medications (if stocked) - Product name + concentration: __________ exp ____ - Dosing syringe 1 mL: Y/N - Dosing syringe 5 mL: Y/N - Dose log card + marker: Y/N SECTION F: Documents - Emergency contacts card: Y/N - Care plans (asthma/allergy): Y/N - Insurance info (optional): Y/N