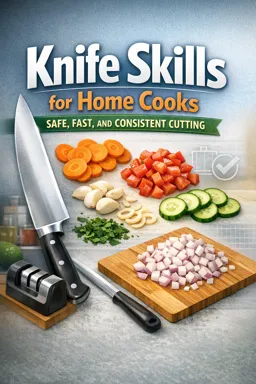
Course Goals: Safe, Fast, Consistent
This course is built around three outcomes that reinforce each other:
- Safe: you keep your hands, feet, and workspace protected so you can cook confidently every day.
- Fast: speed comes from efficient setup and repeatable motion, not rushing.
- Consistent: pieces are similar in size so they cook evenly and look intentional.
Every technique you learn later follows the same governing rules. If a technique ever feels unsafe or out of control, return to these rules first.
The Rules That Govern Every Technique
- Stability before motion: stabilize the board, stabilize the food, then move the knife.
- Edge awareness always: know where the sharp edge is, where it will travel next, and what it could contact.
- One job per hand: the knife hand cuts; the other hand stabilizes food and stays out of the blade’s path.
- Clear path: the blade travels through food into the board—never toward clutter, fingers, or the sink edge.
- Control before pace: increase speed only when each cut lands where you intend.
- Dry and clean wins: moisture and scraps create slips; remove them early and often.
Workstation Setup: Build a Safe Cutting Zone
Your cutting improves immediately when the station is stable, well-lit, and uncluttered. Use this setup every time, even for “quick” prep.
Cutting Board Types (and What to Look For)
Choose a board that stays flat, is large enough for the ingredient plus your guiding hand, and is easy to clean.
- Wood: gentle on knife edges, stable, and pleasant to work on. Needs proper washing and drying; don’t soak.
- Plastic: easy to sanitize and lightweight. Replace when deeply scarred (grooves can hold residue).
- Composite: often dishwasher-safe and stable; varies by brand.
Size guideline: you should be able to cut without ingredients falling off the board. If you routinely “chase” pieces, your board is too small.
- Listen to the audio with the screen off.
- Earn a certificate upon completion.
- Over 5000 courses for you to explore!

Download the app
Stabilize the Board (Damp Towel Method)
A sliding board is a top cause of accidents. Fix it in 10 seconds.
- Dampen a kitchen towel or paper towel (not dripping).
- Lay it flat on the counter where the board will sit.
- Place the board on top and press down at the corners.
- Test: push the board forward/sideways. If it moves, re-wet slightly or reposition.
If your board has rubber feet, still test it—wet counters or uneven surfaces can defeat the feet.
Counter Height and Body Position
Good height lets you keep shoulders relaxed and wrists neutral.
- Too high: shoulders creep up, wrists bend, control drops.
- Too low: you hunch, fatigue increases, accuracy drops.
Quick check: stand close to the counter with elbows relaxed at your sides. The board should allow your forearms to work comfortably without shrugging your shoulders. If needed, adjust by placing a thin non-slip mat under the board (slightly raises height) or use a lower surface for heavy prep.
Lighting: See the Edge, See the Food
Shadows hide fingertips and uneven cuts.
- Turn on the brightest overhead light available.
- If your body blocks the light, add a side light (under-cabinet or a lamp aimed at the board).
- Keep the board surface clean so contrast helps you see the blade edge and cut lines.
Keep the Area Dry and Uncluttered
Clutter forces awkward knife paths; moisture causes slips.
- Dry zone: wipe puddles immediately (water, oil, vegetable juice).
- Clear zone: keep only the board, knife, ingredient, and one scrap bowl on the counter.
- Landing zone: designate a safe spot to set the knife down (spine facing you, edge away).
Scrap bowl tip: place a bowl at the top corner of the board (opposite your knife hand) so you can sweep scraps away without crossing the blade over your body.
Core Safety Habits That Prevent Most Accidents
Knife Awareness (The “Where Is the Edge?” Habit)
Before each cut, know three things:
- Edge location: where the sharp edge is right now.
- Edge direction: where it will move next (down, forward, back).
- Edge consequence: what it would hit if it slipped (board, food, finger, counter).
When you feel distracted, pause. Put the knife down in the landing zone, then reset.
Passing a Knife Safely
Most kitchen “oops” happen during handoffs, not cutting.
- Best method: set the knife down on the counter/board and let the other person pick it up.
- If you must hand it directly: offer the handle only, with the blade pointed down and away from both bodies; wait for the other person to confirm grip before releasing.
Never pass a knife through a crowded space or over a sink full of dishes.
Carrying a Knife
Use a predictable, low-risk carry so others can read your movement.
- Hold the knife by the handle at your side.
- Blade pointed down, edge facing behind you (away from your leg).
- Walk—don’t rush—and announce “knife behind” or “knife coming through” in tight spaces.
Keep Blades Pointed Down When Moving
Pointing down reduces the chance of contacting someone’s torso/arms and keeps the tip from catching on clothing or towels. It also encourages slower, deliberate movement.
Clean-As-You-Go to Avoid Slipping Hazards
Slips happen when the board gets greasy or when scraps roll under the blade.
- Wipe the board edge and counter when wet.
- Sweep scraps into the scrap bowl frequently (every 30–60 seconds during heavy prep).
- Reset the towel under the board if it becomes saturated.
Micro-routine: after finishing one ingredient, pause for 10 seconds: scrape scraps, wipe moisture, regroup the next ingredient.
If a Knife Drops: What to Do
This is non-negotiable: do not try to catch it.
- Freeze your hands and step back.
- Let it hit the floor.
- After it stops moving, pick it up by the handle.
- Check the area: look for chips on the blade and any damage to the floor; wipe if needed.
If anyone is nearby, say “knife down” so they don’t step into it.
Guided Warm-Up Routine (2–3 Minutes)
Warm hands and wrists improve control and reduce the urge to grip too hard. Do this before longer prep sessions.
1) Finger Open/Close (20 seconds)
- Spread fingers wide as if pushing air away.
- Close into a gentle fist (no squeezing).
- Repeat slowly 10 times.
2) Wrist Circles (30 seconds each direction)
- Hold hands in front of you, elbows relaxed.
- Make small circles with both wrists.
- Reverse direction.
3) Forearm Rotation (30 seconds)
- Elbows at your sides, bent 90 degrees.
- Rotate palms up, then palms down.
- Repeat 10–15 times, smooth and controlled.
4) “Soft Grip” Practice (30 seconds)
- Hold an imaginary knife handle.
- Alternate between a firm squeeze and a relaxed hold.
- Settle on relaxed-but-secure—enough to control, not enough to tire.
5) Shoulder Drop + Breath (20 seconds)
- Inhale, lift shoulders slightly.
- Exhale, let shoulders drop.
- Repeat 3 times.
Control Checklist (Use This Before and During Cutting)
This checklist is your “pre-flight” and your mid-task reset. In later chapters, you’ll apply it to every cut.
| Control Point | What to Check | Quick Fix |
|---|---|---|
| Stance | Feet stable, body close enough that you’re not reaching; weight balanced. | Step closer to the board; widen stance slightly for stability. |
| Elbows | Elbows relaxed and near your sides; shoulders not shrugged. | Drop shoulders; bring elbows in; slow down for 3 cuts. |
| Blade contact point | Knife contacts the board in a consistent spot; you’re not slapping the blade down. | Lighten pressure; aim for smooth contact; keep the blade on the board between cuts when appropriate. |
| Pacing | You can predict where the next cut will land; no rushing to “finish.” | Count “one-and-two” per cut for 10 seconds; resume only when accuracy returns. |
How to Use the Checklist (Step-by-Step)
- Before you start: stabilize board, clear clutter, set scrap bowl, confirm lighting.
- First 5 cuts: cut at half speed while you check stance, elbows, and blade contact.
- During prep: whenever a piece slips, the board gets wet, or you feel tense—stop and run the checklist again.
- After switching ingredients: do a 10-second reset (scrape, wipe, reposition).
Rule of thumb: if you can’t keep the blade contact point predictable, your pace is too fast for your current control.