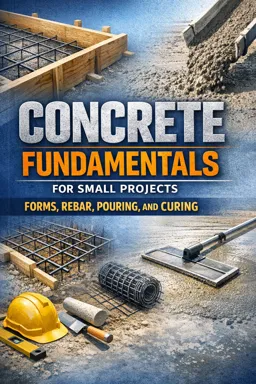
What Counts as “Small” Concrete Work (and What Good Looks Like)
Small concrete projects are typically hand-managed pours where you can place, consolidate, and finish the concrete without a pump crew or large forming systems. Common examples include:
- Shed or generator pads (often 4–6 in thick, sometimes thicker at edges)
- Small slabs for patios, hot tubs, trash can pads, or equipment bases
- Walkways and garden paths (narrow pours with lots of edge work)
- Steps/landings (small volume but high finishing and safety demands)
Even “small” pours can fail if the basics are missed. Your quality goals should be clear before you start, because they drive layout, form height, reinforcement placement, finishing choices, and curing.
Quality Goals to Aim For
- Flatness: The surface should be even and free of humps and birdbaths. For walkways and pads, small dips become puddles and ice hazards.
- Strength: Strength depends on proper mix, correct water content, consolidation, and curing. Adding water to “make it easier” is one of the fastest ways to weaken concrete and increase cracking/dusting.
- Drainage: Concrete should shed water. A common target is about 1/8 in per foot (≈1%) slope away from buildings, unless local conditions require more.
- Durability: Durability comes from good finishing timing (not overworking bleed water), proper air content where freeze-thaw is a concern, and consistent curing to reduce surface shrinkage and cracking.
Safety: PPE and Hazard Awareness
Concrete work combines heavy materials, sharp steel, power tools, and chemical exposure. Treat safety as part of the job setup, not an afterthought.
Essential PPE (Minimum Kit)
- Eye protection: Safety glasses for mixing, cutting rebar, and any time dust or splatter is possible.
- Gloves: Use durable work gloves for forming and rebar; use waterproof/chemical-resistant gloves when handling wet concrete.
- Respirator for dust: A properly fitted respirator (often P100 or equivalent) when cutting, grinding, sweeping dry cement, or working around silica-containing dust.
- Rubber boots: Waterproof boots keep wet concrete off your skin and improve footing on muddy subgrade.
- Long sleeves and pants: Reduces skin exposure to wet concrete and cement paste.
- Hearing protection: For saws, grinders, plate compactors, and mixers.
Key Hazards and How to Control Them
Cement and Wet Concrete (Skin Burns)
Wet concrete is caustic. Prolonged contact can cause chemical burns that may not hurt immediately. Control measures:
- Avoid skin contact: Don’t kneel in wet concrete; use kneeboards if needed.
- Wash promptly: If concrete gets inside gloves/boots, stop and rinse with clean water. Change contaminated clothing.
- Barrier planning: Keep a water source, mild soap, and clean towels available before the pour starts.
Silica Dust (Respiratory Hazard)
Cutting or grinding concrete and sweeping dry cement can release respirable crystalline silica. Control measures:
- Listen to the audio with the screen off.
- Earn a certificate upon completion.
- Over 5000 courses for you to explore!

Download the app
- Use wet methods: Wet cutting/grinding where practical.
- Use dust collection: HEPA vacuum attachments on grinders/saws when available.
- Wear a respirator: Especially in enclosed or still-air areas.
- Don’t dry sweep: Use a HEPA vacuum or wet cleanup.
Manual Handling and Pinch/Trip Hazards
- Plan material staging: Place forms, stakes, and tools so you’re not stepping over them during the pour.
- Lift smart: Bags of mix and wet concrete loads are heavy; use a wheelbarrow, cart, or get help.
- Rebar ends: Cap exposed ends or bend them down to reduce impalement risk.
Core Tools and What Each One Does
Beginners often buy tools randomly. A better approach is to match tools to the workflow: layout → base → forms → reinforcement → placement → consolidation → finishing → curing.
Layout and Grade Tools
- Tape measure: For dimensions, diagonals, and offsets.
- Level (2–6 ft): Quick checks of form tops and slopes.
- Laser level (rotary or line): Fast, accurate grade control across the entire pad/walkway.
- String lines and line level: Establish straight edges, corners, and consistent slopes.
- Marking paint/chalk: Mark excavation limits and form lines.
Practical tip: Use string lines to represent the finished edge of concrete, then set form tops to the planned elevation relative to that string.
Base Preparation Tools
- Plate compactor: Best for compacting granular base on slabs and walkways.
- Hand tamper: Useful for tight areas, edges, and small patches where a plate compactor won’t fit.
- Rake/shovel: For spreading and shaping base material.
Why it matters: A well-compacted base reduces settlement and cracking. If the base is soft, the slab can flex and break even if the concrete itself is strong.
Forms and Staking Tools
- Form boards: Straight lumber or form system to hold concrete shape and elevation.
- Stakes: Wood or steel stakes to lock forms in place.
- Screws/nails: Screws allow easier adjustment; nails are fast but less adjustable.
- Hammer/drill/driver: For assembly and adjustments.
- Form release (optional): Helps stripping forms cleanly.
Practical tip: Stake outside the form line and fasten forms to stakes so the inside face stays clean and true.
Rebar and Reinforcement Tools
- Tie wire: Secures rebar intersections so steel stays where you place it.
- Rebar tying pliers (or twister tool): Speeds up tying and reduces hand fatigue.
- Rebar cutter/bender: Cuts and bends bar accurately; for small jobs, a manual bender is common.
- Rebar caps: Safety caps for exposed ends.
- Chairs/spacers: Keeps steel at the correct height so it ends up embedded, not sitting on the ground.
Common beginner mistake: Placing rebar on the base and “hoping it ends up in the middle.” Without chairs/spacers (or a deliberate lift-and-place method), steel often stays too low to be effective.
Mixing and Placement Tools
- Wheelbarrow: Moves concrete from mixer/truck to forms; choose a sturdy model with a good tire.
- Hoe: Mixing bagged concrete in a tub or wheelbarrow; also useful for pulling material into corners.
- Concrete mixer: For consistent mixing when using bagged mix or small batches.
- Chute: From a ready-mix truck (or a portable chute) to direct concrete into forms.
- Come-along (concrete rake): Pulls and roughly levels concrete without overworking it like a garden rake might.
- Shovel: Useful for placing and trimming, but avoid excessive “chopping” that can segregate the mix.
Practical tip: Stage your wheelbarrow path and keep it clear. A single trip hazard during placement can ruin edges, forms, and finishing timing.
Consolidation Tools
- Rod (rebar piece or purpose-made rod): Pokes and works concrete into corners and along forms to reduce voids.
- Concrete vibrator: Removes trapped air and helps concrete flow around reinforcement (especially useful for thicker sections or congested steel).
Use with care: Over-vibration can cause segregation (coarse aggregate sinking, paste rising). Use short insertions and move systematically.
Finishing Tools
- Screed board (straight 2x4 or aluminum screed): Strikes off concrete to the correct elevation using the forms as guides.
- Bull float: Smooths and levels the surface after screeding; helps embed aggregate slightly and bring paste to the top.
- Edger: Rounds slab edges to reduce chipping.
- Groover: Creates control joints to guide cracking.
- Magnesium float (mag float): Refines the surface after bull floating; good for exterior slabs.
- Steel trowel: Produces a dense, smooth surface; typically not ideal for exterior broom-finished slabs because it can make the surface too slick and can trap water at the surface if used too early.
- Broom: Adds slip-resistant texture for walkways and outdoor slabs.
Timing note: Many finishing problems come from working the surface too early (while bleed water is present) or too late (after it has stiffened). Tool choice matters, but timing matters more.
Curing and Protection Tools
- Sprayer: For applying curing compound or misting water (as appropriate for your curing method).
- Plastic sheeting: Covers concrete to retain moisture; also protects from light rain or debris.
- Burlap: Holds moisture against the surface when kept damp; useful in hot/dry conditions.
- Sandbags/boards: Weigh down plastic and protect edges from wind lift.
Job Setup: Layout, Access, and Staging
Before any concrete arrives (or before you mix your first batch), set up the job so you can move continuously from placement to finishing without interruptions.
Access Planning
- Delivery path: Can a truck reach the pour? If not, plan wheelbarrow distance and manpower.
- Discharge location: Identify where concrete will enter the forms to minimize re-handling.
- Weather plan: Have plastic ready for unexpected rain; have shade/windbreak options for hot, dry, or windy days.
Tool Staging
- “Clean tools” zone: Finishing tools should be clean and within reach, not buried under materials.
- Water and cleanup: Set a rinse bucket and hose location so you can clean tools without walking across fresh concrete.
- Backup items: Extra stakes/screws, tie wire, and a spare float can save a pour if something breaks mid-finish.
Structured Workflow Checklist (Layout to Curing)
Concrete work is schedule-sensitive because the material is always changing: it starts plastic, then stiffens, then sets. Your workflow should reduce delays and rework.
| Phase | What You Do | Why It Matters | Beginner Checks |
|---|---|---|---|
| 1) Layout | Mark edges, corners, and elevations; establish slope for drainage. | Everything else follows layout; drainage errors are hard to fix later. | Measure diagonals for square; confirm slope direction away from structures. |
| 2) Excavation & Base | Excavate to depth; place and compact base in lifts. | Prevents settlement and cracking; supports uniform thickness. | Base feels firm underfoot; no soft pockets; edges compacted. |
| 3) Forms | Set forms to line and grade; stake and brace; verify straightness. | Forms control thickness, flatness, and edge quality. | Form tops match target elevation; forms don’t move when pushed. |
| 4) Reinforcement | Place rebar/mesh; tie intersections; set on chairs/spacers. | Steel must be positioned correctly to do its job. | Rebar is off the ground; clear cover maintained from edges. |
| 5) Pre-pour staging | Stage tools, plan placement route, wet subgrade lightly if needed, confirm manpower. | Prevents stoppages during the critical placement window. | All finishing tools clean; water source ready; PPE on hand. |
| 6) Placement | Place concrete evenly; avoid dumping huge piles; work from far end back. | Reduces segregation and makes screeding easier. | Concrete reaches corners; no voids along forms. |
| 7) Consolidation | Rod edges and corners; vibrate where appropriate. | Removes trapped air; improves bond to reinforcement and forms. | No honeycombing at edges; surface not overly “soupy” from over-vibration. |
| 8) Screed | Strike off to form height; fill low spots; re-screed as needed. | Sets flatness and thickness; saves time later. | Straightedge rides forms; surface is roughly level with minimal waves. |
| 9) Bull float | Float immediately after screeding to smooth and level. | Closes surface and prepares for edging/jointing. | Don’t trap bleed water; keep passes controlled and consistent. |
| 10) Edge & joint | Run edger; cut grooves/control joints at planned spacing. | Reduces edge spalling and helps control cracking locations. | Joints straight and consistent depth; edges uniform. |
| 11) Final finish | Mag float and/or steel trowel (as appropriate); broom finish for exterior traction. | Surface durability and slip resistance depend on correct timing. | No finishing on bleed water; broom texture even and aligned. |
| 12) Curing & protection | Begin curing as soon as finishing allows; cover or apply curing method; protect from traffic and weather. | Curing controls shrinkage cracking and improves strength and durability. | Plastic secured; edges protected; curing maintained without drying out. |
Timing and Coordination: Why the Schedule Feels “Tight”
- Placement and screeding must keep up with delivery or batch output so concrete doesn’t set in piles.
- Finishing depends on surface moisture and stiffness; if you’re short-handed, you may miss the best finishing window.
- Curing starts right after finishing; waiting “until tomorrow” can lead to early drying and surface problems.
Step-by-Step: A Beginner-Friendly Pre-Pour “Go/No-Go” Check
- Confirm elevations: Check form tops with level/laser; verify slope for drainage.
- Confirm form strength: Push on forms; add stakes/bracing where there’s movement.
- Confirm reinforcement position: Steel tied and supported on chairs/spacers; rebar ends capped.
- Confirm access: Wheelbarrow path clear; chute plan ready; no hoses/cords crossing the route.
- Stage finishing tools: Screed, bull float, edger, groover, mag float, broom placed within reach.
- Stage curing materials: Plastic/burlap/sprayer ready and weighed down.
- PPE check: Eye protection, gloves, respirator (for dust tasks), boots, long sleeves.
- Assign roles (even if it’s just two people): One placing and raking, one screeding/finishing, then both curing/protecting.