What “Choking” Means in First Aid (and Why the Response Must Be Fast)
In first aid, choking refers to a foreign-body airway obstruction: food, a small object, or vomit blocks airflow through the upper airway (throat). The danger is not the object itself—it is the loss of oxygen. The correct technique depends on age and size because the airway anatomy and injury risk differ between infants, children, and teens.
Two broad situations matter:
- Mild obstruction (effective cough): The person can breathe, speak/cry, and cough forcefully. Air is moving.
- Severe obstruction (ineffective cough): The person cannot breathe adequately, cannot speak/cry, has a silent or weak cough, may clutch the throat, and may turn blue or become limp.
Your goal is to restore airflow quickly while avoiding actions that can worsen the blockage (such as blind finger sweeps) or cause injury (such as excessive force in a small infant).
Key principle: treat the person, not the object
Do not spend time trying to identify what is stuck. Use the correct maneuvers to create enough pressure to expel the obstruction. If the person becomes unresponsive, the approach changes to a resuscitation-focused sequence with airway checks during compressions.
Recognizing Mild vs Severe Airway Obstruction
Signs of mild obstruction (effective cough)
- Can inhale and exhale
- Can speak, cry, or make sounds
- Cough is strong and productive
- May gag but remains alert
What to do: Encourage continued coughing and keep the person under close observation. Do not perform back blows or abdominal thrusts if the cough is effective, because you can convert a partial obstruction into a complete one.
- Listen to the audio with the screen off.
- Earn a certificate upon completion.
- Over 5000 courses for you to explore!

Download the app
Signs of severe obstruction (ineffective cough)
- Cannot breathe or has very limited airflow
- Cannot speak, cry, or make sound (or only high-pitched wheeze/stridor)
- Weak, silent, or absent cough
- Panic, wide eyes, clutching throat
- Color change (pale/blue lips), rapid fatigue
What to do: Begin age-appropriate choking relief immediately. If the person becomes unresponsive at any point, transition to unresponsive choking care (compressions with airway checks and rescue breaths as trained).
Infants (Under 1 Year): Back Blows and Chest Thrusts
Infants have small, delicate airways and abdominal organs that are more vulnerable to injury. For this reason, abdominal thrusts are not used in infants. The standard approach is alternating back blows and chest thrusts.
Positioning basics
- Support the infant’s head and neck at all times.
- Keep the infant’s head lower than the chest to use gravity.
- Use your forearm and thigh/lap for stability.
Step-by-step: severe choking in a responsive infant
1) Place the infant face-down on your forearm. Rest your forearm on your thigh. Support the jaw with your fingers (avoid compressing the soft tissues under the chin). Keep the head lower than the body.
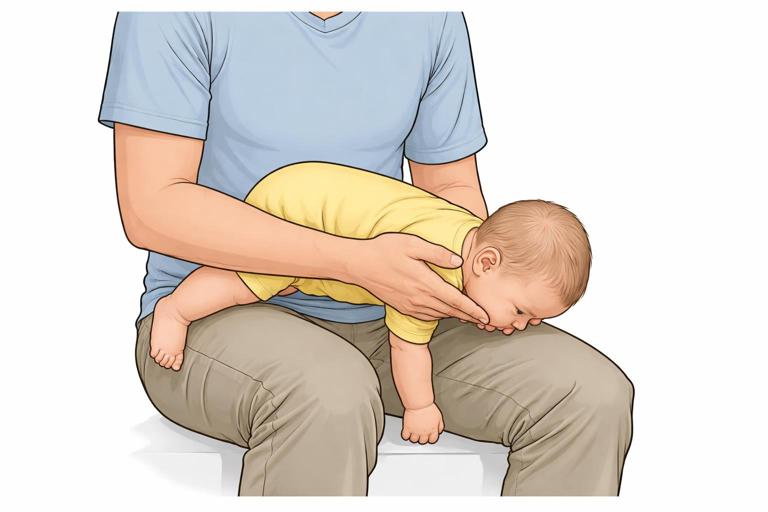
2) Give 5 firm back blows. Use the heel of your free hand to strike between the shoulder blades. Each blow should be distinct and controlled—firm enough to create pressure, not a tap.
3) Turn the infant face-up. Sandwich the infant between your forearms and turn carefully, maintaining head support. Keep the head lower than the torso.
4) Give 5 chest thrusts. Place two fingers on the center of the chest, on the lower half of the breastbone (sternum), just below the nipple line. Press down about 1.5 inches (4 cm) with quick thrusts, allowing the chest to recoil between thrusts.
5) Repeat cycles of 5 back blows and 5 chest thrusts. Continue until the object comes out or the infant becomes unresponsive.
If you can see the object
If the infant’s mouth is open and you can clearly see the object, you may remove it carefully with a finger. Do not sweep blindly; pushing deeper is a common cause of worsening obstruction.
Common mistakes with infants
- Blind finger sweep: can lodge the object deeper and injure tissues.
- Shaking the infant: ineffective and dangerous.
- Hitting too low on the back: aim between shoulder blades.
- Compressing the throat while supporting the jaw: support the bony jawline, not soft neck tissue.
Practical example: infant choking during feeding
An 8-month-old suddenly stops babbling while eating, mouth open, silent, with wide eyes. You pick the infant up, position face-down on your forearm, deliver 5 back blows, then turn and deliver 5 chest thrusts. After the second cycle, a piece of food pops into the mouth and the infant begins to cry. Crying indicates airflow has returned; you stop thrusts and monitor breathing and color.
Children (About 1 Year to Puberty): Abdominal Thrusts (and When to Use Back Blows)
For children, the primary technique for severe choking is abdominal thrusts (often called the Heimlich maneuver). Back blows may be used in some training systems, but abdominal thrusts are the core method for a responsive child with severe obstruction.
Step-by-step: severe choking in a responsive child
1) Confirm severe obstruction. The child cannot speak or cough effectively, may nod “yes” to “Are you choking?” and looks distressed.
2) Position yourself behind the child. Kneel if needed so your hands align with the child’s upper abdomen.
3) Find the correct hand placement. Make a fist and place the thumb side against the abdomen, just above the navel and well below the breastbone.
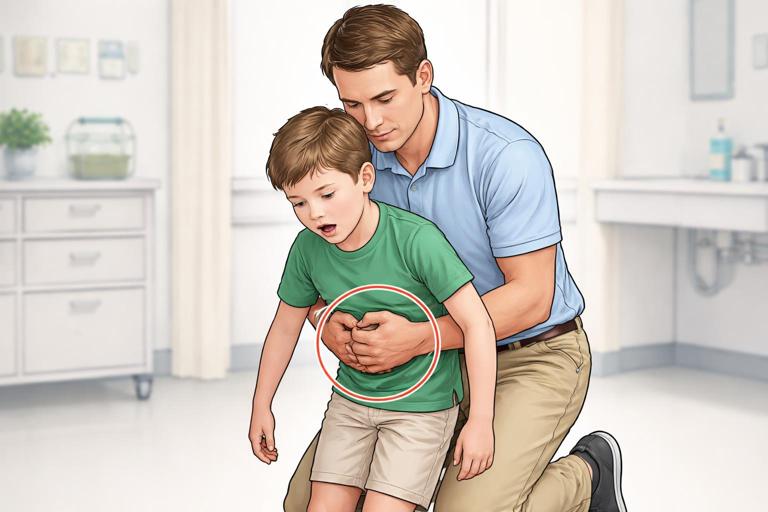
4) Grasp your fist with the other hand.
5) Deliver quick inward-and-upward thrusts. Think “in and up” toward the child’s diaphragm. Each thrust should be separate, with a brief reset.
6) Continue thrusts until the object is expelled or the child becomes unresponsive.
Technique notes for smaller children
- Use controlled force; children require less force than adults.
- Keep your hands off the ribs and breastbone to reduce injury risk.
- If the child is very small, you may need to kneel behind them for proper angle and control.
Special situation: pregnant teen or child with a large abdomen
If abdominal thrusts are not possible or could cause harm (for example, late pregnancy), use chest thrusts instead.
Step-by-step: chest thrusts for a responsive person who cannot receive abdominal thrusts
1) Stand behind the person.
2) Place your arms under the armpits and around the chest.
3) Place the thumb side of your fist on the center of the breastbone. Avoid the lower tip of the sternum.
4) Grasp your fist with the other hand.
5) Deliver quick straight-back thrusts. Each thrust is distinct and directed straight inward.
Practical example: choking at school lunch
A 6-year-old stands up suddenly, hands at throat, unable to answer. You step behind, place your fist above the navel, and deliver repeated abdominal thrusts. After several thrusts, the child coughs and spits out a piece of food. You stop thrusts once effective coughing begins and keep the child calm and seated while you observe breathing and color.
Teens: Adult-Style Abdominal Thrusts and Self-Rescue Options
Most teens can be treated using the same approach as adults: abdominal thrusts for severe obstruction, chest thrusts when abdominal thrusts are not appropriate. The main differences are social context (sports, crowds, embarrassment) and size variation (a small teen may still need you to kneel for correct positioning).
Step-by-step: severe choking in a responsive teen
1) Identify severe obstruction. Inability to speak, silent cough, distress, possible throat-clutching.
2) Abdominal thrusts from behind. Fist above navel, below breastbone; quick inward-and-upward thrusts.
3) Continue until the obstruction clears or the teen becomes unresponsive.
Self-rescue: when the teen is alone or you cannot reach them immediately
A teen who is choking may be able to help themselves if still conscious:
- Self-abdominal thrusts: Make a fist, place it above the navel, grasp with the other hand, and thrust inward-and-upward.
- Thrusts over a firm surface: Lean the upper abdomen forcefully over the back of a sturdy chair, a countertop edge, or a railing to create upward pressure under the diaphragm. The surface must be stable and not sharp.
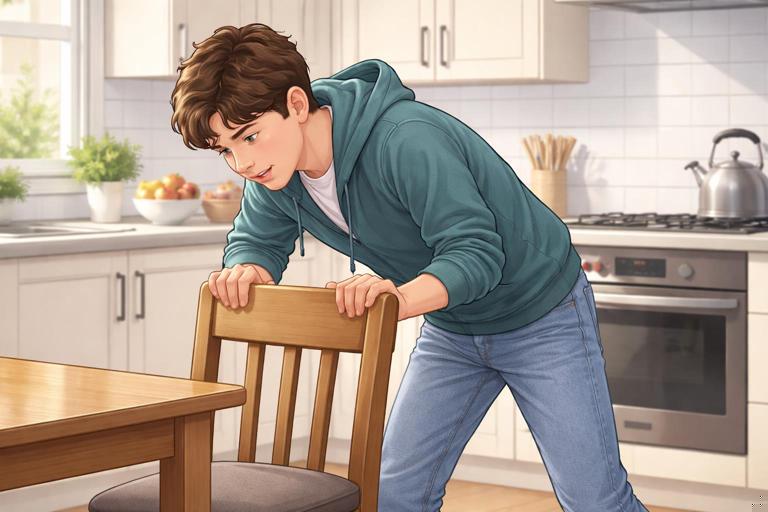
As a responder, you can guide them with short commands if they can still nod or make minimal sounds: “Lean over the chair edge—hard. Again.”
Practical example: choking during sports practice
A 14-year-old on the sidelines is chewing gum and suddenly cannot speak, eyes watering. A coach steps behind and performs abdominal thrusts. The gum dislodges and the teen coughs repeatedly. The coach stops thrusts once coughing is effective and keeps the teen under observation, watching for persistent breathing difficulty.
Unresponsive Choking: What Changes When the Person Collapses
When an infant, child, or teen becomes unresponsive, the priority shifts to restoring oxygen delivery with compressions and breaths, while checking the mouth for visible obstruction. The key idea is that compressions can help move the obstruction by generating pressure changes in the chest.
Core rules for unresponsive choking
- Do not perform blind finger sweeps.
- Each time you open the airway to give breaths, look for a visible object. Remove it only if you can see it clearly.
- If breaths do not go in, reposition and try again. If still not going in, resume compressions.
Step-by-step: if a child or teen becomes unresponsive while choking
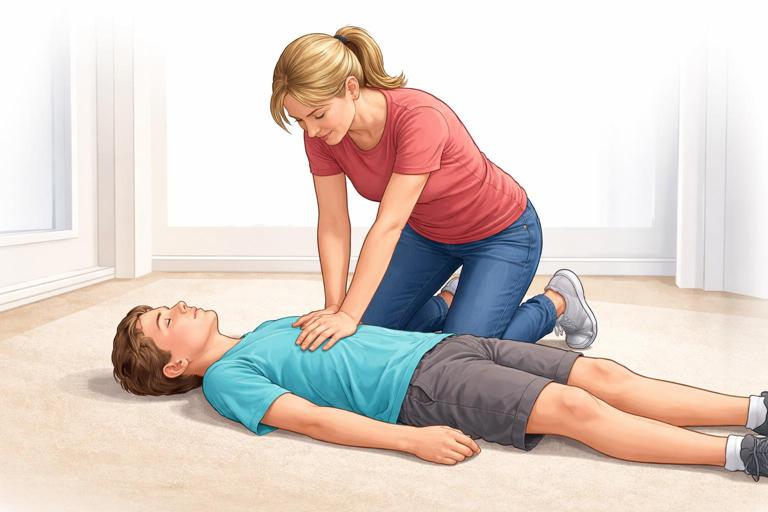
1) Lower them to the ground safely. Protect the head and neck as you guide them down.
2) Begin chest compressions. Use the appropriate hand position and depth for the child/teen’s size as trained. Compressions are continuous in cycles with attempts at ventilation.
3) Open the mouth and look. If you see the object, remove it carefully.
4) Attempt rescue breaths. If the chest does not rise, reposition the head and try again, then return to compressions.
5) Continue cycles until breathing returns or advanced help takes over.
Step-by-step: if an infant becomes unresponsive while choking
1) Place the infant on a firm, flat surface.
2) Begin infant chest compressions. Use two fingers in the center of the chest on the sternum, with appropriate depth as trained.
3) Open the airway and look in the mouth. Remove only visible objects.
4) Attempt rescue breaths. If breaths do not go in, reposition and try again, then resume compressions.
5) Continue cycles.
Even if the obstruction clears, the person may still need medical evaluation, especially if there was a period of unresponsiveness, persistent coughing, wheezing, drooling, or voice changes.
What to Do After the Object Comes Out
Once airflow returns, your actions depend on how the person looks and feels. Choking relief maneuvers can irritate or injure the airway and chest/abdomen, and a small fragment can remain.
Immediate checks
- Breathing quality: Is breathing easy, or is there persistent wheeze/stridor?
- Voice/cry: Is it normal or hoarse?
- Color and alertness: Are they pink and responsive?
- Ongoing cough: Is it improving or worsening?
When to seek urgent evaluation after choking relief
- Choking episode involved unresponsiveness at any point
- Persistent trouble breathing, noisy breathing, or drooling
- Persistent chest pain or abdominal pain after thrusts
- Ongoing vomiting or inability to swallow
- Suspected aspiration (object may have gone into the airway) with ongoing cough or wheeze
For infants and young children, err on the side of evaluation if symptoms persist, because airway swelling can develop and small aspirated pieces can cause delayed breathing problems.
Special Scenarios and Adaptations
Choking with vomiting or heavy secretions
Sometimes the obstruction is thick food, mucus, or vomit. The same age-appropriate choking maneuvers apply if airflow is severely blocked. If the person is coughing effectively, allow coughing and keep them upright. If they are unresponsive, visible material in the mouth can be removed carefully, but avoid blind sweeps.
Choking in a wheelchair or seated position
If the child/teen cannot stand, you can perform thrusts from behind while they are seated:
- Stabilize their torso against the chair back if possible.
- Use the same hand placement (above navel for abdominal thrusts, or center of sternum for chest thrusts when indicated).
- Deliver controlled thrusts; be mindful of chair armrests and posture that may limit your angle.
Choking in water
If a child or teen is pulled from water and is not breathing normally, treat it as an unresponsive emergency with compressions and breaths as trained. Do not attempt abdominal thrusts to “get water out.” Focus on ventilation and compressions; water in the lungs is not removed by thrusts, and delays worsen oxygen deprivation.
Multiple rescuers: role assignment
When more than one adult is present, efficiency improves if roles are clear:
- Rescuer 1: performs choking relief maneuvers continuously.
- Rescuer 2: prepares to call for help, clears space, retrieves emergency equipment if available, and prepares to assist if the person becomes unresponsive.
Switch rescuers if fatigue reduces thrust effectiveness, but avoid long pauses.
Safety and Technique Quality: How to Make Maneuvers Effective
Back blows: what “firm” means
Back blows work by creating a sharp vibration and pressure wave in the airway. “Firm” means decisive and controlled, not a gentle pat and not a wild strike. Aim between the shoulder blades, not the neck and not the lower back.
Thrusts: direction matters
Abdominal thrusts must be inward-and-upward to push the diaphragm upward and force air out of the lungs. Chest thrusts are straight back on the sternum. Incorrect direction reduces effectiveness and increases injury risk.
Stop when effective coughing returns
Once the person can cough forcefully, breathe, or speak/cry, stop thrusts and allow coughing. Continuing thrusts after the obstruction clears can cause unnecessary injury.
Quick Reference: Age-Based Technique Map
- Infant (< 1 year), responsive, severe obstruction: 5 back blows + 5 chest thrusts, repeat.
- Child (1 year to puberty), responsive, severe obstruction: abdominal thrusts (or chest thrusts if abdominal thrusts not appropriate).
- Teen, responsive, severe obstruction: adult-style abdominal thrusts (or chest thrusts if needed); consider self-rescue if alone.
- Any age, becomes unresponsive: compressions with airway checks for visible object and rescue breaths as trained; no blind finger sweeps.
Skill Practice: How to Train the Motions at Home (Without Risk)
You should never practice thrusts on a real child or infant. Instead, build muscle memory safely:
- Hand placement rehearsal: Practice locating “above the navel, below the breastbone” on yourself and on a fully clothed adult volunteer without applying force.
- Infant hold rehearsal: Use a doll to practice the face-down forearm position and the careful turn to face-up, focusing on head support and keeping the head lower than the chest.
- Command practice: Rehearse short phrases you would use under stress: “Cough, keep coughing.” “Are you choking?” “I’m going to help you.” “Lean forward.”
These drills reduce hesitation and improve accuracy when seconds matter.