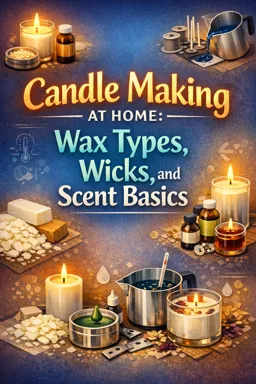
Three Core Wax Families and What “Performance” Means
Choosing a wax is less about “best” and more about matching the wax to your goal: strong fragrance, a certain look, easy pouring, or a specific candle format (container vs. pillar). In practice, wax performance shows up in a few repeatable categories: scent throw (cold and hot), appearance (glossy vs. creamy, color clarity), ease of use (how forgiving it is), shrinkage (pulling away from glass/molds), frosting tendency (crystalline haze), and cure time (how long it needs before it smells and burns as intended).
Cold throw vs. hot throw (quick clarity)
- Cold throw: how strong the candle smells when unlit. It depends on how well the wax holds fragrance near the surface and how the wax crystallizes as it cools.
- Hot throw: how strong the candle smells while burning. It depends on melt pool formation, wax volatility, and how efficiently fragrance is released with heat.
Decision Framework: Compare Soy, Paraffin, and Beeswax
| Criteria | Soy Wax | Paraffin Wax | Beeswax |
|---|---|---|---|
| Scent throw (cold) | Good to very good, can be subtle with some scents; improves with cure | Often very strong and immediate | Naturally honey-like; added scents can be more muted |
| Scent throw (hot) | Good when wicked correctly; can be softer than paraffin | Often strongest hot throw; wide scent compatibility | Moderate; natural aroma competes with added fragrance |
| Appearance | Matte/creamy; can frost; smooth tops may need technique | Glossy, crisp color; can look very “finished” | Warm, natural glow; often golden; can be rustic or polished |
| Ease of use | Moderate: sensitive to pour/cool conditions; tops can be tricky | High: forgiving, predictable set and finish | Moderate: higher melt point; can be stubborn in molds |
| Shrinkage / adhesion | Lower shrink than paraffin but can still pull from glass; varies by batch and cooling | Higher shrink; more likely to pull from containers and need repours | Moderate to high shrink in molds; releases well but can crack if cooled too fast |
| Frosting tendency | Higher (natural crystal pattern); more visible with dyes | Low (typically) | Low; may show bloom/patina over time |
| Typical cure time | Often longer (commonly about 1–2 weeks for best throw) | Often shorter (commonly 1–3 days) | Often moderate (commonly several days to ~1 week) |
| Best suited formats | Containers, wax melts (with the right blend), some votives | Pillars, votives, containers, melts (very versatile) | Pillars, tapers, votives; some containers with proper wicking |
How to use this table as a decision tool
- If your top priority is maximum hot throw and a glossy, “store-finish” look, start testing with paraffin or a paraffin blend.
- If you want a plant-based, creamy look and you’re okay with longer cure and occasional cosmetic quirks, start with soy (especially for containers).
- If you want a natural wax with its own aroma and excellent pillar structure, choose beeswax (especially for pillars/tapers).
Additives and Blends: What They Change (Without Brand Formulas)
Additives and blending are ways to tune wax behavior. Rather than memorizing recipes, focus on what you’re trying to fix and choose adjustments that target that issue.
Common goals and what blending/additives can influence
- Improve glass adhesion / reduce wet spots: Some blends increase flexibility or adjust crystallization so the wax stays in contact with the container wall more consistently.
- Reduce frosting (especially in soy): Certain additives or small amounts of another wax can disrupt crystal growth, making frosting less visible.
- Increase hardness for melts or votives: Adding a harder wax component can raise the melt point and help pieces unmold cleanly.
- Boost scent throw: Some waxes “carry” fragrance differently; blending can improve how fragrance is retained and released. (Note: wick choice and melt pool still matter.)
- Improve surface finish: Additives can reduce sinkholes, smooth tops, or change gloss/matte appearance.
When you change wax composition, you often change wick needs, pour behavior, and cure time. Treat any blend as a new wax: test it like you’ve never used it before.
Handling Notes by Wax Type
Soy Wax: creamy, container-friendly, but sensitive to cooling
Melt behavior: Soy typically melts into a cloudy-to-clear liquid and then re-crystallizes as it cools. That crystallization is why frosting and texture changes can appear days later.
Ideal mixing approach: Stir gently but thoroughly after adding fragrance so it disperses evenly without whipping in air. Keep your process consistent from batch to batch (same stir time, similar pour conditions) so you can interpret results.
- Listen to the audio with the screen off.
- Earn a certificate upon completion.
- Over 5000 courses for you to explore!

Download the app
Common beginner mistakes
- Chasing a perfect top immediately: Overheating or repeated heat-gunning can change crystal structure and lead to later frosting or uneven texture.
- Pouring in a very cold room: Rapid cooling increases the chance of rough tops, pull-away, and visible frosting.
- Judging scent too early: Soy often needs a longer cure; testing hot throw the next day can mislead you.
Best candle types
- Containers: A common match because soy is typically softer and benefits from container support.
- Wax melts: Works well when formulated/blended for snap and release; pure container-style soy can be too soft.
- Votives/pillars: Possible with the right wax type or blend; pure soft soy can deform or stick in molds.
Paraffin Wax: strong throw, glossy finish, versatile formats
Melt behavior: Paraffin melts to a clear liquid and sets with a more uniform structure than soy, often producing a smooth, glossy surface. It also tends to shrink more as it cools.
Ideal mixing approach: Paraffin usually accepts fragrance readily; mix thoroughly and keep notes on any change in viscosity after fragrance addition (a clue that the wax is binding well).
Common beginner mistakes
- Ignoring shrinkage: Paraffin can form sinkholes around the wick as it cools; beginners often skip planning for a second pour or surface correction.
- Overloading fragrance: Too much can cause seepage (“sweating”), poor burn, or mottled surfaces.
- Assuming one wick fits all: Paraffin’s strong throw can tempt you to under-test; different jars and dyes still change burn behavior.
Best candle types
- Pillars and votives: Excellent because paraffin can be made hard and releases from molds well.
- Containers: Works well but may show more wet spots/pull-away due to shrinkage.
- Wax melts: Very common because it can be tuned for hardness and strong scent.
Beeswax: natural aroma, higher melt point, great structure
Melt behavior: Beeswax melts at a higher temperature than many soy/paraffin container waxes and becomes a clear golden liquid. It sets firm and can be slow to fully level if poured too cool.
Ideal mixing approach: If adding fragrance, mix patiently and keep the wax warm enough to stay fluid while you stir. Beeswax already has a natural scent; choose added scents that complement rather than fight it.
Common beginner mistakes
- Expecting strong added fragrance: Beeswax can mute some fragrances; the natural honey note may dominate.
- Cooling too quickly in molds: Fast cooling can increase cracking or pull lines, especially in thicker pillars.
- Using container wicks by habit: Beeswax pillars often need different wicking than soft container waxes.
Best candle types
- Pillars and tapers: A classic fit due to firmness and burn characteristics.
- Votives: Works well, especially when you want a natural look and aroma.
- Containers: Possible, but test carefully for jar adhesion and wick performance; the higher melt point changes melt pool behavior.
Mini-Lab: Three-Wax Test Candles (Soy vs. Paraffin vs. Beeswax)
This activity helps you see differences in adhesion, appearance, and scent strength using the same jar size, wick style (as close as practical), and fragrance level. You are not trying to “perfect” the candles—only to compare wax behavior.
What you’ll make
- Three small container candles (same jar type and fill weight): one soy, one paraffin, one beeswax.
- Optional: a fourth candle using a simple blend (e.g., mostly soy with a small portion of another wax) to observe how blending shifts results.
Materials (keep everything consistent)
- 3 identical heat-safe containers
- Same wick type and as similar a size as you can across all three (note: one wick may not be “ideal” for all waxes; that’s okay for comparison)
- One fragrance oil (single scent) so differences are easier to detect
- Thermometer, scale, stir tool, labels
Step-by-step procedure
- Label containers: “Soy,” “Paraffin,” “Beeswax.” Add a line for date/time poured.
- Prepare wicks: Center and secure each wick the same way. Keep wick length consistent above the container.
- Weigh wax: Use the same wax weight for each candle (example: 100 g each). Record the exact weights.
- Melt each wax separately: Melt soy, paraffin, and beeswax in separate pitchers or one at a time, cleaning between waxes to avoid cross-contamination.
- Add fragrance at a consistent rate: Choose one fragrance load (example: 6% by weight) and use it for all three. Weigh fragrance precisely. Add it when the wax is fully melted and fluid, then stir gently for a consistent time (example: 2 minutes).
- Pour consistently: Pour each wax into its labeled container under similar room conditions. Try to keep pour temperature and cooling environment consistent across the three (same countertop, away from drafts).
- Do not “fix” tops yet: Let them set naturally so you can compare surface behavior, sinkholes, and pull-away.
- Record initial observations at set times: Check at ~1 hour, ~4 hours, and ~24 hours. Note changes.
- Cure and test scent: Smell each candle at 24 hours for cold throw notes, then again after typical cure windows (e.g., day 3 and day 14). If you do a burn test later, keep burn time equal (example: 2 hours) and record hot throw impressions.
Observation sheet (copy/paste template)
Batch date: __________   Fragrance: __________   Fragrance load: ____%   Jar: __________   Wick: __________  Fill weight: ____ g  Pour temp: ____° (if tracked)  Room temp: ____° (if tracked)  Notes: __________

Candle: SOY
- 1 hr: adhesion to glass (0-5): __  top smoothness (0-5): __  visible frosting? Y/N  notes: __________
- 4 hr: adhesion (0-5): __  sinkhole near wick? Y/N  wet spots? Y/N  notes: __________
- 24 hr: appearance: __________  cold throw (0-5): __  notes: __________
- Day 3: cold throw (0-5): __  notes: __________
- Day 14: cold throw (0-5): __  notes: __________

Candle: PARAFFIN
- 1 hr: adhesion (0-5): __  top smoothness (0-5): __  notes: __________
- 4 hr: adhesion (0-5): __  sinkhole near wick? Y/N  pull-away ring? Y/N  notes: __________
- 24 hr: appearance: __________  cold throw (0-5): __  notes: __________
- Day 3: cold throw (0-5): __  notes: __________
- Day 14: cold throw (0-5): __  notes: __________

Candle: BEESWAX
- 1 hr: adhesion (0-5): __  top smoothness (0-5): __  notes: __________
- 4 hr: adhesion (0-5): __  cracks? Y/N  pull lines? Y/N  notes: __________
- 24 hr: appearance: __________  cold throw (0-5): __  notes: __________
- Day 3: cold throw (0-5): __  notes: __________
- Day 14: cold throw (0-5): __  notes: __________
How to interpret what you see
- Adhesion: If you see gaps or “wet spots,” that wax likely shrank away from the glass more during cooling. Compare which wax shows the most pull-away.
- Appearance: Note gloss vs. matte, any frosting haze (especially on soy), and whether the top is smooth or cratered.
- Scent strength over time: If one wax smells weak at 24 hours but improves significantly by day 14, that points to a longer cure profile. If another is strong early, it may have a shorter cure profile.
- Next test decision: Based on your notes, decide what you’d adjust next: wick size, pour conditions, or a small blend/additive aimed at the specific issue (adhesion, frosting, hardness, or throw).