Why starting current (inrush) is high
At the instant a motor starts, it is not yet producing significant counter-electromotive force (back EMF). Back EMF is the “self-generated” voltage that opposes the supply as the rotor comes up to speed. With little back EMF at standstill, the winding impedance is mostly the winding resistance plus leakage reactance, so the motor draws a large current to establish the magnetic field and develop starting torque.
For electricians, the key practical takeaway is: high inrush is normal, but it must be managed so it does not cause excessive voltage drop, nuisance tripping, contactor damage, or mechanical shock to the driven load.
- Electrical stress: voltage dip, heating in windings, stress on contacts, fuses, breakers, and supply transformers.
- Mechanical stress: torque shock on couplings, belts, gearboxes; high acceleration forces; water hammer in pumps; belt slip.
How starting methods reduce stress
Starting methods reduce stress by doing one (or more) of the following: (1) reduce applied voltage during acceleration, (2) control current rise, (3) shape torque to match the load, (4) shorten the time spent at high current by improving starting torque, or (5) ramp frequency/voltage together (VFD) so the motor develops torque without needing full-line inrush.
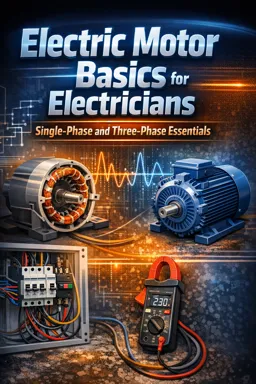
1) Single-phase start circuits: what starts the motor and what can fail
Many single-phase motors use an auxiliary (start) winding to create a phase shift and starting torque. A starting device connects and disconnects components so the motor can start strongly and then run efficiently.
Capacitors: start vs run
- Start capacitor: high capacitance, used briefly to boost starting torque. Usually removed from the circuit after the motor reaches a portion of rated speed.
- Run capacitor: lower capacitance, stays in circuit to improve running performance and power factor (in capacitor-run designs).
What electricians should recognize: a weak or open start capacitor often causes a motor that hums, starts slowly, or needs a spin to start. A shorted capacitor can blow fuses or trip breakers quickly.
- Listen to the audio with the screen off.
- Earn a certificate upon completion.
- Over 5000 courses for you to explore!

Download the app
Start relays (potential relay / current relay)
Start relays automate removing the start capacitor and/or start winding after acceleration.
- Potential relay: senses the rising voltage induced in the start winding as speed increases; opens contacts to remove the start capacitor at the right point.
- Current relay: senses high inrush current at startup; closes contacts to energize the start circuit, then opens as current drops with increasing speed.
Common failure patterns:
- Relay contacts stuck open → no start assist → hum/no start or slow start.
- Relay contacts stuck closed → start capacitor stays in too long → overheating, capacitor bulging, relay chatter, eventual trip.
Centrifugal switch (mechanical start switch)
A centrifugal switch is mounted on the motor shaft. At low speed it is closed (start circuit engaged). As speed rises, centrifugal force opens the switch to disconnect the start winding/capacitor.
What to look for: dirt, worn mechanism, pitted contacts, broken springs, or misadjustment. A switch that fails to open can overheat the start winding/capacitor; a switch that fails to close causes a no-start condition.
Practical step-by-step: verifying a single-phase start circuit (field workflow)
- Lockout/tagout and verify zero energy.
- Visual inspection: bulged/leaking capacitor, burnt relay, loose spade terminals, overheated switch housing, damaged insulation.
- Check capacitor: use a meter with capacitance function; compare to the capacitor’s µF rating and tolerance. If no capacitance function is available, check for obvious short/open with resistance test (not definitive, but can catch gross failures).
- Check start switch/relay contacts: continuity test (with power off). For centrifugal switch, rotate shaft by hand (if accessible) to see if contacts change state.
- Verify wiring against the motor’s internal diagram: ensure start components are in the correct series/parallel arrangement and that no field modifications bypassed the switch/relay.
- Re-energize and observe start behavior: listen for relay click, watch acceleration time, measure starting current with a clamp meter capable of inrush capture if available.
2) Three-phase starting options: how each changes current and torque
DOL (across-the-line) starting
DOL applies full line voltage immediately through a contactor and overload relay. It is the simplest and most common method.
- Pros: low cost, simple, strong starting torque.
- Cons: highest inrush current and mechanical shock; can cause voltage dip and nuisance trips on weak supplies.
When it fits: small-to-medium motors, stiff utility/service, loads that can tolerate torque step, short acceleration times.
Wye-delta (star-delta) basics
Wye-delta starting reduces the voltage per winding during start by connecting the motor in wye (star), then transitions to delta for run. Reduced voltage means reduced current and reduced starting torque.
- What changes electrically: in wye, each winding sees lower phase voltage than in delta (for the same line voltage), so current is reduced.
- What changes mechanically: starting torque is reduced significantly; the load must be able to accelerate with lower torque.
Key practical points:
- Requires a motor with six leads and a starter designed for wye-delta.
- Transition timing matters: too early can stall; too late can overheat due to extended acceleration.
- Open-transition starters can create a noticeable “bump” during changeover; closed-transition reduces disturbance but is more complex.
Soft starter concepts
A soft starter uses solid-state devices (typically SCRs) to ramp the applied voltage (and sometimes limit current) during start, then bypasses the electronics with a contactor once running.
- Pros: adjustable ramp time, reduced mechanical shock, reduced voltage dip, often includes built-in protections and diagnostics.
- Cons: still a line-frequency start (no frequency change), so torque at very low speed can be limited; generates heat and harmonics during ramp; not ideal for very high inertia loads without proper sizing.
Typical settings electricians must coordinate: initial voltage (or torque), ramp time, current limit, kick-start (if needed), and stop ramp (for pumps to reduce water hammer).
VFD starting principles
A VFD starts a motor by controlling both frequency and voltage. By starting at low frequency and increasing smoothly, the motor can develop torque with much lower inrush than DOL, while providing controlled acceleration.
- Pros: best control of acceleration, torque, and speed; can greatly reduce starting current; can match motor to load requirements.
- Cons: requires correct programming, proper grounding/shielding practices, and attention to motor insulation and cable length considerations; may require line reactors/filters depending on installation.
Practical note: with a VFD, the “starting problem” often shifts from breaker tripping to parameter or installation issues (accel time too short, current limit too low, incorrect motor data, or drive faulting on undervoltage/overcurrent).
3) What to inspect during commissioning (what must be verified before handover)
Commissioning is where electricians prevent most starting-related call-backs. The goal is to confirm the supply and protection can tolerate inrush and that the chosen starting method is correctly sized and set.
Wire sizing and terminations
- Conductor ampacity: verify conductors are sized for the motor circuit per applicable code and design documents, considering continuous duty and ambient/derating factors.
- Terminations: torque to manufacturer specs; check for aluminum/copper compatibility and use correct lugs/anti-oxidant where required.
- Thermal evidence: look for discoloration, insulation deformation, or loose strands at lugs—common causes of voltage drop and nuisance trips during start.
Breaker/fuse type and coordination
Starting current is brief but high. Protective devices must allow normal inrush while still protecting against faults.
- Inverse-time breakers: may tolerate short inrush, but magnetic trip settings (if adjustable) and breaker curve matter.
- Time-delay fuses: often used to ride through inrush without opening, while still providing short-circuit protection.
- Coordination: confirm the upstream device does not trip before the motor branch protection or starter protection operates as intended.
Voltage drop (especially during start)
Excessive voltage drop reduces starting torque and increases acceleration time, which can keep current high longer and trigger trips.
- Measure line voltage at the starter/drive input at rest and during start (use appropriate instruments and safe test points).
- Compare measured drop to design expectations; investigate long runs, undersized conductors, weak transformer/service, or shared feeders with other large loads.
Starter/drive sizing and settings
- Contactor and overload: verify correct ratings and overload setting per motor full-load current and service factor guidance in the design/spec.
- Wye-delta: confirm correct lead connections, timer setting, and interlocks; verify transition does not cause stalling.
- Soft starter: verify current limit and ramp time; confirm bypass contactor operation; check heat sinking/ventilation.
- VFD: enter correct motor data (voltage, current, base frequency, speed if required), set accel time, current limit, and control mode; verify line/load wiring is correct (line to input, motor to output—never swapped).
Practical step-by-step: commissioning checks focused on starting
- Confirm supply: measure no-load voltage and verify phase balance (three-phase) at the starter/drive line terminals.
- Inspect protection: verify breaker/fuse type and rating; confirm overload class/setting; check control transformer fusing if used.
- Verify wiring: correct conductor size, correct lugging, correct grounding, correct control wiring, and correct motor lead configuration for the starting method.
- First start observation: start unloaded if possible; record inrush current (or peak/average), acceleration time, and minimum voltage during start.
- Load start: start under normal load; confirm acceleration time stays within expected range and protection does not operate.
- Fine-tune settings: adjust soft starter/VFD parameters to reduce mechanical shock while maintaining adequate torque.
- Document: record measured values and final settings for future troubleshooting.
4) Practical symptom mapping: what you see, what it usually means
| Symptom | Likely root causes | What to check first |
|---|---|---|
| Lights dim noticeably when motor starts | High inrush on weak supply; excessive feeder impedance; undersized transformer/service; long run causing voltage drop; DOL start on large motor | Measure voltage at motor starter during start; check feeder length/size and shared loads; consider reduced-voltage start (soft starter/VFD/wye-delta) if appropriate |
| Nuisance breaker trips instantly at start | Breaker magnetic trip too sensitive; wrong breaker type/curve; short circuit/ground fault; miswired starter; seized load causing locked-rotor condition | Verify correct breaker type/rating; inspect for faults; uncouple load if possible and retest; check inrush magnitude and duration |
| Trips after a few seconds of starting | Low voltage causing extended acceleration; overload setting too low; soft starter current limit too low; VFD accel too fast causing overcurrent; mechanical load too heavy | Measure voltage sag; check acceleration time; verify overload class/setting; review soft starter/VFD parameters; check driven equipment for binding |
| Motor hums but won’t start (single-phase) | Failed start capacitor; stuck-open start switch/relay; start winding issue; low supply voltage; load jammed | Check capacitor µF; check relay/switch continuity; measure supply voltage at motor; try starting with load removed (if safe/possible) |
| Starts only if spun by hand (single-phase) | Weak/open start capacitor; start circuit not engaging; incorrect wiring of start components | Capacitance test; inspect relay/switch operation; verify wiring against diagram |
| Slow acceleration / “lazy” start (three-phase) | Voltage drop; wrong starting method for load (wye-delta on high-torque load); soft starter set too low; VFD current limit too low; mechanical overload | Measure voltage during start; confirm load torque requirement; adjust soft starter/VFD settings; check for mechanical drag |
| Hard mechanical jerk at start | DOL torque step; soft starter ramp too short or kick-start too aggressive; coupling/belt issues; driven load sensitive (pumps, conveyors) | Increase ramp time; reduce initial voltage/torque; inspect coupling/belt tension; consider VFD for smoother control |
| Wye-delta transition causes a “bump” or stall | Transition timing incorrect; load too heavy for wye start; wiring/interlock issue; open-transition disturbance | Verify timer setting; confirm motor leads and starter wiring; evaluate whether wye-delta is suitable; consider soft starter/VFD |
| Soft starter overheats or faults during repeated starts | Too many starts per hour; undersized soft starter; inadequate ventilation; long ramp time with high current | Check starts/hour and duty limits; verify soft starter rating; inspect enclosure temperature/airflow; adjust ramp/current limit |
| VFD trips on undervoltage at start | Supply sag; undersized feeder; shared loads; line reactor needed; accel too aggressive drawing high current | Measure line voltage at drive input during start; length/size of feeder; add reactor if specified; increase accel time |
| VFD trips on overcurrent at start | Accel time too short; current limit too low/high depending on control mode; incorrect motor data; mechanical jam | Verify motor nameplate data entered; increase accel time; check torque boost settings; inspect driven load |
Quick diagnostic pattern: inrush duration matters as much as peak
Two starts can have the same peak current but very different outcomes. A healthy system typically shows a high peak that quickly decays as speed builds. If current stays elevated for too long, look for low voltage, insufficient starting torque (wrong method/settings), or excess mechanical load.
Field tip: separate electrical from mechanical causes
- If possible, start the motor with the load uncoupled (or with process isolated). If it starts normally unloaded but not loaded, focus on the driven equipment and torque requirement.
- If it struggles even unloaded, focus on supply voltage, start circuit (single-phase), starter settings, wiring errors, or internal motor issues.