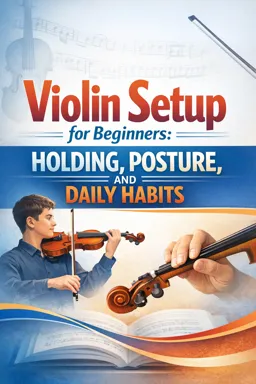
What “Good Standing Posture” Means for Violin
Standing posture for violin is not a rigid pose. It is an organized, balanced alignment that lets you hold the instrument without leaning, bracing, or twisting. The goal is simple: your skeleton supports you, your muscles stay available for fine control, and your breathing stays easy. Think “stacked” from feet to head, with small, adjustable joints (ankles, knees, hips, ribs, neck) rather than locked ones.
Step-by-Step Standing Setup (Feet to Head)
1) Foot placement: build a stable base
Start with both feet on the floor, about hip-width apart. Many players feel best with the left foot slightly forward (a small step, not a lunge) so the violin can sit naturally on the left side without the torso rotating.
- Option A (neutral): feet parallel, toes forward.
- Option B (common for violin): left foot a half-step forward, both feet still pointing mostly forward.
Practical cue: imagine your feet are “tripods” (heel, base of big toe, base of little toe). Feel all three points on each foot.
2) Weight distribution: centered and quiet
Let your weight settle evenly between left and right, then allow a tiny preference toward the balls of the feet (not the toes). You should feel ready to move in any direction without needing to “catch” yourself.
- Avoid hanging into one hip (often the right hip) while the left shoulder reaches for the violin.
- Avoid shifting so far forward that your heels feel light.
3) Knees: unlocked, springy
Keep the knees soft—neither bent deeply nor locked straight. Locked knees often create a stiff lower back and a tense neck; overly bent knees can make the upper body collapse.
- Listen to the audio with the screen off.
- Earn a certificate upon completion.
- Over 5000 courses for you to explore!

Download the app
Practical cue: gently micro-bend and return to neutral until you find the point where the legs feel supportive but not rigid.
4) Pelvis: neutral (not tucked, not arched)
Neutral pelvis means the front of the hips and the pubic bone are in a comfortable, upright relationship—no exaggerated “tail tucked under” and no exaggerated lower-back arch. This is the base for a long spine.
- Common sign of tucking: glutes clenched, lower back flattened, chest tends to collapse.
- Common sign of arching: ribs flare forward, lower back feels compressed, shoulders creep up.
5) Spine: lengthened, not stiff
Imagine your spine growing upward from the pelvis, like a stack of blocks that is tall but not rigid. Keep the ribs resting over the pelvis rather than thrusting forward.
Practical cue: think “up through the crown of the head” while the tailbone drops naturally.
6) Chest: open without arching
“Open chest” does not mean pushing the chest forward. Instead, allow the collarbones to widen and the sternum to feel buoyant while the ribs stay stacked over the pelvis.
- Let the shoulder blades rest on the back; avoid pinching them together.
- Keep breathing easy; if your breath feels stuck, you are likely over-lifting the chest.
7) Head and neck: balanced on top
Balance the head over the spine as if it is gently floating. The jaw is free, and the neck is long. This matters because violin playing can tempt you to “reach” the head forward or clamp down.
- Avoid: pushing the chin forward to meet the chinrest.
- Avoid: tucking the chin down hard (a bracing pattern that tightens the front of the neck).
Practical cue: imagine a small space between the back of the neck and your collar, as if the head is lightly suspended.
Side-View Checkpoints (Quick Scan)
Use a mirror or phone camera from the side. Aim for these checkpoints:
- Ankles: not collapsed inward; weight feels centered on the foot tripod.
- Knees: not locked back; kneecaps not pulled up hard.
- Pelvis: neither tucked under nor tipped forward; lower back feels long.
- Ribs over pelvis: no rib “flare” forward.
- Shoulders: resting, not lifted; arms hang easily when not holding the violin.
- Head: ear roughly over shoulder (not drifting forward).
Common side-view mistake: leaning into the instrument. This often looks like the head and upper ribs drifting forward toward the violin, while the hips drift back to compensate.
Front-View Checkpoints (Symmetry and Twist)
Check yourself from the front (mirror or camera). Look for:
- Feet: hip-width, not turned out dramatically; left foot may be slightly forward but not far.
- Hips: level (no hanging into one side).
- Ribcage: centered over the pelvis (not shifted right/left).
- Shoulders: level and relaxed (one shoulder hiking up is a red flag).
- Head: centered, not tilted or rotated when you are simply standing.
Common front-view mistake: twisting the torso. This can happen when the feet point one way but the chest rotates another, or when the left shoulder pulls forward while the right shoulder pulls back. The result is uneven tension and unstable bow control.
Common Mistakes and How to Fix Them
Leaning into the instrument
What it feels like: you “reach” your head/upper body toward the violin to secure it.
Fix: return your head over your spine first, then bring the violin to you by adjusting how you stand (small left-foot-forward stance) rather than bending your body. Re-check weight distribution: if your hips drift back, bring them under you.
Twisting the torso
What it feels like: one shoulder is always forward; your belly button points somewhere different than your feet.
Fix: align feet and pelvis first. Then let the sternum face forward. If you need the violin angled, allow it to be a small, comfortable orientation without rotating your whole ribcage. Re-check that both shoulders can drop equally.
Tucking the chin down hard
What it feels like: pressure under the jaw, tight front of neck, jaw clenched.
Fix: think “head floats up” and “jaw releases.” Practice turning the head gently left/right (see self-tests) to confirm you are not bracing. The chin can rest, but it should not press.
Quick Self-Tests (30–60 Seconds)
Self-test 1: Rocking weight heel-to-toe
Without the violin first, gently rock your weight a few millimeters toward the heels, then toward the balls of the feet, then settle in the middle.
- Pass sign: you can rock smoothly without gripping the toes or locking the knees.
- If you wobble: widen stance slightly and re-find the foot tripod points.
- If your shoulders tense: you are using upper body to balance—return attention to feet and knees.
Self-test 2: Raise and lower shoulders
Slowly lift both shoulders toward your ears, then let them drop and widen.
- Pass sign: shoulders drop easily and the chest stays buoyant without arching.
- If they “stick” up: check ribs (they may be flared) and soften the knees; then repeat.
Self-test 3: Turn head left/right (neck not braced)
Keeping the body facing forward, gently turn your head left, return to center, then right. Do this slowly and comfortably.
- Pass sign: the head turns smoothly without the shoulders following and without jaw clenching.
- If the shoulders move: you may be twisting to compensate—re-center ribs over pelvis.
- If the turn feels blocked: reduce chin pressure (avoid tucking) and imagine the head balancing up and back.
Putting It Together: A 20-Second Standing Reset Before Playing
- Place feet hip-width; optionally step left foot slightly forward.
- Find even weight on both foot tripods; soften knees.
- Set pelvis neutral; lengthen spine upward.
- Let collarbones widen; shoulders rest.
- Balance head over spine; jaw free.
- Do one quick head turn left/right to confirm the neck is not braced.