Why “Software-Agnostic” Matters in Construction Scheduling
A software-agnostic implementation means your scheduling method works the same way regardless of whether you use a spreadsheet, a dedicated CPM tool, or an enterprise platform. The goal is to separate (1) the scheduling decisions that require construction judgment from (2) the button-clicks required by a specific product. When teams confuse the two, schedules become fragile: they only “work” in one tool, only one person can update them, and the project loses continuity when software changes midstream.

In practice, a software-agnostic approach defines a stable “data model” for your schedule (what fields you track, how you name activities, how you code work, how you store logic, and how you record updates). Then you can implement that model in any tool with minimal translation. This chapter focuses on how to implement that model and keep it consistent, with optional walkthroughs for spreadsheets and common scheduling tools.
The Core Data Model (What You Must Be Able to Represent Anywhere)
Any scheduling environment—spreadsheet or CPM software—must be able to store and maintain a minimum set of information. If your tool cannot represent these items, you can still use it, but you must add a workaround (extra columns, a separate log, or a companion file).
1) Activity identity and naming
Unique Activity ID: A stable identifier that never changes even if the activity name changes. Example: “A-1200”.
Activity Name: Verb + object + location (and sometimes trade). Example: “Install drywall – Level 2 – East Wing”.
Continue in our app.- Listen to the audio with the screen off.
- Earn a certificate upon completion.
- Over 5000 courses for you to explore!

Download the app
Area/Location: Zone, floor, unit, or gridline range. This is essential for filtering and look-ahead planning.
2) Dates, durations, and calendar assumptions
Planned Duration: Working days (or hours) consistent with your project calendar.
Planned Start/Finish: Calculated by logic where possible; manually entered dates should be the exception.
Calendar: Standard workweek, holiday exceptions, shutdown periods, and special calendars (night shift, weekend work). If your tool cannot handle multiple calendars, you must document exceptions clearly.
3) Logic and constraints (stored explicitly)
Predecessors and relationship type: FS/SS/FF/SF plus lag/lead if used.
Constraints: If you must use them, record the type and date, and track why it exists (e.g., “Owner access restriction”).
Logic notes: A short explanation for non-obvious relationships (e.g., “SS because crews can start in parallel by zone”).
4) Responsibility and handoffs
Owner: GC, subcontractor, vendor, designer, AHJ, owner rep.
Trade: Useful for filtering and accountability.
Deliverable/Acceptance: What “done” means (inspection passed, test report received, punch list complete, etc.).
5) Status and update fields
Status: Not started / In progress / Complete (or a numeric percent rule if you use one).
Actual Start/Finish: The factual dates.
Remaining Duration: The forward-looking estimate after update.
Update Note: A short reason for variance (weather, rework, access, late material, etc.).
6) Coding for reporting (optional but powerful)
Phase: Sitework, structure, envelope, interiors, MEP rough-in, commissioning, closeout.
Cost code / CSI division: Helps align schedule with cost and procurement reporting.
Location code: Building/level/area/unit.
If you standardize these fields, switching tools becomes a data migration exercise rather than a reinvention of the schedule.
Implementation Blueprint: A Repeatable, Tool-Independent Workflow
The workflow below is written so it can be executed in any environment. The “how” changes by tool; the “what” stays the same.
Step 1: Define your schedule dictionary (one-page standard)
Create a short standard that your team follows on every project. Include:
Naming convention: Verb + object + location; avoid vague terms like “misc.”
ID convention: Prefix by phase or discipline (e.g., “S-” for site, “E-” for envelope) or sequential numeric IDs.
Required fields: At minimum: ID, Name, Location, Trade/Owner, Duration, Predecessors, Successors (optional), Status, Actual Start/Finish, Remaining Duration, Notes.
Update cadence: Weekly update cut-off time, who owns updates, and when the updated schedule is issued.
Version control: File naming and storage rules (e.g., “Project_Schedule_YYYY-MM-DD_Rev##”).
This dictionary prevents “silent drift” where each update changes how activities are described or tracked.
Step 2: Build a master activity register (the source of truth)
Even if you use a CPM tool, maintain a master register that can be exported/imported. Think of it as your schedule database. It can live in a spreadsheet, a table in a project management system, or a CSV exported from your CPM tool.
Minimum columns for the register:
ID
Name
Location
Trade/Owner
Phase
Duration
Predecessors (as a list of IDs with relationship types and lag)
Constraints (type/date/reason)
Status fields (Actual Start, Actual Finish, Remaining Duration)
Update note
Why this matters: if a scheduler leaves, if a tool license expires, or if the owner demands a different format, you still have the schedule in a portable structure.

Step 3: Choose the “engine” for calculations (CPM tool or spreadsheet logic)
A dedicated CPM tool is best for robust logic, multiple calendars, and clean critical path calculations. A spreadsheet can still be effective for smaller projects or for teams that need transparency and quick edits, but it requires discipline to avoid broken formulas and hidden assumptions.
Software-agnostic rule: the engine can change, but the register fields and naming standards do not.
Step 4: Establish a change-control lane for logic edits
Logic changes are high-impact. Create a simple process:
Request: Who requested the change and why (RFI response, field means/methods change, design revision).
Proposed edit: Which activity links or constraints change.
Review: Superintendent + PM (and key subs when needed).
Record: Log the change in a “Logic Change Log” with date and version.
This prevents the schedule from becoming a moving target where the network is quietly rewritten to make dates look better.
Step 5: Standardize outputs (what you publish)
Different stakeholders need different views, but they should all come from the same dataset. Standard outputs you can produce in any tool:
Milestone list: Key dates only.
Phase summary: Start/finish by phase and by location.
Trade look-ahead: Next 2–6 weeks by trade and area.
Constraint/hold list: Activities blocked by access, approvals, inspections, or owner decisions.
Software-agnostic rule: define these outputs once, then recreate them in whatever tool you use.
Optional Walkthrough A: Spreadsheet Implementation (Practical, Transparent, Limited CPM)
A spreadsheet is not a full CPM engine unless you build one (which can become complex). However, you can still implement a disciplined schedule register and produce reliable short-interval plans, phase summaries, and status tracking. For many residential and small-to-mid commercial projects, this is enough—especially when paired with consistent field coordination.
Spreadsheet tab structure
Tab 1: Activity Register (the master table)
Tab 2: Logic Table (one row per relationship)
Tab 3: Updates (weekly status entries, optionally as a log)
Tab 4: Look-Ahead View (filtered/pivoted)
Tab 5: Milestones (filtered list)
Step-by-step: Build the Activity Register tab
Create a table with these columns (example headings):
Activity_ID
Activity_Name
Location
Trade
Phase
Duration_Days
Planned_Start
Planned_Finish
Actual_Start
Actual_Finish
Remaining_Duration
Status
Update_Note
In a spreadsheet, you can treat Planned_Start/Finish as either manually planned (simple) or semi-calculated (more advanced). If you choose semi-calculated, keep it limited and auditable.
Step-by-step: Build the Logic Table tab (recommended)
Instead of storing predecessors as a comma-separated text field, use a normalized table:
Pred_ID
Succ_ID
Rel_Type (FS/SS/FF/SF)
Lag_Days
Logic_Note
This structure makes it easier to filter “what depends on what,” and it is closer to how CPM tools store relationships.
Step-by-step: Create a simple forward-pass calculation (FS only)
If your project can tolerate a simplified model, you can calculate early dates for FS relationships only. This will not cover all CPM cases, but it can provide a consistent planning baseline.
Assumptions for this simplified approach:
All relationships are Finish-to-Start with optional lag.
No circular logic.
Activities are sorted in a roughly logical order (predecessors appear above successors).
Example pseudo-formula approach:
Planned_Start = MAX( Planned_Finish of all predecessors + lag ) (or a project start date if none) Planned_Finish = Planned_Start + Duration_DaysImplementation tip: use lookup functions to pull predecessor finish dates, but keep a “Logic Check” column that flags missing predecessor IDs or out-of-order rows. If you need SS/FF relationships, multiple calendars, or reliable critical path, move the calculation engine to a CPM tool and keep the spreadsheet as a reporting/export layer.
Step-by-step: Weekly update workflow in a spreadsheet
Freeze a copy: Save last week’s file as the record.
Enter actuals: Update Actual_Start/Actual_Finish for activities that changed status.
Update remaining duration: For in-progress work, adjust Remaining_Duration rather than rewriting original Duration_Days (preserves planning history).
Write a note: One sentence explaining variance for any activity that slipped or changed materially.
Refresh views: Update filters/pivots for look-ahead and constraints.
Key discipline: do not “fix” the schedule by overwriting planned dates to match reality. Keep planned vs actual visible, even if your spreadsheet is simple.
Optional Walkthrough B: Dedicated CPM Tool Implementation (General Steps That Fit Most Tools)
Most CPM tools differ in menus and terminology, but the implementation steps are consistent. Use this as a checklist when setting up in any CPM application.
Step-by-step: Create the project container and calendars
Create project with start date and default calendar.
Define holidays and exceptions immediately so early dates are meaningful.
Create additional calendars only when necessary (e.g., weekend concrete pours, night work). Keep the number of calendars small to reduce confusion.
Step-by-step: Import or enter the Activity Register
Enter IDs and names exactly per your dictionary.
Assign codes (phase, trade, location) so you can filter and report.
Enter durations and confirm units (days vs hours).
Step-by-step: Build logic using a relationship-first mindset
Add relationships from your Logic Table (Pred, Succ, type, lag).
Run a schedule calculation (often called “Schedule,” “Calculate,” or “Run”).
Check for open ends (activities with no predecessors or no successors) and confirm they are intentional.
Check for constraints and verify each has a documented reason.
Step-by-step: Create standard views and filters
Look-ahead filter: Activities starting/finishing in the next X weeks, grouped by trade and location.
Milestone view: Milestones only, sorted by date.
Exception view: Activities with negative float (if applicable), constraints, or out-of-sequence progress.
Step-by-step: Set up a baseline and versioning approach (tool feature optional)
Even if your tool supports baselines, keep an exported copy (PDF + data export) as a durable record. If the tool does not support baselines, your versioned exports become the baseline record.
Step-by-step: Update cycle (generic CPM tool)
Set data date (the cut-off date for status).
Enter actual starts/finishes and remaining durations.
Recalculate schedule and review exceptions (out-of-sequence, constraints, negative float).
Capture variance notes in an activity notebook field or a dedicated “Update_Note” column.
Publish outputs (PDF, image, or web view) and export data (CSV) for portability.
Portability: How to Move Between Tools Without Losing Integrity
Tool changes happen: owners mandate a platform, a JV partner uses a different system, or a project transitions from precon to operations. Portability is easiest when you plan for it from day one.
Use a “Schedule Exchange” CSV format
Maintain an exportable table that includes:
Activity_ID, Activity_Name, Duration, Calendar, Location, Trade, Phase
Predecessor_ID, Relationship_Type, Lag (either in a separate logic file or repeated rows)
Actual_Start, Actual_Finish, Remaining_Duration, Status, Update_Note
Many CPM tools can import activities and relationships from CSV if formatted correctly. Even when direct import is imperfect, a clean exchange file reduces manual re-entry and errors.
Preserve IDs at all costs
If you change activity IDs during migration, you break traceability across versions, meeting minutes, and change logs. Keep IDs stable and add a separate “Legacy_ID” column if a new system forces a different numbering scheme.
Keep logic separate from presentation
Gantt chart formatting, colors, and grouping are presentation. Logic is the network. When migrating, prioritize preserving:
Relationships and lags
Calendars
Constraints (and reasons)
Actuals and remaining durations
You can always rebuild layouts; rebuilding logic from memory is risky and time-consuming.
Governance: Keeping the Schedule “Clean” Across Tools and Users
Role clarity (even on small projects)
Schedule Owner: Maintains the master file, controls versions, runs updates.
Field Contributors: Provide status, constraints, and near-term sequencing input.
Approvers: PM/Super sign off on logic changes and published updates.
Version control rules that work anywhere
One live file in a controlled location.
Weekly archive of both a human-readable output (PDF) and a data export (CSV/XLSX).
Change log stored with the schedule: logic changes, calendar changes, and major scope-driven inserts (without re-teaching scope definition).
Quality checks (tool-independent)
Run these checks before publishing any update:
Missing logic: Any non-milestone activity with no predecessor or no successor—confirm intentional.
Date overrides: Activities with manually entered dates—confirm why.
Constraint review: New constraints added this cycle—confirm documentation.
Out-of-sequence progress: Work started before predecessors complete—confirm whether logic needs refinement or field sequencing changed.
Calendar anomalies: Activities scheduled on non-work days—confirm calendar settings.
Practical Example: One Activity Implemented Three Ways (Same Data, Different Tools)
Consider an activity: “Paint – Level 3 – West Corridor.” The software-agnostic record might be:
ID: I-3420
Name: Paint – Level 3 – West Corridor
Location: L3-WC
Trade: Painting
Phase: Interiors
Duration: 4 days
Predecessors: I-3410 (Drywall finish – L3-WC) FS +0; I-3415 (Prime coat approval – L3) FS +0
Acceptance: Area ready for ceiling grid punch
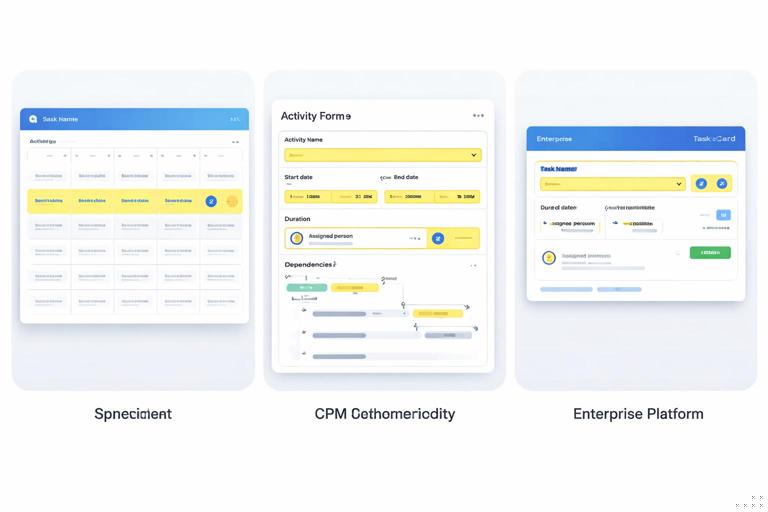
In a spreadsheet, you store this as one row in the Activity Register and two rows in the Logic Table. In a CPM tool, you enter the same fields and create the two relationships. In an enterprise platform, you may store the activity as a task with dependencies and codes. The point is that the meaning is identical, so reporting and accountability remain consistent.
Tool Walkthrough C (Optional): Turning the Register Into a Look-Ahead Without Rebuilding the Schedule
Sometimes you need a clean look-ahead view quickly, even if the master schedule lives elsewhere. You can generate a look-ahead from the register export using simple filters.
Step-by-step in a spreadsheet or table tool
Import the latest export (CSV/XLSX) into a table.
Create a “Window Start” and “Window Finish” (e.g., next Monday to six weeks out).
Filter activities where Planned_Start or Planned_Finish falls within the window and Status is not Complete.
Group by Trade then Location to mirror how the field executes work.
Add a “Constraint Flag” column that highlights activities with missing prerequisites (based on your notes/flags) so the look-ahead becomes actionable.
This approach is software-agnostic because it relies on exported schedule data, not on proprietary views.
Choosing the Right Level of Tooling (Decision Guide)
When a spreadsheet is usually sufficient
Small project with limited concurrency and few specialized calendars
Team needs maximum transparency and quick edits
Primary need is reliable near-term planning and status tracking
When a CPM tool is strongly recommended
Many interdependent trades and areas with complex logic
Multiple calendars, shifts, or phased turnovers
Owner requires formal CPM updates and auditable calculations
Frequent changes where recalculation and exception reporting save time
When an enterprise platform adds value
Portfolio reporting across multiple projects
Integrated workflows for approvals, documents, and field reporting
Need for standardized dashboards across stakeholders
Software-agnostic implementation does not mean “avoid tools.” It means you can scale up or down without changing your underlying schedule discipline.
Minimum Viable Implementation Checklist (Use This to Start Tomorrow)
One-page schedule dictionary (IDs, naming, required fields, update cadence)
Master Activity Register that can be exported (CSV/XLSX)
Logic stored explicitly (in-tool relationships or a separate Logic Table)
Weekly version control: archived PDF + archived data export
Logic Change Log for relationship/constraint edits
Standard published views: milestones, phase summary, trade/location look-ahead, constraint list
Pre-publish quality checks: open ends, constraints, date overrides, out-of-sequence, calendar anomalies