Why Planning Matters in Shorts (Even When You “Improvise”)
Short-form vertical videos feel spontaneous, but high-retention shorts are usually planned. Planning is not about making your video stiff; it is about removing decision fatigue on shoot day, preventing missing shots, and ensuring the edit has enough coverage to maintain clarity. In vertical production, you often have fewer angles, tighter spaces, and faster turnaround. A lightweight planning system lets you shoot quickly while still controlling story clarity and visual continuity.
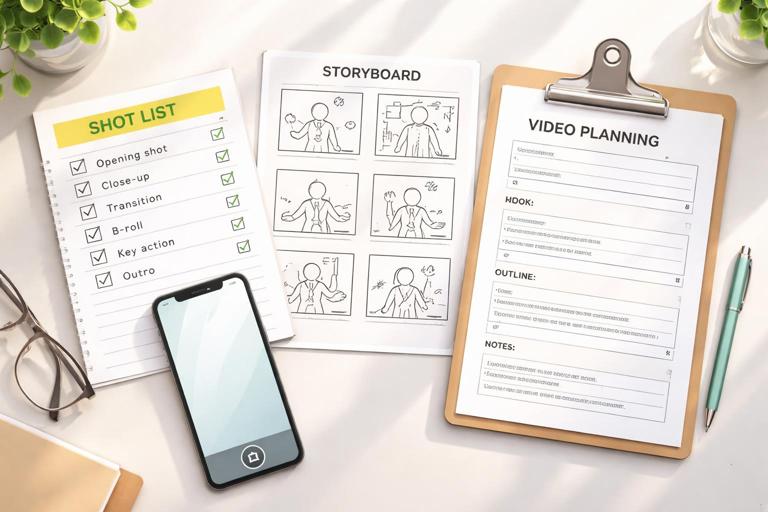
This chapter focuses on three tools that work together: shot lists (what you need to capture), storyboards (what it will look like), and repeatable planning frameworks (how you make this process fast and consistent across many videos).
Shot Lists: The Practical Backbone of a Short
What a shot list is (and what it is not)
A shot list is a checklist of the exact shots you need to record to assemble the final video. It is not a script, and it is not a storyboard. A script is about words and beats; a storyboard is about visualizing frames; a shot list is about execution: camera position, subject action, props, and coverage.
In short-form, a shot list should be short enough to use on a phone screen while you shoot. If it becomes a multi-page document, you will ignore it. The goal is to capture only what you need, plus a small buffer of optional shots for flexibility in the edit.
Core fields to include in a vertical shot list
- Shot ID: A simple label (A1, A2, B1) so you can reference it quickly.
- Shot type: Wide/medium/close detail, over-the-shoulder, top-down, screen recording, etc.
- Action: What happens in the shot (hands open package, finger taps button, marker circles mistake).
- Audio plan: Live dialogue, voiceover later, natural sound, or silent.
- Duration target: Rough seconds (0.5s, 1s, 2s). This keeps you from overshooting and helps pacing.
- Notes: Props, wardrobe continuity, on-screen elements, safety takes.
Shot list templates that fit common short formats
Use templates so you are not reinventing the wheel. Below are three shot-list patterns you can reuse.
- Listen to the audio with the screen off.
- Earn a certificate upon completion.
- Over 5000 courses for you to explore!

Download the app
Template 1: Demonstration / How-to short
Shot ID | Type | Action | Audio | Target | Notes A1 | Medium | Presenter holds item/tool | Live | 1.0s | Clean background A2 | Close | Show key feature/detail | VO | 0.7s | Keep hands centered A3 | Top-down | Step 1 action | VO | 1.2s | Capture clean hand movement A4 | Close | Step 2 detail | VO | 0.8s | Get an extra take A5 | Medium | Result reveal | Live | 1.0s | Reaction + hold 0.5s A6 | Close | Final result beauty shot | Music | 0.8s | Optional slow push-inTemplate 2: Before/After transformation
Shot ID | Type | Action | Audio | Target | Notes B1 | Medium | “Before” state | VO | 0.8s | Match framing later B2 | Close | Problem detail | VO | 0.7s | Show texture/issue B3 | Montage | Process steps (3–5 clips) | Music | 2.0s | Shoot extra coverage B4 | Medium | “After” reveal | Live | 1.0s | Same position as B1 B5 | Close | After detail | VO | 0.7s | Highlight improvementTemplate 3: Product / app walkthrough (screen + hands)
Shot ID | Type | Action | Audio | Target | Notes C1 | Medium | Phone in hand, app open | Live | 0.8s | Avoid glare C2 | Screen rec | Tap feature 1 | VO | 1.0s | Record clean taps C3 | Screen rec | Tap feature 2 | VO | 1.0s | Show outcome state C4 | Close | Reaction / benefit moment | Live | 0.7s | Optional 2 takes C5 | Screen rec | Final summary screen | VO | 0.8s | Leave room for overlaysHow to build a shot list in 10 minutes
When you are producing frequently, you need a fast method. Use this step-by-step approach.
- Step 1: Write the “must-understand” moments. List 3–6 moments the viewer must see to understand the story (e.g., the problem, the key action, the result).
- Step 2: Assign a shot to each moment. For each moment, choose one primary shot type (medium, close detail, screen recording). Keep it simple.
- Step 3: Add coverage shots. Add 1–3 optional shots that can help transitions (hands moving, object placed down, quick reaction). Mark them as optional so you do not waste time if you are behind schedule.
- Step 4: Add audio notes. Decide what must be captured live versus what can be voiceover. This prevents you from relying on unusable live audio.
- Step 5: Order the list by shooting efficiency. Group shots by setup (same location, same framing) rather than story order. This speeds production.
Storyboards: Visualizing Clarity Before You Shoot
What a storyboard does for short-form
A storyboard is a sequence of frames that shows what the viewer will see. In short-form, storyboards are less about cinematic artistry and more about preventing confusion. They help you answer: “Will the viewer understand what is happening if they only glance at the screen?”
You do not need to draw well. Stick figures and boxes are enough. The value is in deciding what is inside the frame, what changes from shot to shot, and where the viewer’s attention should go.
Storyboard formats that work fast
- 6-panel storyboard: Great for most shorts. One panel per major beat.
- 9-panel storyboard: Useful for process videos with quick steps.
- Thumbnail storyboard: Tiny sketches with arrows and notes; fastest option.
How to storyboard a short in 15 minutes
- Step 1: Choose your panel count. Start with 6 panels unless the concept demands more steps.
- Step 2: Sketch the primary subject and key object. Use simple shapes. Indicate hands, phone, product, or screen.
- Step 3: Mark motion and transitions. Use arrows for movement (hand enters frame, object rotates, screen scrolls).
- Step 4: Add “clarity notes.” Write what must be readable: the label on a bottle, the button on a screen, the before/after difference.
- Step 5: Flag risky moments. Any moment that could confuse the viewer (e.g., a fast swap, a hidden step) gets a note: “Need close-up” or “Add insert shot.”
Example: 6-panel storyboard for a quick DIY fix
Panel 1: Medium shot. Object with visible problem. Hand points to issue. Note: show problem clearly. Panel 2: Close-up. Tool/material introduced next to problem area. Note: keep both in frame. Panel 3: Top-down. Step 1 action (apply/attach). Arrow shows direction. Panel 4: Close-up. Step 2 detail (tightening/smoothing). Note: capture texture change. Panel 5: Medium. Reveal result; compare to “before” position. Note: match angle for comparison. Panel 6: Close beauty shot. Final result held steady. Note: optional slow movement.Storyboard-to-shot-list translation
Once you storyboard, convert each panel into 1–2 shots on your shot list. If a panel contains multiple actions, split it into separate shots. This is a common mistake: trying to capture too much in one take, then discovering in the edit that you cannot cut cleanly.
Repeatable Planning Frameworks: Build Once, Use Forever
A repeatable framework is a standardized way to plan videos so you can produce consistently without starting from zero. The framework should tell you: what decisions to make, in what order, and what “minimum viable coverage” you need to capture.
Frameworks are especially useful when you are batching content, working with a team, or producing series where the audience expects a consistent style.
Framework 1: The “Beat-to-Block” planning method
This method converts your story into production blocks you can shoot efficiently.
- Step 1: List beats. Write the sequence of beats as single verbs/nouns (e.g., “show problem,” “introduce tool,” “do step,” “reveal result”).
- Step 2: Assign each beat a visual block. A block is a setup: camera position + location + props. Example blocks: “top-down table,” “medium talking,” “close detail.”
- Step 3: Shoot by block, not by timeline. Capture all top-down shots together, then all close-ups, etc.
- Step 4: Add one “bridge shot” per block transition. A bridge shot is a neutral insert that helps you cut between setups (hand places object down, quick pan to next area, screen tap).
Why it works: you reduce setup changes and guarantee edit-friendly transitions.
Framework 2: Minimum Viable Coverage (MVC) for shorts
MVC is the smallest set of shots that still gives you a coherent edit. It prevents overshooting and keeps your workflow fast.
A practical MVC set for many shorts is:
- Anchor shot: The main shot that carries the story (often a medium shot or top-down).
- Detail shot: One close-up that proves the key action or key change.
- Result shot: A clear reveal of the outcome.
- Optional bridge: A quick insert to cover a cut or time jump.
When planning, label shots as “MVC” or “Optional.” On shoot day, capture all MVC shots first. If time remains, capture optional shots for polish.
Framework 3: The “Series Bible” for repeatable formats
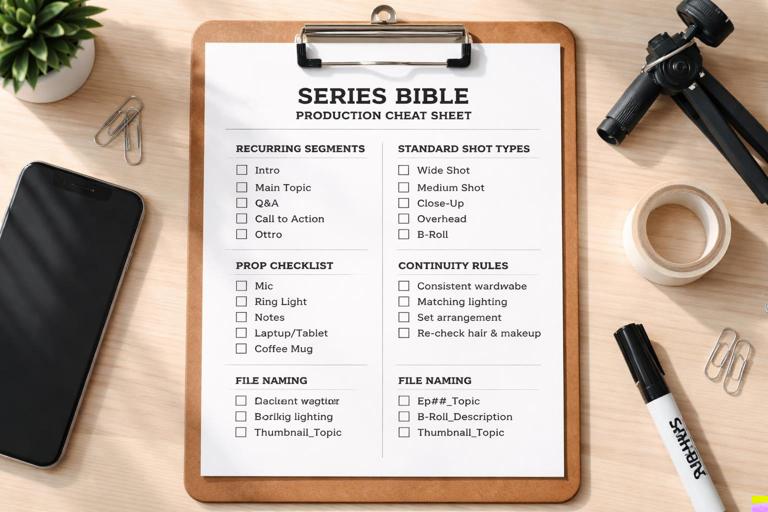
If you are creating a recurring series (weekly tips, product tests, mini case studies), make a one-page “series bible” that standardizes planning. This is not a creative manifesto; it is a production cheat sheet.
Include:
- Recurring segments: e.g., “setup,” “demo,” “result,” “one takeaway.”
- Standard shot types: e.g., “A-cam medium,” “top-down hands,” “screen recording,” “result close-up.”
- Prop checklist: items you always need (tripod, tape, marker, cleaning cloth).
- Continuity rules: consistent wardrobe, consistent background elements, consistent framing distance.
- File naming: a simple naming convention so you can find clips quickly.
With a series bible, you can hand off planning to a teammate or future-you without losing consistency.
Planning for the Edit: Designing Shots That Cut Cleanly
Plan “edit points” inside actions
Many short-form edits rely on cutting mid-action (hand reaches, object turns, screen changes). To make this work, plan for edit points: moments where motion can hide a cut.
- Action start: hand begins moving toward object.
- Action peak: object lifted/turned; motion blur can mask a cut.
- Action end: object placed; hold a beat for stability.
On your shot list, add a note like “hold 0.5s at end” so you have clean handles for trimming.
Plan for inserts that solve common problems
Inserts are small shots that rescue edits. Build them into your planning framework so you always capture them.
- Hands-only insert: neutral background, hands perform a simple motion (point, tap, place).
- Object beauty insert: slow rotation or steady hold of the object.
- Environment insert: quick shot of the workspace to reset orientation.
- Screen-state insert: a static screen recording of the “final state” for 1 second.
These inserts help you compress time, remove mistakes, and maintain clarity without reshoots.
Practical Walkthrough: Plan a 30–45 Second Short From Scratch
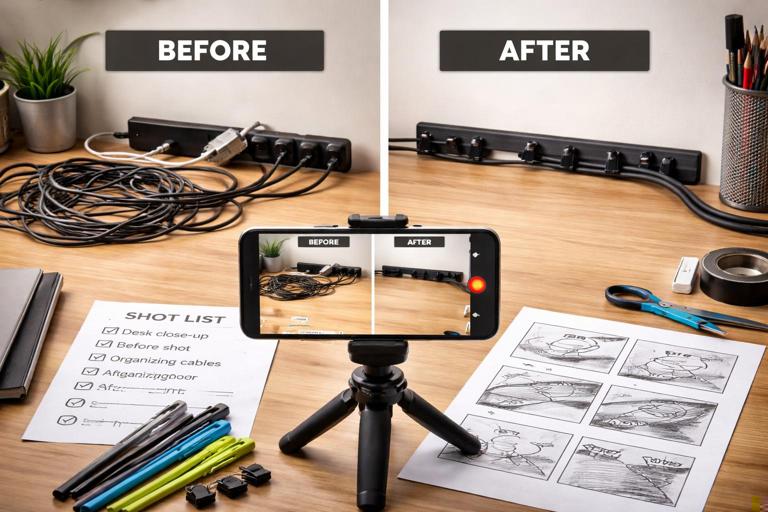
Below is a complete planning workflow you can repeat. The example is a short where you organize a messy cable setup using a simple method.
Step 1: Define the deliverable
- Goal: Show a clear before/after and the key steps.
- Constraints: One location (desk), one phone camera, minimal props.
- Output: 30–45 seconds.
Step 2: Identify the must-see moments
- Messy cables (problem proof)
- Materials/tools shown
- Three quick organizing steps
- Clean final setup (result proof)
Step 3: Create a 6-panel storyboard (text version)
1) Medium: desk with messy cables; hand gestures at mess. 2) Close: materials laid out (ties/clips); hand points. 3) Top-down: step 1 bundle cables. 4) Close: step 2 secure with tie/clip. 5) Medium: step 3 route cables neatly behind desk edge. 6) Medium + close insert: clean desk reveal + detail of neat routing.Step 4: Convert storyboard to a shot list (MVC + optional)
Shot | MVC? | Type | Action | Audio | Target | Notes D1 | MVC | Medium | Show messy cables | VO | 0.8s | Hold steady 0.5s D2 | MVC | Close | Show materials | VO | 0.7s | Keep items centered D3 | MVC | Top-down | Bundle cables (step 1) | VO | 1.2s | Shoot 2 takes D4 | MVC | Close | Secure tie/clip (step 2) | VO | 0.8s | Capture fingers clearly D5 | MVC | Medium | Route cables (step 3) | VO | 1.0s | Leave clean end handle D6 | MVC | Medium | Final reveal | Live or VO | 1.0s | Match D1 framing D7 | Optional | Close | Detail of neat cable path | Music | 0.7s | Beauty insert D8 | Optional | Hands insert | Hand places one last clip | Music | 0.5s | Bridge shotStep 5: Shoot by setup blocks
- Block 1 (Medium desk angle): D1, D5, D6. Keep camera locked; only change the desk state.
- Block 2 (Top-down): D3. Capture two takes to ensure clean motion.
- Block 3 (Close detail): D2, D4, D7, D8. Move closer and capture all inserts while you are in close-up mode.
This block approach reduces time lost to moving the camera and re-lighting, and it ensures you get the essential shots first.
Advanced Tactics: Making Frameworks Work Under Real Constraints
Batch planning: one hour, five videos
If you produce frequently, plan in batches. The trick is to separate “idea decisions” from “execution decisions.”
- Batch Step 1: Pick a single format template. Choose one of your shot list templates and stick to it for all five videos.
- Batch Step 2: Write five sets of beats. Each set should fit the same structure (problem → action → result).
- Batch Step 3: Duplicate the shot list. Replace only the action and prop notes per video.
- Batch Step 4: Create micro-storyboards only for risky steps. If a video has a confusing action, storyboard that part; otherwise skip.
Planning for reshoots you hope you won’t need
Reshoots happen when a key moment is unclear or unusable. You can reduce risk by adding “insurance shots” to your framework.
- Insurance close-up: one extra close shot of the key action.
- Insurance result hold: hold the final result for 2–3 seconds so you can extend the ending if needed.
- Insurance neutral insert: a simple shot of hands placing the object down.
These take little time but can save an entire project.
Continuity checklist for short-form series
Continuity is not only for films. In a series, small changes can distract viewers or make edits harder.
- Prop positions: mark positions on the table with small removable tape if needed.
- Wardrobe consistency: keep a “shoot shirt” for series days.
- Background clutter: remove items that may shift between takes.
- Handedness: if you demonstrate with your right hand in one shot, avoid switching hands unless motivated.
Tools and Systems: How to Store and Reuse Your Planning Assets
Create a reusable planning pack
Build a folder (digital or physical) that contains:
- Shot list templates for your top 3 formats
- Storyboard sheets (6-panel and 9-panel)
- Prop checklists per format (demo, before/after, screen walkthrough)
- Location checklists (desk setup, kitchen setup, car setup)
The goal is to reduce planning time to filling in blanks rather than starting from scratch.
File naming that matches your shot list
When your shot list uses IDs (A1, A2, B1), you can mirror that in your clip naming. Even if your phone records generic filenames, you can keep a simple log in your notes app: “A3 take 2 is best.” This speeds editing because you are not hunting for the right clip.
Quality control: a 60-second pre-shoot review
Before you hit record, scan your plan and ask:
- Do I have an MVC set (anchor, detail, result)?
- Is there at least one bridge/insert shot planned?
- Are the risky moments covered with a close-up?
- Is the shot list ordered by setup efficiency?
This quick review catches most planning gaps while they are still easy to fix.