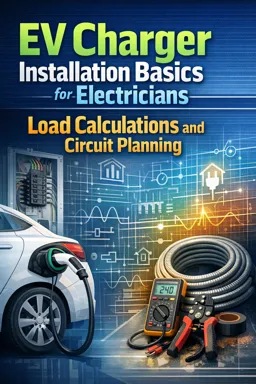
Integrating an EV Charging Circuit into an Existing Distribution System
Adding an EV charging circuit is not only about running a new branch circuit; it is about fitting that circuit into the existing distribution system without exceeding equipment ratings, violating listing/labeling, or creating termination and grounding problems. The panelboard (or switchboard) becomes the “integration point,” so your checks focus on: panel ratings, bus and main limitations, breaker compatibility, physical space rules, and whether a subpanel is a better distribution strategy.
1) Verifying Panel Ratings (What Must Match the New Work)
Before selecting a breaker position, confirm the panelboard’s nameplate information and that the panel is suitable for the environment and application. Key items to verify on the panel label (often on the door or inside can):
- Panelboard rating (A): the maximum bus rating (e.g., 100 A, 150 A, 200 A). This is not automatically the same as the main breaker size.
- Main disconnect rating (A): the main breaker (or main lugs) rating and whether it is service equipment or a downstream panel.
- Voltage system: e.g., 120/240 V single-phase, 3-wire.
- Short-circuit current rating (SCCR) or series rating information if applicable.
- Wiring diagram / neutral bar details: whether neutral is isolated, where bonding is permitted, and accessory bar compatibility.
Practical tip: If the panel label is missing, illegible, or the panel appears modified beyond its listing (non-listed breakers, drilled bus, improvised neutral/ground bars), treat that as a red flag requiring correction before adding an EV circuit.
2) Bus and Main Limitations (Avoiding Hidden Overstress)
Even when a load calculation indicates the service can handle EV charging, the panel itself can still be the limiting factor. Two common constraints:
- Bus rating vs. main breaker size: A panel may have a 200 A main but a lower bus rating in some configurations, or vice versa. You must not exceed the panel’s bus rating.
- Feed-through and backfed arrangements: If the panel is fed from upstream equipment, confirm feeder OCPD and any backfeed breaker retention requirements (hold-down kits) per the panel’s labeling.
Also verify whether any large existing loads are landed in a way that concentrates heat on one side of the bus (for example, multiple high-amperage two-pole breakers adjacent). While not always prohibited, it can contribute to nuisance heating in older panels and should influence breaker placement.
- Listen to the audio with the screen off.
- Earn a certificate upon completion.
- Over 5000 courses for you to explore!

Download the app
3) Breaker Compatibility (Listing Matters)
Use only breakers listed and identified for the specific panelboard. “Fits” is not the same as “listed for.” Mixing breaker brands or using “classified” breakers without verifying the exact panel model can create poor bus contact pressure, overheating, and inspection failures.
- Match the panel’s breaker type: The label typically lists acceptable breaker series.
- EVSE requirements: If the EVSE requires GFCI protection or a specific breaker type, ensure the panel supports that breaker format (e.g., 2-pole GFCI breaker availability in that panel line).
- Handle ties vs. common-trip: For 240 V EV circuits, you typically use a 2-pole common-trip breaker. If you are in a scenario where two single-pole breakers are permitted for a multiwire branch circuit or shared neutral arrangement (not typical for EVSE), handle ties must be listed and installed correctly. For EV charging, plan on a 2-pole breaker unless the equipment and wiring method explicitly require otherwise.
4) Available Spaces vs. Tandem Limitations
Physical space is often the first practical obstacle. Do not assume that “there’s room” because there are empty knockouts or because tandem breakers exist.
- Count usable breaker positions: Panels have a maximum number of circuits and a maximum number of breaker poles. The label indicates whether tandems are allowed and in which positions.
- Tandem (duplex) breakers: Only permitted where the panel labeling allows them. Many panels restrict tandems to specific slots; installing tandems elsewhere is a code and listing violation.
- Two-pole EV breaker space: A 2-pole breaker consumes two adjacent spaces (or a dedicated 2-pole position). Confirm you have an approved adjacent pair available.
- Do not “make space” by double-lugging: Placing two conductors under a lug not rated for two conductors is a common field error and should be corrected, not used as a workaround.
Practical example: If the panel is full and tandems are not permitted (or already maxed out), the correct options are typically (a) replace the panel with a larger one, (b) add a subpanel, or (c) reconfigure circuits into an approved subpanel—never force in non-listed tandems or double-tap neutrals/grounds to “free up” terminals.
5) Evaluating Subpanel Options (When the Main Panel Isn’t the Best Place)
A subpanel can be a clean solution when the main panel is space-limited, far from the garage, or when you want a dedicated area for EV and other future loads.
Evaluate these points:
- Feeder capacity and OCPD: Size the feeder and feeder breaker to the subpanel rating and expected loads (including EV charging and any planned expansion).
- Subpanel rating and spaces: Choose a panel with enough spaces for the EV breaker and likely future circuits (garage receptacles, heat pump, etc.).
- Neutral/ground separation: In a subpanel, neutrals must be isolated from the enclosure; grounds bond to the enclosure. Remove bonding screw/strap if present and install a separate equipment grounding bar if needed.
- Location and accessibility: Place the subpanel where it meets working clearance requirements and is accessible for service.
Placement and Identification Guidance Inside the Panel
Dedicated EV Breaker Labeling
Label the EV circuit clearly and specifically. Avoid vague labels like “Garage.” Use wording that helps future troubleshooting and load management, such as:
- “EV CHARGER – GARAGE – 240 V”
- “EVSE – WALL CONNECTOR – 2P XXA”
- “EV CHARGING CIRCUIT – CONTINUOUS LOAD” (if your labeling practice includes load notes)
Place the breaker where it is easy to identify and service. If the panel is crowded, consider grouping it near other large 2-pole loads for logical organization, while still paying attention to heat concentration and wire routing.
Handle Ties and Disconnecting Means (Where Applicable)
For a 240 V EVSE branch circuit, a 2-pole common-trip breaker is the standard approach and provides simultaneous disconnect of ungrounded conductors. Handle ties are generally relevant when two single-pole breakers are used for circuits that require simultaneous disconnecting means; if encountered, ensure the handle tie is listed for that breaker model and that the installation matches the panel and breaker instructions.
Neutral/Ground Separation in Correct Locations
Correct neutral/ground treatment depends on whether the panel is service equipment (first means of disconnect) or a downstream panel:
- Service equipment: Neutral is bonded to the enclosure (main bonding jumper present). Equipment grounding conductors terminate on the bonded bar.
- Subpanel / downstream panel: Neutral must be isolated from the enclosure; equipment grounding conductors bond to the enclosure. No neutral-to-ground bonding screw/strap installed in the subpanel.
Field check: Look for a green bonding screw or bonding strap connecting the neutral bar to the can. In a subpanel, that must be removed/absent. Verify neutral conductors are not landed on a grounding bar and that grounds are not landed on an isolated neutral bar.
Step-by-Step Panel Capacity Check Procedure (Field Inspection + Quality Checks)
Use this procedure before landing the EV breaker and conductors. It is designed to catch common integration problems: rating mismatches, termination defects, grounding/bonding errors, and early signs of failure.
Step 1: Safety Setup and Visual Survey
- Confirm you have safe access and required PPE for the equipment condition.
- Open the panel deadfront only after verifying conditions and following safe work practices.
- Perform a quick scan for water intrusion, missing knockouts, debris, insect nests, or damaged insulation.
Step 2: Verify Panel and Main Information Against the Planned Addition
- Read the panel label: bus rating, max number of circuits, allowed breaker types, and any tandem restrictions.
- Confirm the main disconnect rating and whether this panel is service equipment or a subpanel.
- Check that the planned EV breaker type is listed/identified for this panel.
Step 3: Confirm Physical Space and Approved Breaker Positions
- Identify two adjacent approved spaces for a 2-pole EV breaker.
- If tandems exist, verify they are installed only where permitted by the panel labeling.
- Check wire bending space and routing: ensure the new conductors can be dressed without sharp bends or pinching under the deadfront.
Step 4: Inspect Neutral and Ground Bars for Proper Terminations
- Look for double-lugged neutrals where not permitted by the terminal labeling (many neutral terminals are rated for one conductor).
- Verify equipment grounding conductors are terminated on a bar bonded to the enclosure (or on a listed grounding bar kit).
- In subpanels, confirm the neutral bar is isolated from the can and the bonding screw/strap is not installed.
Step 5: Torque and Termination Quality Checks
Loose or improperly terminated conductors are a leading cause of overheating. Follow manufacturer torque specifications and use a calibrated torque tool where required by your work practices or jurisdiction.
- Breaker terminal torque: Verify the breaker’s lug torque spec and conductor range match the conductor you are landing.
- Neutral/ground bar torque: Check bar labeling for conductor size range and torque values.
- Conductor condition: No nicked strands, no insulation under the lug, no copper showing beyond what the lug design allows.
- Aluminum conductors: If present in the panel, verify correct lug rating and antioxidant use where required by manufacturer instructions.
Step 6: Grounding Electrode and Bonding Considerations (Integration Check)
When adding a significant new load like EV charging, you are not typically reworking the grounding electrode system, but you should confirm the existing grounding/bonding is not obviously compromised.
- At service equipment, verify the presence of the main bonding jumper and grounding electrode conductor termination.
- Look for loose, corroded, or damaged grounding electrode conductor connections.
- Confirm bonding of metallic water piping or other required bonding points appears intact (where visible and applicable).
If you find missing bonding, severely corroded connections, or evidence of prior improper modifications, address those issues before adding the EV circuit.
Step 7: Identify Signs of Overheating, Arcing, or Corrosion
Do not add a new high-duty circuit into a panel showing active distress. Inspection points include:
- Breaker stabs/bus: discoloration, pitting, melted plastic, or a “burnt” odor.
- Breaker bodies: heat damage, cracked housings, or loose seating on the bus.
- Neutral bar: darkened terminals, melted insulation near terminations, or powdery corrosion.
- Moisture indicators: rust streaks, condensation marks, white/green corrosion on copper, or water staining.
If overheating is suspected, investigate root cause (loose terminations, overloaded conductors, incompatible breakers, damaged bus). Adding an EV load without correcting these issues increases failure risk.
Step 8: Plan the EV Breaker Location and Conductor Routing
- Select a breaker position that allows clean routing to the cable/conduit entry point.
- Use a proper connector and protect conductors from sharp edges.
- Maintain neat conductor dressing to avoid pressure on breaker handles and to allow deadfront installation without pinching.
- Update the circuit directory immediately after installation.
When to Recommend a Subpanel Near the Garage (Practical Guidance)
Recommend a garage-adjacent subpanel when it improves installation quality, reduces material and labor, or creates a safer, more serviceable distribution layout. Common triggers:
- Long feeder run to the EVSE location: If the main panel is far from the garage, a subpanel near the garage can reduce the length of the high-amperage branch circuit conductors and simplify routing.
- Main panel is full or tandem-restricted: No approved spaces for a 2-pole breaker, or tandems already at the panel’s allowed limit.
- Future expansion expected: A subpanel provides room for a second EV circuit, garage loads, or other electrification upgrades without repeatedly reworking the main panel.
- Cleaner separation of circuits: Grouping garage/EV loads in one subpanel can improve labeling, troubleshooting, and maintenance.
- Panel condition concerns: If the main panel shows crowding, poor terminations, or marginal organization (but is otherwise serviceable), moving new work to a properly installed subpanel can reduce disturbance of existing conductors.
Field decision rule: If adding the EV breaker forces non-listed tandems, awkward conductor routing, or termination compromises, a subpanel is usually the more professional recommendation—especially when placed near the garage to shorten the highest-current runs and keep the EV circuit integration straightforward.