Why Lighting and Camera Setup Matter More on Phones
Phone cameras are extremely capable, but they are also unforgiving. Their small sensors and heavy computational processing can make footage look sharp in ideal conditions and noisy, smeared, or overly contrasty in poor conditions. For vertical shorts, viewers decide in a fraction of a second whether the image feels “clean” and trustworthy. Lighting and camera setup are the fastest ways to raise perceived production quality without changing your story.
Two principles guide phone-based production:
- Control the light first. A phone can’t “fix” bad light without adding artifacts (noise reduction, aggressive sharpening, weird skin tones).
- Lock the camera decisions. Auto exposure and auto white balance can drift mid-shot, creating visible flicker and color shifts that feel amateur.
Core Lighting Concepts (Phone-Specific)
Exposure: Keep Skin and Key Details in a Safe Range
Phones protect highlights aggressively. If a window or bright lamp is in frame, the phone may darken your face to avoid clipping. The result is a dim subject with noisy shadows. Your goal is to expose for the subject (usually a face or hands) and reduce extreme bright areas that force the phone to compromise.
- Watch highlights: Forehead, cheeks, and reflective objects clip quickly. If they look “paper white,” reduce light intensity or move the light larger/softer.
- Avoid lifting shadows too much: Underexposed footage brightened later reveals noise and banding.
White Balance: Stop Color Shifts Before They Start
Auto white balance (AWB) can change during a take if something bright enters frame or if you move slightly. That creates a visible “warming/cooling” pulse. Mixed lighting (window daylight + warm indoor bulbs) makes this worse. Set a consistent color temperature and remove competing sources.
- Daylight look: Use daylight-balanced lights (around 5600K) and turn off warm room bulbs.
- Warm look: Use warm lights (around 3200K) and block or reduce daylight from windows.
Soft vs Hard Light: Phones Prefer Soft Light for Faces
Hard light creates sharp shadows and high contrast that can push phone processing into harsh sharpening and blotchy skin. Soft light wraps around the face, reduces contrast, and looks more flattering while keeping detail.
- Listen to the audio with the screen off.
- Earn a certificate upon completion.
- Over 5000 courses for you to explore!

Download the app
- Make light softer by increasing the apparent size of the source (move it closer, bounce it, or diffuse it).
- Control spill with simple flags (a piece of black foam board) so the background doesn’t become as bright as the subject.
Dynamic Range: Reduce Extremes Instead of “Fixing in Post”
Phones have limited dynamic range compared with larger cameras. If you have a bright window behind you and a dim interior, the phone must choose: blow out the window or crush your face into shadow. Solve it physically:

- Turn the subject toward the window for flattering side light.
- Use a sheer curtain to reduce window intensity.
- Add a key light to match the window brightness.
- Move away from the window so it’s not in frame.
Lighting Setups That Work Reliably for Vertical Shorts
Setup 1: Window Key + Simple Fill (Fastest “Pro” Look)
Best for: talking-head, tutorials, product explainers at a desk.
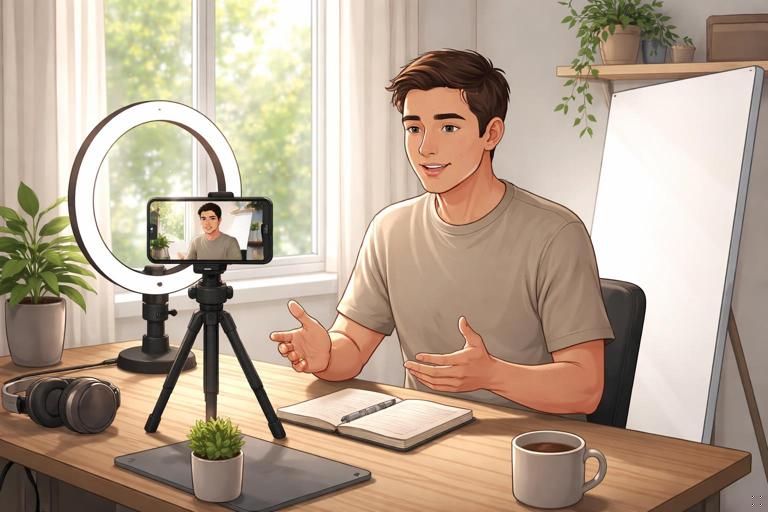
What you need: a window, a white wall or foam board, optional sheer curtain.
- Step 1: Stand or sit at a 45° angle to the window so the window light hits one side of your face.
- Step 2: Place a white board opposite the window to bounce light back into the shadow side (this is your fill).
- Step 3: If the window is too harsh, hang a sheer curtain or tape diffusion (even a thin white sheet) to soften it.
- Step 4: Turn off overhead room lights to avoid mixed color temperatures and unflattering top shadows.
- Step 5: Check the background brightness. If it’s brighter than your face, reposition so the background is darker or more even.
Practical check: If your phone keeps darkening your face, the window is too dominant in frame. Recompose so less window is visible, or add more fill/key light on your face.
Setup 2: Single Soft Key Light (Controlled and Repeatable)
Best for: consistent daily posting, night shoots, small rooms.
What you need: one soft light source (softbox, LED panel with diffusion, or a ring light used carefully).
- Step 1: Place the light slightly above eye level, angled down about 30–45°.
- Step 2: Move the light close to your face (just out of frame). Closer = softer and brighter without raising ISO.
- Step 3: Angle the light from the side (not straight-on) to create gentle shape in the face.
- Step 4: If the background is too dark, add a small practical lamp in the background (but keep its color temperature consistent with your key).
Ring light note: Ring lights can look flat and create circular catchlights. If you use one, move it slightly off-center and add diffusion if possible. Avoid placing it too far away; distance makes it harder and less flattering.
Setup 3: Key + Hair/Edge Light (Separation for Dark Backgrounds)
Best for: dark clothing, dark hair, moody rooms, backgrounds that blend into the subject.

What you need: key light + small back light (a small LED or even a desk lamp with diffusion).
- Step 1: Set your key light as in Setup 2.
- Step 2: Place a small light behind you, higher than your head, aimed at the back/side of your hair and shoulder.
- Step 3: Dim the back light until it creates a subtle edge, not a glowing outline.
- Step 4: Keep the back light out of frame to avoid lens flare and exposure pumping.
Practical check: If your phone’s exposure keeps changing, the back light may be too bright or visible. Reduce intensity or reposition.
Setup 4: Product/Hands Tabletop Lighting (Clean Demonstrations)
Best for: cooking, crafts, unboxings, repairs, drawing, skincare demos.
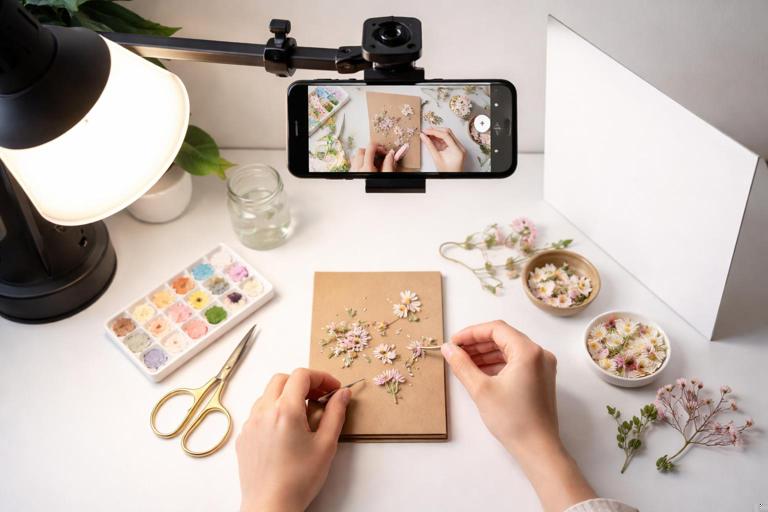
What you need: one overhead-ish soft source and one side fill.
- Step 1: Place the main light at a 45° angle from the table, slightly above, so it lights the working area without casting your hands’ shadows directly onto the subject.
- Step 2: Add a white bounce card on the opposite side to lift shadows.
- Step 3: If glare appears on glossy products, move the light more to the side and increase diffusion.
- Step 4: Keep the phone lens clean; tabletop shoots show smudges immediately.
Camera Setup: Make the Phone Behave Like a Camera
Lens Choice and Distance: Avoid the “Big Nose” Look
Most phones default to a wide lens. Wide lenses close to the face create distortion (nose larger, face edges stretched). For talking-head, step back and use a longer focal length if your phone has it (often labeled 2x/telephoto). If you don’t have a tele lens, increase distance and crop slightly in editing rather than filming extremely close.
- Talking-head guideline: Keep the phone at least an arm’s length away; farther if using the wide lens.
- Hands/product guideline: Use the main lens for sharpness; avoid ultra-wide unless you need coverage and can tolerate distortion.
Stability: Tripod First, Then Body Mechanics
Stabilization affects perceived quality as much as resolution. Even with phone stabilization, micro-shakes look messy in vertical video because the subject often fills more of the frame.
- Best: a tripod with a phone clamp.
- Next best: brace your elbows against your torso and lean against a wall.
- For movement: use slow, deliberate moves; avoid quick pans that create rolling-shutter wobble.
Frame Rate and Shutter: Prevent Flicker and Motion Weirdness
Phones hide shutter speed, but many camera apps allow manual control. Lighting flicker happens when your shutter speed conflicts with the frequency of your lights (common with cheap LEDs and some indoor fixtures). Motion can also look too sharp or too smeary depending on shutter.
- Choose a frame rate you can maintain: 30 fps is a safe default for most shorts; 60 fps is useful for fast action or if you plan to slow down.
- Match shutter to local power: In 60Hz regions, try 1/60 or 1/120; in 50Hz regions, try 1/50 or 1/100 to reduce flicker.
- If you can’t control shutter: change frame rate (30 ↔ 25, 60 ↔ 50) or change the light source.
Resolution and HDR: Consistency Over Maximum Specs
Higher resolution isn’t always better if it triggers heavy processing or overheating. HDR can help with bright windows but may create unnatural edges or shifting exposure if the scene changes.
- Use 4K only if your workflow supports it and your phone stays stable (no overheating, no dropped frames).
- Test HDR: If you see halos around your face or exposure “breathing,” turn HDR off and fix the lighting instead.
Focus: Lock It to Avoid “Hunting”
Focus hunting is a common phone giveaway. Lock focus on the subject’s eyes (or the product) before recording. If you move a lot, increase distance from camera and keep your position consistent so focus doesn’t drift.
- Talking-head: tap to focus on eyes, then lock.
- Product: focus on the front edge or the label; keep the product in the same plane.
Exposure Lock: Stop Brightness Pumping Mid-Sentence
Auto exposure changes when you gesture, hold up a product, or when the background shifts. Lock exposure after you set your lighting. If your app allows it, expose slightly lower than you think you need to protect highlights, then add light to the subject rather than raising exposure.
- Step: set your key light → compose → tap and hold to lock AE/AF → record.
- Tip: if your face is the priority, expose for skin and keep bright objects out of frame.
Step-by-Step: A Repeatable Phone Setup Workflow (10 Minutes)
1) Choose the Location Based on Light Control
- Pick a room where you can turn lights on/off and block windows if needed.
- Avoid rooms with multiple different bulb colors (warm ceiling light + cool desk lamp + daylight window).
2) Build the Light Before You Place the Camera
- Set your key light (window or LED) at 45° to your face.
- Add fill with a white board if shadows are too deep.
- Check for glare on glasses: raise the light higher and angle it down, or move it more to the side.
3) Place the Phone and Choose the Lens
- Mount the phone on a tripod at eye level for talking-head.
- Select 2x/tele if available for a natural face shape; otherwise step back on the main lens.
- Keep the background simple and not brighter than the subject.
4) Set Camera Controls (Manual If Possible)
- Set frame rate (e.g., 30 fps) and resolution (e.g., 1080p or 4K depending on workflow).
- Lock white balance to match your light (daylight or tungsten).
- Lock focus on eyes (or product) and lock exposure.
5) Record a 10-Second Test and Review Like a Viewer
- Look for exposure pumping, focus hunting, and color shifts.
- Zoom in to check noise in shadows and highlight clipping on skin.
- Listen for any buzzing lights (some LEDs can cause audible noise in quiet rooms).
6) Make One Change at a Time
If something looks off, adjust in this order:
- First: move/soften the light (closest, biggest improvement).
- Second: remove mixed lighting (turn off a lamp, close a curtain).
- Third: adjust exposure/white balance locks.
- Last: change camera settings like HDR or resolution.
Common Phone Lighting Problems (and Fixes)
Problem: Grainy Face, Clean Background
Cause: subject is underlit; phone raises ISO and adds noise reduction.
- Fix: bring the key light closer, increase diffusion size, or add fill. Don’t “brighten later.”
Problem: Blown-Out Forehead or Cheeks
Cause: light is too hard/close without diffusion, or exposure is too high.
- Fix: diffuse the light, move it slightly farther, angle it more from the side, and lower exposure a touch.
Problem: Yellow Skin One Moment, Blue the Next
Cause: auto white balance reacting to movement or mixed lighting.
- Fix: lock white balance; remove competing light sources; keep consistent bulb temperatures.
Problem: Flickering Brightness or Bands Across the Image
Cause: LED flicker + shutter mismatch.
- Fix: change frame rate (30↔25, 60↔50), set shutter to match mains frequency if possible, or swap the light source.
Problem: Background Looks Sharper Than You
Cause: focus locked on background or face too close on wide lens.
- Fix: tap-focus on eyes and lock; step back and use 2x if available.
Practical Examples You Can Copy
Example A: Nighttime Talking-Head With One Light
- Turn off ceiling light.
- Place a soft LED key at 45° and close to face, slightly above eye line.
- Set phone on tripod, use 2x lens if available.
- Lock white balance to the LED’s temperature (e.g., 5600K) and lock exposure on face.
- Add a dim background lamp set to the same color temperature (or gel it) so it doesn’t go orange.
Example B: Window Setup in a Small Apartment
- Sit sideways to the window (45°).
- Hang a sheer curtain to soften.
- Place a white board opposite the window as fill.
- Keep the window out of frame or minimized so exposure doesn’t drop your face.
- Lock exposure and white balance after you’re in position.
Example C: Hands-Only Demo Without Harsh Shadows
- Place key light to the side and slightly above the table, not directly overhead.
- Add bounce card opposite the key.
- Test with your hands moving: if your hands cast heavy shadows over the object, move the key higher and more to the side, or increase diffusion.
- Lock focus on the working area and keep the object in the same spot.
Gear That Helps (Minimal, High Impact)
Lighting
- One soft key light: a small softbox or diffused LED panel is the most reliable upgrade.
- Diffusion: softbox, diffusion cloth, or a translucent shower curtain (kept safely away from hot lights).
- Bounce/negative fill: white foam board for fill; black foam board to deepen shadows and add shape.
Camera Support
- Tripod + phone clamp: eliminates micro-shake and keeps framing consistent.
- Small tabletop tripod: useful for product and hands setups.
Apps and Controls
If your default camera app doesn’t allow locking exposure/white balance, use a camera app that supports manual or semi-manual control. The key capability is consistent AE/AF lock and white balance lock so your image doesn’t change mid-take.
On-Set Checklist (Use Before Every Shoot)
- Lens cleaned (front and any protective filter).
- Key light positioned and softened; background not brighter than subject.
- Mixed lighting removed (match color temperature).
- Phone on tripod; correct lens selected.
- Focus locked on eyes/product; exposure locked on subject.
- Flicker check (record 5 seconds and look for bands/pulsing).
- Test clip reviewed at full brightness on the phone screen.