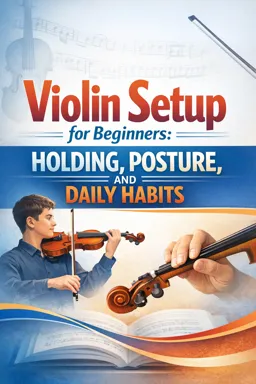
What “Left-Hand Frame” Means (and Why It Matters)
Your left-hand frame is the repeatable hand shape that lets your fingers land accurately on the strings with minimal effort. A good frame keeps the hand balanced (not gripping), so the fingers can move independently while the thumb and wrist stay calm. Think of it as a “hand scaffold”: the violin neck rests in the hand, and the fingers drop onto the strings from above rather than reaching or squeezing.
Core Elements of a Beginner-Friendly Frame
- Thumb placement: the thumb sits lightly on the side of the neck, roughly opposite the space between the first and second fingers (not far behind the first finger, not creeping up toward the scroll).
- Finger curves: fingers are naturally curved so the fingertips contact the string (avoid flat, collapsed joints).
- Knuckles aligned: the big knuckles (where fingers meet the hand) form a gentle line/arch; they should not cave inward toward the fingerboard.
- Wrist neutral: the wrist stays straight and relaxed—not collapsed inward (toward the violin) and not pushed outward.
Set the Frame by Bringing the Violin to the Hand (Not the Hand to the Violin)
A common beginner problem is “reaching” with the head/shoulder or pulling the left arm forward to meet the violin. Instead, keep your upper body quiet and let the violin’s neck settle into a ready hand.
Step-by-Step: Finding the Frame Without Gripping
- Start with a relaxed left hand at your side. Let the fingers hang naturally curved.
- Lift the left hand as a unit (forearm and hand together) so the palm faces slightly inward, keeping the fingers curved.
- Place the thumb first on the side of the neck (light contact), aiming for “opposite the 1st/2nd finger area.” The thumb should feel like a guide, not a clamp.
- Let the neck rest into the base of the index finger (near the side of the first finger). Avoid stuffing the neck deep into the palm.
- Hover the fingers over a string with curved fingertips. Check that your wrist remains neutral—imagine a straight line from forearm through the back of the hand.
- Micro-check: if you feel you must pull your head/shoulder forward to reach, reset and bring the violin neck slightly toward the hand instead of chasing it with your body.
Thumb Placement: Light Contact, Minimal Travel
The thumb’s job is balance and orientation. It should not squeeze the neck. A helpful image is “thumb as a bookmark”: it marks where you are, but it doesn’t pinch the pages.
Quick Thumb Checks
- Pressure test: you should be able to slightly wiggle the thumb pad on the neck without moving the violin.
- Height check: the thumb tip points upward, not hooked over the fingerboard.
- Opposition check: the thumb is roughly opposite the first/second finger zone, not opposite the third/fourth finger.
Finger Curves and “Fingertip Landing”
Curved fingers help you land cleanly and keep neighboring strings free. The fingertip should touch the string with a small, focused contact point. If the finger collapses (especially at the last joint), the pad spreads and can mute adjacent strings.
Step-by-Step: Curved Finger Drop
- Hover your first finger above the string, keeping the knuckle lifted (not caved in).
- Drop the fingertip straight down as if pressing a button.
- Release back to hover without letting the finger fly high.
- Repeat with each finger, aiming for the same curved shape each time.
Knuckle Alignment and Finger Spacing
Beginners often lose the frame when the hand collapses inward, causing the knuckles to sink and the fingers to stretch or twist. Instead, keep the knuckles buoyant and allow natural spacing between fingers.
- Listen to the audio with the screen off.
- Earn a certificate upon completion.
- Over 5000 courses for you to explore!

Download the app
Spacing Check: “Windows Between Fingers”
When the fingers hover or land, you should see small “windows” (spaces) between most fingers. They do not need to be huge; the goal is avoiding a squeezed-together hand that limits independence.
- Good sign: fingers can lift and drop independently without the whole hand tensing.
- Warning sign: fingers press together tightly, or the hand feels like it’s “clawing” the neck.
Wrist Neutrality: Avoid the Collapsed Wrist
A collapsed wrist (bent inward toward the violin) often comes from trying to reach notes by bending the wrist instead of adjusting the arm/hand position. This can create tension and reduce finger control.
Neutral Wrist Self-Check
- Visual line: look for a mostly straight line from forearm to the back of the hand.
- Space check: there should be some air between the wrist area and the violin (avoid “folding” into the instrument).
- Mobility check: you can gently rotate the forearm a little without the wrist locking.
Drills to Build the Frame (No Force, High Awareness)
Drill 1: Feather Taps (Finger Tapping Without Pressing)
This drill teaches finger placement without squeezing or over-pressing.
- Set the frame with thumb light and wrist neutral.
- Choose one string and hover all four fingers above it.
- Tap one finger so the fingertip touches the string lightly (no pressing to the fingerboard).
- Listen/feel: you should feel contact, but not a “dig.”
- Repeat 10–20 taps per finger, keeping the other fingers calm and close.
Goal: accurate landing with minimal effort and minimal finger lift.
Drill 2: Minimal Thumb Slide (Anti-Grip Reset)
This drill prevents the thumb from locking and squeezing.
- Place the thumb lightly on the neck in your normal frame.
- Without moving the fingers much, slide the thumb up/down the neck 1–2 mm (a tiny glide).
- Stop and return to stillness, keeping the thumb soft.
- Repeat several times, especially if you notice tension building.
Rule: if the thumb cannot slide at all, you are gripping.
Drill 3: Fingertip “Drop and Hover” With Space Between Fingers
This drill trains clean fingertip placement while maintaining finger spacing.
- Hover all fingers above the string with small spaces between them.
- Drop first finger to the string (light-to-medium pressure), then return to hover.
- Drop second finger, then return to hover; continue with third and fourth.
- Watch for squeezing: keep the “windows” between fingers as you move.
Tip: aim for efficient motion—fingers lift only slightly, not dramatically.
Common Mistakes and How to Release Tension
| Mistake | What it feels/looks like | Quick fix |
|---|---|---|
| Thumb squeeze | Thumb presses hard; hand feels locked; shifting the hand feels impossible | Do Minimal Thumb Slide; then place the thumb as a light “touch point,” not a clamp |
| Palm touching the neck | Neck is buried in the palm; fingers flatten; hand can’t reach cleanly | Let the neck rest more on the side/base of the index finger; create a small air gap between palm and neck |
| Collapsed inward wrist | Wrist bends toward the violin; fingers feel stretched; tension in forearm | Reset to neutral wrist; adjust the arm/hand position instead of bending the wrist to reach |
| Fingers flying high | Fingers lift far off the string; timing and accuracy suffer | Practice Feather Taps; keep fingers close—lift only as much as needed to clear the string |
| Knuckles caving in | Hand collapses; fingers twist; fingertips land inconsistently | Lift the big knuckles slightly; imagine the fingers dropping from a stable “arch” |
Micro-Reset Routine (10 Seconds)
- Open the left hand briefly (release all contact).
- Re-place thumb lightly opposite the 1st/2nd finger area.
- Check wrist neutral (straight line forearm to hand).
- Hover curved fingers with small spaces between them.