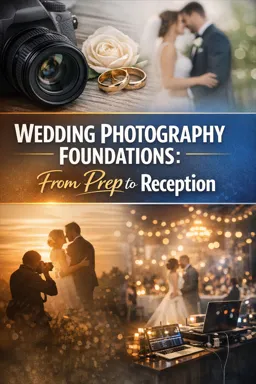
Why Family Formals Matter (and Why They Get Stressful)
Family formals are the most logistics-heavy part of the day: many people, limited time, emotional dynamics, and high stakes. Your job is to create a calm, efficient system that produces complete coverage without making anyone feel rushed or managed. Authority comes from clarity and pace; empathy comes from listening, using respectful language, and protecting sensitive relationships.
Authority + Empathy: The Tone That Works
- Be the director, not the drill sergeant: clear instructions, friendly voice, decisive movement.
- Assume good intent: people are distracted, not difficult.
- Protect dignity: avoid calling out mistakes publicly (wrinkled jacket, crooked tie, missing boutonniere). Fix quietly.
- Use names and roles: “Parents of the bride,” “Siblings,” “Grandparents,” rather than “You guys.”
Create the Family Formal List in Advance
Efficiency starts before the wedding day. A well-built list prevents forgotten combinations and reduces on-the-spot negotiation.
How to Build a Usable List
- Request the list in writing (email or shared doc) and ask for first names plus relationship labels (e.g., “Aunt Maria (mom’s sister)”).
- Limit to essential groups by asking: “Which photos would be painful to miss?”
- Mark sensitive dynamics privately: divorced parents, estrangements, step-family preferences, deceased parent representation (e.g., locket, framed photo already handled elsewhere).
- Identify mobility needs: grandparents who need chairs, anyone who cannot stand long, anyone using mobility aids.
- Assign a ‘caller’ (see below) and include their phone number.
List Format That Works On-Site
Use a numbered list with checkboxes and a logical order. Example format:
[ ] 1. Couple + both sets of parents (all)  (8 people)  Caller: bring now
[ ] 2. Couple + bride’s parents            (4)
[ ] 3. Couple + groom’s parents            (4)
[ ] 4. Couple + bride’s immediate family   (parents + siblings + partners)
[ ] 5. Couple + groom’s immediate family   (parents + siblings + partners)
[ ] 6. Couple + grandparents (both sides)  (seated)
[ ] 7. Couple + bride’s extended family    (aunts/uncles/cousins)
[ ] 8. Couple + groom’s extended family    (aunts/uncles/cousins)
Keep groups modular so you can add/remove people without rebuilding from scratch.
Choose an Efficient Grouping Order
The best order minimizes people moving in and out. Build from “largest and most important” to “smaller subsets,” or vice versa, depending on your constraints. Most of the time, a funnel method is fastest: start with the biggest group, then peel off.
- Listen to the audio with the screen off.
- Earn a certificate upon completion.
- Over 5000 courses for you to explore!

Download the app
Recommended Funnel Order (Typical)
- Start with the couple + all immediate family (both sides if relations allow).
- Peel off one side at a time (bride’s side groups, then groom’s side groups).
- Do grandparents early (comfort + limited stamina).
- Do children’s groups early (attention spans).
- Save friend groups for later if family time is tight, unless requested otherwise.
When to Split the Funnel
If dynamics are sensitive (divorced parents, conflict), run separate lanes:
- Lane A: Couple + Bride’s family combinations
- Lane B: Couple + Groom’s family combinations
This prevents awkward “everyone together” moments and keeps the pace steady.
Select a Location: Light, Background, and Flow
Family formals succeed when your location is predictable: consistent light, minimal distractions, enough space, and close to where people already are.
Location Checklist
- Light: open shade or evenly lit indoor area; avoid patchy sun across faces.
- Background: clean, uncluttered, no bright signage, no trash cans, no exit signs if possible.
- Space: room for 2–3 rows of people and for you to step back.
- Sound: avoid loud DJ speakers; you need to be heard.
- Access: minimal stairs for elders; nearby seating.
Set Up the “Stage”
- Pick a clear standing line (edge of shade, a seam in flooring, a step).
- Place 2–4 chairs ready for grandparents or anyone who needs to sit.
- Mentally mark where the front row toes go to keep distance consistent.
Use a Caller to Gather People
A caller is your logistics partner: they know faces, names, and family politics better than you do. This keeps you behind the camera directing, not chasing relatives.
Who Makes a Good Caller
- Assertive but kind (often a sibling, cousin, or wedding party member).
- Knows both sides of the family (or use two callers, one per side).
- Not emotionally overwhelmed (avoid parents if they’re stressed).
How to Brief the Caller (30 Seconds)
Give them the list and a simple job:
- “Please bring Group 1 now, and while I’m photographing it, start gathering Group 2.”
- “Keep people close, out of the sun, and ready.”
- “If someone is missing, tell me immediately so we can swap the order.”
Step-by-Step Method: Efficient, Repeatable, Calm
1) Set Camera and Exposure First (Before People Arrive)
Before you place anyone, lock in your baseline so you’re not adjusting while a group waits.
- Choose your framing and distance for the largest group.
- Set exposure for faces in your chosen light.
- Set focus mode appropriate for groups and confirm depth of field is sufficient for multiple rows.
- Take a quick test shot of an assistant or the caller in the exact spot.
Goal: once the first group steps in, you only make micro-adjustments.
2) Place the Group: Tallest/Shortest and the “Anchor” Method
Start with an anchor and build outward.
- Anchor: place the couple first (or the seated grandparents if they must be central).
- Height logic: tallest toward the back/edges; shortest toward front/center; avoid a tall person directly behind a shorter person’s head.
- Balance: distribute heights and colors evenly so one side doesn’t look visually heavy.
- Couples within the group: keep partners together unless requested otherwise.
3) Build Rows and Align Heads (So It Looks Intentional)
Group photos look polished when heads form clean, staggered lines rather than random stacking.
- Create 1–3 rows depending on group size.
- Stagger heads: avoid “totem poles” where faces align vertically.
- Chin and posture: ask for a gentle lean from the waist and a slight chin-forward-down to reduce double chins.
- Feet: angle bodies slightly toward the center; avoid everyone squared to camera.
4) Watch Hands, Jackets, and Micro-Details
Hands and posture are the fastest way a formal photo looks awkward.
- Hands: avoid fists, dangling hands, hands in pockets (unless consistent), and “claw hands” on shoulders.
- Men’s jackets: smooth lapels; check boutonniere angle; decide buttoned/unbuttoned consistently.
- Spacing: close gaps; “Shoulders touching” reads like family.
- Glasses: quick check for glare by shifting angle slightly if needed.
5) Capture Multiple Frames for Blinks (and Give a Clear Countdown)
For each group, shoot a short burst of 3–5 frames with a consistent cadence.
- Give a cue: “Eyes here in 3…2…1.”
- Take 3–5 frames without changing your stance.
- If you saw a blink, say: “One more for safety,” and repeat.
Tip: after the first set, ask for a second expression option if appropriate: “Now one with big smiles,” then “Now a relaxed smile.” Keep it fast.
6) Release People Clearly and Call the Next Group
People don’t know when they’re done. End each set with a clear release:
- “Perfect—thank you! You’re all done. Parents, please stay; siblings, you can step out.”
- Point where you want them to go so they don’t drift into your background.
Common Issues and Practical Fixes
Late Relatives
- Build a buffer: schedule the “must-have” groups first, then optional groups.
- Use placeholders: photograph the group without the missing person, then do a quick add-on when they arrive.
- Swap order instantly: if Group 3 isn’t ready, jump to Group 4. Your caller should keep the pipeline moving.
Divorced Parents and Complex Dynamics
Your goal is to honor the couple’s preferences and avoid forcing interactions.
- Get instructions in advance: “Are there any combinations you do not want?”
- Use neutral language: “Let’s do one with Mom,” “Now one with Dad,” instead of “Now everyone together.”
- Physical spacing: place the couple between parents if needed; use rows to avoid shoulder-to-shoulder contact.
- Keep it moving: don’t linger; take the frames and transition immediately.
Mobility Limitations (Elders, Injuries, Wheelchairs)
- Seat first: place anyone who needs a chair before building the group.
- Bring the group to them: don’t make them stand “just for one.”
- Row planning: seated row in front, standing row behind; ensure faces are visible (raise standing row slightly if possible).
- Short sessions: photograph their essential combinations early, then let them rest.
Children (Toddlers to Teens)
- Do children early and keep their groups short.
- Give them a job: “Can you stand next to Mom and hold her hand?”
- Use simple prompts: “Show me your biggest smile,” “Look at me,” “Eyes on the camera.”
- Safety first: if holding a baby, ensure secure support; avoid asking kids to sit on unstable ledges.
- Rapid-fire frames: take more frames; expressions change quickly.
Height Extremes and Awkward Composition
- Use steps, curbs, or slight elevation changes to create rows.
- Place very tall people on the ends or back corners.
- Bring shorter adults slightly forward rather than hiding them behind shoulders.
People Blocking Faces
- Use the “show me your ears” check: if you can’t see both ears (or at least the outline of the face), someone is blocked.
- Ask for micro-shifts: “Take a half-step left,” “Turn your shoulders toward the couple,” “Chin slightly toward me.”
Timing Model: How to Stay on Schedule
Your speed depends on group size, complexity, and cooperation. Use a realistic model and communicate it to the couple or planner if needed.
| Scenario | Average time per group | Groups per minute | Notes |
|---|---|---|---|
| Small, cooperative groups (2–6 people) | 30–45 seconds | 1.3–2.0 | Pre-set exposure, minimal rearranging |
| Medium groups (7–12 people) | 60–90 seconds | 0.7–1.0 | Row building + head alignment |
| Large groups (13–25 people) | 2–3 minutes | 0.3–0.5 | More blinks, more blocking, more coaching |
| Complex dynamics / mobility needs | Add 1–2 minutes total | — | Plan chairs and separate combinations |
Practical planning rule: for a typical family formal set of 10–15 groupings, budget 15–25 minutes if the list is clean and the caller is effective. If extended families are included (20+ groupings), budget 30–45 minutes.
Recommended Directing Script (Calm, Clear, Repeatable)
Start Script (Sets Expectations)
“Hi everyone—thank you! We’re going to move quickly so you can get back to the celebration. Please stay close by until you’re released. If you’re in the next group, our caller will bring you in. When you step in, come in tight—shoulders close—and look right here at my camera.”
Placement Script (While Building the Group)
“Couple right here in the center. Parents, come in on either side. Great—take one step closer. Siblings, behind them, stagger so I can see every face. Perfect. Turn your shoulders slightly toward the couple.”
Hands/Posture Script (Fast Fixes Without Embarrassing)
“Relax your shoulders. Hands soft—either at your sides or gently around the person next to you. Bring your chins slightly forward and down. Beautiful.”
Capture Script (Consistent Countdown)
“Eyes right here. Big smiles in 3…2…1. And again—3…2…1. One more for safety—3…2…1.”
Transition Script (Peel-Off Method)
“Perfect—thank you! Everyone is done except parents—please stay. Siblings, you can step out to my left. Caller, please bring in grandparents next.”
Script for Sensitive Dynamics (Neutral and Respectful)
“Let’s do one with Mom and the couple. Great—thank you. Now one with Dad and the couple. Perfect. Now we’ll do one with the couple and siblings.”