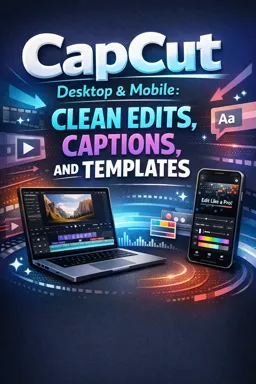
Desktop vs Mobile: A Side-by-Side Map of the Workspace
CapCut Desktop and CapCut Mobile share the same editing logic (assets → timeline → adjustments → export), but the controls are arranged differently. Use the map below to quickly locate the same function on both devices.
| What you need | CapCut Desktop (typical location) | CapCut Mobile (typical location) |
|---|---|---|
| Projects / Home | Home screen with project tiles; open recent projects | Home screen with project list/tiles; tap a project to open |
| Media bin / Library | Left panel: Media (imported clips, images, audio) | Bottom toolbar: Media / Album picker when adding; project media appears in the editing view |
| Preview / Player | Center/top preview monitor with playback controls | Top preview area with play button and scrub bar |
| Timeline | Bottom timeline with tracks/layers | Bottom timeline with layers; pinch/drag to zoom |
| Inspector / Properties | Right panel: clip properties, transform, speed, color, audio, etc. | Tap a clip → bottom tool strip shows properties (e.g., Edit, Speed, Adjust, Audio) |
| Text / Captions | Top/left tools: Text and Captions panels; add text tracks on timeline | Bottom toolbar: Text / Captions; captions appear as a layer on timeline |
| Audio tools | Audio tab/panel; timeline audio tracks; right inspector for volume, fade, noise reduction (if available) | Bottom toolbar: Audio; tap audio clip for volume, fade, enhance options |
| Export | Top-right: Export button with format/resolution/FPS options | Top-right: Export/Share icon with resolution/FPS options |
How to think about the interface (one mental model)
- Media bin = your source library (what you have).
- Timeline = your edit (what you use, in order).
- Inspector/Properties = how a selected item behaves (position, scale, speed, volume, style).
- Export = final delivery settings (resolution, frame rate, bitrate/quality).
Start a New Project: Canvas, Naming, and Asset Organization
Step 1: Choose the correct canvas (aspect ratio)
Pick the canvas before importing and arranging clips so you avoid unnecessary cropping and re-framing later.
- 9:16 (Vertical): Shorts/Reels/TikTok-style vertical video.
- 1:1 (Square): Feed posts and some marketplace/social placements.
- 16:9 (Horizontal): YouTube, presentations, standard landscape video.
Desktop: Create a new project and set the aspect ratio/canvas in project settings (or via the canvas/aspect control near the preview). Mobile: Create a new project and select the ratio (often shown as 9:16, 1:1, 16:9) before you begin editing; you can change it later, but do it early.
Step 2: Use a naming convention that survives cross-device work
Good names prevent “final_final_v3” chaos and make relinking easier when moving between phone and computer.
Recommended pattern:
- Listen to the audio with the screen off.
- Earn a certificate upon completion.
- Over 5000 courses for you to explore!

Download the app
YYYY-MM-DD_ClientOrChannel_ProjectName_AR_FPS_v01Examples:
2026-01-21_Acme_SpringPromo_9x16_30_v012026-01-21_Personal_RecipeShort_9x16_60_v02
Rules that help:
- Use only letters, numbers, dashes, and underscores (avoid special characters that can break paths on some systems).
- Keep version numbers consistent (
v01,v02). - Include aspect ratio and FPS in the name when you know the delivery spec.
Step 3: Organize assets into folders/albums (before importing)
Cross-device editing is smoother when your media lives in a predictable structure.
Suggested folder structure (computer/cloud drive):
ProjectName/ 01_Footage/ A_Cam/ B_Cam/ ScreenRecord/ 02_Audio/ VO/ Music/ SFX/ 03_Graphics/ Logos/ Overlays/ 04_Exports/ 05_ProjectFiles/On mobile, mirror the intent using albums/folders where possible:
- Create an album for the project (e.g.,
2026-01-21_RecipeShort). - Inside it, keep footage, music, and graphics grouped (even if the OS doesn’t support nested albums, keep consistent prefixes like
FOOTAGE_,AUDIO_,GFX_in filenames).
Import Routine (Camera Roll, Files, Cloud) + Clip Property Verification
Use the same routine every time. It reduces missing files, wrong frame rates, and rotated clips.
Routine A: Import from Camera Roll (Mobile-first)
Prepare the album: Put all clips for the project into a single album on your phone.
Create the project with the correct canvas (9:16, 1:1, or 16:9).
Add media from the album (select all relevant clips in one pass if possible).
Verify each clip’s properties (see the checklist below). If one clip is different (e.g., 24 fps mixed into 60 fps), decide now how you’ll handle it (replace, convert, or accept motion differences).
Routine B: Import from Files (Desktop or Mobile)
Copy media into the project folder first (e.g., into
01_Footage), rather than editing directly from a downloads folder.Import into CapCut from that folder location.
Do not rename or move files after importing unless you’re ready to relink (moving breaks file paths).
Routine C: Import from Cloud (cross-device)
Cloud is useful, but the key is consistency: the same folder names and predictable locations on both devices.
Create a cloud project folder using the same structure as your desktop.
Upload media into the correct subfolders (
01_Footage,02_Audio, etc.).On the other device, download to a matching local folder (not just “Downloads”). Example: download into
ProjectName/01_Footageon desktop, or into a dedicated project folder in your phone’s Files app.Import from that local folder into CapCut.
Clip property verification (do this immediately after import)
Check these properties before you start cutting. If you wait, you may discover problems after you’ve built the timeline.
- Resolution: e.g., 1920×1080, 3840×2160. Mismatched resolution can cause softness or unexpected scaling.
- Frame rate (FPS): e.g., 24/25/30/60. Mixed FPS can cause jitter or inconsistent motion blur.
- Orientation: portrait vs landscape. A “sideways” clip is usually an orientation metadata issue.
- Audio presence: confirm which clips have usable audio and which are silent (screen recordings, b-roll, etc.).
- Color profile/look: if some clips look flatter or more contrasty, note it now so you can group them later for consistent adjustments.
Practical method:
- Desktop: Click a clip in the media bin and look for details/metadata in the info area or inspector panel.
- Mobile: Long-press or open clip info where available; if detailed metadata isn’t shown, verify visually by adding the clip to the timeline and checking for stutter (FPS mismatch), black bars (aspect mismatch), or rotation issues.
Cross-Device Setup: Moving Projects/Assets Without Breaking Links
Most “missing media” problems happen because the project file references media by its file path. If the file moves, the link breaks. Your goal is to keep paths stable or be ready to relink quickly.
Best practice: Treat media as “managed” inside one project folder
- Keep all source media inside the project folder structure from the start.
- When transferring to another device, transfer the entire project folder, not individual clips.
- Avoid editing from temporary locations like
Downloads, messaging apps, or removable drives that change mount names.
Option 1: Phone → Computer (assets first, then rebuild/import)
This is the most reliable when you don’t need to transfer an editable CapCut project file, only the media.
On phone: Export or share original files into a project folder in the Files app (not just camera roll).
Transfer the entire folder to your computer (AirDrop, cable, or cloud download).
On desktop: Place the folder in a stable location (e.g.,
Documents/CapCutProjects/).Create a new CapCut Desktop project and import from the transferred folder.
Why it works: you avoid partial transfers and you keep a single “source of truth” folder.
Option 2: Computer → Phone (keep folder names identical)
On desktop: Ensure all media is inside the project folder (no external references).
Transfer the folder to the phone’s Files app into a dedicated location (e.g.,
On My iPhone/CapCut/ProjectNameor similar).Import media from Files into the mobile project.
Tip: If you must download from cloud on mobile, download into the same folder name each time (avoid duplicates like ProjectName (1)).
When links break: a practical relinking routine
If CapCut shows missing media, the fix is usually to point it to the new location of the same file.
Stop and locate the correct folder on the device (don’t import random duplicates).
Restore the expected structure: match the original folder names (
01_Footage,02_Audio, etc.).Relink by selecting the missing item and choosing the new file location (if CapCut provides a relink/replace prompt). If not, manually replace the clip on the timeline with the same file and re-check trims.
Verify sync: play around every cut point where the missing clip was used to ensure timing and audio alignment are intact.
Rules that prevent relinking headaches
- Don’t rename files after importing (rename before import).
- Don’t move the project folder once editing has started; if you must, move the entire folder as one unit.
- Keep consistent root locations: e.g., always store projects under
Documents/CapCutProjectson desktop, and under a single CapCut folder in Files on mobile. - Avoid duplicate filenames like
IMG_0001.MOVacross different shoots; rename to something unique (e.g.,Recipe_A001.MOV).
Clean Project Setup Checklist (Before You Start Editing)
- Canvas set: 9:16 / 1:1 / 16:9 matches delivery.
- Project named with date + project + aspect + FPS + version.
- Folder/album created and all assets placed inside it (footage, audio, graphics).
- Import completed from the project folder (not from temporary locations).
- Clip properties verified: resolution, FPS, orientation, audio presence.
- Problem clips flagged: mixed FPS, rotated footage, low-res assets identified before cutting.
- Cross-device plan chosen: cloud folder + matching local folder, or direct transfer of the entire project folder.
- Stable storage location confirmed: you know exactly where the project folder lives on each device.
- Test playback: drop 2–3 representative clips on the timeline and play to confirm smooth playback and correct framing.