Brakes as Controlled Friction: What You’re Really Doing with Your Foot
When you press the brake pedal, you are not “stopping the wheels” directly. You are commanding a system that converts your leg force into hydraulic pressure, then into clamping force at the wheels, creating controlled friction between two surfaces. That friction turns the vehicle’s motion into heat at the brakes. Good braking is about producing the right friction, at the right wheels, for the conditions—without overheating or losing control.
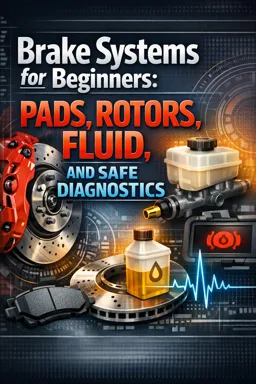
(1) Key Components and What Each One Does
Pedal (your input lever)
The pedal is a lever. A small movement and force from your foot becomes a larger force at the pushrod going into the booster/master cylinder. Pedal ratio (lever geometry) is one reason two cars can feel different even with similar brakes.
Brake booster (assist, not braking by itself)
The booster (vacuum or electric) multiplies your input force so you don’t need to press as hard. If assist is reduced, the brakes can still work, but pedal effort rises significantly.
Master cylinder (pressure maker)
The master cylinder converts pushrod force into hydraulic pressure in brake fluid. Most vehicles use a tandem (dual-circuit) master cylinder so that if one hydraulic circuit fails, the other can still provide partial braking.
Brake lines and hoses (pressure delivery)
Steel lines carry pressure along the body; flexible hoses connect to moving suspension/steering parts. Their job is to transmit pressure with minimal expansion and withstand heat, vibration, and corrosion.
- Listen to the audio with the screen off.
- Earn a certificate upon completion.
- Over 5000 courses for you to explore!

Download the app
Caliper or wheel cylinder (force at the wheel)
Disc brakes: a caliper uses hydraulic pressure to push piston(s) that clamp pads onto a rotor. Drum brakes: a wheel cylinder pushes shoes outward against the drum.
Pads/shoes and rotors/drums (the friction pair)
These are the wear parts that actually create friction. Pads press on rotors; shoes press on drums. Their materials are designed to provide stable friction across a range of temperatures and conditions.
(2) Tracing Fluid Pressure from the Master Cylinder to Each Wheel
Think of the hydraulic side as a sealed, fluid-filled network. Brake fluid is (for practical purposes) incompressible, so pressure you create at the master cylinder appears throughout the circuit.
Step-by-step pressure path (typical disc brake example)
- Step 1: Pedal moves → pushrod force increases.
- Step 2: Booster assists (if equipped) → more force reaches the master cylinder.
- Step 3: Master cylinder pistons move → fluid is pressurized in one or two circuits.
- Step 4: Pressure travels through lines/hoses → to each caliper/wheel cylinder on that circuit.
- Step 5: Caliper piston(s) extend → pads clamp rotor (or shoes expand into drum).
- Step 6: Release pedal → master cylinder ports allow fluid to return; seals relax; pads retract slightly (disc) or springs pull shoes back (drum).
Key idea: pressure vs. force
Hydraulics transmit pressure (force per area). The wheel-end actuator turns that pressure into force using piston area:
Pressure = Input Force / Master Piston Area  (simplified)
Clamp Force at caliper ≈ Pressure × Caliper Piston Area (per piston)
Practical takeaway: for the same pedal effort, a larger caliper piston area can create more clamp force, but it may require more fluid volume (which can affect pedal travel).
Why pedal travel exists
Some pedal movement is normal because the system must: move pads/shoes into contact, flex seals slightly, and take up tiny clearances. Excess travel usually means extra clearance or compressibility somewhere (more on that below).
(3) Friction Pairings, Heat Generation, and Heat Management
Friction pairings
- Disc brakes: pad material against rotor face.
- Drum brakes: shoe lining against drum inner surface.
In both cases, the friction coefficient (how “grippy” the materials are) and the normal force (clamp/expanding force) determine braking torque at the wheel.
Where the heat comes from
Braking converts kinetic energy into thermal energy at the friction surfaces. More speed and more vehicle mass mean more energy to shed. A single hard stop from highway speed can generate substantial heat in rotors/drums and pads/shoes.
How the system manages heat
- Rotors as heat sinks: rotors absorb heat; vented rotors move air through internal vanes to cool faster.
- Drums hold heat longer: drums can be effective but often shed heat more slowly than vented discs.
- Pad/shoe materials: designed to maintain friction when hot; some materials are quieter or cleaner but may behave differently at temperature extremes.
- Brake fluid protection: fluid must resist boiling. If fluid boils, vapor compresses and pedal feel changes dramatically.
Practical example: what “fade” can mean
| What you feel | Likely heat-related mechanism | What’s happening physically |
|---|---|---|
| Pedal stays firm but stopping power drops | Friction fade | Pad/shoe friction coefficient drops at high temperature |
| Pedal gets longer/softer during repeated hard braking | Fluid boiling or compressibility increase | Gas/vapor or very hot fluid increases compressibility |
| Brakes grab or change feel after water | Wet friction surfaces | Water film temporarily reduces friction until dried |
(4) Normal Pedal Behavior and What Changes Suggest a Fault
Pedal feel is your best “sensor.” Learn what is normal for the vehicle, then notice changes. Use these patterns as a diagnostic starting point (not a final verdict).
What “normal” often feels like
- Firmness: pedal resists your foot and firms up as braking demand increases.
- Travel: some initial travel, then a stable point where the vehicle decelerates predictably.
- Consistency: similar feel stop-to-stop under similar conditions.
Common pedal changes and what they often point to
| Pedal symptom | What it suggests | Quick checks you can do safely |
|---|---|---|
| Pedal slowly sinks while holding steady pressure at a stop | Internal leak in master cylinder or external hydraulic leak | Hold pedal at a stop for 20–30 seconds; look for fluid loss at reservoir and at wheels/lines (do not drive if sinking is severe) |
| Spongy/soft pedal, improves when pumped | Air in system, flexible hose expansion, or excessive clearance | With engine off, pump pedal: if it firms up then softens again later, suspect air/clearance; inspect for leaks |
| Very hard pedal with poor braking | Loss of booster assist or restricted hydraulic path | With engine off, press pedal several times (should get hard); hold pedal and start engine—pedal should drop slightly if booster works |
| Long travel but eventually firm | Pad wear/knockback, rear drum adjustment issues, or caliper retraction/clearance | Note if it’s worse after bumps/turns (knockback); check rear drums if equipped (adjustment issues often show up as long travel) |
| Pedal pulsation during braking | Rotor thickness variation, drum issues, or ABS activation (if on slippery surface) | Differentiate: ABS pulsation is rapid and usually with noise; mechanical pulsation often correlates with speed and is repeatable |
A simple step-by-step “pedal feel” baseline test (driveway)
- Step 1 (engine off): press pedal 3–5 times. It should get firmer as vacuum assist is depleted.
- Step 2 (engine off hold): press and hold. Pedal should not drift significantly downward.
- Step 3 (start engine while holding): pedal should drop slightly as assist comes in, then feel firm.
- Step 4 (low-speed test in a safe area): confirm the car stops straight and predictably with light and moderate braking.
(5) A Simple Mental Model for Braking Balance (Front-to-Rear and Left-to-Right)
Front-to-rear balance: “the front usually does more”
When you brake, weight transfers forward. The front tires gain normal force and can generate more braking force before sliding; the rear tires lose some normal force and can lock more easily. That’s why most vehicles are designed so the front brakes do a larger share of the work in typical stops.
Mental model: imagine each axle has a “traction budget.” Under braking, the front budget increases and the rear budget decreases. Good balance means using as much of each budget as possible without exceeding it.
Left-to-right balance: “equal work unless something is wrong”
On a straight, level road with equal tire grip, left and right brakes should produce similar torque. If one side produces less braking force, the vehicle may pull toward the stronger side (or away from the weaker side, depending on how you describe it).
Practical cues for imbalance
- Pulls during braking: often indicates left-right imbalance (caliper issue, contamination, uneven pad friction, hose restriction, tire mismatch).
- Rear lockup tendency: suggests rear brakes are doing too much for available rear traction (could be proportioning/ABS issue, rear hardware problems, or very low rear tire grip).
- Nose-dives heavily with weak stopping: can indicate front brakes are underperforming while weight transfer still happens (front friction/pressure problem).
Quick “balance” thought experiment you can use while driving (safe conditions)
During a gentle stop on a dry, straight road, ask: (1) Does the car track straight with hands lightly on the wheel? (2) Does braking feel progressive (more pedal = more decel) rather than sudden grab? (3) Does the pedal feel consistent from stop to stop? If any answer is “no,” treat it as a sign to inspect the system rather than simply adapting your driving to it.