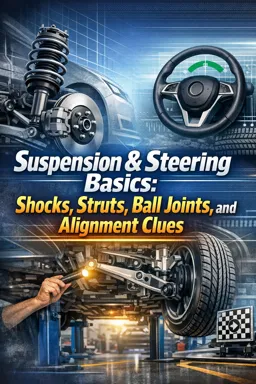
1) Component-by-component: what each part does (forces, pivots, and angles)
Spring (coil spring, leaf spring, torsion bar)
Job: hold the vehicle up and allow the wheel to move up/down over bumps while keeping the body at a usable ride height.
Force idea: a spring stores energy when compressed and releases it when it rebounds. The basic relationship is Force = spring rate × deflection. A stiffer spring (higher rate) compresses less for the same load, which can reduce body motion but can also reduce compliance on rough roads.
What you feel when it’s off: sagging ride height, bottoming out, or a “floaty” body that seems to keep moving after a bump (often actually a damping issue, but weak springs can contribute).
Shock absorber / damper (and the damper inside a strut)
Job: control spring motion so the tire stays in contact with the road. The damper turns motion into heat by forcing oil through valves.
Compression vs rebound damping:
- Listen to the audio with the screen off.
- Earn a certificate upon completion.
- Over 5000 courses for you to explore!

Download the app
- Compression: resistance as the wheel moves upward (bump). Too little can allow the suspension to slam into bump stops; too much can make the ride harsh and reduce grip on rough surfaces.
- Rebound: resistance as the spring extends after being compressed. Too little rebound lets the body “bounce” and can let the tire unload; too much rebound can “pack down” over repeated bumps, reducing travel and grip.
Simple mental model: the spring decides how far the suspension moves for a given load; the damper decides how fast it moves.
Strut (MacPherson strut assembly)
Job: a strut is a structural suspension member that combines a damper with a load path between the wheel knuckle and the body. It helps locate the wheel (geometry) as well as damp motion.
Geometry note: because the strut is part of the locating structure, changes in strut length, mount position, or play in the strut’s upper bearing can affect alignment angles and steering feel more directly than a standalone shock.
Control arms (upper/lower arms, trailing arms)
Job: position the wheel in the vehicle and control its path as it moves through travel. Control arms define pivot points and therefore define the arc the wheel follows.
Geometry idea: the wheel doesn’t move straight up and down; it moves in an arc around the control arm pivots. That arc influences alignment angles as the suspension compresses (camber gain, caster change, toe change depending on design).
Where compliance lives: control arms usually connect via bushings that allow small, controlled movement. Too much bushing compliance or tearing lets the wheel shift under load, changing toe/camber dynamically.
Ball joints
Job: act as a pivoting “socket” joint between a control arm and the steering knuckle, allowing suspension movement and steering rotation at the same time (depending on design).
Force idea: ball joints carry vertical loads (vehicle weight through the suspension) and side loads (cornering), while still allowing angular movement. Any looseness becomes wheel movement you can feel as clunks, wander, or uneven tire wear.
Tie rods (inner and outer)
Job: transmit steering rack movement to the steering knuckle and set/hold toe.
Geometry idea: toe is the direction the tires point relative to the vehicle centerline. Small toe changes have big effects on tire wear and straight-line stability. If a tie rod joint is loose, toe can change while driving (dynamic toe), causing darting or a “loose” steering feel.
Steering rack (rack-and-pinion)
Job: convert steering wheel rotation into left-right movement of the rack, pushing/pulling tie rods to steer the wheels.
Feel and control: internal rack play, worn rack bushings, or assist issues can create on-center looseness, inconsistent return-to-center, or a knock over bumps (especially if rack mounting bushings allow the rack housing to shift).
Sway bar (anti-roll bar) and end links
Job: reduce body roll by linking left and right suspension movement. When one side compresses more than the other, the bar twists and resists that difference.
Force idea: sway bars mainly add roll stiffness in cornering, not in straight-line bumps (both wheels moving together twists the bar less). End links and sway bar bushings are common noise sources because they see frequent small motions.
Steering knuckle (upright) and wheel hub/bearing (context for how parts connect)
Job: the knuckle is the central “connector” that the strut, ball joint(s), tie rod, and hub attach to. The hub/bearing supports wheel rotation and must be tight to keep the wheel stable under load.
Why it matters here: many symptoms blamed on shocks/struts are actually looseness at the knuckle connections (ball joint, tie rod, hub bearing) because that looseness changes wheel direction or camber under load.
2) How loads transfer during braking/turning (and what that means for wear)
Braking: weight transfer forward (dive) and toe changes under load
When you brake, the vehicle’s center of mass creates a forward load transfer: front suspension compresses, rear extends. What happens next depends on spring rate, damping, and bushing compliance.
- Front springs/struts: manage how much the front compresses. Weak damping can allow repeated oscillation after a stop; overly soft springs allow excessive dive.
- Control arm bushings: braking forces try to pull the wheel rearward. If bushings are worn, the control arm can shift, changing caster and toe momentarily. This can feel like instability or a steering wheel that moves during braking.
- Tie rods: if there’s play, braking loads can “steer” the wheels slightly (toe change), causing a pull that comes and goes.
Wear implications: repeated braking with loose bushings/tie rods can create feathered tread edges (toe-related wear) and can accelerate joint wear because parts are constantly shifting under load.
Cornering: lateral load transfer, camber needs, and roll control
In a turn, load transfers to the outside wheels. The outside suspension compresses; the inside extends. Tires generate grip best when their contact patch stays flat and the wheel direction stays consistent.
- Sway bar: reduces body roll, helping keep camber closer to ideal on many setups. Broken end links often show up as clunks over small bumps and increased roll feel.
- Ball joints/control arms: carry high side loads. Any looseness can show up as a delayed response when you turn the wheel (initial steering input doesn’t immediately change the tire’s direction).
- Strut upper bearing/mount: on strut cars, the strut must rotate smoothly as you steer. A binding bearing can cause “memory steer” (doesn’t return smoothly) or a spring “pop” as it winds/unwinds.
Wear implications: cornering with poor camber control or loose joints can wear shoulders of the tire. Toe problems still tend to create the fastest wear, but camber issues often show as inside or outside edge wear depending on direction.
Bumps mid-corner: why damping and joint tightness matter
A bump during a turn combines vertical and lateral forces. If damping is weak, the tire can momentarily unload (less normal force), reducing grip. If joints/bushings are loose, the wheel can also change toe/camber at the same moment, which feels like a sudden “step out” or steering correction requirement.
3) One worn part can mimic another: symptom crossovers (with practical checks)
Many complaints sound the same from the driver’s seat. Use a “what changes with load?” approach: does it happen on bumps, on braking, on steady cruise, or only while turning?
“Bouncy ride” vs “loose steering” (shocks/struts vs joints)
- Worn dampers: repeated oscillation after a bump, nose continues to bob after braking, poor control over washboard roads.
- Loose ball joint/tie rod: may feel like wandering or delayed steering response rather than pure bouncing; can clunk when changing direction or hitting bumps.
Step-by-step quick differentiation (safe, basic):
- Road test on a known section: note whether the issue is primarily vertical motion (bounce) or directional instability (wander/dart).
- Visual check: look for leaking damper oil, torn boots, shifted/broken mounts, cracked bushings.
- Static bounce test (limited): push down firmly and release. Multiple oscillations suggest weak damping, but some vehicles are too stiff for this to be definitive.
Clunk over bumps: sway bar links, strut mounts, or ball joints?
- Sway bar end links/bushings: clunk/rattle on small sharp bumps, often more noticeable at low speed; may reduce when driving straight on smooth roads.
- Strut upper mount/bearing: clunk when turning the wheel or going over bumps while steering; may also creak or “pop.”
- Ball joint/control arm bushing: heavier clunk when loading/unloading (brake/accelerate transitions) or when a wheel drops into a pothole.
Step-by-step isolation idea:
- Drive slowly over small bumps straight, then repeat while lightly steering left/right. If noise changes with steering input, suspect strut mount/bearing, tie rod, or ball joint more than sway bar bushings.
- Listen for a rapid rattle vs a single thud. Rapid rattle often points to end links; single thud can be a bushing or joint shifting.
- Inspect end links for torn boots and looseness; inspect sway bar bushings for cracking and shiny “polished” spots where the bar has been moving excessively.
Pulling or uneven tire wear: alignment vs worn parts
Alignment angles can be set correctly on a rack, yet still be wrong on the road if parts move under load.
- Toe wear (feathering, rapid wear): often tie rods, rack play, or control arm bushing compliance causing dynamic toe changes.
- Camber edge wear: can be ride height issues (springs), bent components, worn ball joints, or strut-to-knuckle slop (where applicable).
- Brake pull vs suspension pull: a pull only during braking can be brakes, but a pull that changes with throttle/brake transitions can be bushings or joints shifting.
“Bad struts” that are actually tires or bearings (and vice versa)
- Cupping/scalloping: often blamed on shocks/struts; can also come from wheel imbalance, loose bearings, or worn joints that let the wheel hop.
- Growl/hum that changes with steering: often a wheel bearing, not a strut. A bearing noise typically changes when you load/unload that side in a gentle lane change.
4) Quick terminology map (what each term means and what it typically influences)
| Term | What it is | Typically influences most | Common symptom types |
|---|---|---|---|
| Shock | Damper only; not a structural locating member | Ride control (bounce), tire contact over bumps | Bouncing, longer stopping distance on rough roads, cupping tendency |
| Strut | Damper + structural member that helps locate the knuckle | Ride control + alignment/steering feel (because it’s part of geometry) | Clunks at mount, poor return-to-center if bearing binds, uneven tire wear if geometry shifts |
| Upper mount | Top connection of strut to body; includes rubber isolation | Noise isolation, impact harshness, strut positioning | Thumps/clunks, vibration, visible mount cracking |
| Upper bearing (strut bearing) | Bearing that allows strut to rotate with steering (common on MacPherson) | Steering smoothness and return-to-center | Creak/pop when turning, “memory steer,” spring wind-up |
| Steering knuckle (upright) | Central casting connecting strut, ball joint(s), tie rod, hub | Holds geometry; transfers forces to suspension/body | After impact, can cause alignment changes; looseness at connections causes wander/clunks |
| Bushing (rubber) | Elastomer joint allowing controlled compliance | Noise/vibration isolation; some geometry compliance | Clunks on load change, vague steering, dynamic alignment changes |
| Bushing (hydraulic) | Fluid-filled bushing tuned for specific frequency damping | Refined ride/harshness control | Thumps, fluid leakage, sudden increase in harshness or wander |
| Bushing (polyurethane/solid) | Stiffer aftermarket-style bushing (varies by design) | Sharper response; less isolation | More road feel/noise; can squeak if not maintained |
| Ball joint | Spherical pivot joint between control arm and knuckle | Steering precision, safety, tire wear if loose | Clunk, wander, uneven wear; can be dangerous if severely worn |
| Tie rod (inner/outer) | Steering linkage from rack to knuckle; sets toe | Steering feel and toe stability | Feathered wear, darting, steering wheel shake from looseness |
| Steering rack | Gear assembly converting steering wheel input to lateral motion | On-center feel, consistency, assist feel | Play, knock, inconsistent steering effort |
| Sway bar | Torsion bar linking left/right suspension to resist roll | Body roll control and balance | Excess roll feel, clunks (links/bushings), less stable transitions |
Steering angles referenced (quick definitions)
- Toe: tire pointing in/out when viewed from above. Strong influence on tire wear and straight-line stability.
- Camber: tire tilt in/out when viewed from the front. Influences edge wear and cornering grip.
- Caster: steering axis tilt when viewed from the side. Influences return-to-center and straight-line stability.
Practical “what does it usually change?” cheat cues
- Noise first: sway bar links/bushings, strut mounts, loose bushings.
- Steering feel first: tie rods, rack play/mounting, strut bearing, ball joints.
- Tire wear first: toe-related parts (tie rods, rack, control arm bushings) and geometry-holding parts (ball joints, bent arms/knuckle, ride height changes).
- Ride motion control first: dampers (shocks/struts) and their mounts.