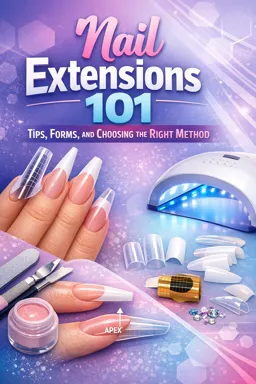
Soft Gel Full-Cover Tips as a System: Fit + Adhesive + Cure
Soft gel full-cover tips work best when you treat them like a three-part system: (1) the tip’s built-in architecture (shape, length, apex design), (2) precise sizing and pressure-free fit, and (3) controlled adhesive volume paired with disciplined curing. If one part is off—wrong apex, tight sidewalls, too much adhesive, or under-curing—you’ll see predictable failures like cuticle lifting, stress cracks, cloudiness, or pop-offs.
1) Selecting the Correct Tip Style (Apex Built-In vs Flat, Lengths, Shapes)
Understand what the tip is “doing” structurally
Full-cover tips are not just a length add-on; they are a pre-formed structure. The tip’s thickness distribution determines where strength lives (stress area) and how much additional product you’ll need later (often none beyond refining and top coat, depending on your system).
- Apex built-in tips: Thicker through the stress area with a pre-formed apex. Best for clients who need durability, have flatter natural nails, or choose medium-to-long lengths. Usually require less reinforcement.
- Flat or low-apex tips: More uniform thickness. Best for short lengths, naturally high-apex nails, or clients who prefer a thinner feel. May need extra reinforcement if worn longer or if the client is hard on nails.
Match style to nail plate and lifestyle
| Client/Nail Situation | Tip Choice | Why |
|---|---|---|
| Flat nail plate, flexible nails | Apex built-in | Creates structure and reduces bending at the stress point |
| High natural apex, curved plate | Lower-apex or more curved tip | Avoids “double apex” bulk and reduces pressure |
| Short practical set | Short length, squoval/round | Lower leverage = fewer pop-offs and cracks |
| Long almond/coffin | Medium/long with built-in apex | Longer length needs stronger stress-area support |
| Client uses hands heavily (gym, cleaning) | Shorter length + stronger apex | Reduces leverage and improves durability |
Shape and length affect leverage
Longer tips increase leverage at the free edge. Pointed shapes (stiletto) concentrate force; square shapes catch edges; almond distributes force more evenly. If you’re troubleshooting repeated breaks, shorten the length or switch to a more forgiving shape before changing products.
2) Sizing and Fitting: Sidewalls, Cuticle Fit, No Pressure
The non-negotiable rule: no pressure fit
A correctly sized soft gel tip sits on the nail plate without squeezing the sidewalls or springing upward. Pressure fit is a common cause of pop-offs and cuticle lifting because the tip is constantly trying to rebound.
Step-by-step sizing check (per finger)
- Start with a “close guess” size and place it on the nail without adhesive.
- Check sidewall coverage: The tip should cover from sidewall to sidewall without digging into skin. If it pinches, go up a size.
- Check the cuticle edge fit: The cuticle edge of the tip should sit close to (but not on) the skin line. You want a neat perimeter you can seal—no gaps, no overlap onto skin.
- Check the contact zone: Press lightly at the center. The tip should not rock, click, or lift at the sides.
- Look for “smile gaps” (air pockets) along the sidewalls or center. If you see gaps, try a different curvature or apex style.
- Confirm comfort: Ask the client if any finger feels tight. Tightness now becomes lifting later.
When between sizes
- Choose the larger size and refine the sidewalls with a file for a custom fit.
- A too-small tip creates pressure and weakens adhesion even if it “looks” like it fits.
Cuticle edge alignment tip
Hold the tip at a low angle and “hover” it near the cuticle line to preview placement. You’re aiming for a consistent margin around the cuticle area so the adhesive can seal cleanly without flooding.
- Listen to the audio with the screen off.
- Earn a certificate upon completion.
- Over 5000 courses for you to explore!

Download the app
3) Adhesive Application: Bead Size, Spread Control, Bubble Avoidance, Overflow Management
Adhesive volume is a measured variable, not a guess
Too little adhesive causes voids and pop-offs; too much causes overflow, skin contact, and cure issues. Your goal is a thin, even adhesive layer with full contact and no trapped air.
Bead size guide (visual cues)
- Short tips / small nail beds: a small bead (think “small pea” split across the contact area).
- Medium tips: a medium bead centered slightly closer to the cuticle edge of the tip.
- Long tips / wider nail beds: a larger bead, but still controlled—aim for coverage, not flooding.
Instead of memorizing bead sizes, watch the spread line: when you press the tip down, adhesive should travel to the sidewalls and free edge evenly, stopping just short of the perimeter without pushing onto skin.
Step-by-step adhesive placement and press-down
- Apply adhesive inside the tip, not on the nail, to reduce mess and bubbles.
- Place the bead slightly toward the cuticle edge of the tip’s interior (so it spreads forward and sideways).
- Set the tip at an angle (cuticle edge first), then slowly roll it down toward the free edge.
- Maintain steady, gentle pressure—enough to seat the tip, not enough to force overflow.
- Watch for a bubble: If you see a circle/halo of air, lift immediately, wipe off adhesive, and reapply. Do not “press harder” to chase bubbles; it usually traps them.
- Check the perimeter: If adhesive is about to flood the cuticle edge, slightly reduce pressure and micro-adjust the angle.
Bubble prevention checklist
- Roll-down motion (not straight “stamp” placement).
- Correct size and curvature match (gaps invite bubbles).
- Adhesive bead centered and not smeared thin before placement.
- Slow, controlled seating—rushing traps air.
Managing overflow safely
Overflow happens when adhesive volume exceeds the available space or when pressure is too high. If you see adhesive pushing toward skin:
- Before curing: Gently lift and reset if it’s significant. If it’s minimal, use a clean implement to trace and remove excess from the perimeter while keeping the tip stable.
- Never cure adhesive on skin: It can cause irritation and creates a weak edge seal that lifts.
Skill goal: achieve a thin “seal line” around the cuticle edge with no pooling.
4) Flash Cure vs Full Cure: Timing, Hand Positioning, Verifying Cure with Lamp Specs
Why two-stage curing exists
Flash curing locks the tip in place so it can’t shift. Full curing completes polymerization for strength and wear. Skipping discipline here leads to tips that look fine immediately but lift or crack within days.
Flash cure: what it is and how to do it
- Purpose: Freeze placement and prevent micro-sliding.
- Typical timing: short bursts (often 5–15 seconds) depending on your lamp and adhesive system.
- Hand positioning: Keep the finger straight and stable. Ensure the lamp’s light reaches the cuticle edge and sidewalls—shadowing causes partial cure at the perimeter.
Placement discipline: During flash cure, keep gentle pressure on the tip so it doesn’t rebound and create a micro-gap at the cuticle edge.
Full cure: complete the chemistry
- Purpose: Achieve full hardness and long-term adhesion.
- Typical timing: commonly 60 seconds in an LED lamp (varies by brand/system).
- Positioning: Thumb placement is the most common failure point—cure thumbs separately if needed so the light hits the sidewalls evenly.
Verify cure using lamp specs (practical checks)
Use the lamp recommended for your adhesive system whenever possible. If you must verify compatibility, check:
- Wavelength range: Many gel systems cure in the 365–405 nm range; some require dual wavelengths.
- Output consistency: A weak lamp can flash-cure the surface but leave under-cured product beneath.
- Reflective interior and diode placement: Poor coverage creates shadow zones at sidewalls and cuticle edge.
Practical verification habits:
- Touch test is not enough: A surface can feel hard while deeper layers remain under-cured.
- Observe clarity: Persistent cloudiness or a “milky” look can indicate trapped air, too-thick adhesive, or incomplete cure.
- Consistency across hands: If failures happen mostly on thumbs or pinkies, suspect positioning/shadowing rather than product quality.
5) Troubleshooting: Common Failures and Targeted Fixes
Lifting at the cuticle edge
What it looks like: A small gap forms near the cuticle line, often catching hair or showing a visible ledge.
Most likely causes:
- Tip placed too far from the cuticle (gap left unsealed).
- Tip shifted during flash cure.
- Overflow onto skin (creates a weak, lifted rim).
- Tip curvature mismatch causing rebound.
Fix:
- Re-check sizing and curvature; eliminate pressure fit.
- Use a steadier roll-down placement and hold firm during flash cure.
- Reduce adhesive volume slightly and focus on a clean perimeter seal.
- Cure thumbs separately to avoid shadowing at the cuticle edge.
Cracking at stress points
What it looks like: Hairline cracks near the apex/stress area or breakage at the free edge after impact.
Most likely causes:
- Tip style too flat for the chosen length (insufficient structure).
- Length too long for the client’s lifestyle.
- Under-cure leading to a weaker, more flexible bond.
Fix:
- Switch to an apex built-in tip or shorten the length.
- Ensure full cure time is met and lamp coverage is even.
- Refine shape to reduce catching (e.g., soften sharp corners).
Cloudy cure (haze, milkiness, or uneven clarity)
What it looks like: The tip looks foggy under the surface or has cloudy patches.
Most likely causes:
- Air bubbles/voids trapped during placement.
- Adhesive layer too thick in one area.
- Shadow curing at sidewalls/cuticle edge.
Fix:
- Remove and reapply if cloudiness is from bubbles—voids compromise wear.
- Use a smaller bead and a slower roll-down to control spread.
- Reassess lamp positioning; cure problematic fingers separately.
Tip pop-off (sudden detachment)
What it looks like: The entire tip detaches cleanly, sometimes with little product left on the nail.
Most likely causes:
- Insufficient adhesive coverage (dry spots/voids).
- Pressure fit causing constant tension.
- Inadequate curing (especially at perimeter).
Fix:
- Increase adhesive coverage slightly and confirm even spread to sidewalls.
- Size up and custom-file rather than forcing a tight tip.
- Extend full cure time within system guidelines and ensure full lamp exposure.
Quality-Control Routine (Before Finishing)
Perform this quick routine on every finger before moving to shaping, color, or top coat:
- Perimeter check: Look around the cuticle edge and sidewalls for any lifted rim, gap, or cured-on-skin adhesive. The edge should be clean and sealed.
- Clarity check: Hold the nail under light and look for bubbles or cloudy patches. Any void near the cuticle or sidewall is a future lift point.
- Alignment check: View from the top and from the side. Confirm the tip is centered and not tilted left/right.
- Stress-area check: Side profile should show appropriate thickness through the stress area for the chosen length (not overly flat for long nails).
- Cure confidence check: Confirm each finger received the correct flash cure and full cure, with special attention to thumbs and pinkies (shadow zones).