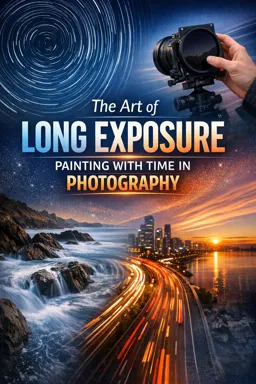
What Makes Night Long Exposure Different
Goal: use long shutter speeds at night to record motion as luminous paths (cars, bikes, trains, boats, aircraft, people with lights) while keeping the non-moving scene clean and sharp.
What changes at night: the scene is dominated by point light sources (street lamps, LEDs, signs, headlights) that are far brighter than the surrounding darkness. This creates extreme contrast, which can fool meters, clip highlights quickly, and introduce color shifts. Night also introduces practical constraints: autofocus struggles, viewfinders are dim, and artificial lights can flicker or pulse, causing banding or uneven brightness.
Two exposures happen at once: (1) the ambient exposure that builds the background (buildings, sky, road texture) and (2) the “additive” exposure of moving lights that paint trails. A long shutter doesn’t just brighten everything equally; it accumulates light over time. That’s why a single passing car can draw a bright line even if the road stays relatively dark.
Light Trails: How They Form and How to Control Them
Trail brightness is about time-in-frame, not just shutter speed
A light trail is created when a bright source moves across the frame while the shutter is open. The trail’s brightness depends on how long that light source is visible and how intense it is. A car that enters late in the exposure may produce a shorter trail than one present for the full duration, even if the shutter speed is the same.
Trail length is about distance traveled during the exposure
Longer shutter speeds generally create longer trails, but the subject’s speed and direction matter. A slow-moving bicycle can create a long trail if it stays in view; a fast car can create a short trail if it crosses the frame quickly. Curves, intersections, and roundabouts are useful because they keep lights in the frame longer and create layered shapes.
- Listen to the audio with the screen off.
- Earn a certificate upon completion.
- Over 5000 courses for you to explore!

Download the app
Color and separation: headlights vs taillights vs mixed sources
Headlights tend to be white (sometimes slightly blue), taillights red, and turn signals amber. Mixed lighting (street lamps, storefront LEDs, vehicle lights) can create complex color casts. If you want clean color separation, choose a viewpoint where headlights and taillights occupy different lanes or different directions of travel. If you want a graphic “ribbon” look, shoot from above so both directions overlap into a dense weave.
Continuous trails vs dotted trails
Continuous trails come from steady lights and uninterrupted motion. Dotted trails can happen when a vehicle’s lights pulse (some LEDs), when a cyclist’s light blinks, or when traffic stops and starts. You can use this creatively, but if you want continuous lines, avoid locations with frequent braking or stoplights, or time your exposure to begin just as traffic starts moving.
Planning a Light-Trail Shot: A Practical Checklist
Step 1: Choose a scene structure that supports trails
Look for leading lines (roads, bridges, rails), a stable anchor (architecture, skyline, trees), and a clean horizon. The best light-trail images usually have a strong static composition that still works without the trails; the trails then become the “brush strokes” that animate it.
Step 2: Predict traffic rhythm and trail density
Trail density is controlled by how many light sources pass through during the exposure. If you want a few elegant lines, shoot during lighter traffic and use shorter exposures. If you want a dense web, shoot during rush hour and use longer exposures or multiple exposures stacked later. Watch for gaps: a 20-second exposure during sparse traffic can produce a single lonely streak; the same exposure during heavy traffic can fill the frame.
Step 3: Decide on a target shutter time range
Use shutter time as your creative dial for trail character. Typical starting points: 5–10 seconds for modest trails and less highlight buildup, 15–30 seconds for strong continuous ribbons, and 60+ seconds for very dense trails and brighter ambient buildup. Your goal is to keep highlights from clipping while still building enough ambient detail to support the scene.
Step 4: Choose a capture mode that matches the situation
Single long exposure is simplest and works well when traffic is predictable. Bulb mode is useful when you want to time the exposure to specific events (a bus entering, a train passing, a boat moving through). Interval shooting (many shorter exposures) can be safer for highlight control and gives you options for blending later, especially when traffic is inconsistent.
Low-Light Metering: Getting a Reliable Starting Exposure
Why meters struggle at night
In very dark scenes, the meter tries to make the overall frame look like a midtone. Bright lamps and signs can dominate the reading, causing the camera to underexpose the darker environment. Conversely, if you meter off a dark area, you may overexpose highlights and lose detail in lamps and neon. Night metering is less about “correct exposure” and more about choosing what you want to protect (usually highlights) while letting shadows fall where they may.
Use highlight-protective metering strategies
Spot meter a bright but textured area (for example, a lit building facade, not the lamp itself) to establish an exposure that keeps detail. Avoid metering directly on the bulb or LED panel; those are often far beyond sensor range and will clip regardless. If your camera offers highlight-weighted metering, it can be a good starting point in mixed night lighting.
Histogram and blinkies: interpret them for night scenes
The histogram at night tends to be left-heavy because most of the frame is dark. That’s normal. What matters is the right edge: if the histogram is slammed against the right, you’re clipping highlights. Use highlight warnings (“blinkies”) to identify which areas are clipping. Decide if those areas are acceptable to clip (small bulbs, specular reflections) or if they contain important detail (neon text, illuminated architecture).
Expose for the background, then let trails add themselves
A practical approach is to first expose for the static scene without worrying about trails. Once the background looks good, keep that exposure and wait for traffic to paint trails. This prevents the common mistake of over-brightening the background just to make trails visible—trails are usually bright enough on their own.
When to use manual exposure vs auto exposure
Manual exposure is typically more consistent at night because the scene brightness changes as cars enter and exit the frame. If you use aperture priority or shutter priority, the camera may change exposure mid-series, making it harder to compare results. Manual exposure also helps when you plan to blend multiple frames later.
Step-by-Step: A Repeatable Night Light-Trail Setup (Single Exposure)
Step 1: Establish a “no-traffic” base exposure
Wait for a moment with minimal moving lights and take a test frame. Your aim is a readable background with controlled highlights. If the scene includes bright signage, decide whether you want readable sign detail (lower exposure) or a glowing graphic element (higher exposure with clipping).
Step 2: Set a shutter time that matches traffic flow
If cars take about 3–5 seconds to cross your frame, a 10–15 second exposure can capture multiple vehicles and produce continuous lines. If you’re shooting a curve where cars remain visible longer, 20–30 seconds can create smoother ribbons. If traffic is stop-and-go, consider shorter exposures to avoid bright “blobs” where cars pause.
Step 3: Control highlight buildup with aperture and ISO choices
At night, highlights can clip even when the rest of the scene is dark. If headlights or street lamps are blowing out too much, stop down the aperture (higher f-number) and/or lower ISO. Stopping down also creates starburst effects on point lights; if you want clean round lights instead, use a wider aperture and manage exposure with shutter time and ISO.
Step 4: Time the exposure start for clean trail entry
Start the exposure just before the first vehicle enters the frame so trails begin at the edge rather than appearing suddenly in the middle. If you’re using bulb mode, close the shutter once the main flow has passed to avoid unnecessary ambient brightening.
Step 5: Review and iterate with intention
After each frame, check: (1) are highlights acceptable, (2) is the background bright enough to support the composition, (3) are trails continuous and well-placed, and (4) are there distracting bright elements (a parked car’s headlights, a flashing sign) pulling attention. Adjust one variable at a time so you learn what changed the look.
Step-by-Step: Flicker-Aware Shooting Under Artificial Light
What flicker is and why it shows up in long exposures
Many artificial lights do not emit constant light. LEDs, some fluorescents, and some electronic signs pulse rapidly, often tied to AC power frequency (commonly 50 Hz or 60 Hz) or to internal PWM dimming. In still photos, flicker can cause banding, uneven brightness across the frame, or inconsistent color between frames—especially noticeable in areas lit by LEDs or in scenes with large illuminated panels.
Step 1: Identify flicker-prone sources in your scene
Common culprits: LED street lamps, LED billboards, indoor lighting spilling through windows, decorative LED strips, and some traffic signals. If you see alternating bright/dim bands in test shots or color shifts between frames, assume flicker is present.
Step 2: Use shutter times that average over flicker cycles
Longer shutter speeds often reduce flicker artifacts because they integrate many pulse cycles. As a practical rule, exposures of 1 second and longer usually average out most mains-frequency flicker, but PWM dimming can still cause issues depending on the driver frequency. If you see banding at 1–2 seconds, try 4–10 seconds and re-test. If you’re already at 20–30 seconds and still see unevenness, the issue may be rolling shutter in electronic shutter mode or a sign/billboard refresh pattern.
Step 3: Prefer mechanical shutter when banding appears
Electronic shutters (and some electronic first-curtain behaviors) can interact with flicker and refresh rates, producing banding or partial-frame brightness differences. If your camera offers a fully mechanical shutter option, test it. If you must use electronic shutter (for silence), increase exposure time and avoid including large LED panels that refresh visibly.
Step 4: Enable anti-flicker features when shooting shorter exposures
Some cameras offer anti-flicker or flicker reduction modes that time the shutter release to the peak brightness of the light cycle. These features are most helpful at faster shutter speeds (for example, 1/60 to 1/250) but can also improve consistency in interval sequences at night. If you’re shooting a series for blending, consistency matters as much as single-frame quality.
Step 5: Manage mixed color temperature shifts caused by flicker
Flicker can change not only brightness but also color. If you notice frames alternating between greener and magenta tones, set a fixed white balance rather than auto white balance to prevent the camera from “chasing” the changes. Then evaluate whether you need to correct remaining shifts in post by targeting specific light sources (signs, windows) rather than applying a global correction.
Low-Light Focusing and Compositional Precision (Night-Specific)
Use bright edges and high-contrast targets for focus confirmation
At night, autofocus may hunt. Aim at a high-contrast edge at the same distance as your main subject: a lit window frame, a reflective sign edge, or a bright building outline. If focus is unreliable, use magnified live view to confirm sharpness on a distant detail.
Lock focus and reframe carefully
Once focus is confirmed, avoid bumping the focus ring and avoid recomposing in a way that changes the focus distance significantly. If you’re shooting multiple frames for blending, keep focus fixed to maintain consistent sharpness across the set.
Managing Headlight Blowout, Ghosting, and Unwanted Light
Headlight clipping: decide what “acceptable” means
Headlights are often too bright to retain detail. Clipping in the core of a headlight can be acceptable if the surrounding trail has smooth tonality and the rest of the scene holds detail. If clipping spreads into large white blobs, reduce exposure (shorter shutter, lower ISO, smaller aperture) or change angle so headlights are less direct.
Ghosting from multiple light sources and reflections
Reflections from wet roads, glass facades, and lens elements can create secondary trails or flare. If you see repeated ghost lines, adjust your shooting position slightly to change reflection angles, and shade the lens from off-frame lights. Also check for smudges on the front element; at night, small smears can bloom into large hazy halos.
Prevent stray light from contaminating the frame
Stray light can come from behind you (a passing car, a street lamp). If your background suddenly brightens or contrast drops, block the light with your body or a flag, or reposition so the light source is not striking the lens directly.
Interval Sequences for Night Trails: Consistency and Blend-Friendly Frames
Why shoot a sequence instead of one very long exposure
Shooting many shorter exposures (for example, 30 frames at 2 seconds each) can reduce risk: if one frame is ruined by a sudden bright vehicle, you can omit it. It also helps manage sensor heat and gives you control over trail density in post by choosing how many frames to blend.
Step-by-step: capture a blend-ready sequence
Step 1: Set manual exposure and fixed white balance for consistency.
Step 2: Choose a shutter speed that captures clean trail segments (often 1–5 seconds for traffic, longer for slower motion like boats).
Step 3: Set an interval with minimal gap between frames so trails connect smoothly. If your intervalometer allows it, set interval time equal to shutter time (or shutter time plus a very small buffer).
Step 4: Capture a “clean plate” frame with no moving lights if possible. This gives you an option to restore parts of the scene later if trails overlap unwanted areas.
Step 5: Monitor highlight clipping as conditions change (more traffic, rain, fog). If highlights start to blow out, adjust exposure and start a new sequence rather than changing settings mid-sequence.
Practical Exposure Scenarios (Starting Points You Can Adapt)
Urban road from an overpass (continuous ribbons)
Start with 10–20 seconds, moderate aperture to control highlights, and low ISO. Aim for a background that shows road texture and building shapes without turning the sky gray. If trails are too thin, lengthen shutter time; if highlights are too strong, stop down or shorten time.
Intersection with stoplights (avoid bright blobs)
Use shorter exposures (2–6 seconds) and shoot a sequence. This reduces the chance of recording stationary cars as over-bright pools of light. Time exposures to begin as traffic starts moving on green.
Light painting with handheld lights (controlled strokes)
Use bulb mode and keep the background exposure low enough that your light strokes dominate. Plan the path and speed of your light movement; slower movement paints brighter strokes. If you see flicker in LED wands, switch to constant-output lights or increase exposure time to average the pulses.
Night sky with foreground lights (protect the brightest points)
When the frame includes both sky and artificial lights, meter to protect the artificial lights first, then decide how dark you want the sky. If the sky becomes too dark, consider capturing separate exposures for blending rather than pushing a single exposure until lights clip heavily.